
Setting up mobile service on the Galaxy S21+ 5G is much more convenient with eSIM technology.
Instead of inserting a physical SIM card, an eSIM allows you to activate a mobile plan digitally directly from your device settings.
This makes the setup process faster and easier, especially when traveling or switching networks.
In this guide, you’ll learn how to install and activate your iRoamly eSIM on the Galaxy S21+ 5G using either a QR code or a manual activation code, along with a few important checks to make sure everything works properly after installation.
Preparations Before Setting Up iRomly eSIM
Before starting the installation process, make sure you have the following ready:
A stable internet connection (Wi-Fi is recommended)
A valid eSIM QR code or activation code provided by your carrier
Your Galaxy S21+ 5G powered on and unlocked
The device updated to the latest available One UI version for better eSIM compatibility
The carrier account activated and eligible for eSIM service
Method 1: Install eSIM by Scanning a QR Code
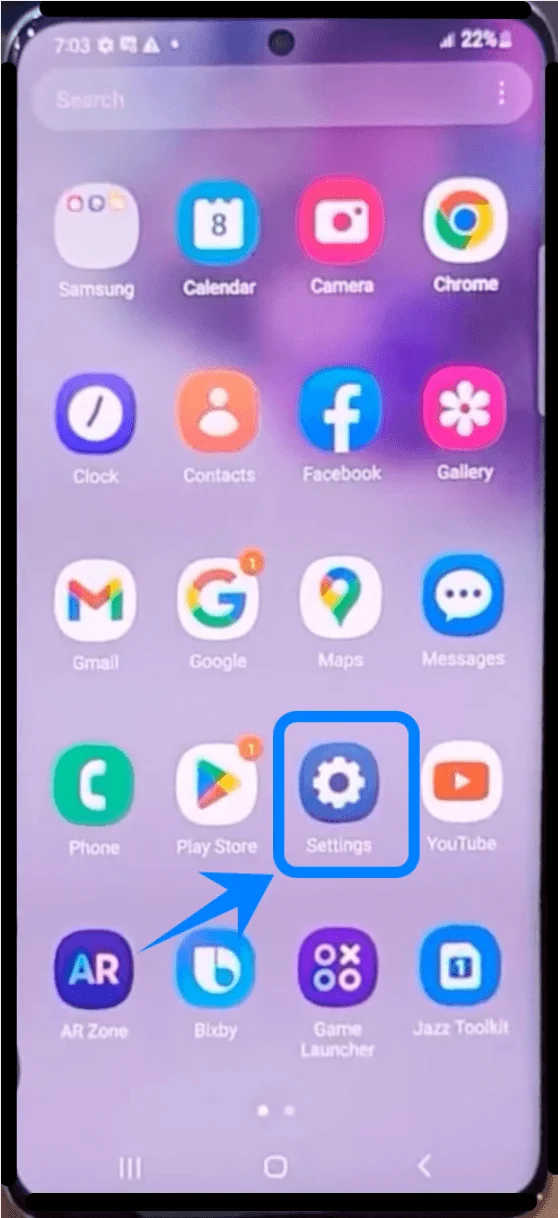
Step 1: Open the Settings Menu
Open the Settings app
Step 2: Open SIM Card Manager
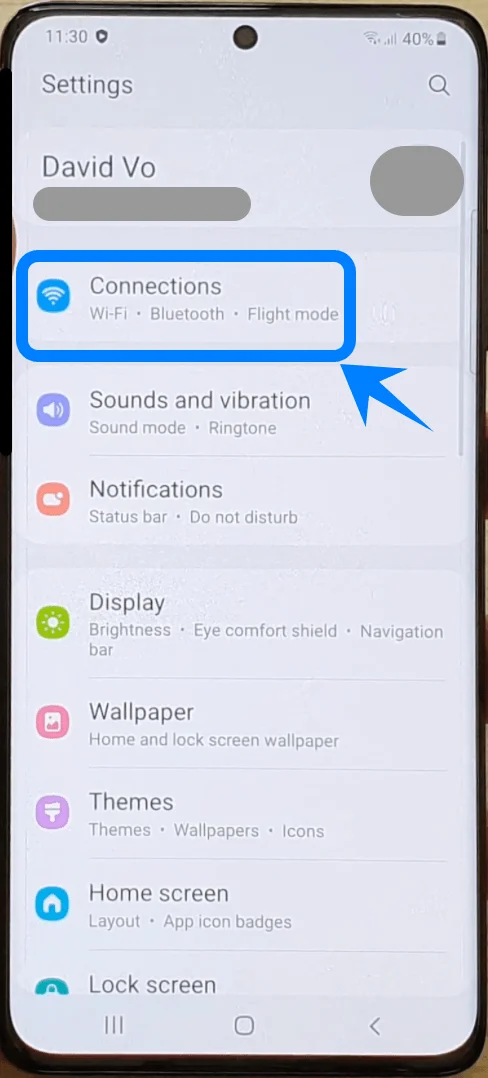
In Settings, tap Connections
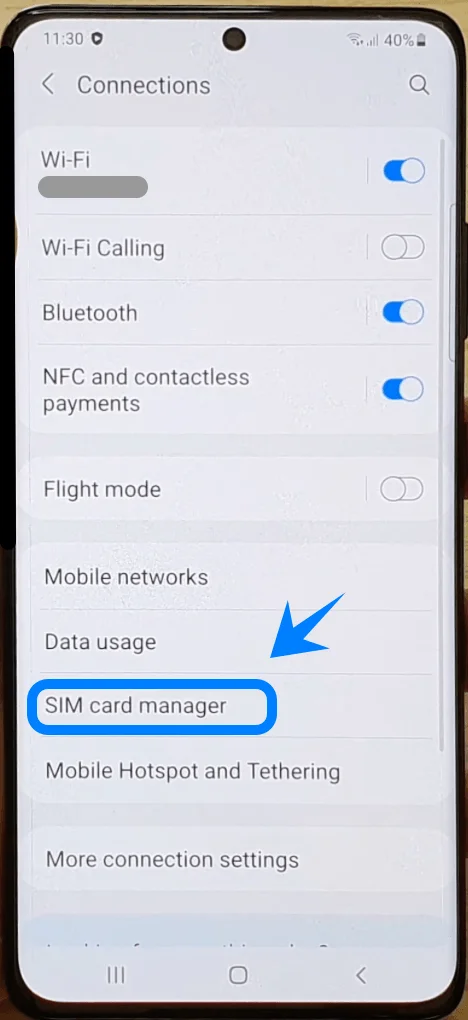
Tap SIM card manager
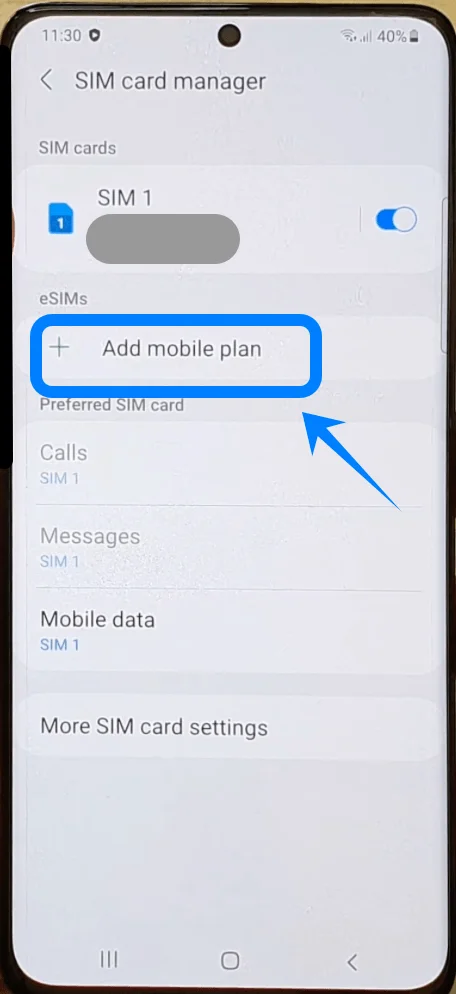
Step 3: Start Adding an eSIM
Tap Add mobile plan
Step 4: Choose QR Code Installation
Tap Scan carrier QR code
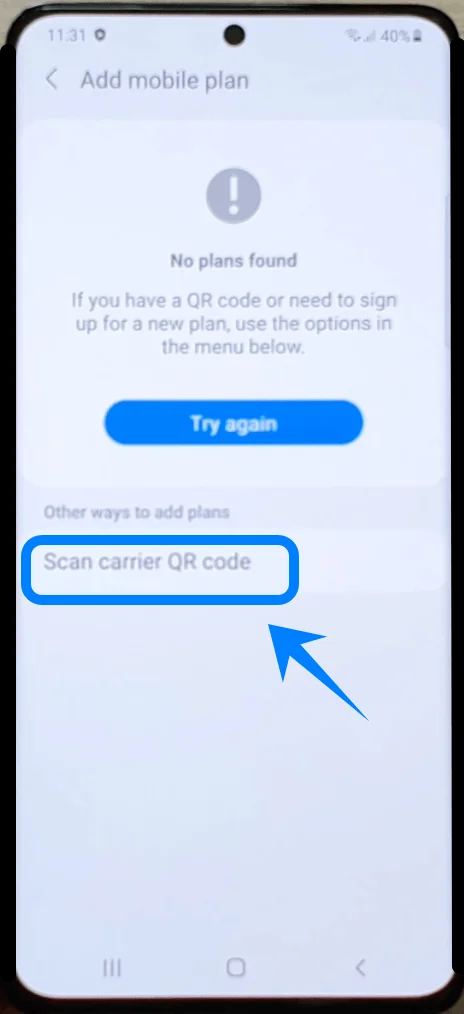
Step 5: Scan the Carrier QR Code
Hold the phone over the QR code provided by your carrier
Align the QR code inside the scanning frame
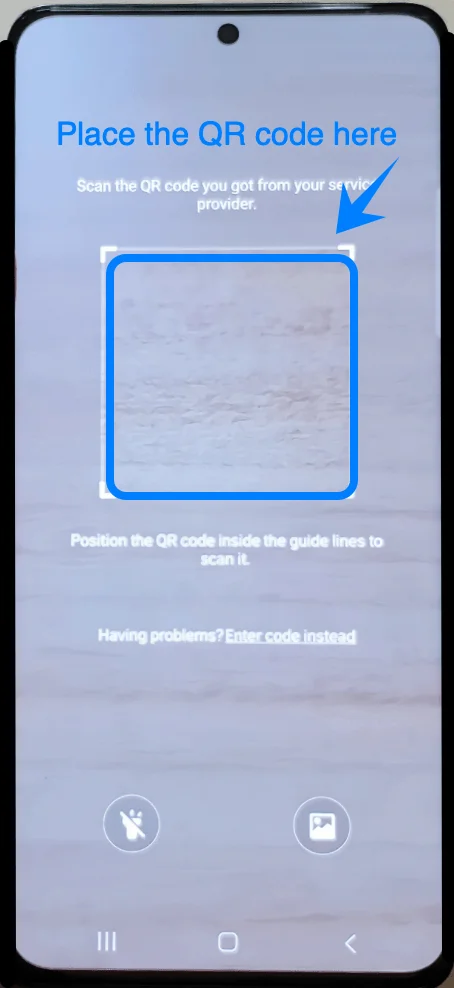
Wait for the device to recognize the eSIM plan
The phone will automatically retrieve the activation profile.
Step 6: Confirm eSIM Installation
When the mobile plan appears, tap Add
Wait while the Galaxy S21+ downloads and installs the eSIM
The installation process may take several minutes.
Step 7: Configure the eSIM
After installation, the phone may ask you to configure SIM preferences.
Follow the prompts in this order:
Select a label for the eSIM if prompted
Tap Next
Choose whether the eSIM will be used for:
Mobile data
Calls
SMS
Tap Done
Step 8: Enable the eSIM
Return to SIM card manager
Verify the new eSIM appears in the SIM list
Ensure the eSIM toggle is turned On
Method 2: Install eSIM Using Manual Activation Code
Step 1: Open Settings
Open Settings
Step 2: Open SIM Card Manager
Tap Connections
Tap SIM card manager
Step 3: Start eSIM Setup
Tap Add mobile plan
Step 4: Select Manual Entry
Tap Scan carrier QR code.
On the QR code scanning screen, tap Enter code instead.
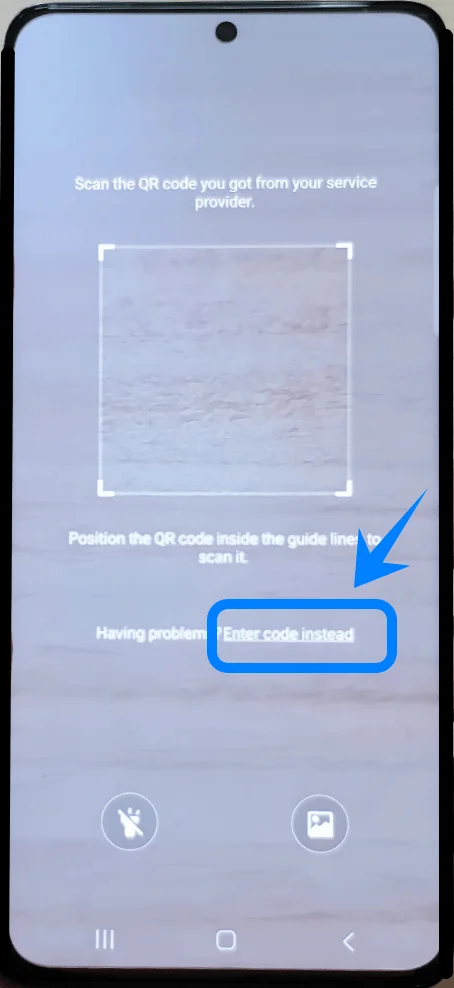
Enter the activation code provided by your carrier.
Depending on the Galaxy S21 software version or carrier firmware, this option may also appear as:
Enter activation code
Enter code manually
Step 5: Enter the Activation Information
Type the activation code exactly as provided by your carrier
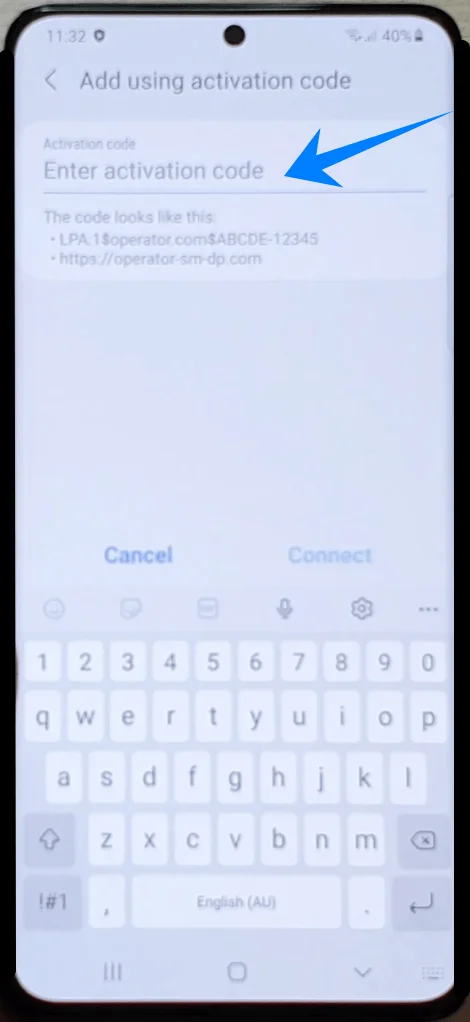
Tap Connect
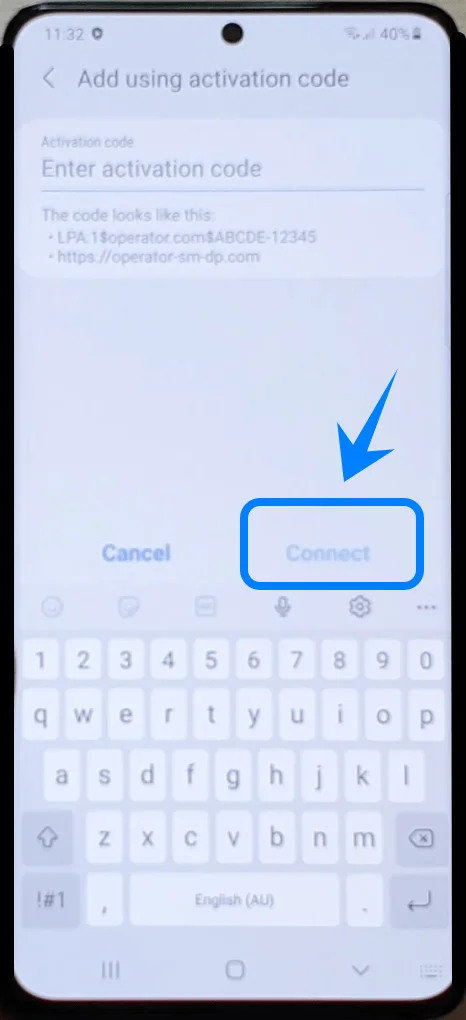
Wait while the device validates the activation information
Be careful to enter all characters correctly, including dashes or special symbols if included.
Step 6: Download the eSIM Profile
After validation:
Tap Add
Wait for the Galaxy S21+ to download the eSIM profile
Do not close the Settings app or disconnect from Wi-Fi during this step.
Step 7: Configure SIM Preferences
Once installation finishes:
Choose whether the eSIM will be the default line for:
Calls
Messages
Mobile data
Tap Done
How to Confirm the eSIM Was Installed Successfully
Check in SIM Card Manager
Open Settings
Tap Connections
Tap SIM card manager
The installed eSIM should now appear in the SIM list with:
Carrier name
Active toggle enabled
Signal bars visible
Verify Mobile Network Connection
Look at the top-right corner of the screen
Confirm signal bars appear for the eSIM network
Disable Wi-Fi temporarily
Open a website or app using mobile data
If the internet works over mobile data, the eSIM is active.
Confirm Mobile Data Selection
Open Settings
Tap Connections
Tap SIM card manager
Tap Mobile data
Verify the newly installed eSIM is selected
Conclusion
By following the instructions in this guide, you can successfully install and activate your iRoamly eSIM on the Galaxy S21+ 5G in just a few minutes.
Once the eSIM profile is active and selected for mobile data, your phone is ready to connect normally using the new plan.
You can also return to the SIM card manager anytime to adjust SIM preferences or manage additional eSIM profiles in the future.