
The Vivo V40 SE is commonly sold as an Android 14 phone with Funtouch OS 14, a 6.67-inch 1080 x 2400 display, slim rounded bezels, and a centered hole-punch front camera. This guide assumes the Funtouch OS 14 menu path used on eSIM-capable Vivo regional variants: Settings > Mobile network > SIM cards & mobile network > Add eSIM.
Travelers may want to install an iRoamly travel eSIM before leaving so the data line is ready when they arrive. Because Vivo regional models and carrier firmware can differ, confirm that your specific Vivo V40 SE shows Add eSIM before purchase or installation.
This guide covers both setup paths: scanning the iRoamly QR code and entering the SM-DP+ Address and Activation Code manually. The manual path is useful when the QR code is on the same phone, the camera cannot scan it, or the QR code image is not available.
Before You Set Up Your iRoamly eSIM
Connect the Vivo V40 SE to stable Wi-Fi before starting.
Confirm that your Vivo V40 SE is unlocked and that your regional model supports eSIM. If Add eSIM does not appear under the SIM settings, your variant or carrier firmware may not support eSIM.
Keep your iRoamly QR code, SM-DP+ Address, Activation Code, and optional confirmation details open on another device or printed out.
Install the iRoamly eSIM 1-2 days before travel when possible, but do not start heavy data use until you are ready for the plan.
iRoamly eSIM validity starts from activation. The exact activation trigger can vary by plan, so check your order details before installing or connecting abroad.
Do not delete the iRoamly eSIM casually. Many travel eSIM profiles cannot be reinstalled after removal or after the QR code has already been used.
iRoamly plans may be data-only. Voice calls and SMS availability varies by plan, so check the plan details instead of assuming calls or texts are included.
Method 1: Install eSIM by Scanning a QR Code
1. Open Settings on the Vivo V40 SE and tap Mobile network. You should see the Funtouch OS network settings area for SIM, data, and roaming controls.
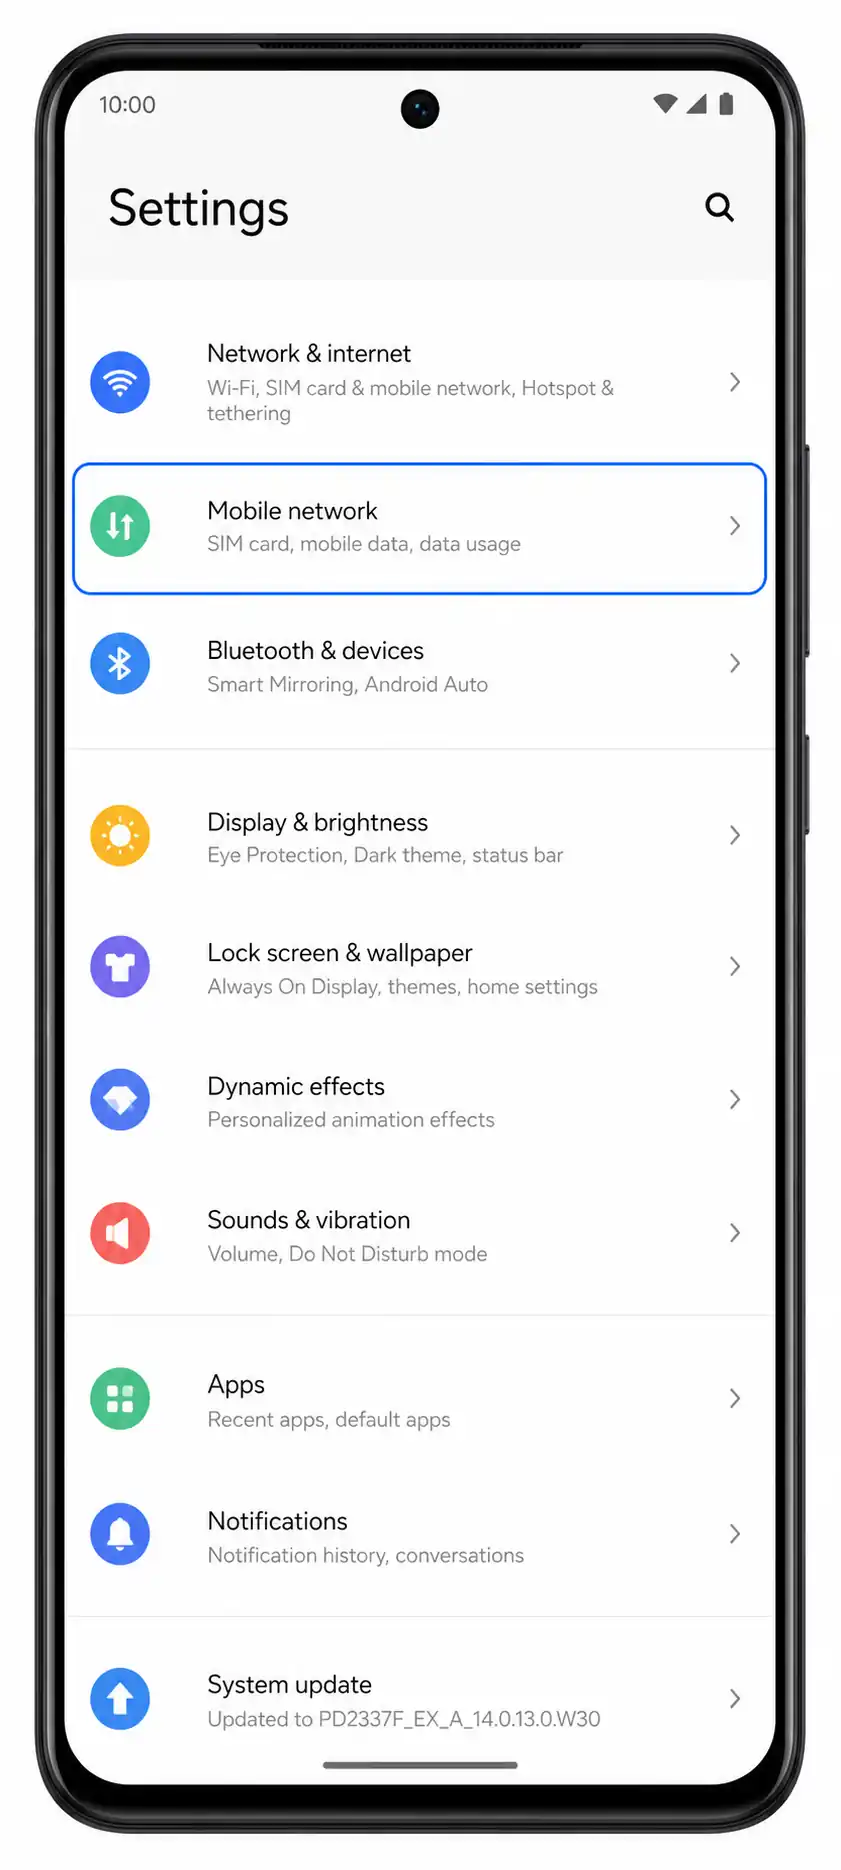
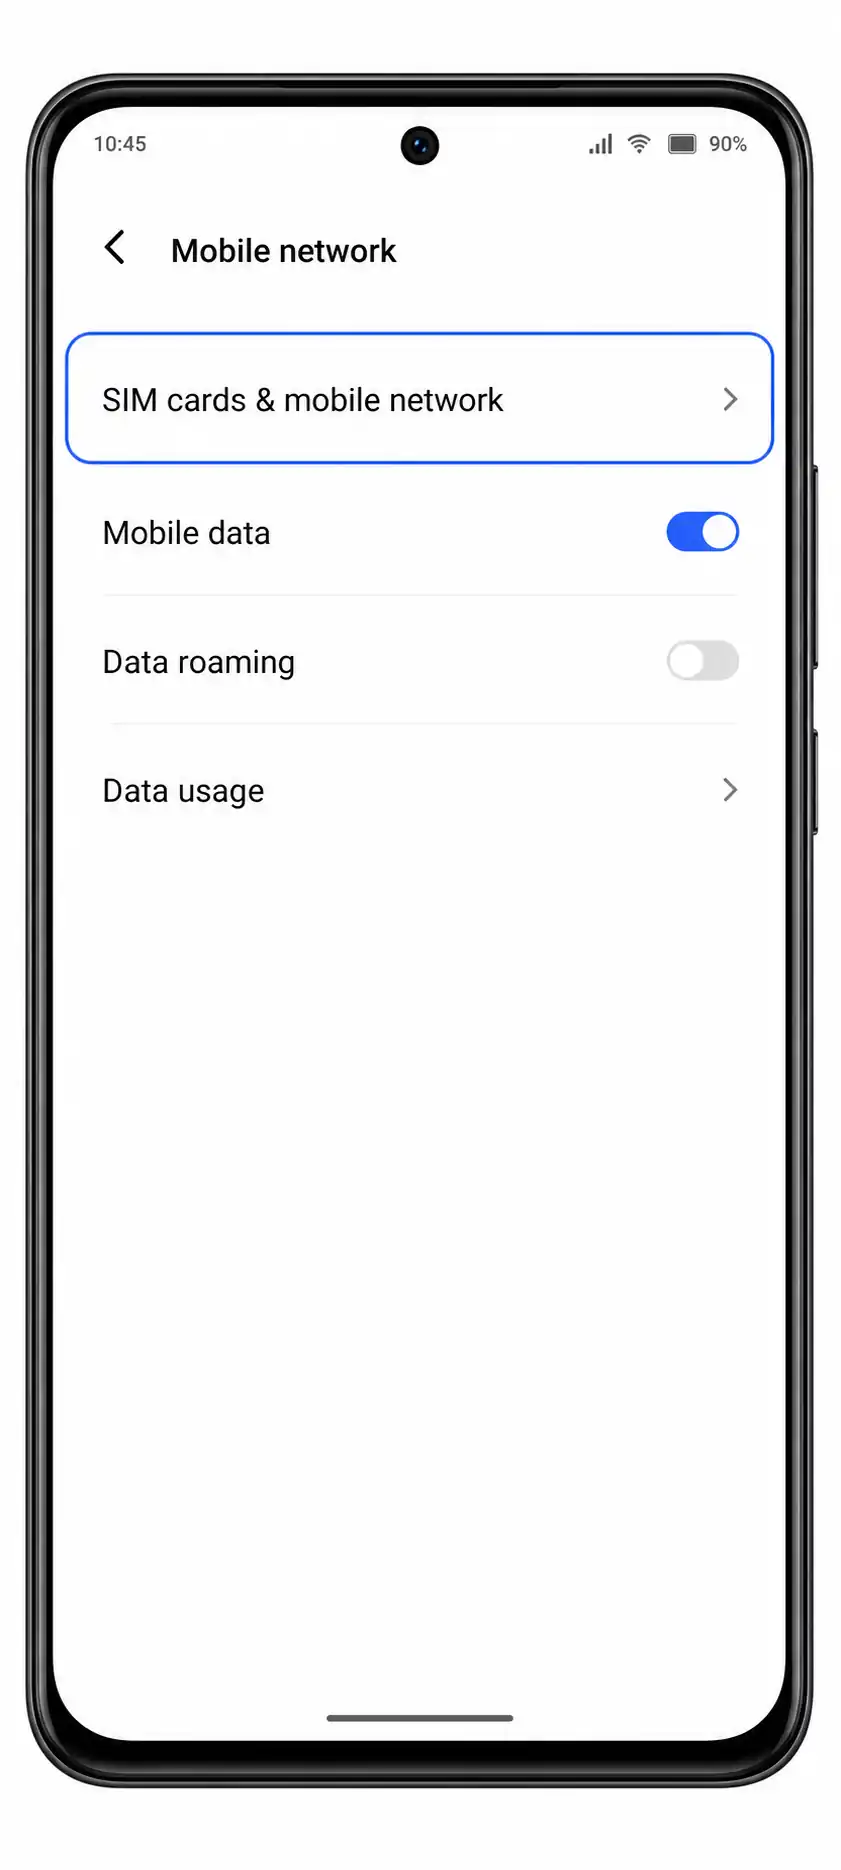
2. Tap SIM cards & mobile network. The phone should open the page where physical SIMs and eSIM options are managed.
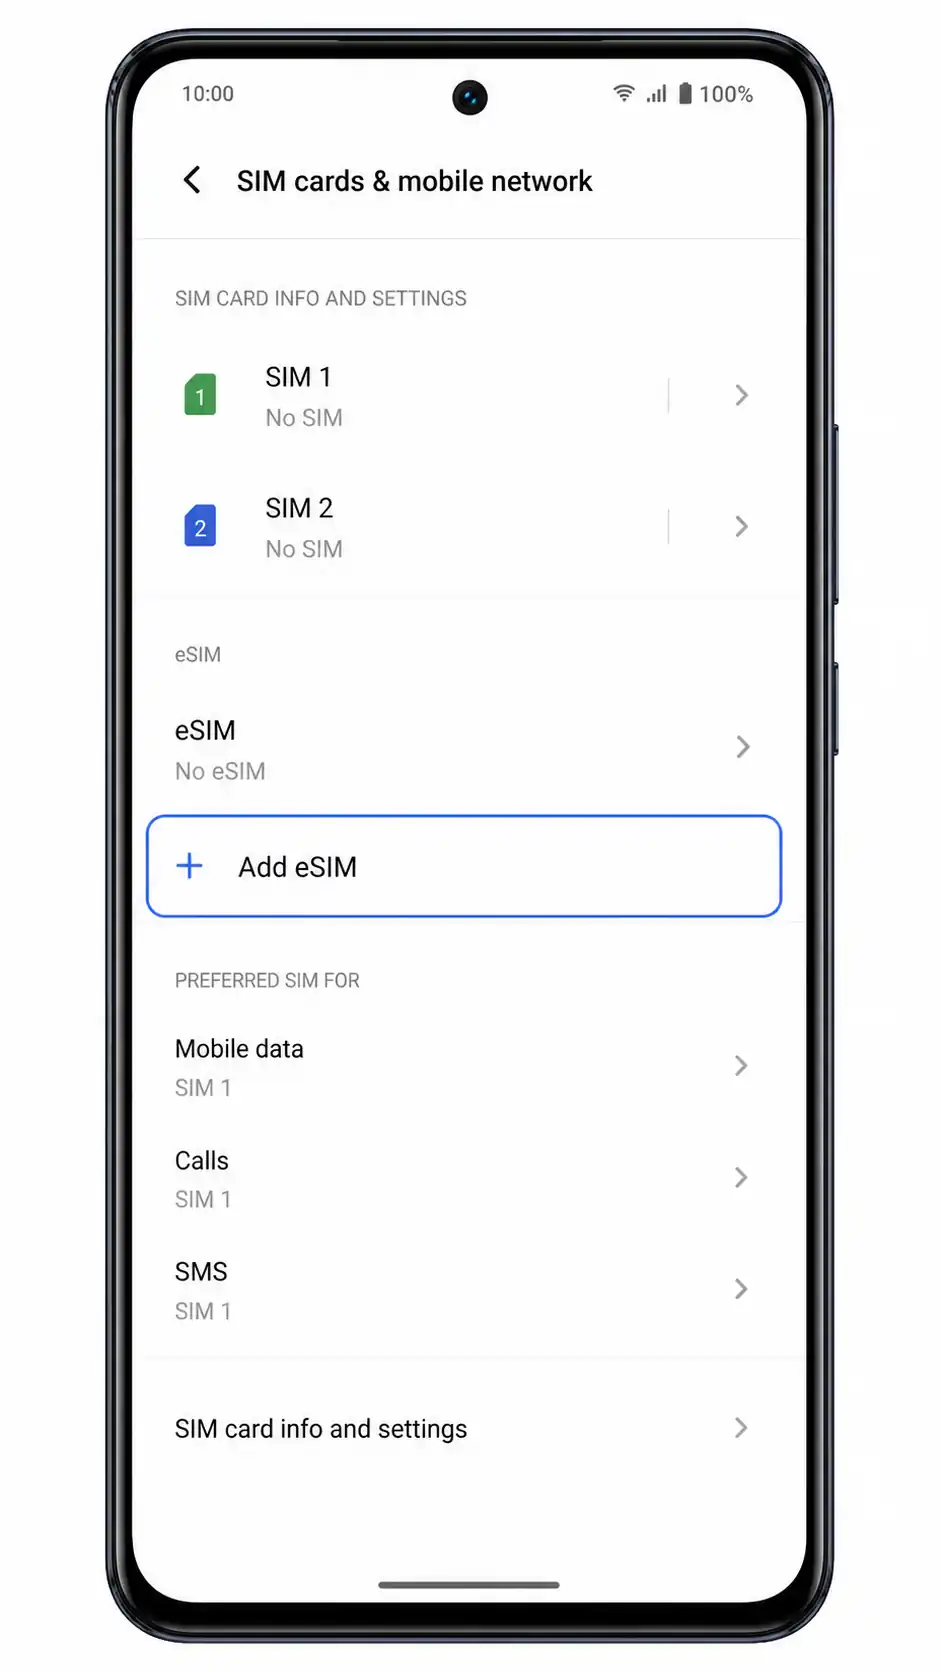
3. Tap Add eSIM. If this option is missing, stop and check whether your Vivo V40 SE regional model, carrier firmware, or software version supports eSIM.
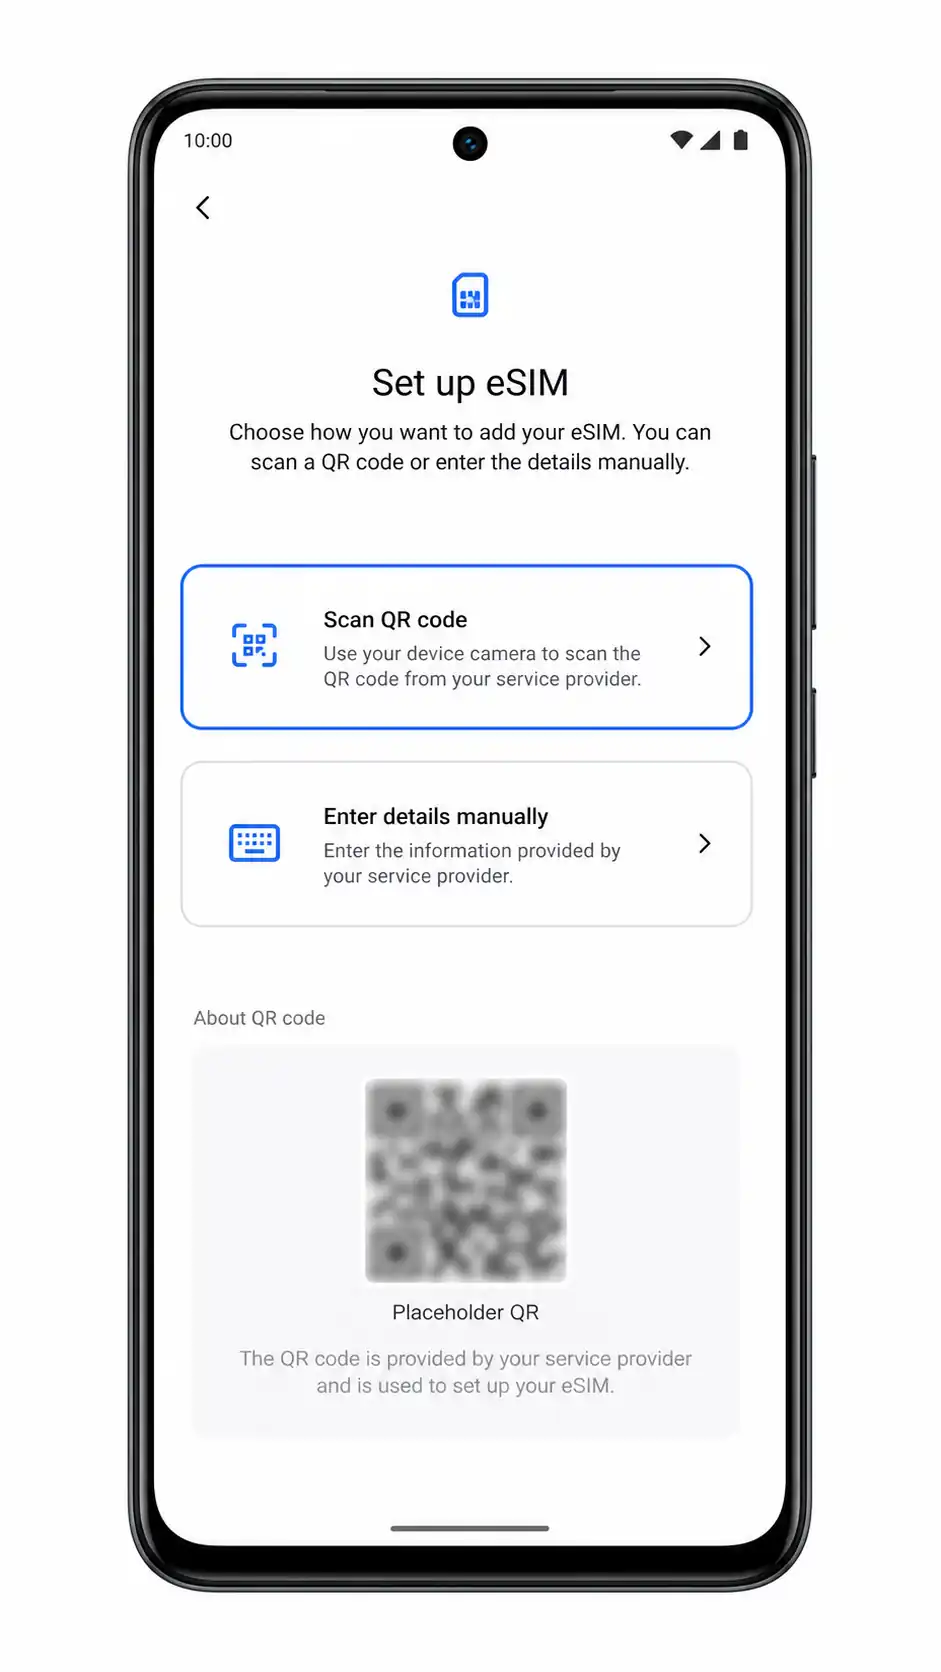
4. Choose Scan QR code and point the camera at the iRoamly QR code from your purchase email or iRoamly account page. The phone should detect the eSIM profile without showing a real activation code on screen.
5. Review the detected iRoamly travel eSIM profile and tap Download or Add. Keep Wi-Fi connected while the Vivo V40 SE downloads the eSIM.
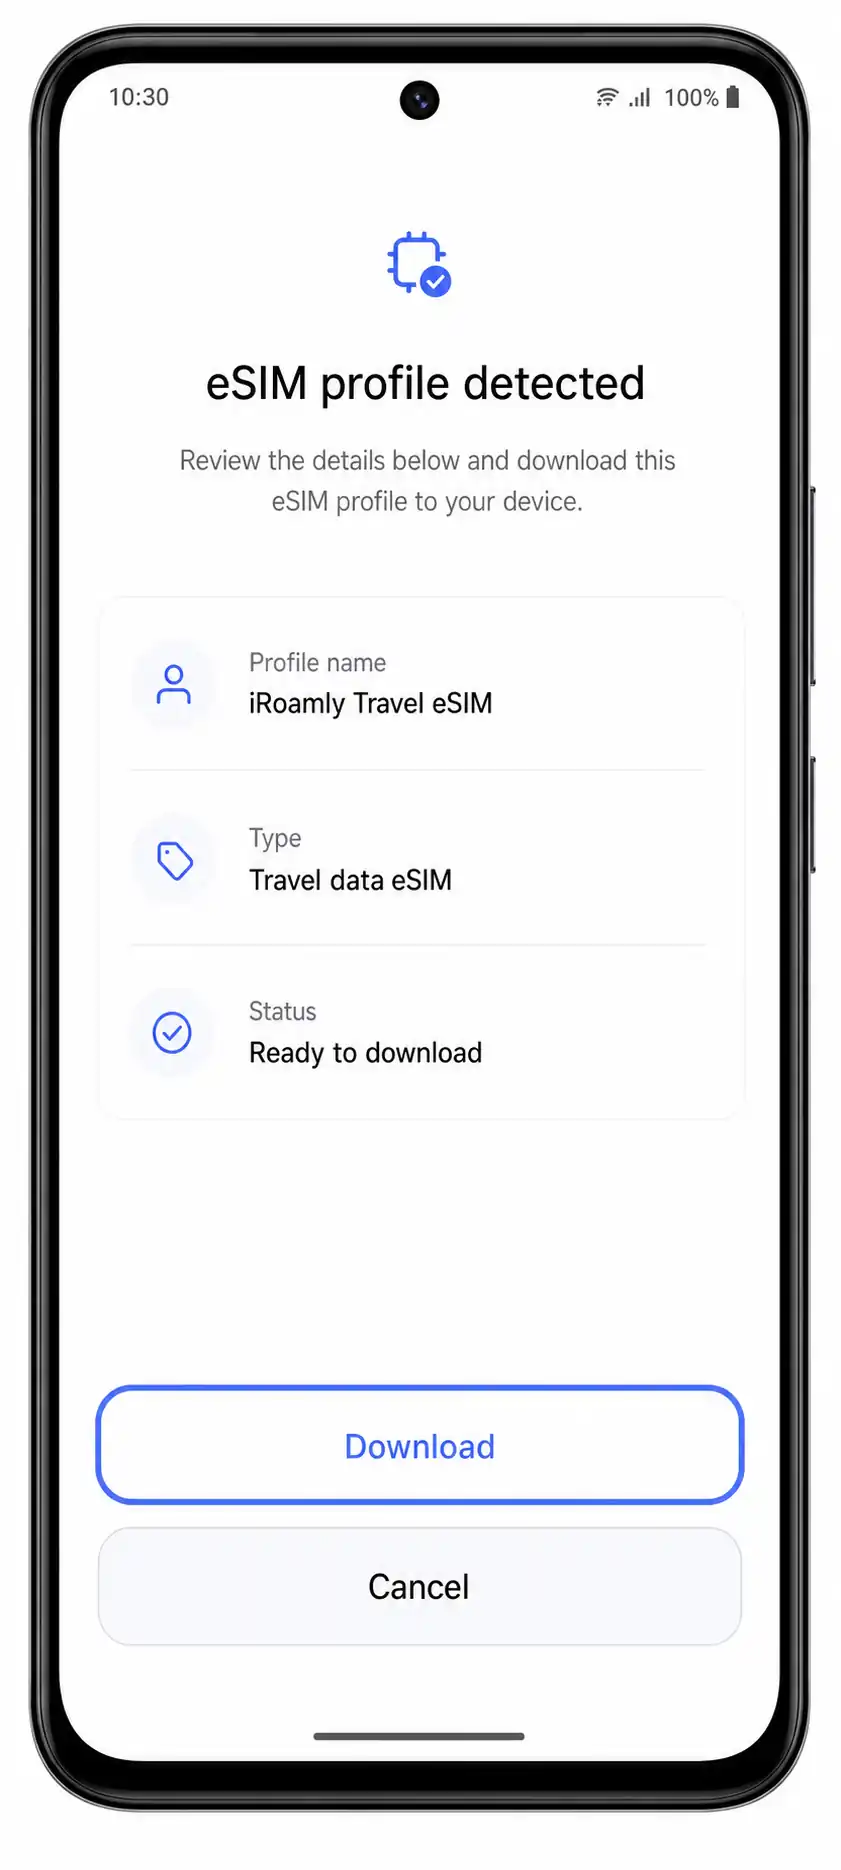
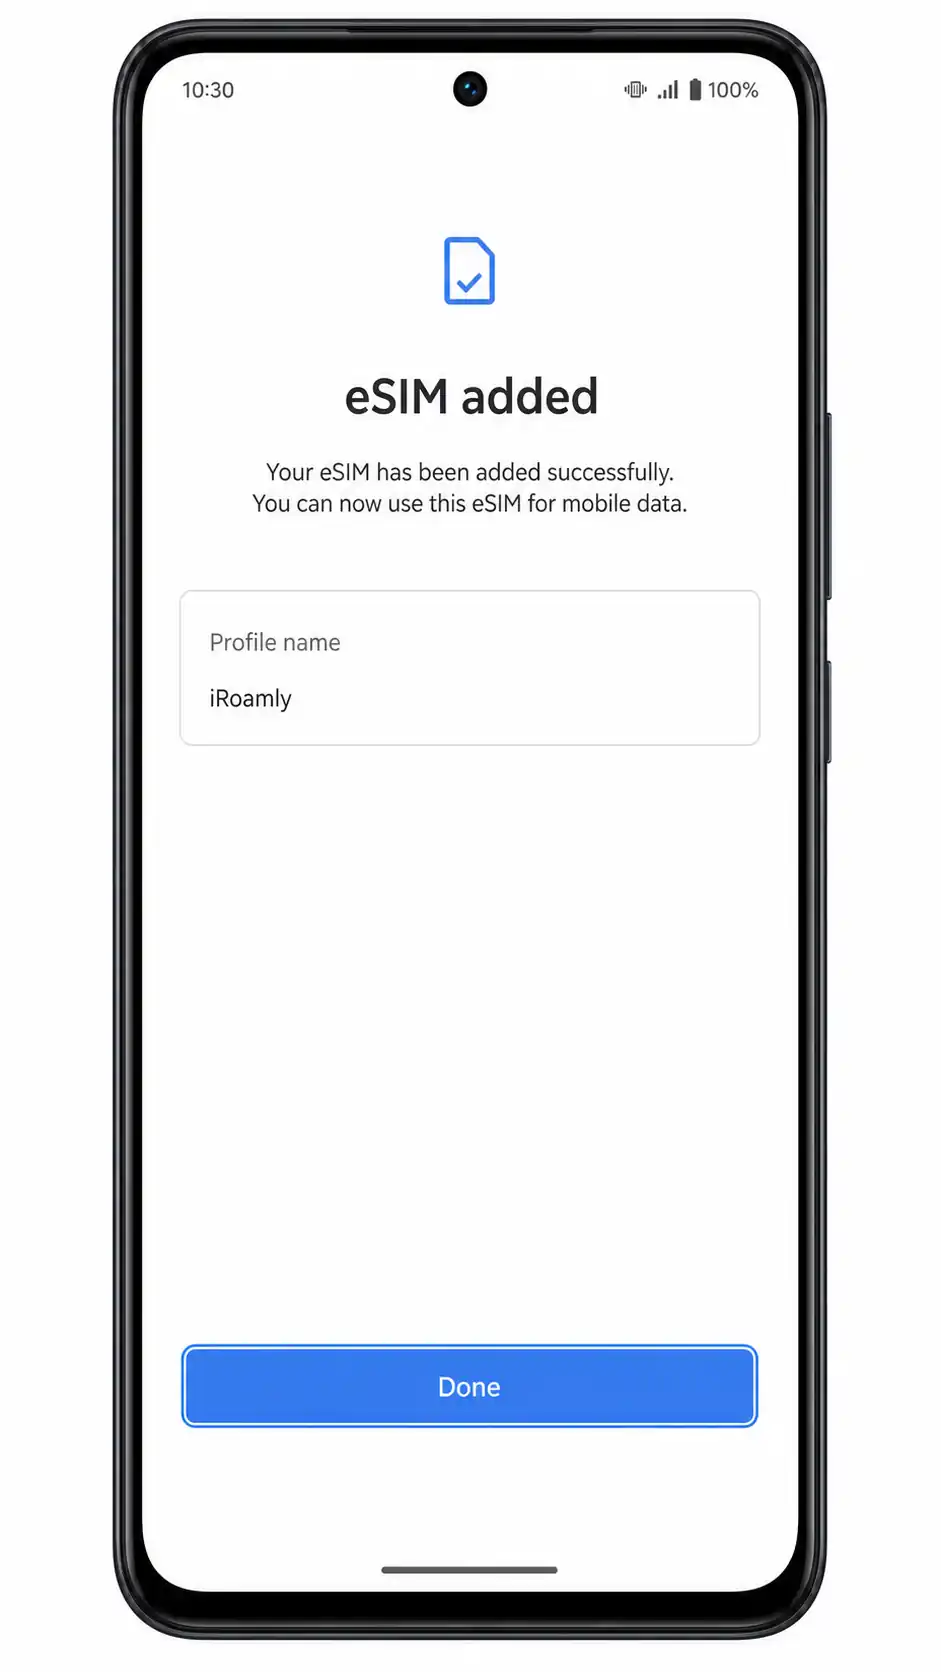
6. When setup finishes, tap Done. If Funtouch OS asks for a label, name the new line iRoamly so it is easy to identify later.
Method 2: Install eSIM Manually
1. Open Settings and tap Mobile network. This starts from the same Vivo settings entry point as the QR method.
2. Tap SIM cards & mobile network. You should see your current SIM slots and the eSIM setup option.
3. Tap Add eSIM. Stay on Wi-Fi because the manual activation still needs an internet connection to download the iRoamly profile.
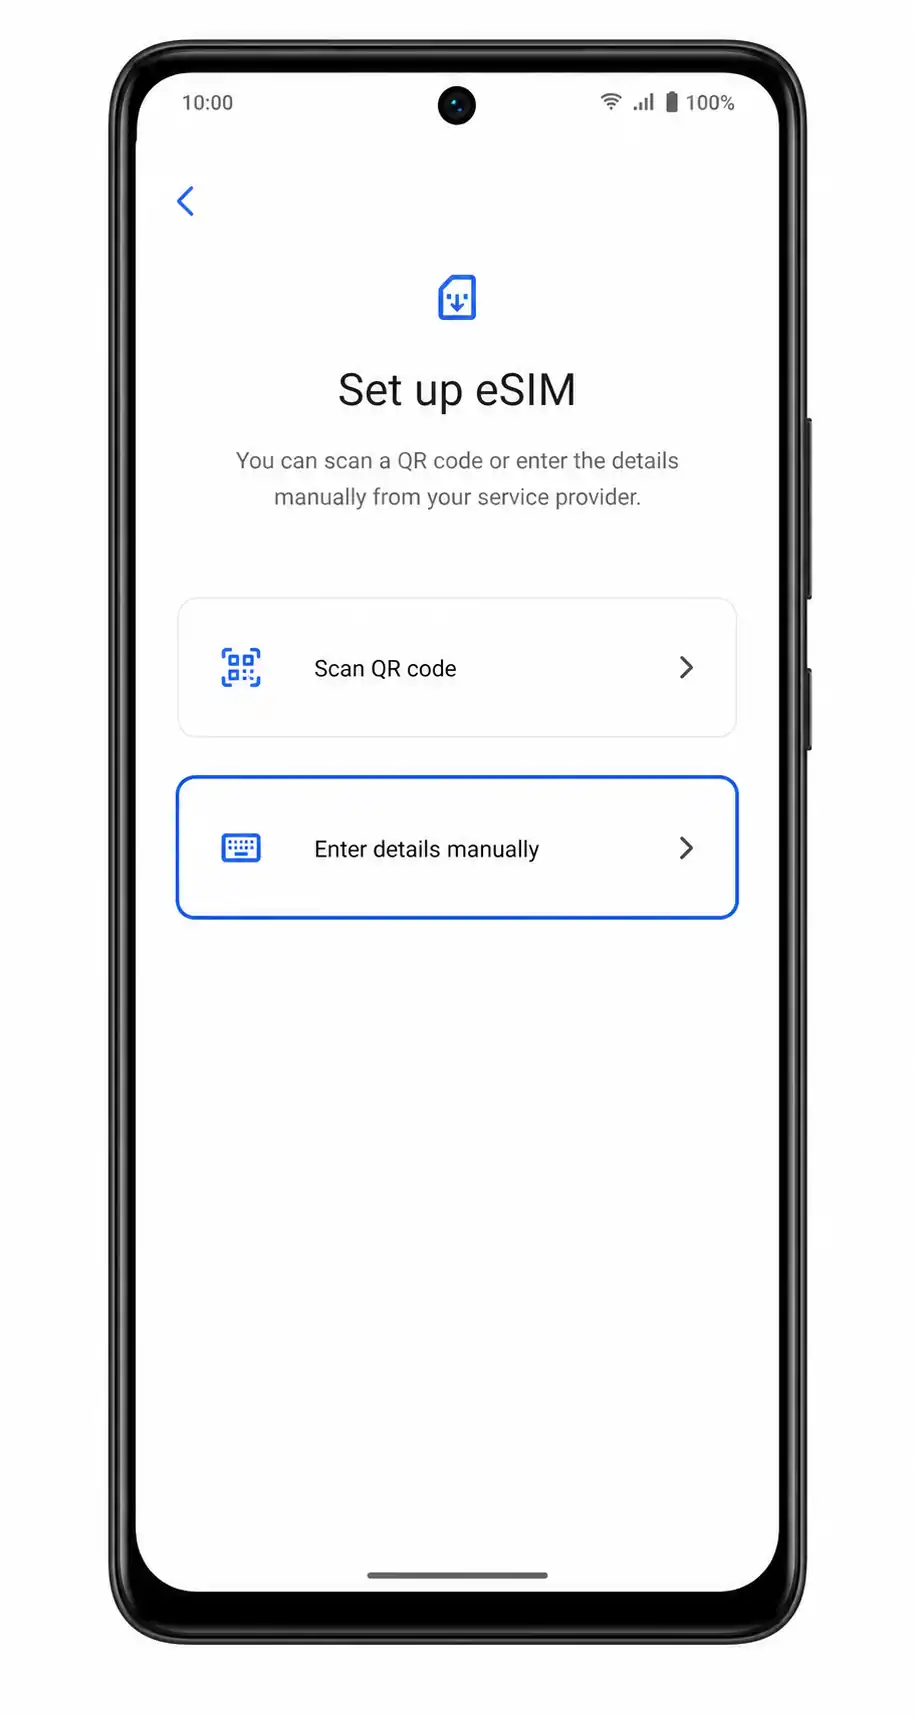
4. Tap Enter details manually or Enter activation code on the QR scanning screen. Funtouch OS should open a manual entry page.
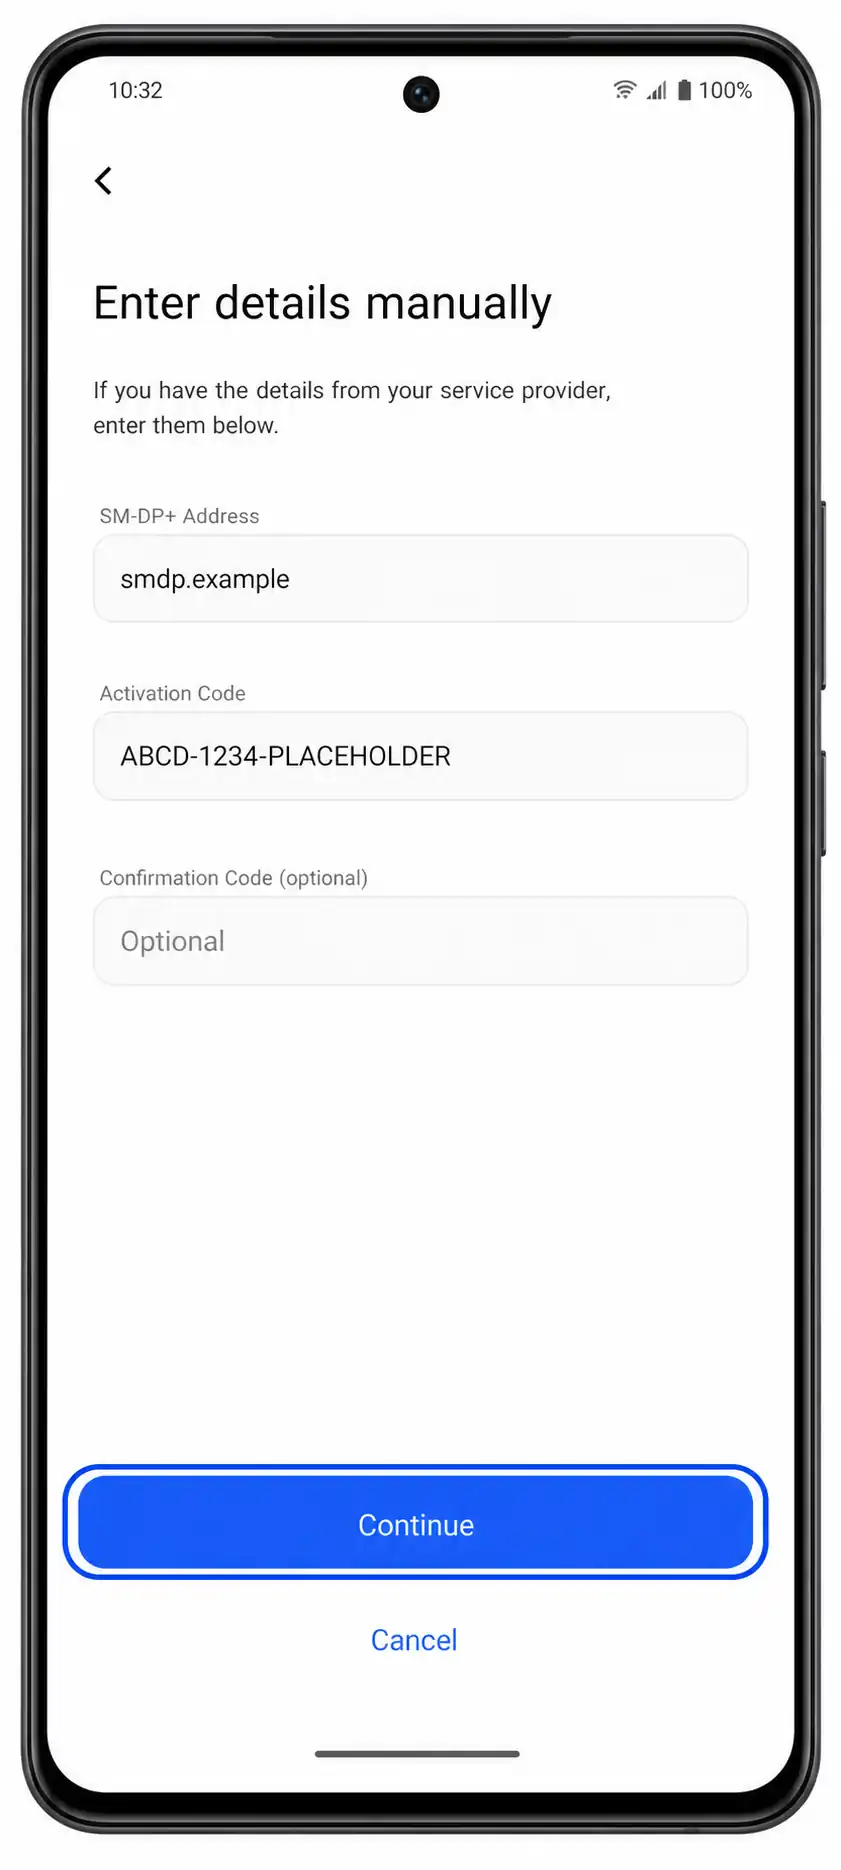
5. Enter the SM-DP+ Address and Activation Code exactly as iRoamly provides them. If a Confirmation Code field appears, leave it blank unless iRoamly specifically provided one, then tap Continue.
6. Review the iRoamly profile details and tap Download or Add. Wait until the Vivo V40 SE confirms that the eSIM has been added.
7. Tap Done and label the eSIM iRoamly if prompted. The installed eSIM should now appear with your other SIM profiles.
How to Confirm Your iRoamly eSIM Is Installed
1. Go to Settings > Mobile network > SIM cards & mobile network and look for an eSIM line labeled iRoamly or a newly added travel eSIM profile. This confirms that the profile is stored on the Vivo V40 SE.
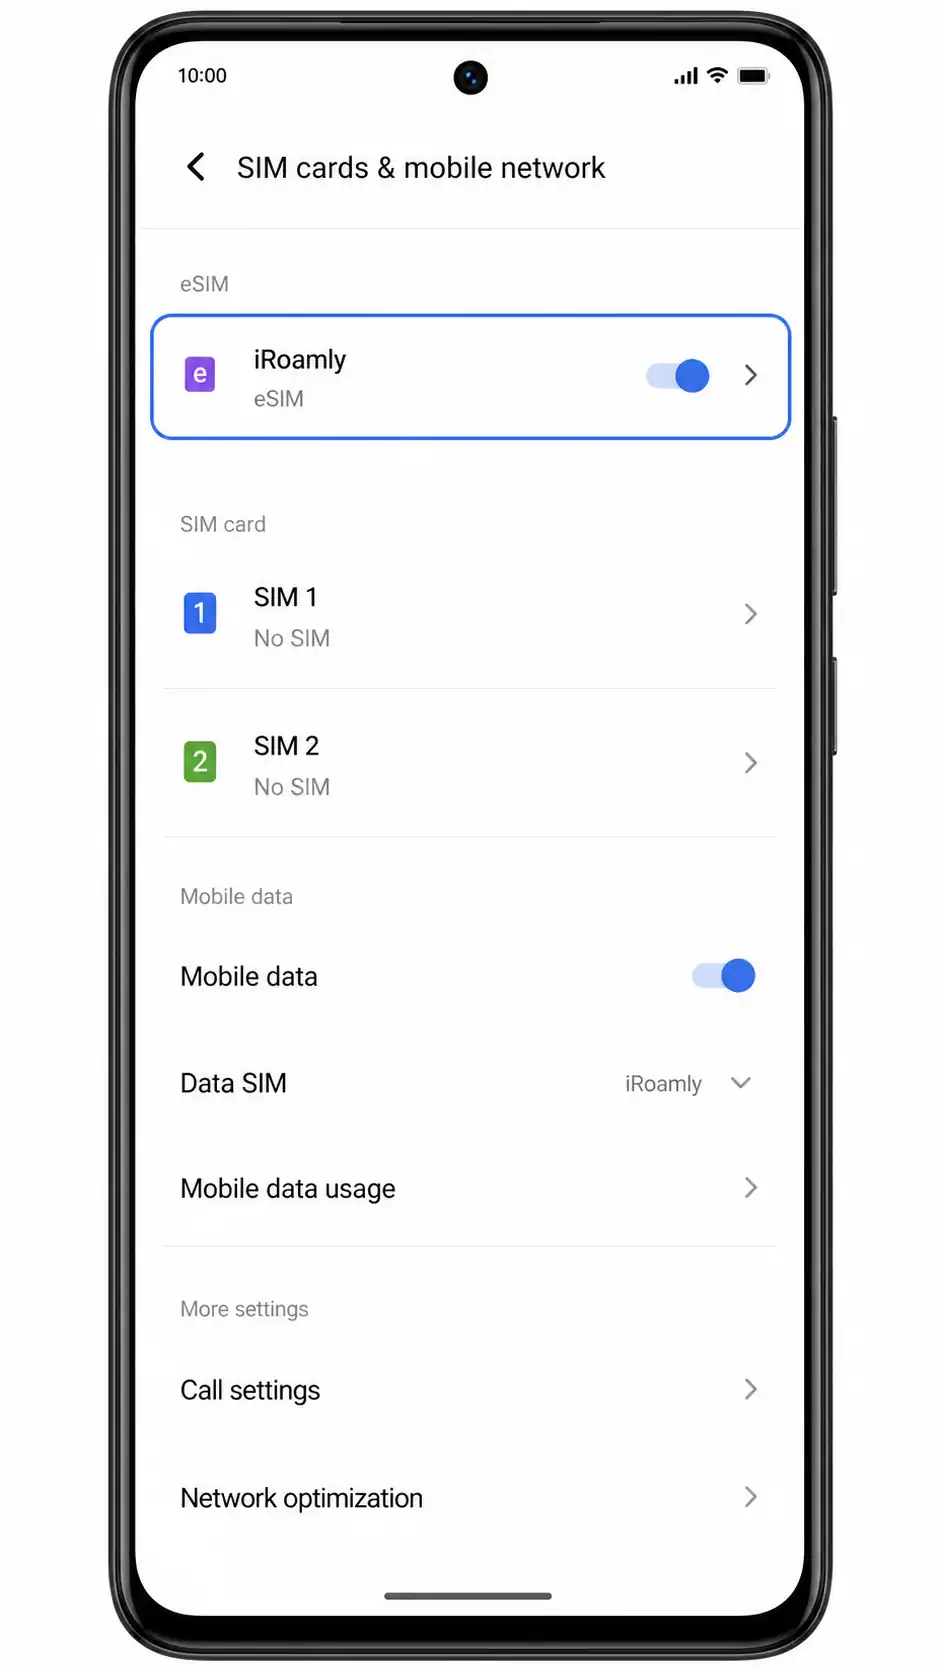
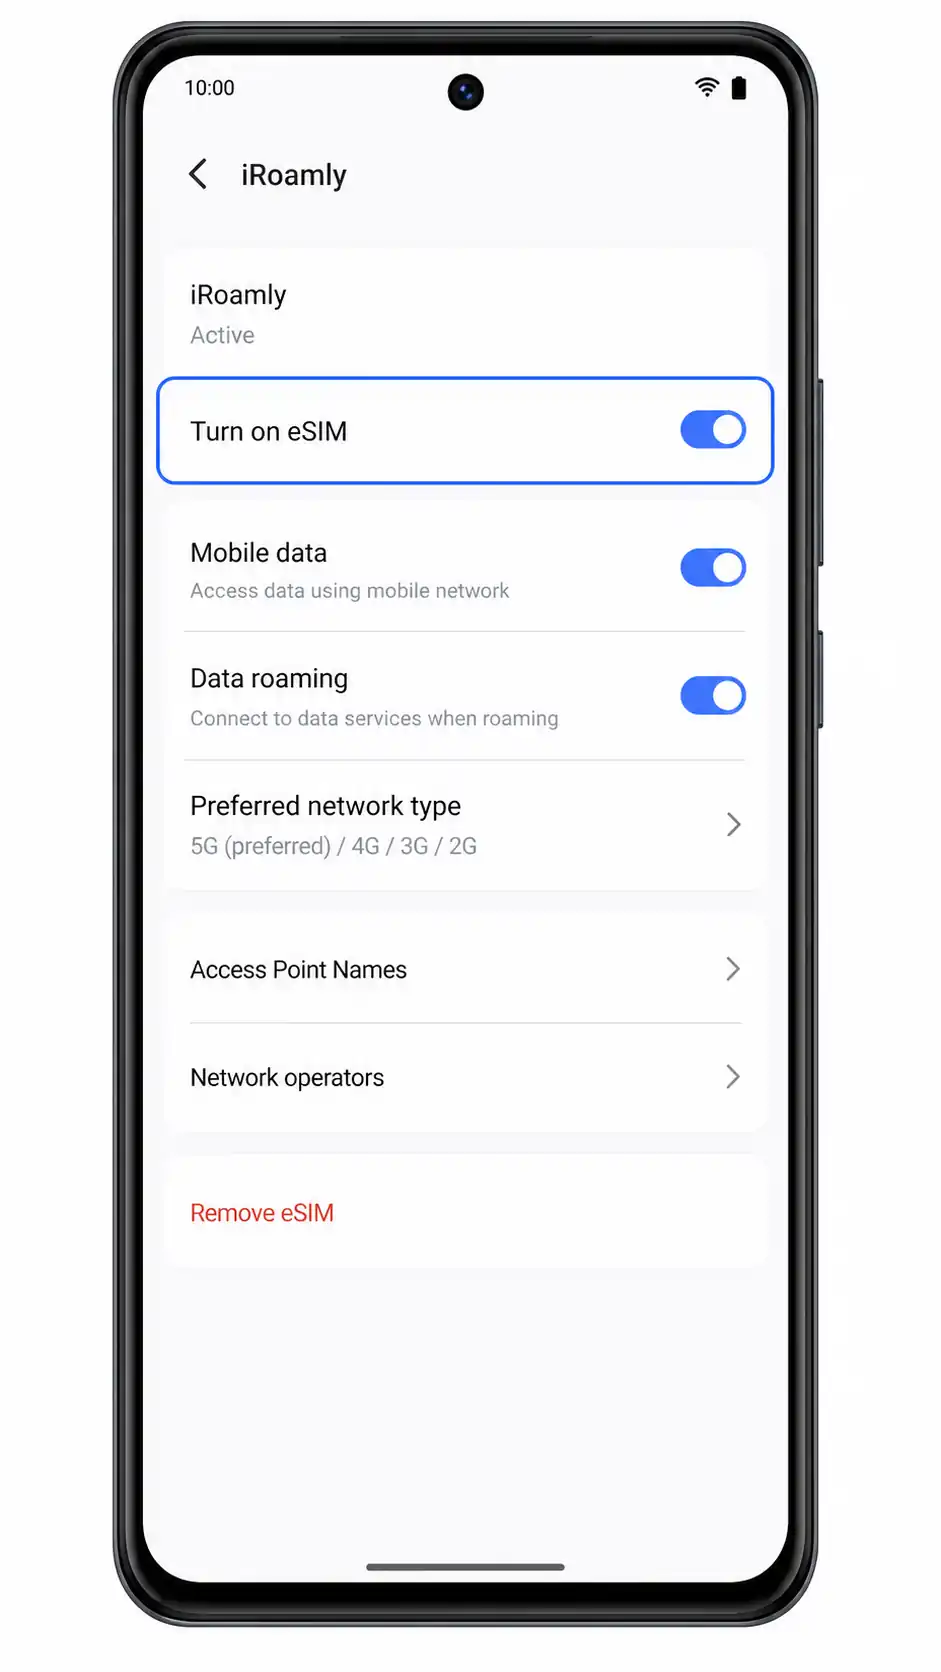
2. Tap the iRoamly eSIM line and make sure the line is turned on. If your trip has not started, you can leave mobile data off until you need it.
Configure eSIM for Mobile Data
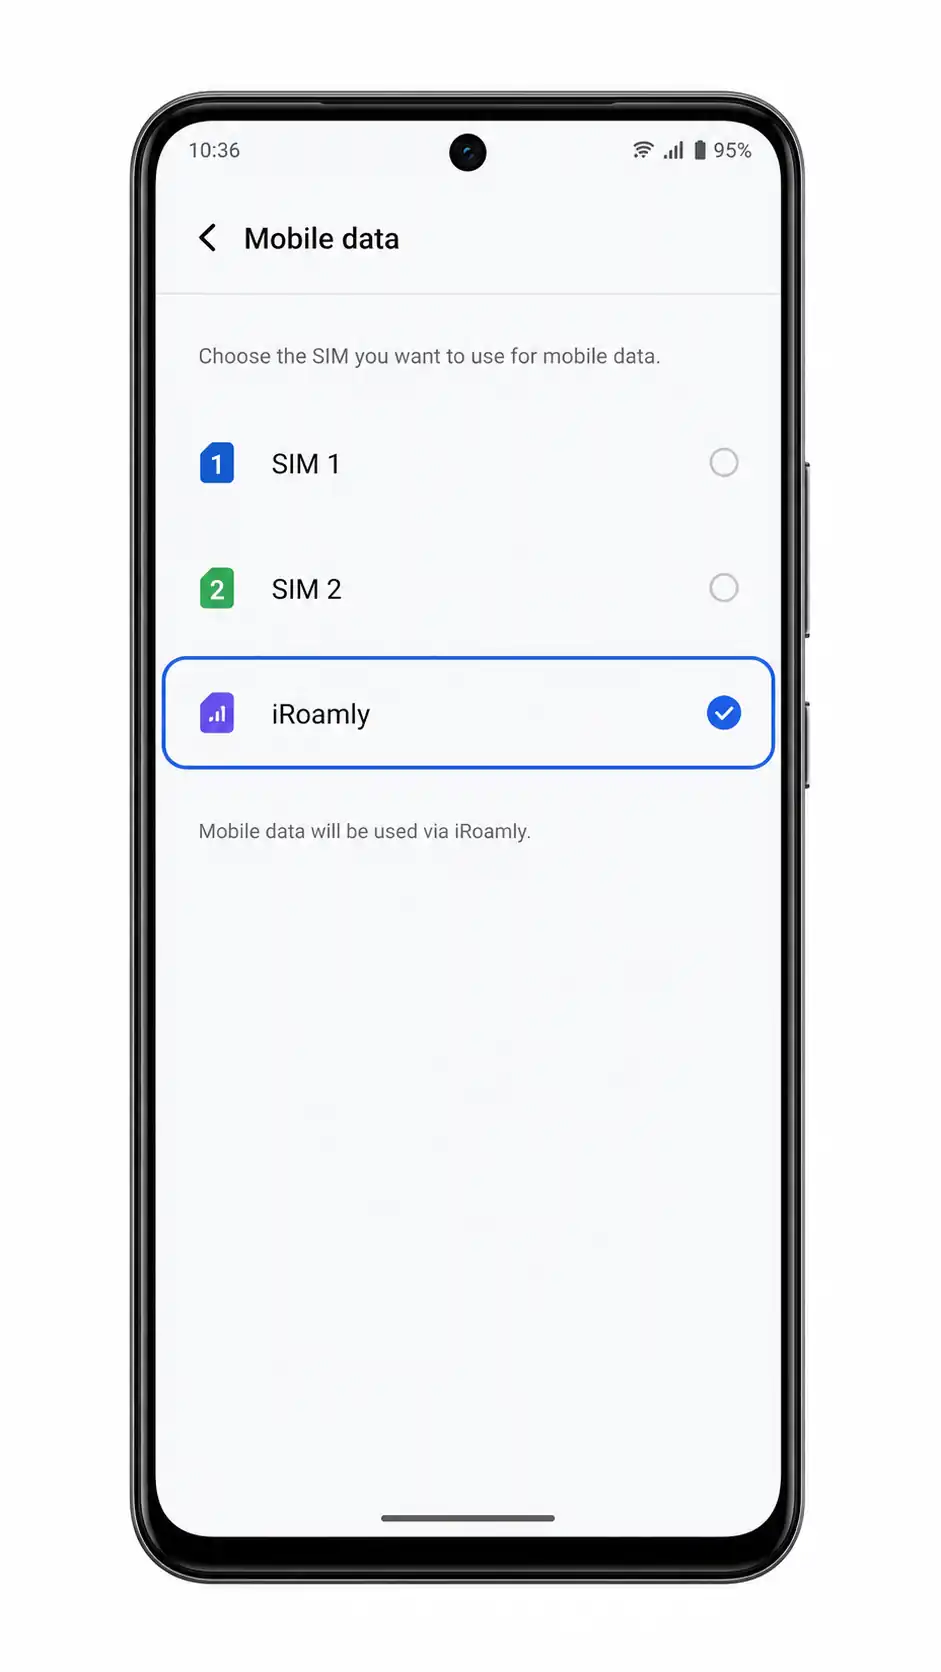
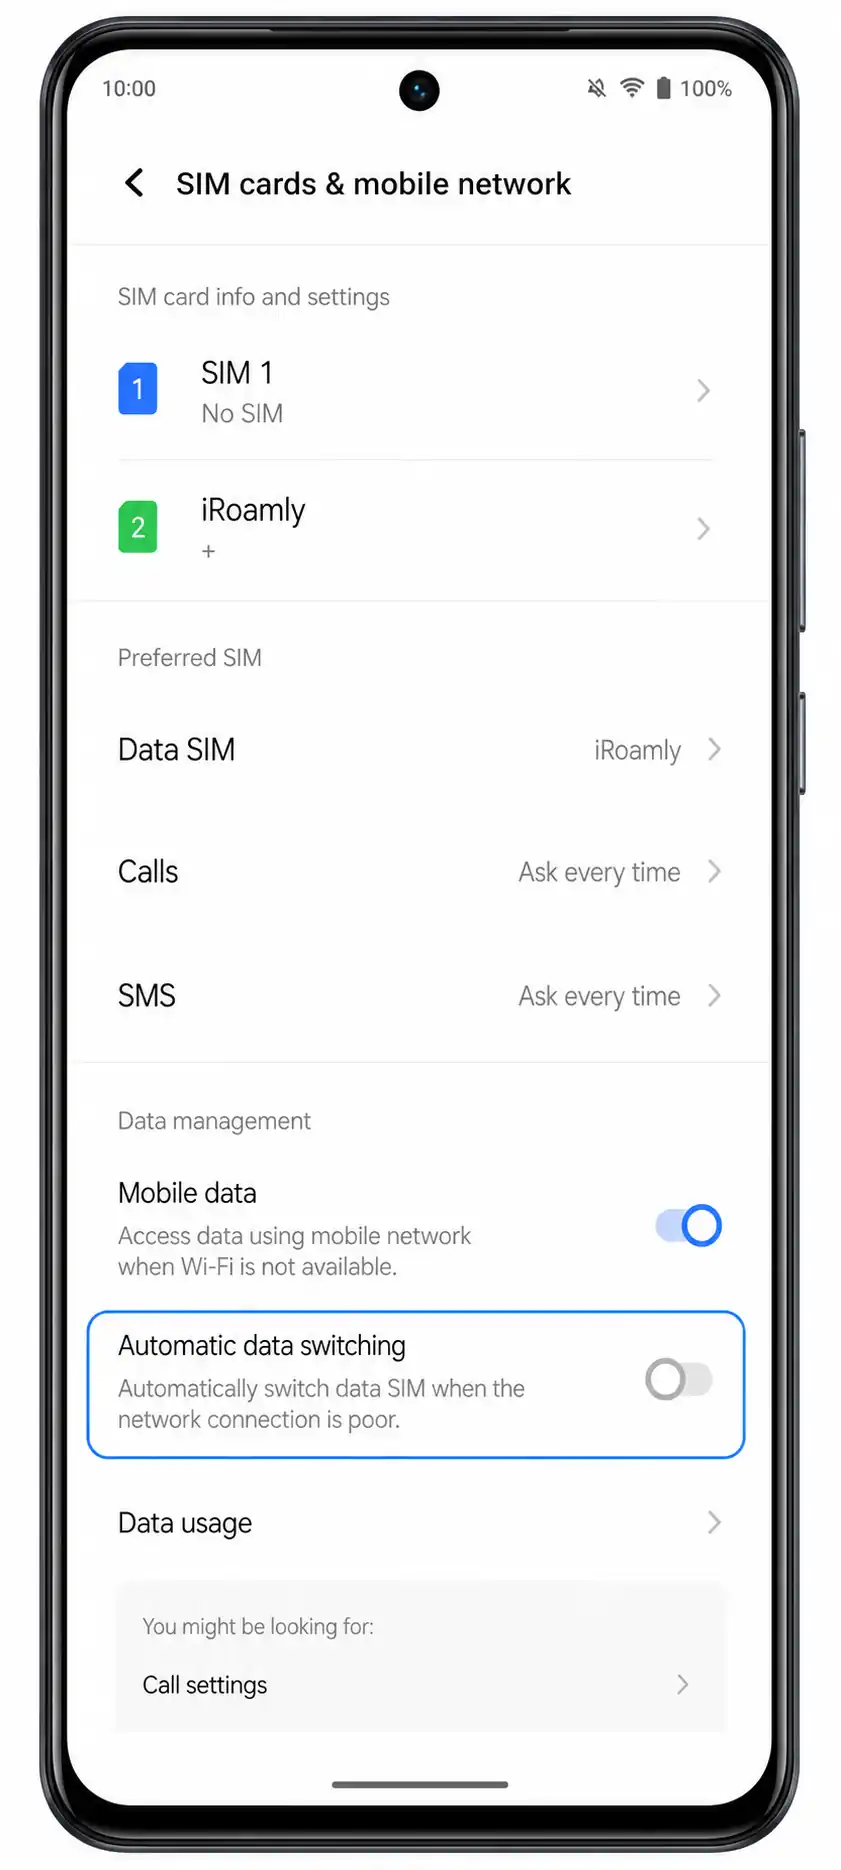
1. Open Settings > Mobile network > SIM cards & mobile network, then tap Mobile data or Default data SIM. Choose the iRoamly eSIM as the data line when you are ready to use the travel plan.
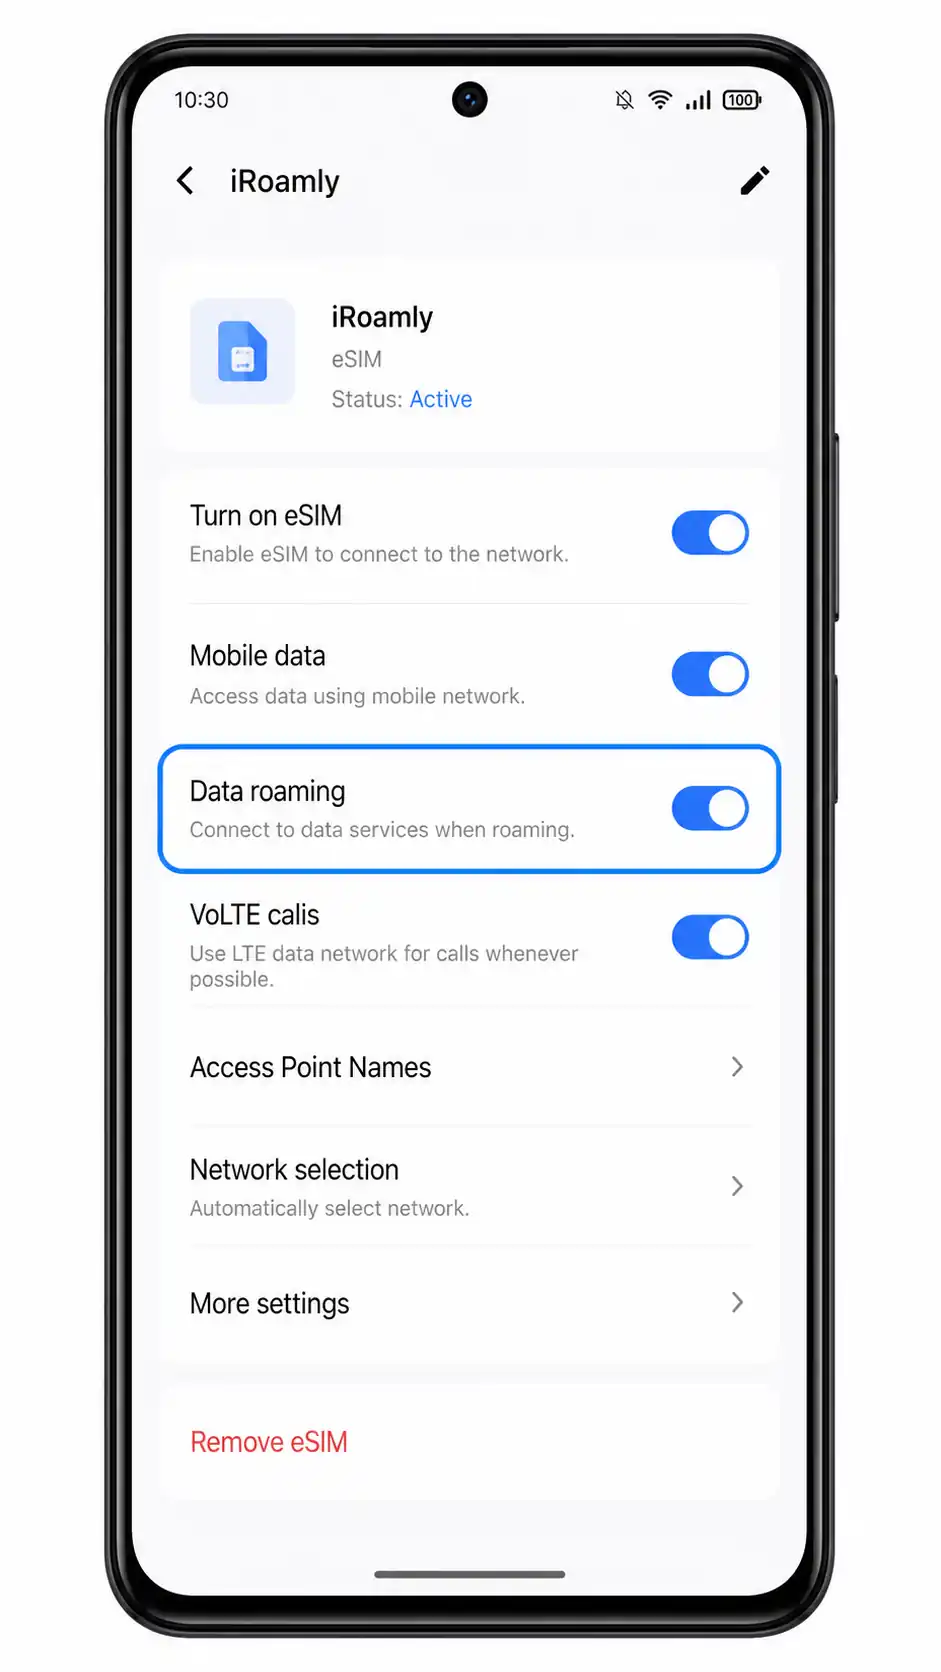
2. Open the iRoamly eSIM settings and turn on Data roaming if your iRoamly plan or destination requires roaming. Travel eSIMs often need roaming enabled to connect to partner networks abroad.
3. Turn off automatic data switching if your Vivo V40 SE offers that option and you want to avoid accidental data use on your primary SIM. Then test a web page or map app after arrival.
Troubleshooting
Add eSIM is missing: confirm that your exact Vivo V40 SE regional SKU supports eSIM, update Funtouch OS, restart the phone, and check whether the carrier firmware hides eSIM setup.
QR code does not scan: increase screen brightness on the device showing the QR code, clean the camera lens, or use the manual entry method with the SM-DP+ Address and Activation Code.
QR code was already used: do not delete the eSIM. Many travel eSIM QR codes are single-use, so contact iRoamly support if the profile was removed or installation failed after scanning.
Activation is pending: keep the phone on Wi-Fi, leave the eSIM installed, and wait a few minutes. Some plans finish activation only after the phone reaches a supported destination network.
No data after installation: select iRoamly for mobile data, turn on Data roaming for the iRoamly line, disable conflicting data switching, and restart the phone.
Calls or SMS do not work: check the iRoamly plan details. Many travel eSIM plans are data-only and will not provide a voice number or SMS service.
Menu names look slightly different: Vivo may change labels by Funtouch OS version, country, or carrier. Use the closest matching Mobile network, SIM cards & mobile network, Add eSIM, and data-roaming labels.
Conclusion
Your iRoamly eSIM is now installed on your Vivo V40 SE, completing the setup process. From this point on, the phone is ready to use your travel data plan whenever the plan becomes active in a supported destination.
Whether you're traveling for business, vacation, or a short weekend getaway, having your eSIM prepared ahead of time means you can start using mobile data sooner and spend more time focusing on your trip instead of your phone settings.