
Using an eSIM on the Galaxy S22 Ultra 5G offers a more modern and convenient mobile experience.
Because the eSIM is embedded directly into the device, you can activate a mobile plan digitally without removing your current SIM card or waiting for physical delivery.
This makes eSIMs especially useful for travel, business use, and users who frequently switch between networks.
With iRoamly eSIM, setup can be completed directly from the phone settings in just a few minutes. In this article, we’ll guide you through the full installation and activation process step by step.
Prepare Your Travel Data with iRoamly
iRoamly Travel eSIM is a travel eSIM service for mobile data in many destinations. Travelers can select available local, regional, and global options, while data allowances, validity, plan types, and supported features vary by destination.
With a travel data line installed on a compatible phone, everyday trip needs such as maps, messaging, translations, bookings, and ride-hailing can stay available without changing your main SIM card.
For the Samsung Galaxy S22 Ultra 5G, this guide keeps the setup focused on Samsung settings for QR code installation, manual input, and post-installation checks. You can prepare the iRoamly profile ahead of a trip, then choose it for mobile data when it is time to use the plan abroad.
Preparations Before Setting Up iRoamly eSIM
If Turkey is on your itinerary, you can set up a Turkey eSIM before departure and activate the travel line for mobile data when needed. The same option is available for Japan if your travel plans take you there.
Before starting the installation process, make sure you have the following ready:
A stable internet connection (Wi-Fi is recommended)
A valid eSIM QR code or activation code provided by your carrier
Your Galaxy S22 Ultra 5G powered on and unlocked
The device updated to the latest available One UI version for better eSIM compatibility
The carrier account activated and eligible for eSIM service
Method 1: Install eSIM Using a QR Code
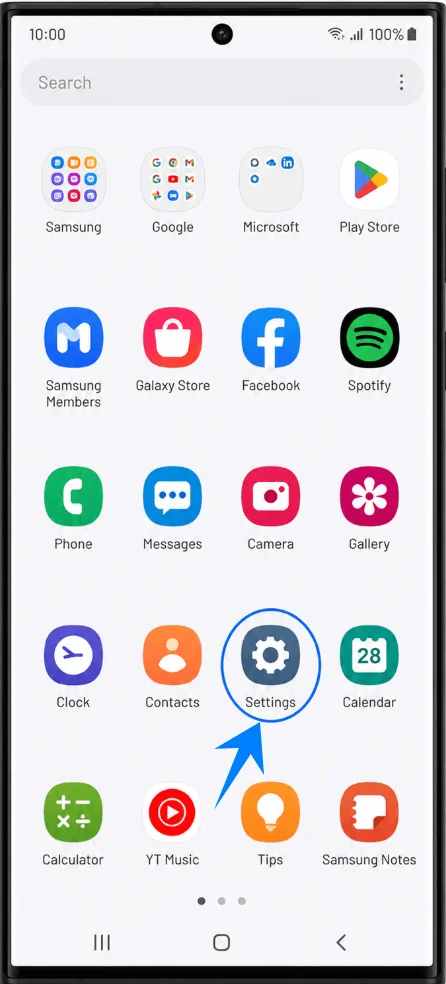
Step 1: Open Settings
Open the Settings app
Step 2: Open SIM Card Manager
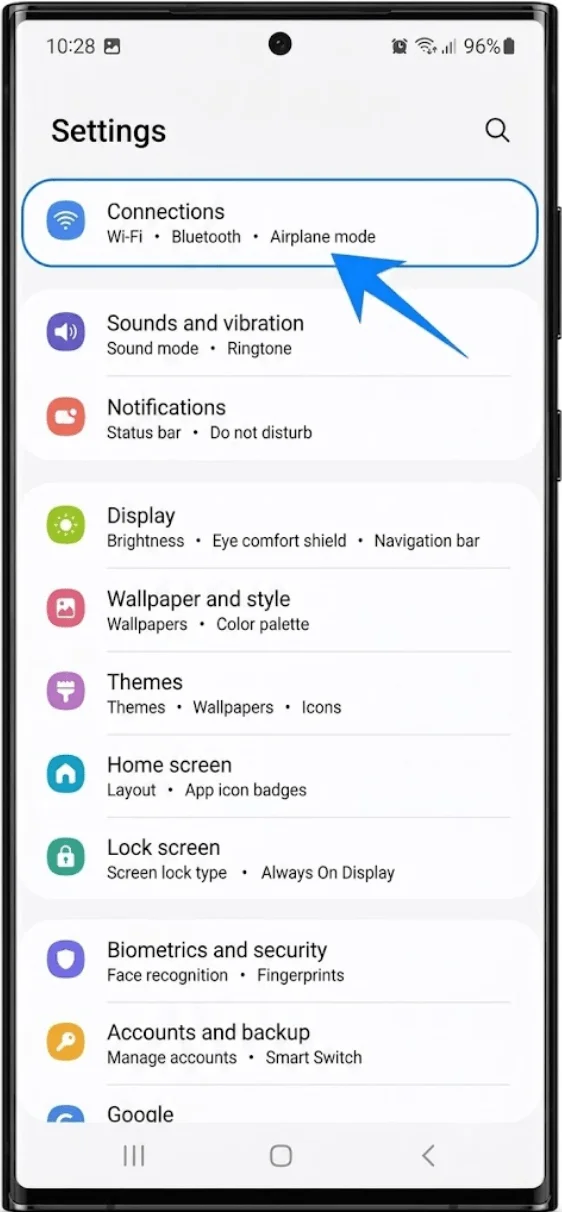
Tap Connections
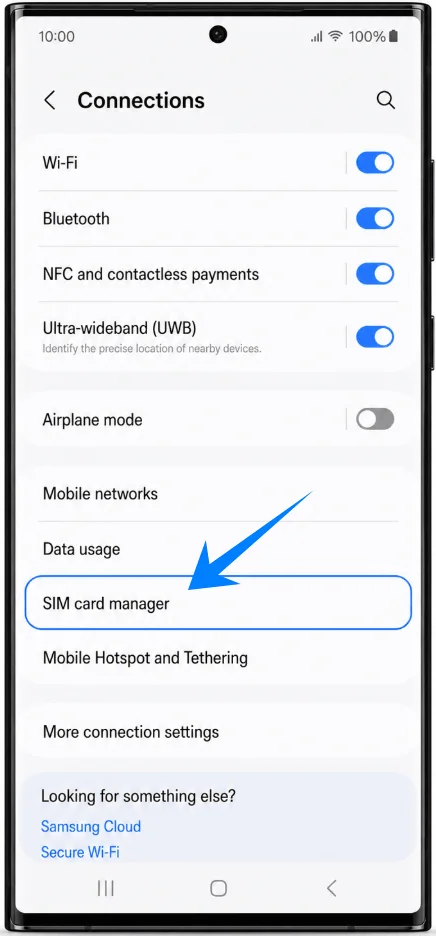
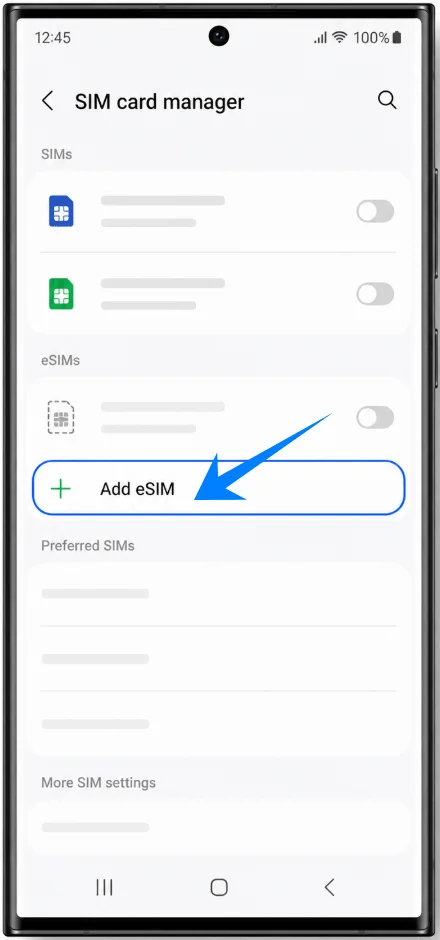
Tap SIM card manager
Step 3: Start the eSIM Setup
Tap Add eSIM
Step 4: Open QR Code Installation
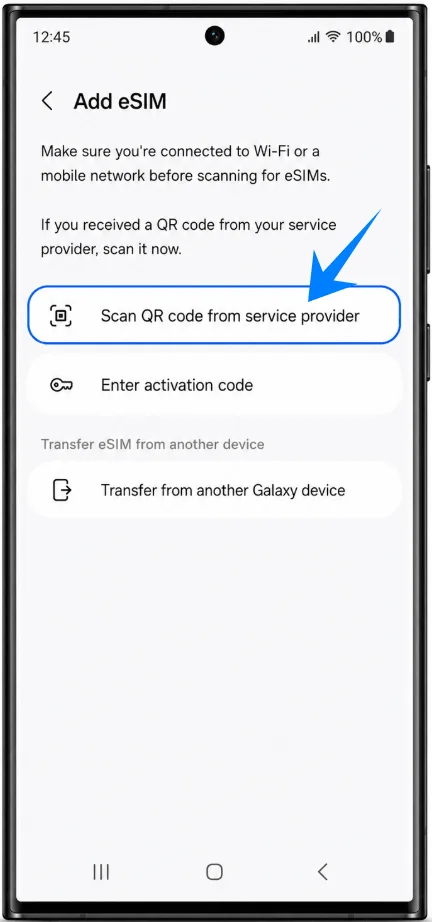
Tap Scan QR code from service provider
The phone camera will open automatically.
Step 5: Scan the Carrier QR Code
Position the QR code inside the camera frame
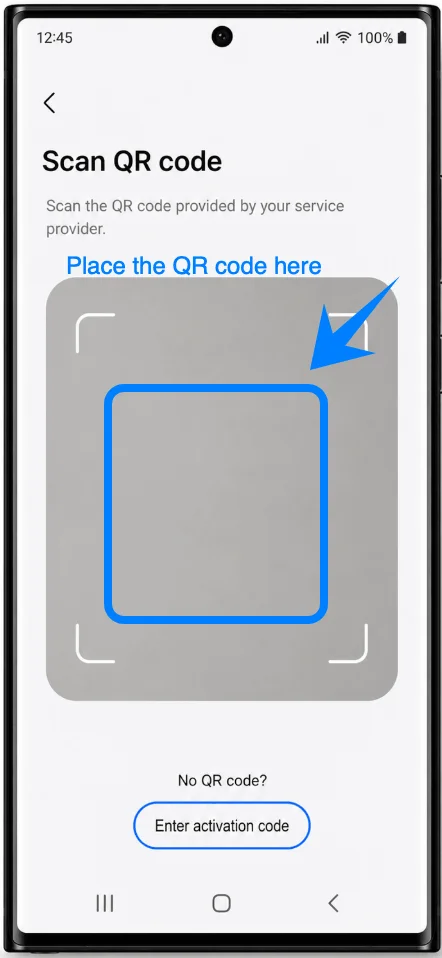
Wait for the device to recognize the eSIM profile
Tap Add or Connect
The Galaxy S22 Ultra 5G will now download the eSIM profile from the carrier server.
Step 6: Complete Activation
Wait for the installation process to finish
Tap OK if prompted
Restart the phone if required
Do not close the Settings app or disconnect from the internet during installation.
Method 2: Install eSIM Using Manual Input
Step 1: Open Settings
Open the Settings app
Step 2: Open SIM Card Manager
Tap Connections
Tap SIM card manager
Step 3: Start the eSIM Setup
Tap Add eSIM
Step 4: Open the Manual Activation Screen
Tap Scan QR code from service provider
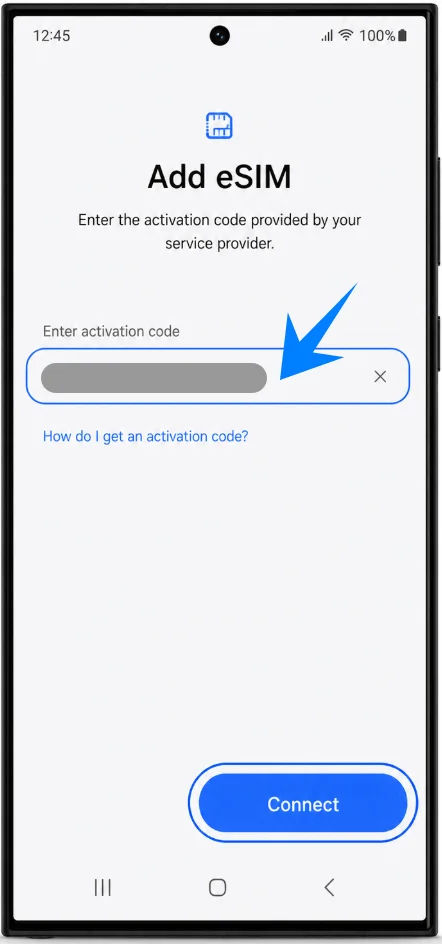
Tap Enter activation code
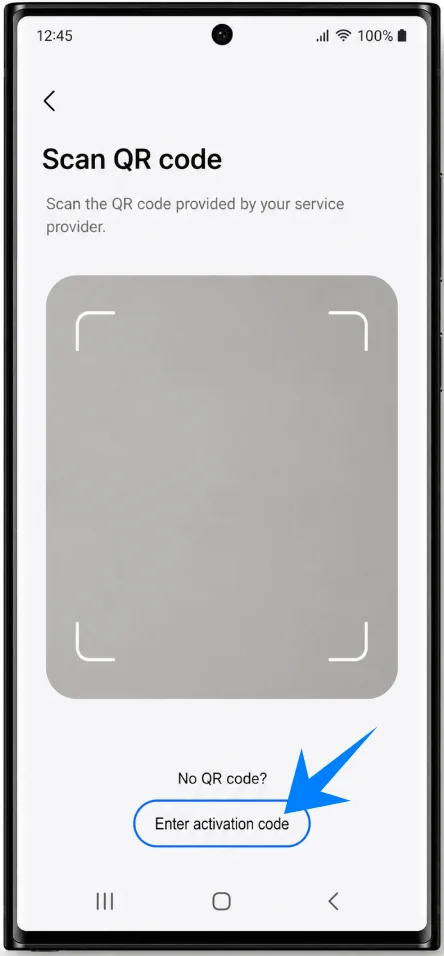
This option is usually displayed at the bottom of the QR code screen.
Step 5: Enter the Activation Code
Tap the Activation code field
Enter the activation code provided by your carrier
Step 6: Install the eSIM
Tap Connect.
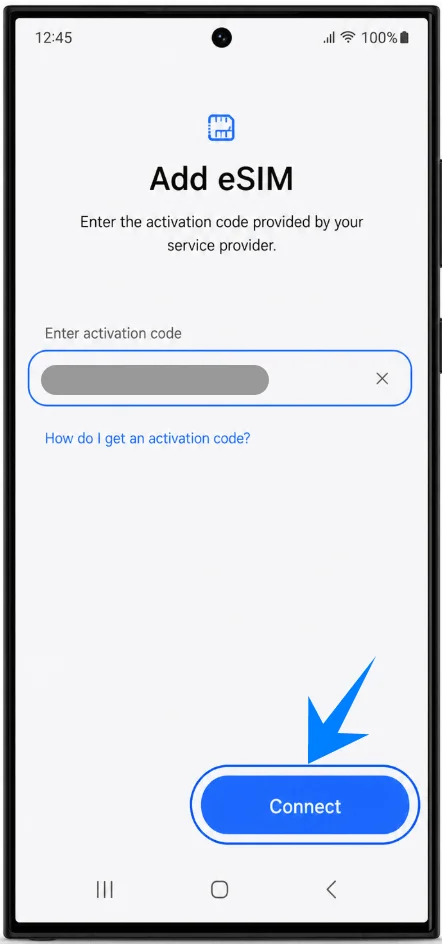
The Galaxy S22 Ultra 5G will now download and install the eSIM profile.
Step 7: Complete Activation
Wait for the installation process to finish
Tap OK if prompted
Restart the device if required
How to Confirm the eSIM Was Successfully Installed
Check eSIM Status
Open Settings
Tap Connections
Tap SIM card manager
You should now see:
the new eSIM profile
signal bars next to the eSIM
the eSIM toggle enabled
Test Mobile Network Connectivity
Confirm that:
the carrier name appears
LTE or 5G signal is visible
mobile data works correctly
You should also:
make a phone call
send a text message
test internet access without Wi-Fi
If all services function normally, the eSIM installation was successful.
Note: Some eSIM plans may not include voice calling support, so this feature might not be available depending on your plan.
More Samsung Galaxy eSIM Setup Guides
Setting up another Samsung Galaxy phone? These eSIM activation guides may help.
Conclusion
After completing the installation steps in this guide, the iRoamly eSIM should now be successfully activated on the Galaxy S22 Ultra 5G.
With built-in eSIM support, the device allows mobile plans to be installed digitally without requiring a physical SIM card, making setup faster and more flexible.
Once the network connection and mobile data are working properly, the Galaxy S22 Ultra 5G is ready for reliable everyday connectivity.