
eSIM offers a more flexible way to connect your phone to a mobile network. By moving the setup process into the device itself, it allows you to complete everything through simple on-screen steps without needing any physical components.
This makes the process faster and more convenient while also giving you better control over your network settings. On the iPhone XS Max, adding an eSIM is a smooth and guided experience.
In the following guide, we’ll show you exactly how to install and activate your iRoamly eSIM, with clear instructions to help you complete each step successfully.
Meet iRoamly for Easier Travel Connectivity
iRoamly is a travel eSIM service that provides mobile data options for trips abroad. Depending on the destination, travelers may find local, regional, or global plans, with allowances, validity periods, and supported features varying by plan.
After installation, the eSIM data line can help with maps, messaging, bookings, ride-hailing, and travel updates.
On the iPhone XS Max, an iRoamly eSIM can be installed through iOS using the same QR-code and manual-input paths covered in this guide. Continue with the preparation and setup steps below to add the profile and check that mobile data is ready.
Preparations Before Setting Up iRoamly eSIM
Once you have chosen an eSIM for your destination, such as an eSIM for Italy, you can install it before departure and select it for mobile data when needed abroad.
Before starting, ensure you have the following:
A stable internet connection (Wi-Fi or cellular)
A valid eSIM QR code or manual activation details (SM-DP+ address and activation code) provided by your carrier
Your iPhone XS Max powered on and unlocked
The device updated to the latest iOS version (recommended for compatibility)
Method 1: Install eSIM via QR Code Scanning
Step 1: Open Cellular Settings
Tap Settings
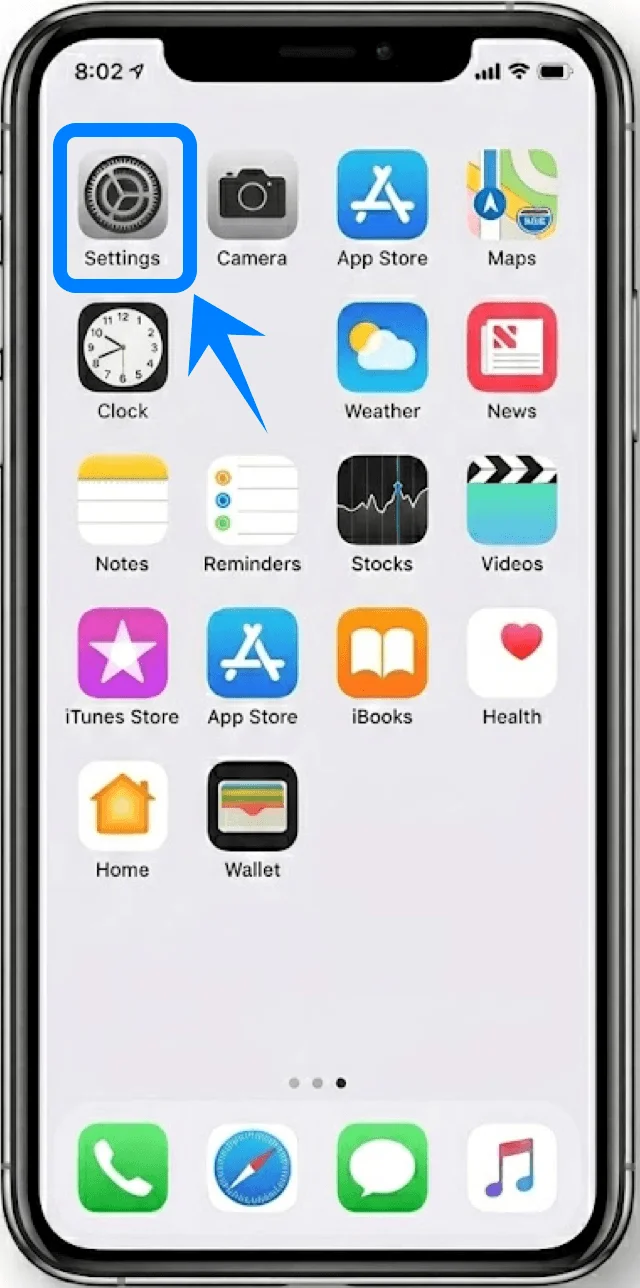
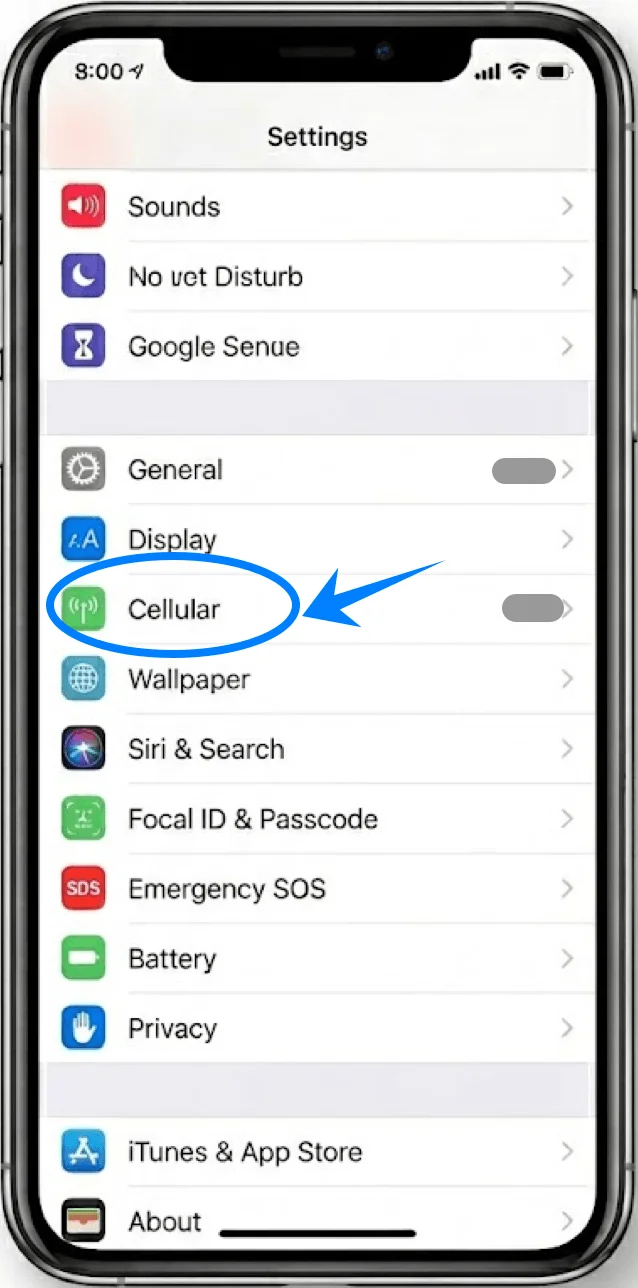
Scroll down and tap Cellular (This option may appear as “Mobile Service” or “Mobile Data” depending on system language or region.)
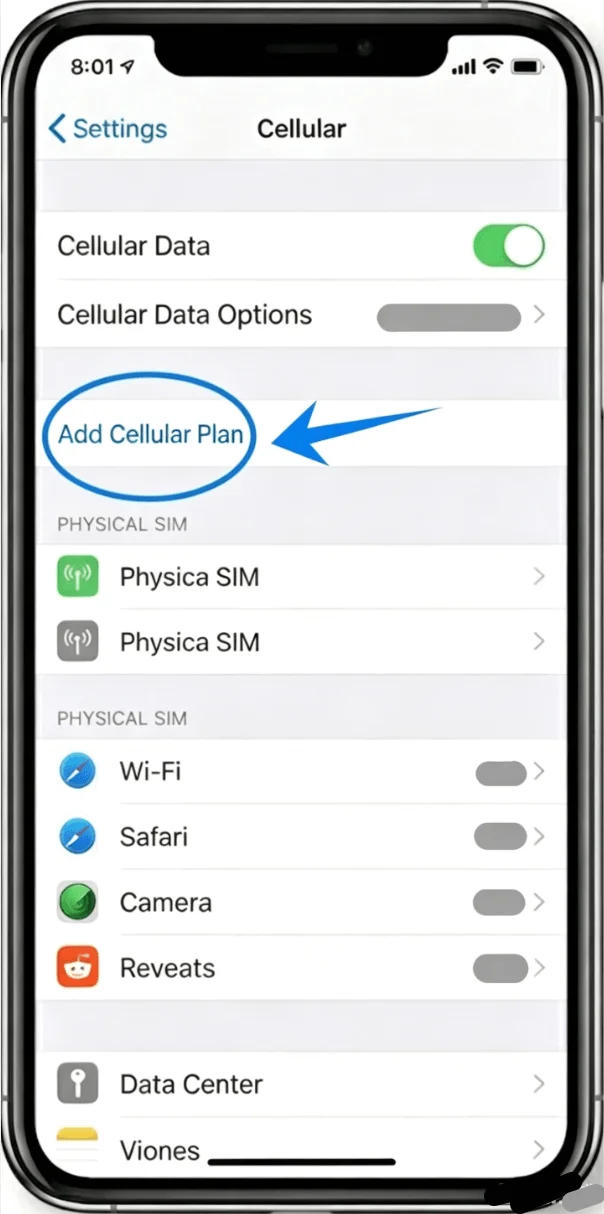
Step 2: Add eSIM Plan
Tap Add Cellular Plan
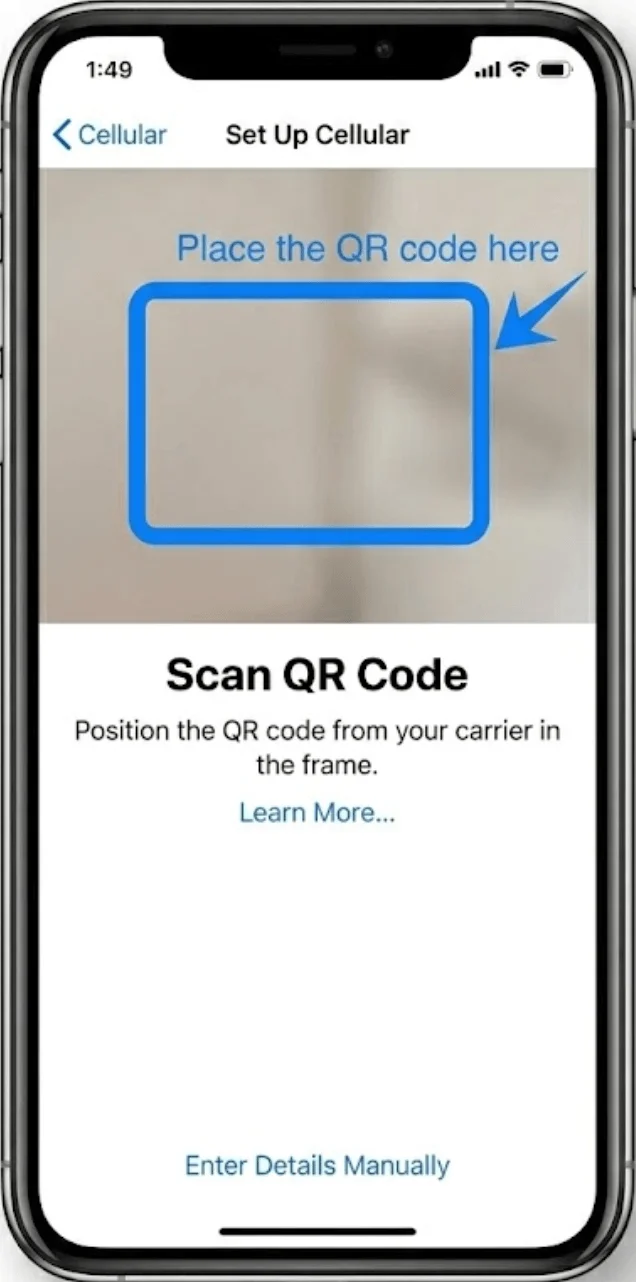
Step 3: Access QR Code Scanner
The camera interface opens automatically under Add Cellular Plan
Position your iPhone so the QR code is clearly visible within the frame
Step 4: Scan the QR Code
Wait for the phone to recognize the code
When prompted, tap Add Cellular Plan
Step 5: Confirm Plan Addition
Tap Add Cellular Plan again on the confirmation screen
Step 6: Label the Plan
Choose a label (e.g., Primary, Secondary, Travel, or Business)
Tap Continue
Step 7: Set Default Line Preferences
Select which line to use as default for:
Voice calls
iMessage & FaceTime
Cellular data
Tap Continue after each selection
Method 2: Install eSIM via Manual Input
Step 1: Open Cellular Settings
Tap Settings
Scroll down and tap Cellular (This option may appear as “Mobile Service” or “Mobile Data” depending on system language or region.)
Step 2: Add Cellular Plan
Tap Add Cellular Plan
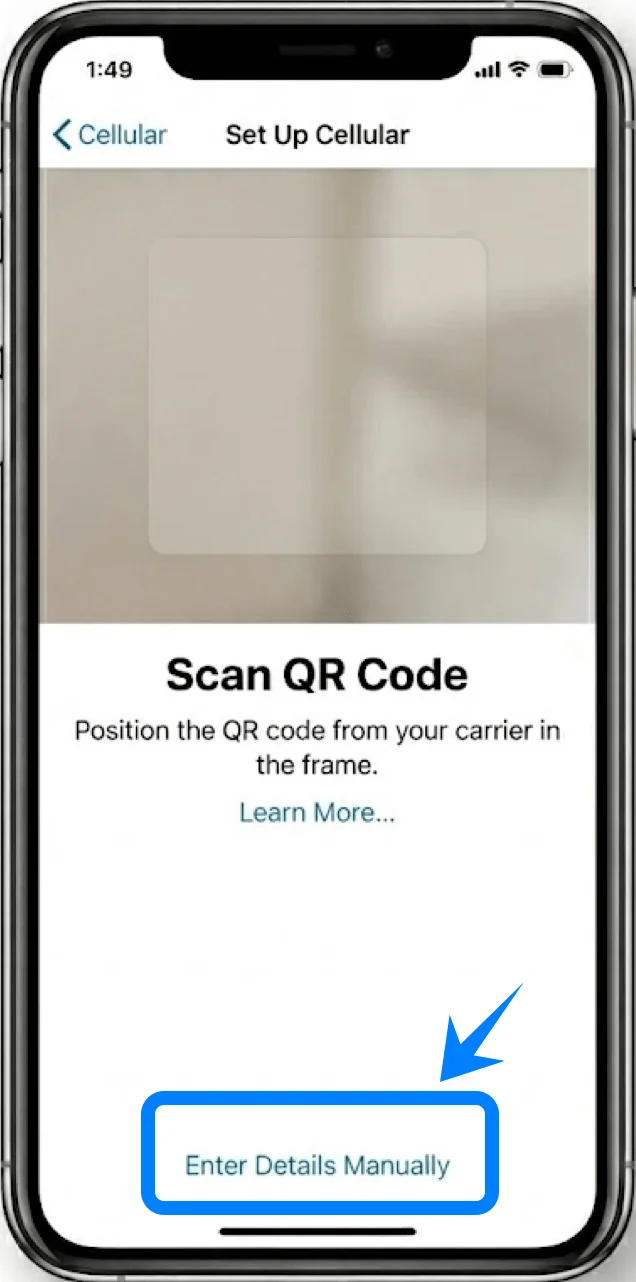
Step 3: Select Manual Entry Option
Tap Enter Details Manually (located at the bottom of the screen)
Step 4: Enter Activation Information
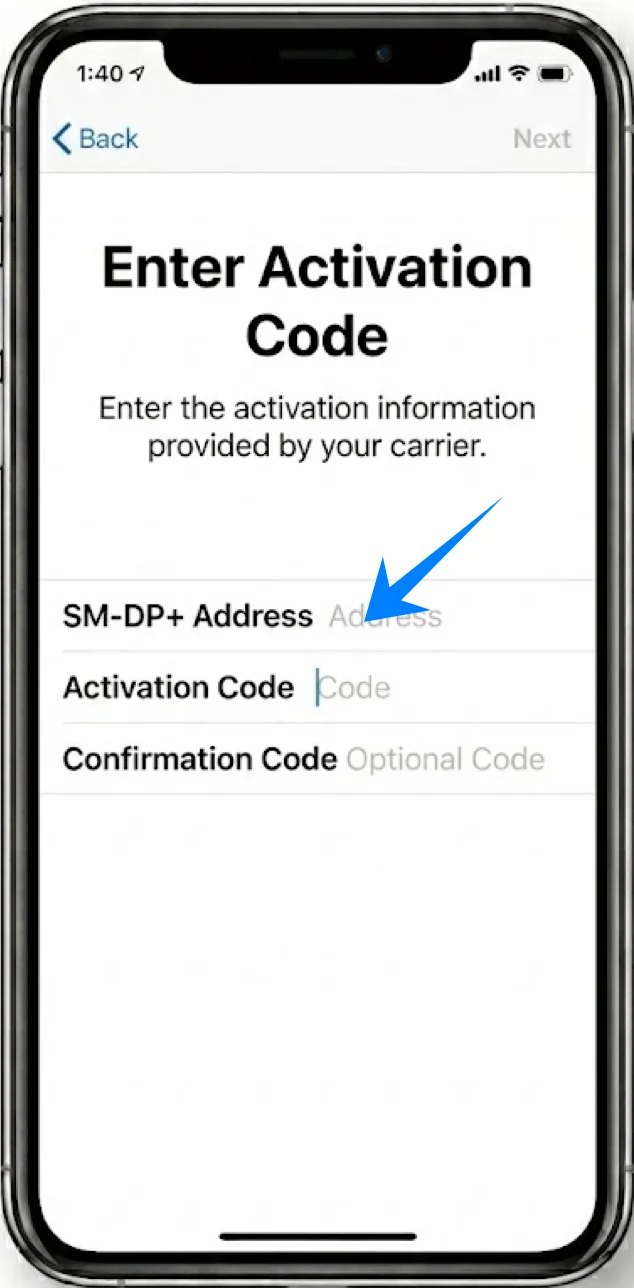
Carefully input the details provided by your carrier:
SM-DP+ Address → Tap the field and type the address
Activation Code → Tap the field and enter the code
Confirmation Code (if required) → Enter when prompted
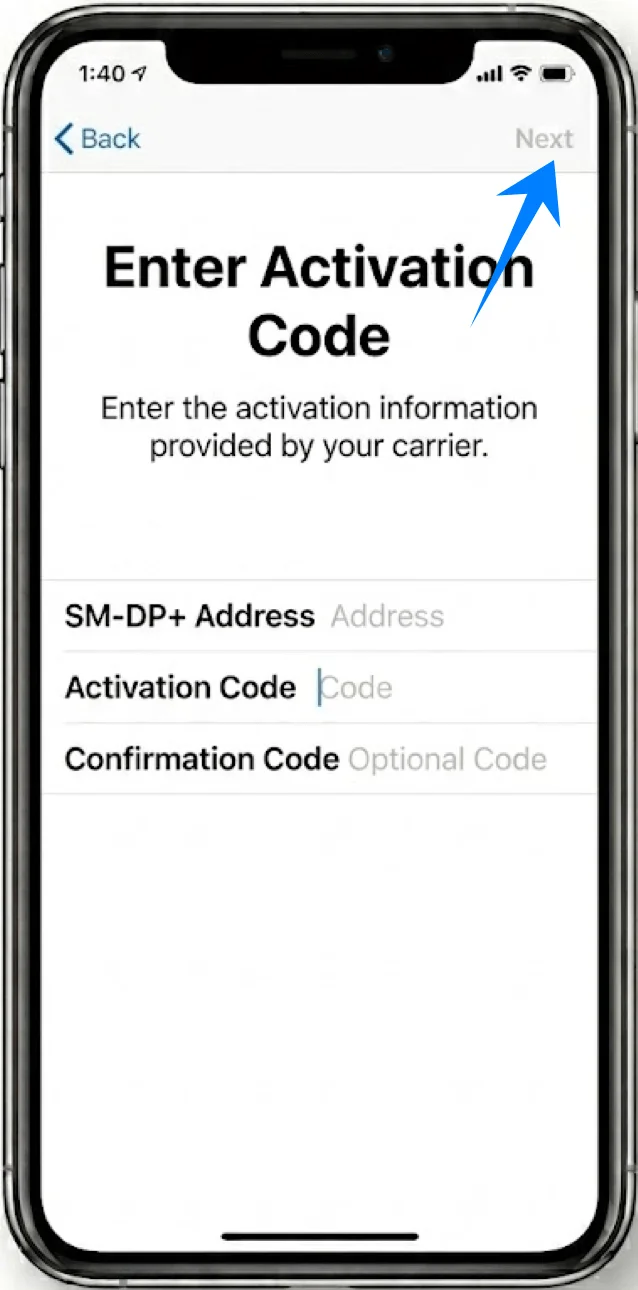
Then:
Tap Next
Step 5: Download and Install eSIM Profile
Wait while the device verifies the information
When prompted, tap Add Cellular Plan
Step 6: Label the Plan
Assign a label (e.g., Primary, Secondary, etc.)
Tap Continue
Step 7: Configure Default Line Usage
Choose preferences for:
Default voice line
iMessage & FaceTime
Cellular data
Tap Continue after each selection
How to Confirm Successful eSIM Installation
Check Cellular Plans
Go to: Settings > Cellular (This option may appear as “Mobile Service” or “Mobile Data” depending on system language or region.)
Confirm that a new plan appears under Cellular Plans
Check Signal Indicator
Look at the top-right corner of the screen
Ensure signal bars appear for the new line
Verify Line Status
Go to: Settings > Cellular (This option may appear as “Mobile Service” or “Mobile Data” depending on system language or region.)> [Your eSIM Plan Label]
Confirm that:
Turn On This Line is enabled (toggle is green)
Test Connectivity
Make a test call:
Open Phone > Keypad > Dial a number > Tap Call
Note: Some eSIM plans may not include voice calling support, so this feature might not be available depending on your plan.
Test mobile data:
Turn off Wi-Fi: Settings > Wi-Fi > Toggle Off
Open Safari and load a webpage
More iPhone eSIM Setup Guides
Using another iPhone? These eSIM setup and activation guides may help.
Conclusion
After completing the setup, your iPhone xs max should be ready to use mobile data without any additional steps. eSIM simplifies the overall experience by removing physical limitations and allowing everything to be handled digitally.
Once you're familiar with the process, managing, reinstalling, or adjusting a plan becomes quick and hassle-free, especially when switching between different usage needs.