
The Motorola Edge (2024) supports dual SIM with one nano SIM and one eSIM, which makes it a practical phone for adding travel data without removing your main SIM card. This guide assumes Motorola's near-stock Android interface, where the eSIM setup path starts from Settings, then Network & internet, then SIMs.
An iRoamly travel eSIM is useful when you want mobile data ready before or soon after arrival. Install it over a stable internet connection, keep your original SIM active if you need calls or banking messages, and check your iRoamly plan details before relying on voice or SMS because availability varies by plan.
Below, you will set up iRoamly on Edge (2024) by scanning a QR code or by entering the manual eSIM details. The QR method is usually fastest, while manual entry helps if the code is on the same phone, the camera cannot scan it, or you received separate SM-DP+ Address and Activation Code details.
Before You Set Up Your iRoamly eSIM
Connect your Motorola Edge (2024) to stable Wi-Fi before starting.
Confirm the phone is unlocked and that your regional or carrier variant supports eSIM.
Update Android if a system update is waiting, because menu names can vary slightly by software version.
Keep your iRoamly QR code, SM-DP+ Address, Activation Code, and optional Confirmation Code ready.
Install the eSIM about 1-2 days before travel when possible, but check your plan details first. iRoamly plan validity starts from activation, and the exact activation trigger can vary by plan.
Do not delete the iRoamly eSIM after installation unless iRoamly support tells you to. Many eSIM profiles cannot simply be reinstalled after removal.
Method 1: Install eSIM by Scanning a QR Code
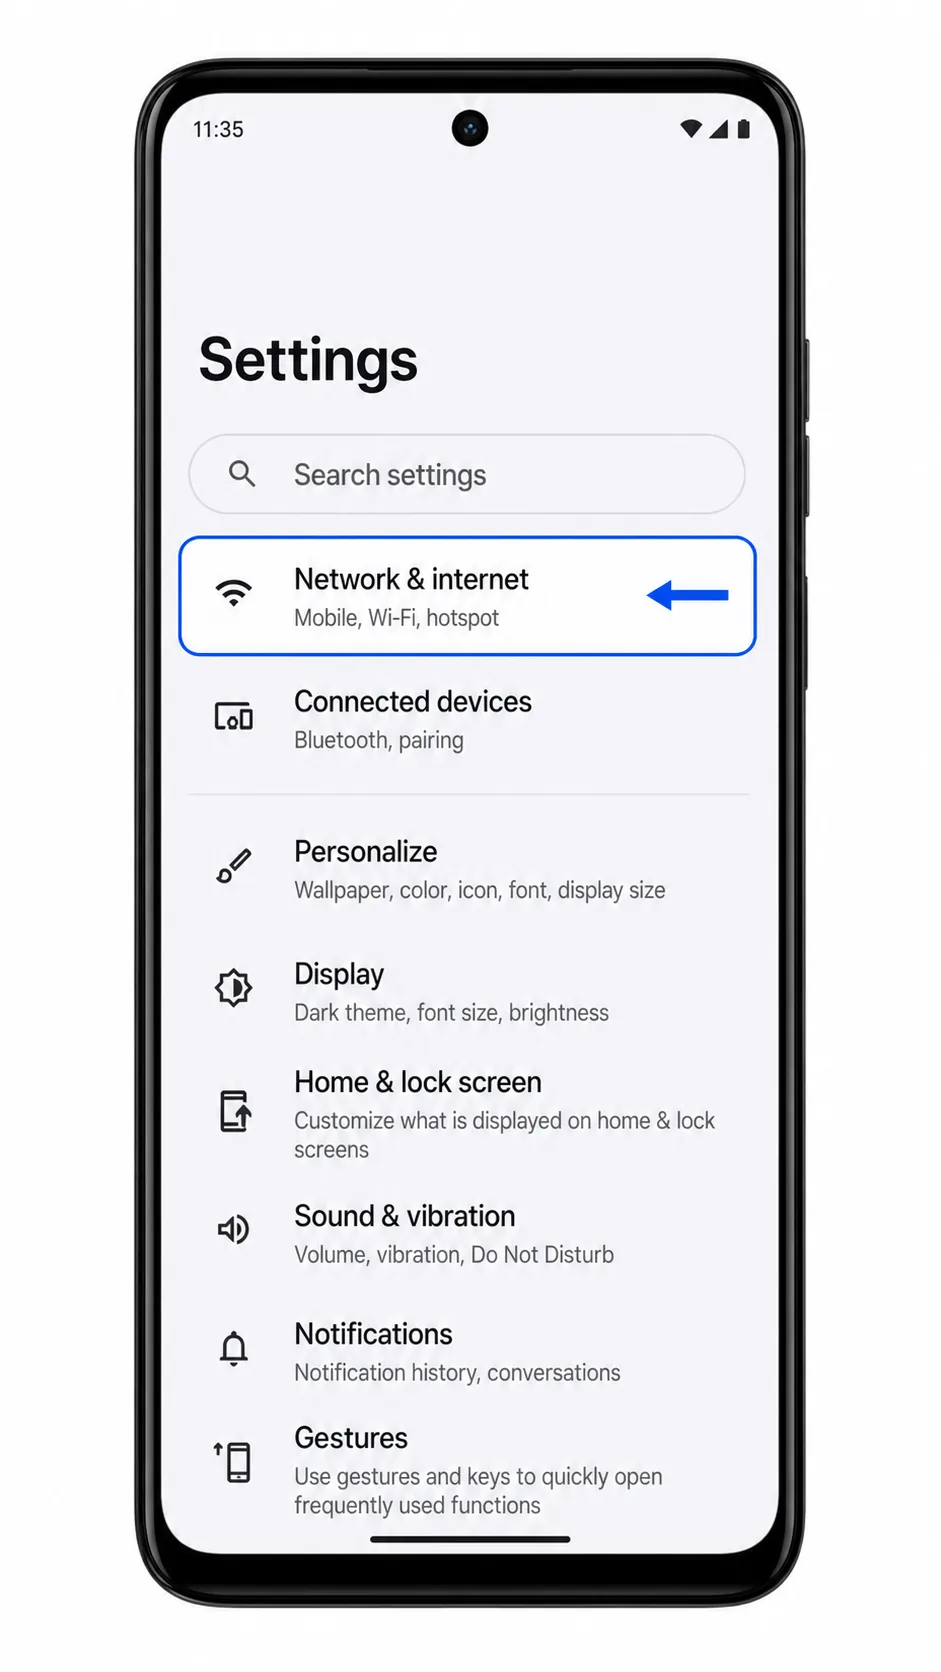
Open Settings on your Motorola Edge (2024), then tap Network & internet.
You should see the Android network settings page with SIMs listed among the connection options.
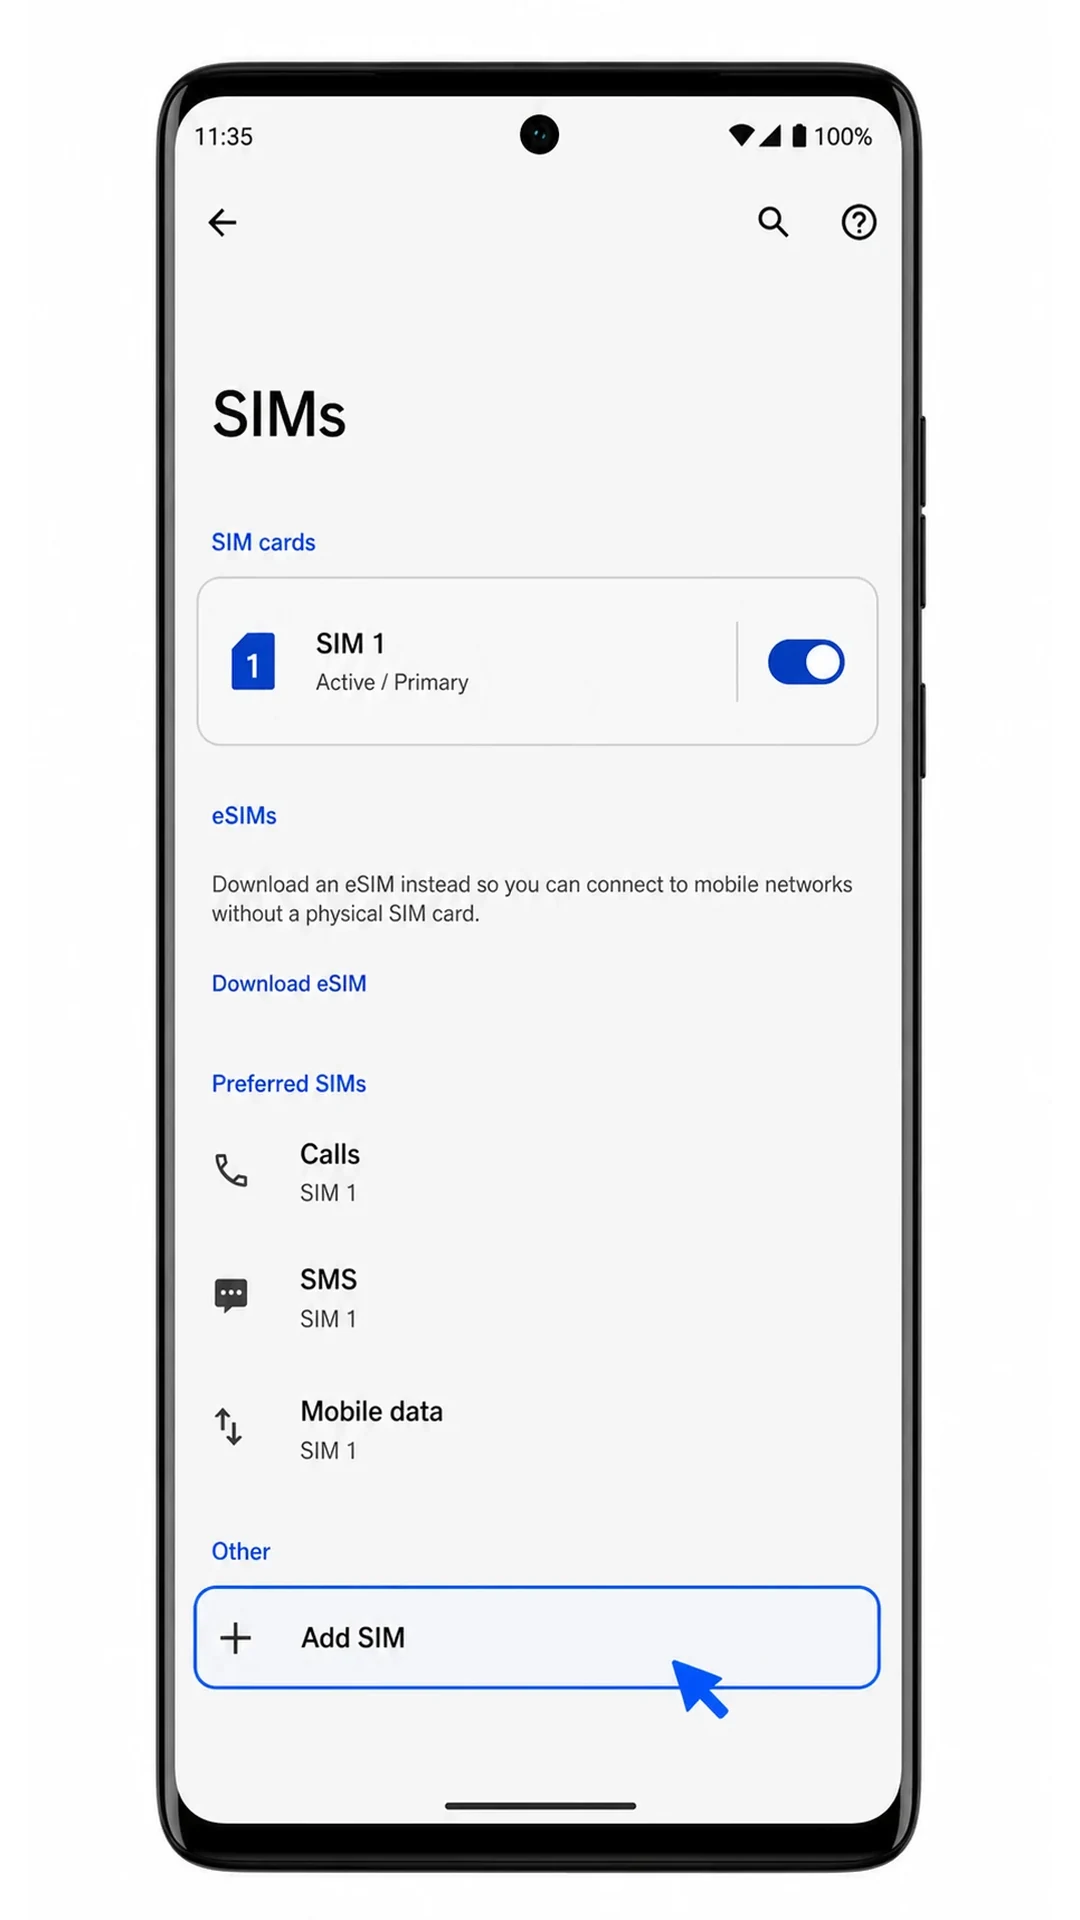
Tap SIMs.
The phone should open the SIM management page, where your physical SIM appears and the option to add another SIM is available.

Tap Add SIM.
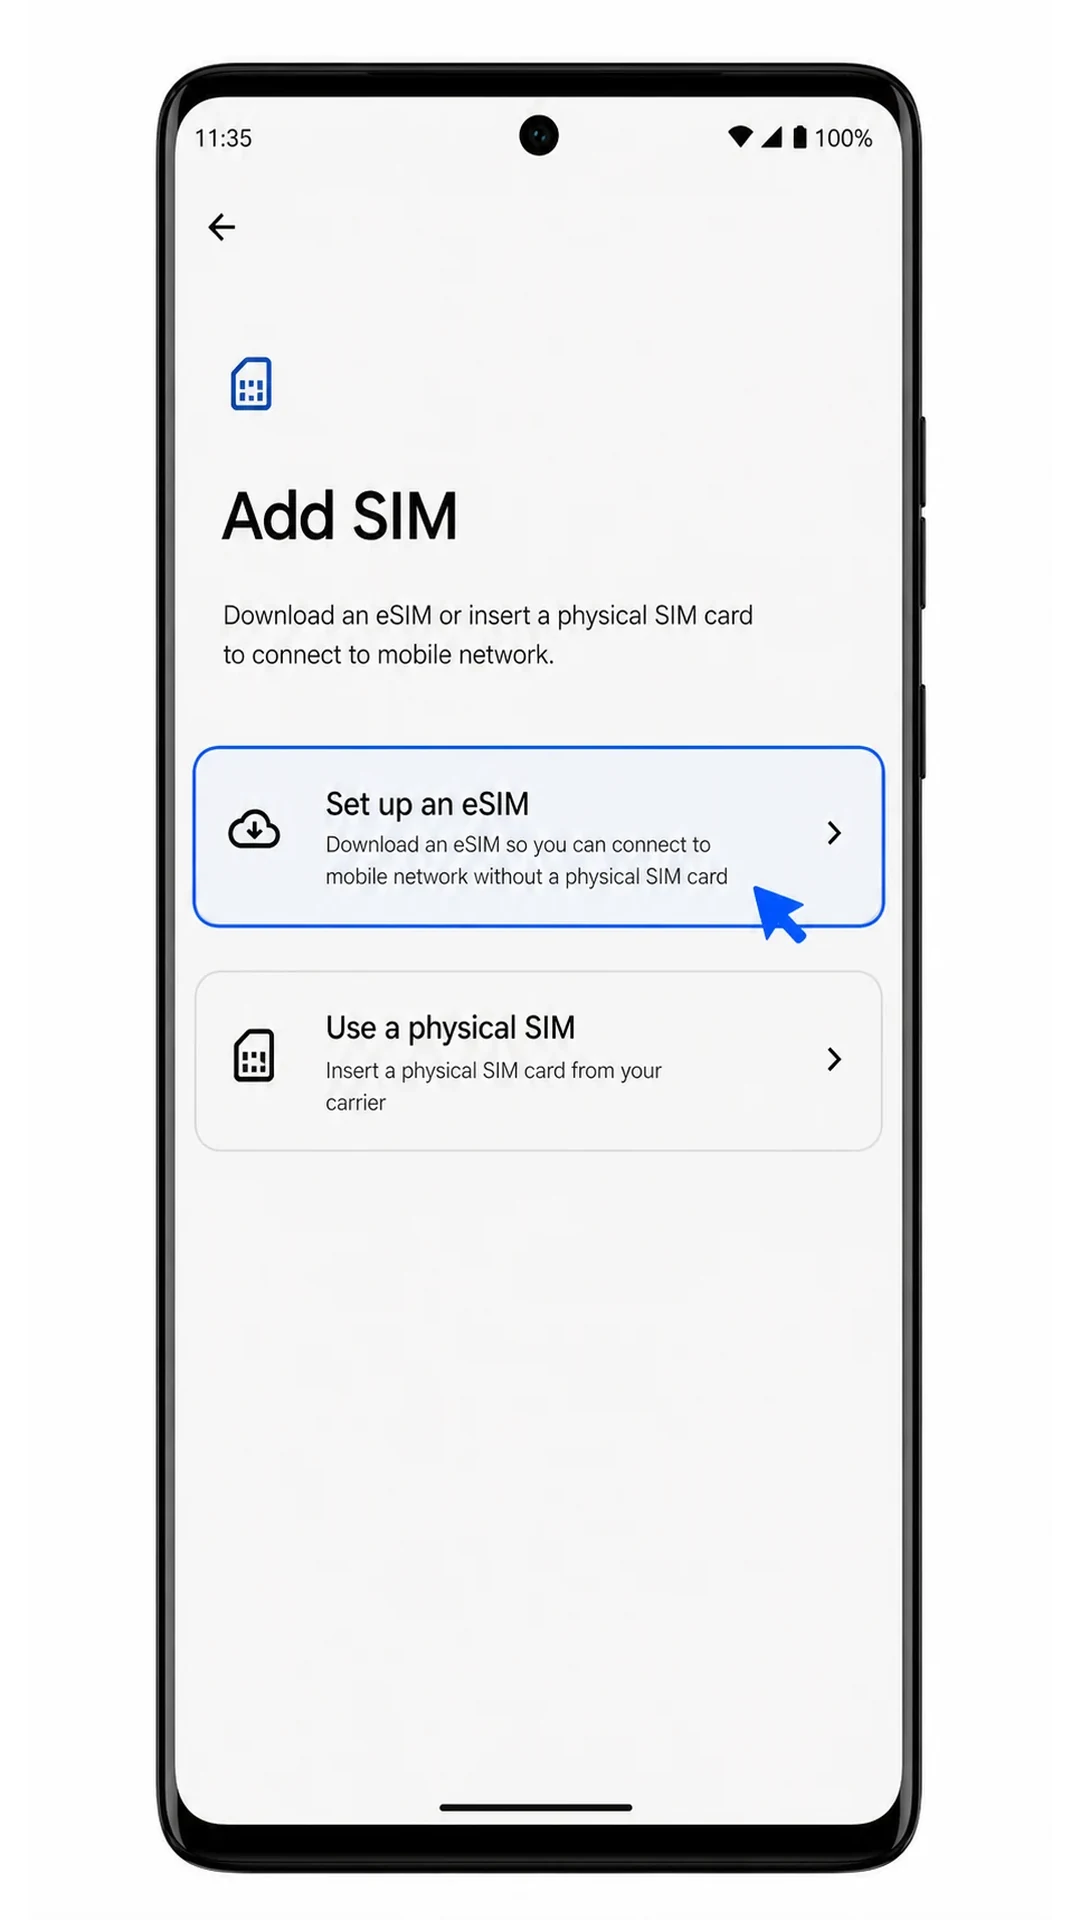
The Edge should show the add-SIM screen with the option to set up an eSIM.
Tap Set up an eSIM.
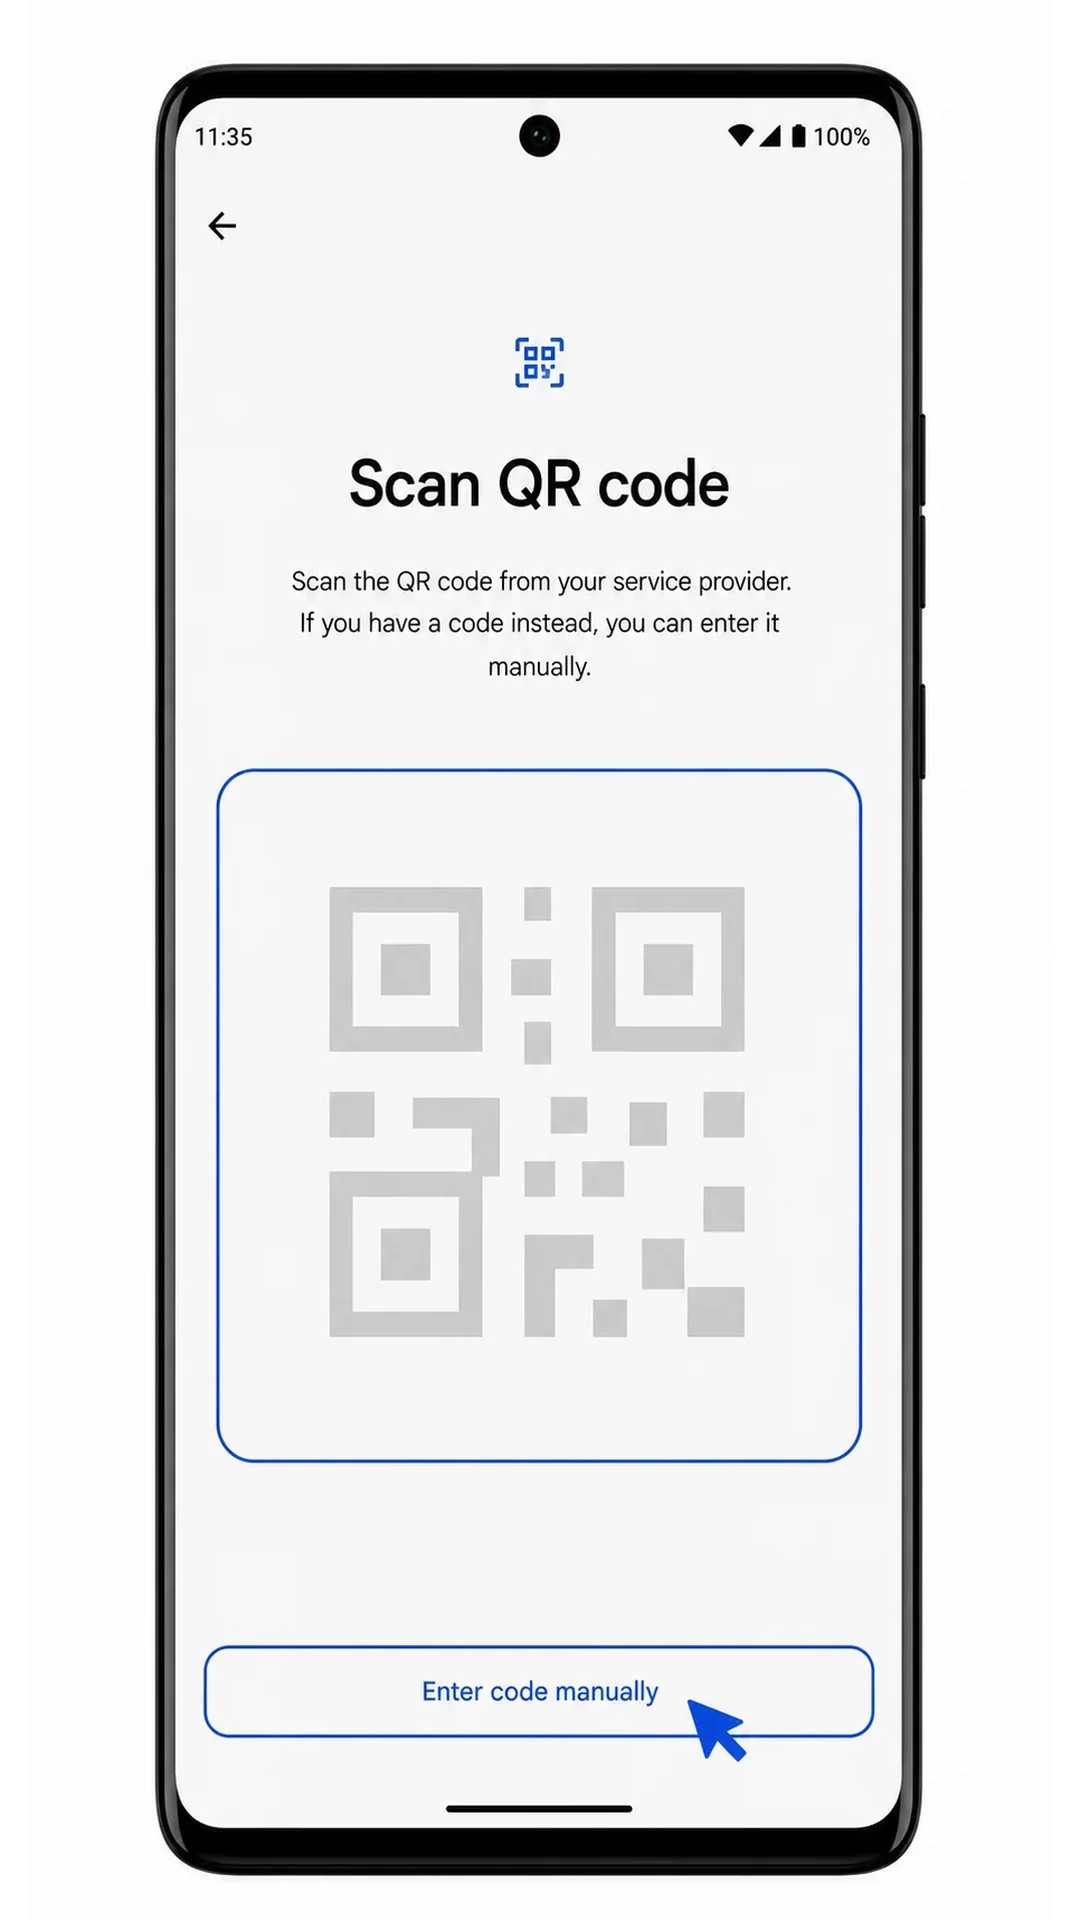
The phone should open the eSIM setup scanner for adding a mobile plan by QR code.
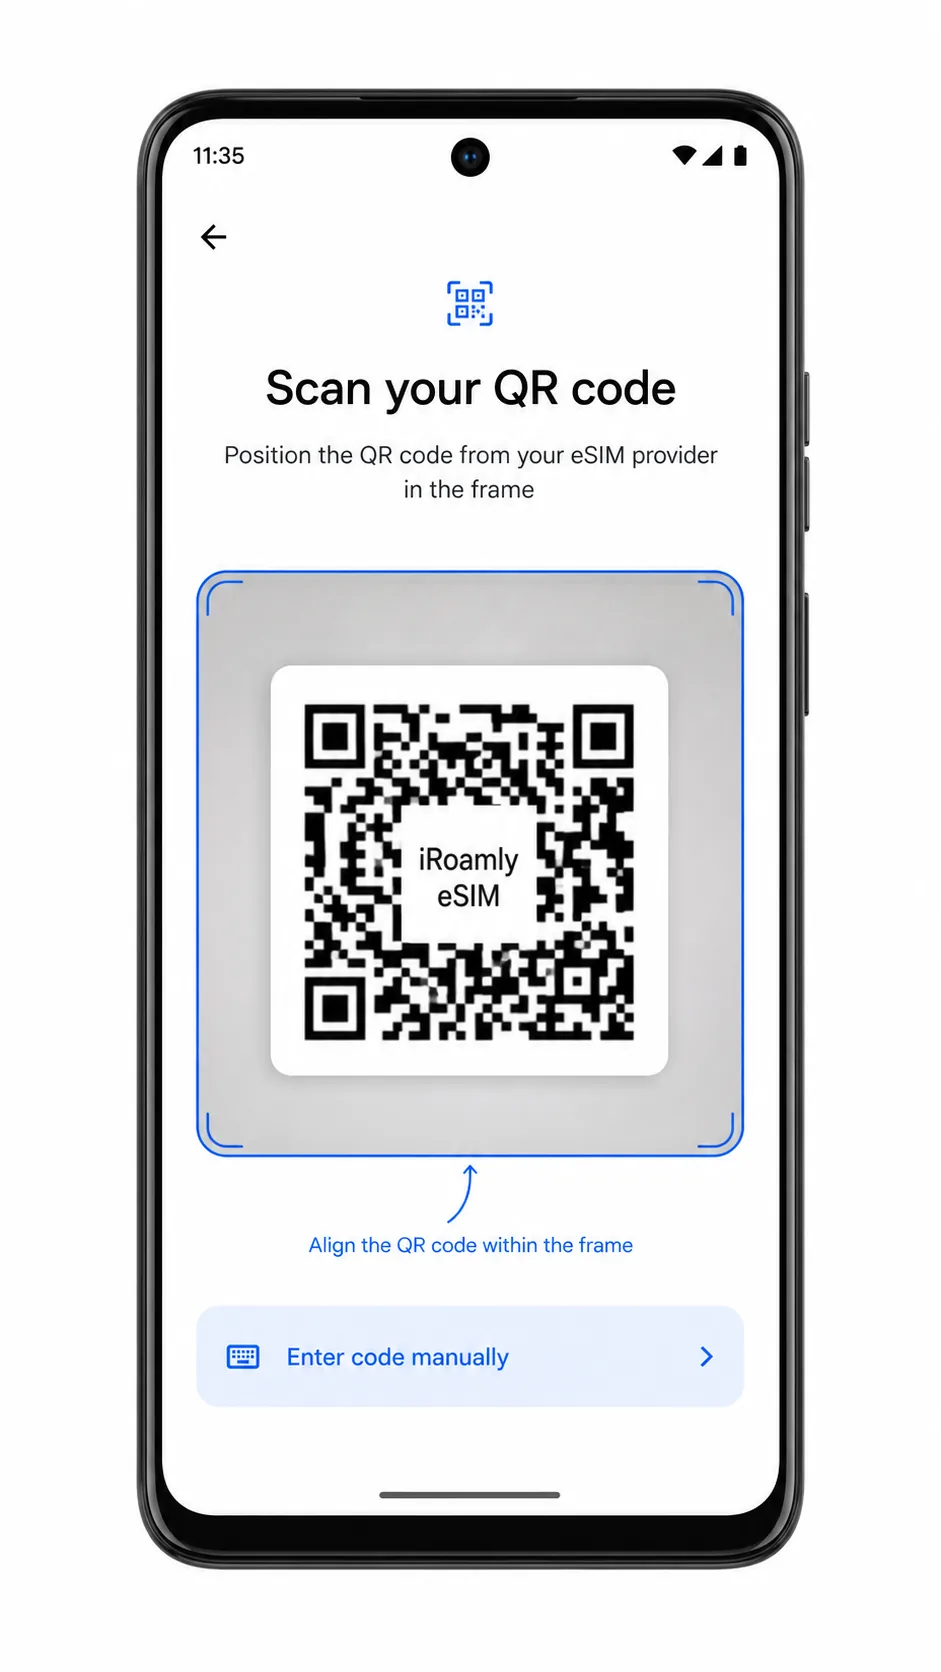
Point the scanner at the iRoamly QR code from another screen or printed copy, then wait for the phone to recognize it.
Use only the iRoamly QR code from your purchase email or iRoamly account. The code should not be reused on another device after installation begins.
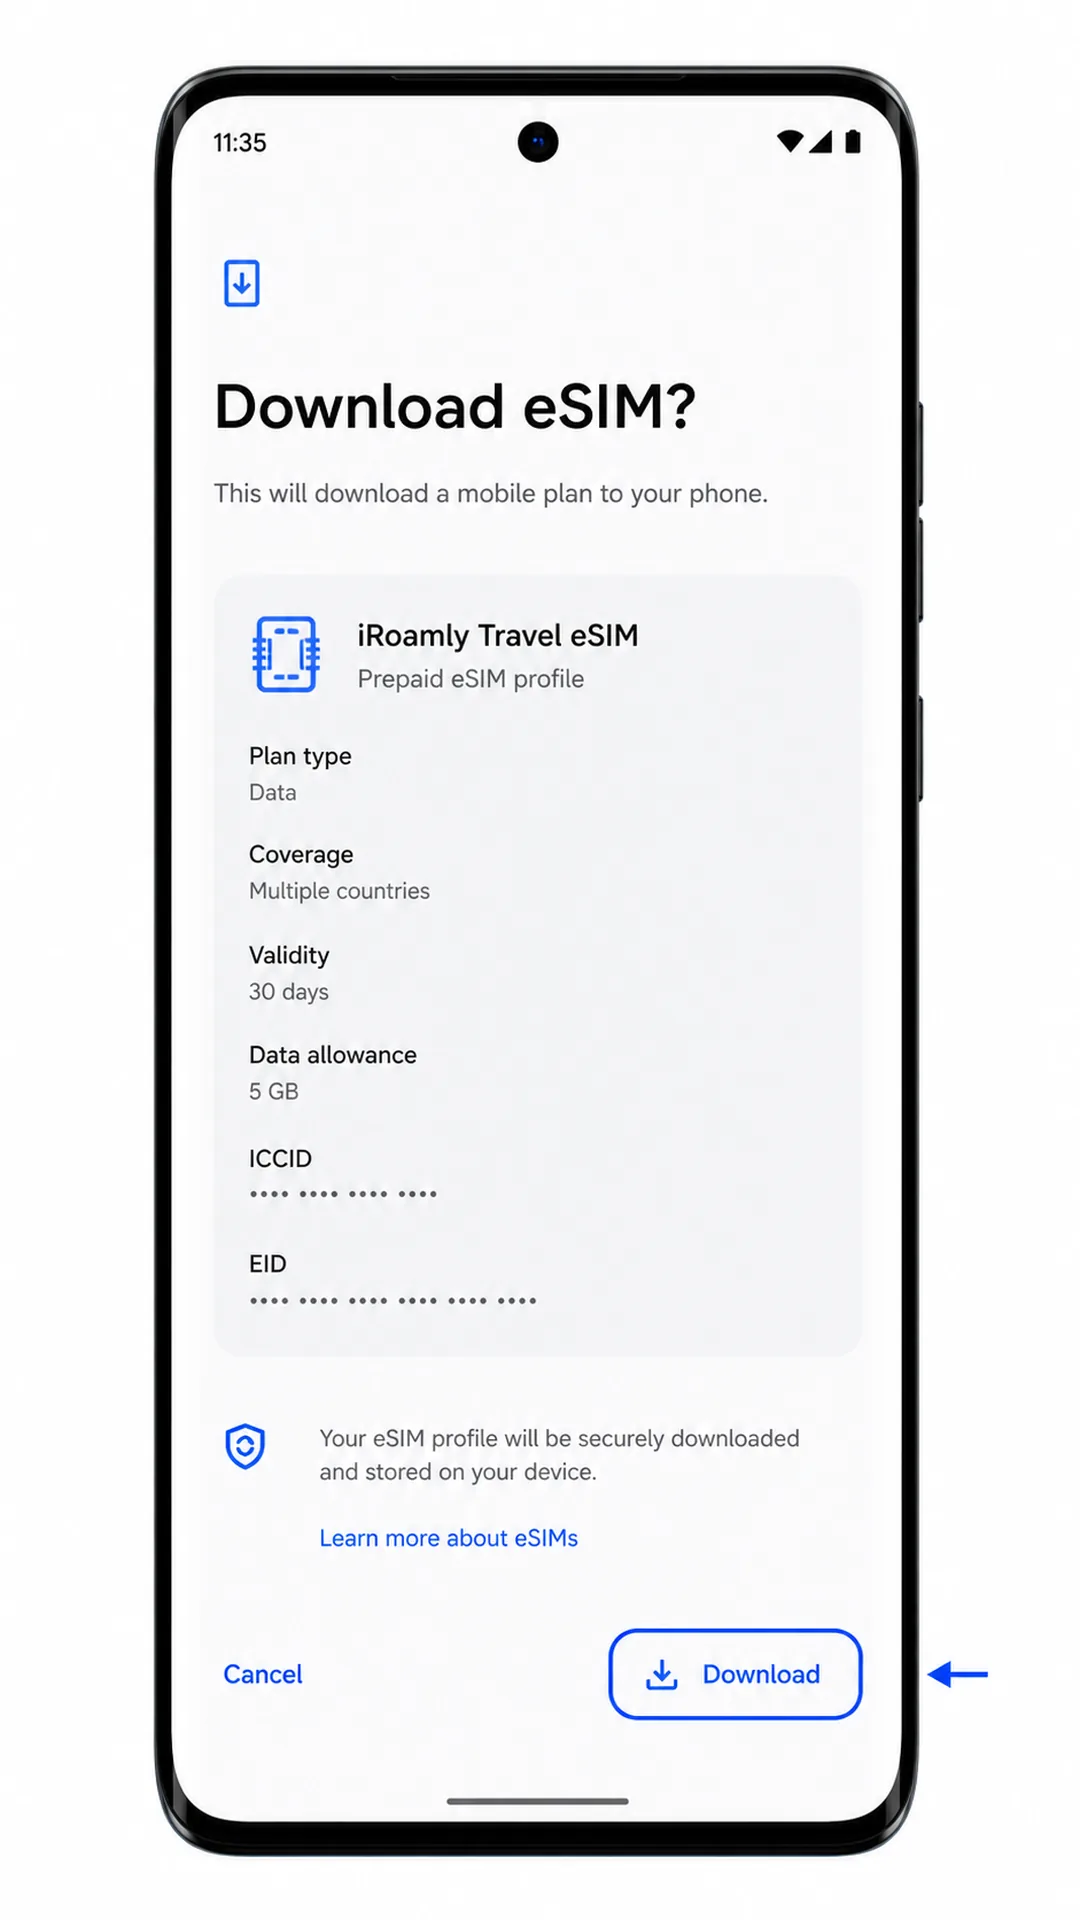
Tap Download or Continue when Android shows the iRoamly eSIM plan details.
Keep the phone on Wi-Fi until the eSIM finishes downloading and Android shows that the profile has been added.
Method 2: Install eSIM Manually
Open Settings on your Motorola Edge (2024), then tap Network & internet.
This is the same starting page used for QR setup, but the manual method still begins from the phone's main settings path.
Tap SIMs.
The SIM management page should show your current SIM and the add-SIM control.
Tap Add SIM.
Android should show the add-SIM screen for adding another cellular plan.
Tap Set up an eSIM.
The eSIM scanner opens first, even when you plan to enter the details manually.
Tap Enter code manually on the QR scanner screen.
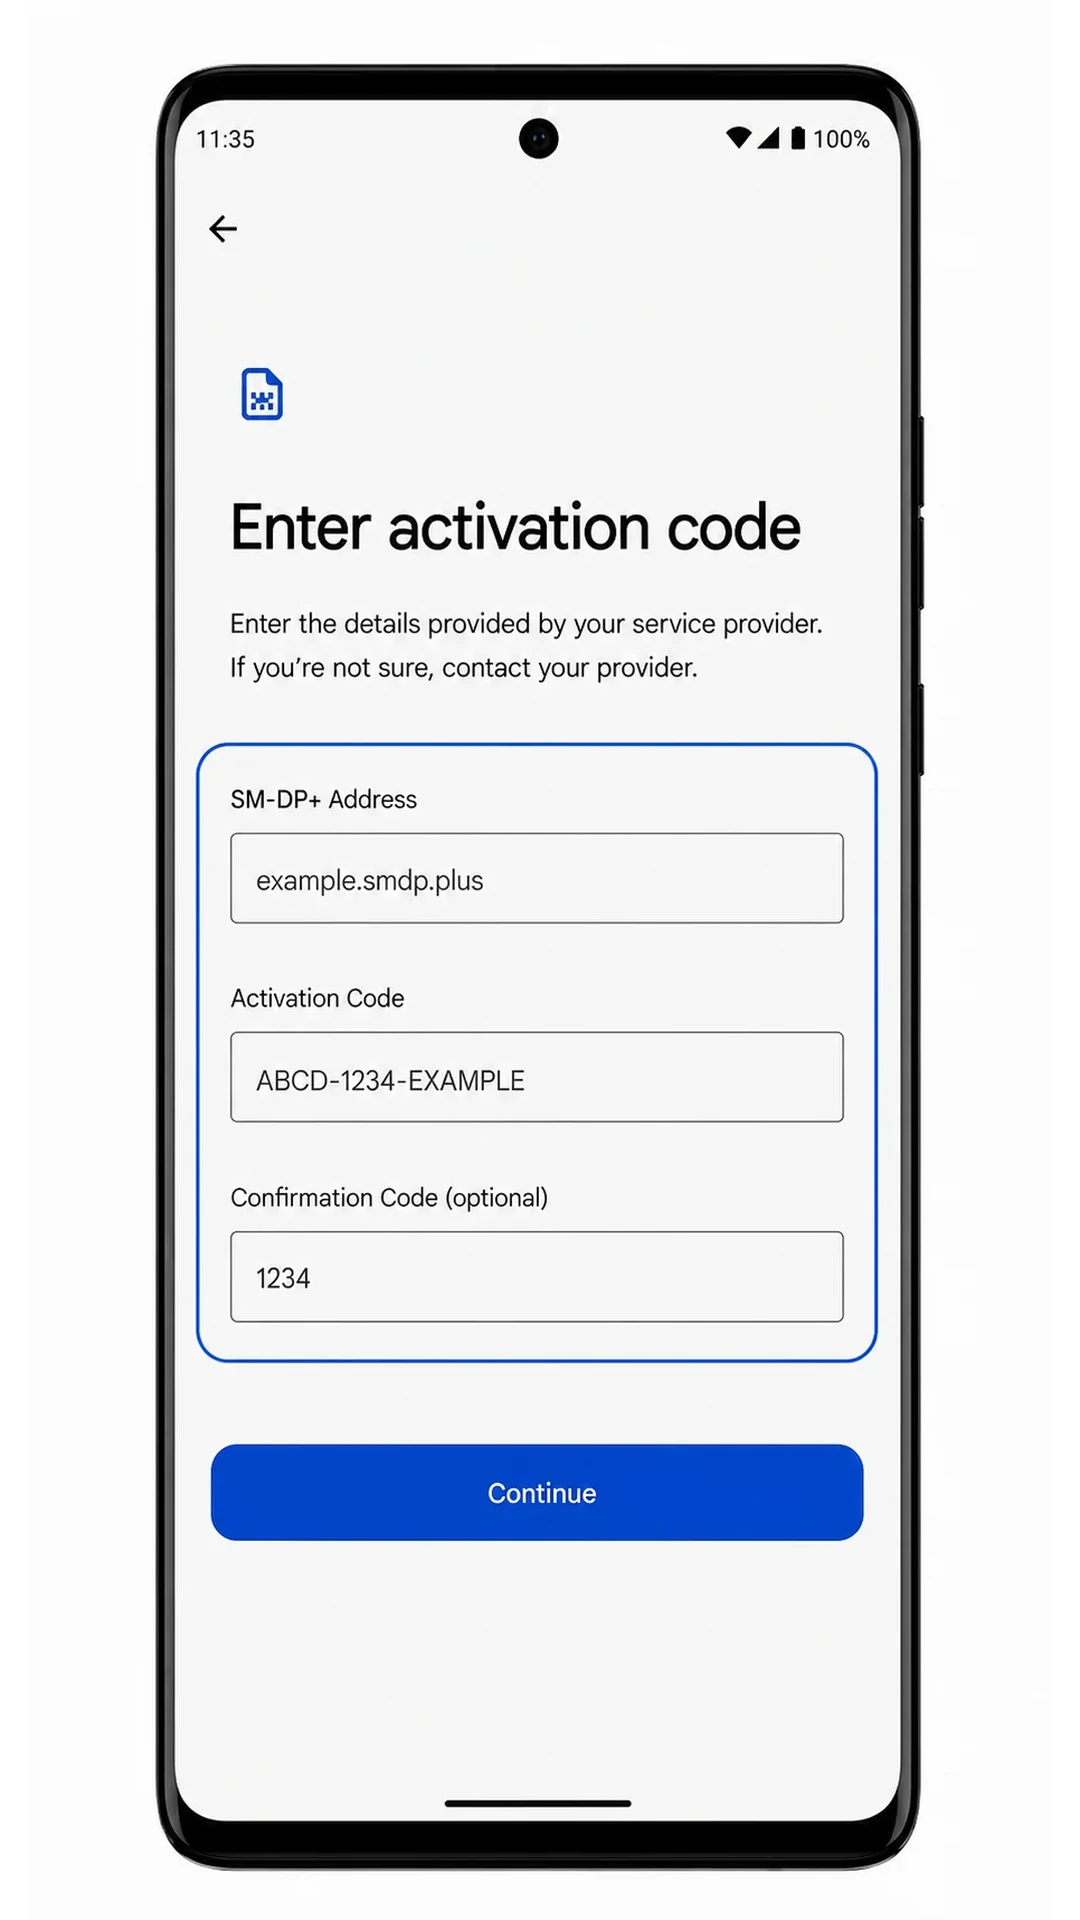
The phone should switch from the camera scanner to the manual activation form.
Enter the SM-DP+ Address and Activation Code exactly as iRoamly provides them, add the Confirmation Code only if your iRoamly instructions include one, then tap Continue.
Check every character before continuing. Extra spaces, missing hyphens, or a copied label in the activation field can stop the eSIM from downloading.
Tap Download or Continue when Android confirms the iRoamly eSIM profile.
Keep Wi-Fi connected while the phone downloads and installs the eSIM profile.
How to Confirm Your iRoamly eSIM Is Installed
Open Settings, tap Network & internet, then tap SIMs.
The iRoamly eSIM should appear in the SIM list as a second mobile plan or as a newly added downloaded SIM.
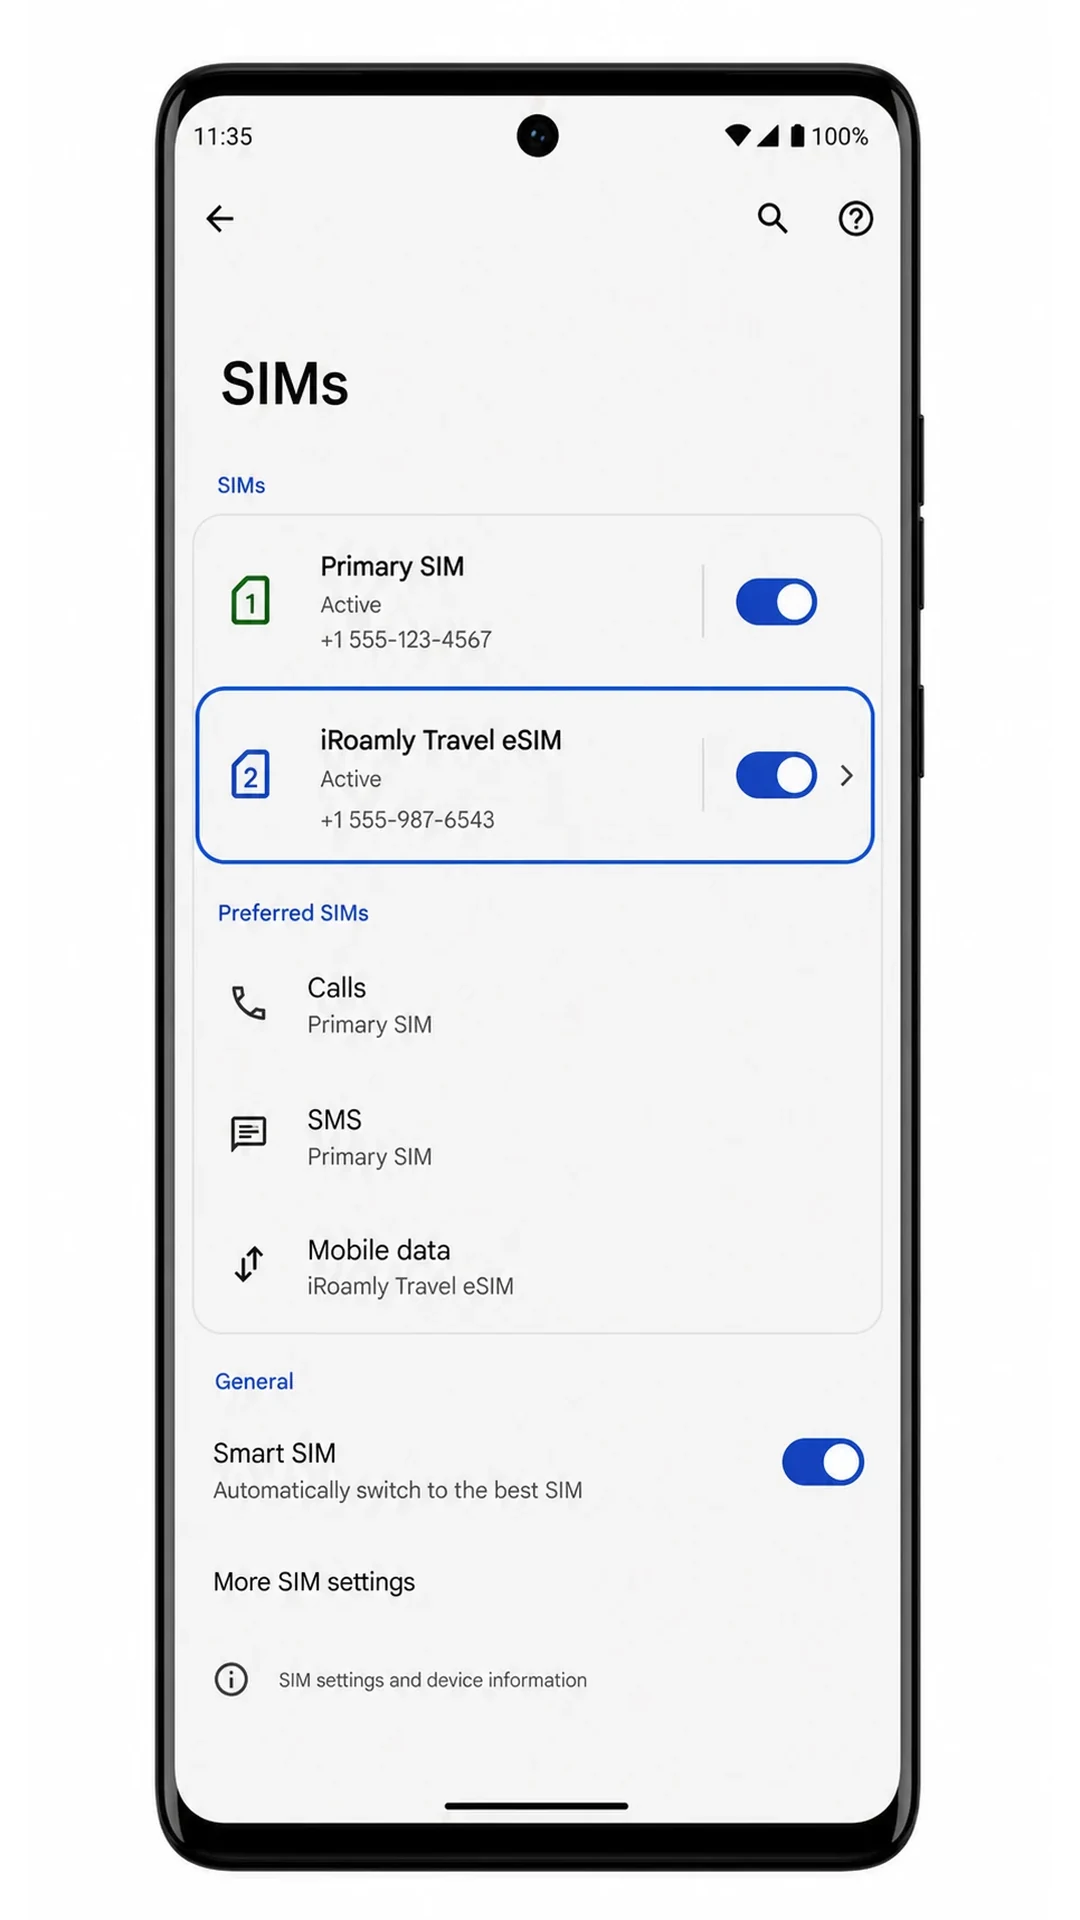
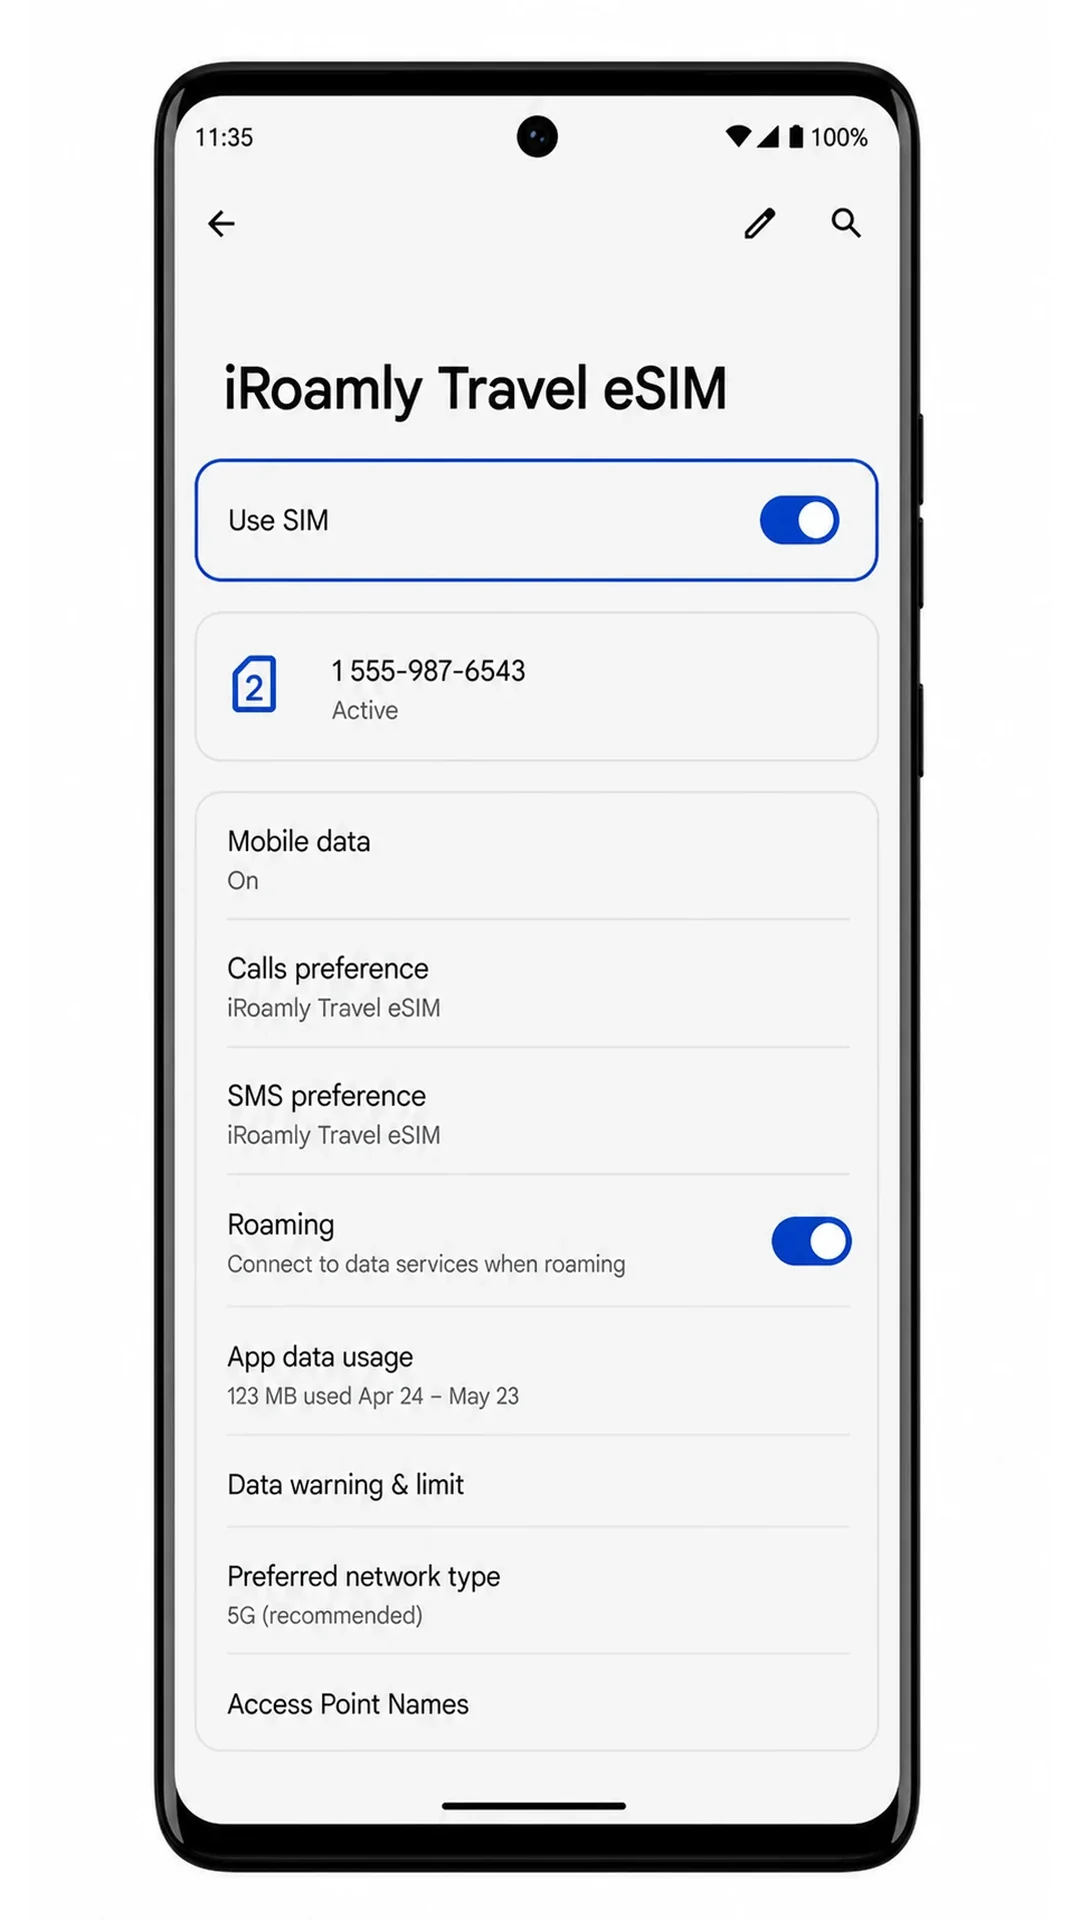
Tap the iRoamly eSIM entry and check that Use SIM is turned on.
If the profile is installed correctly, the line should be available for mobile data settings. Do not test SMS or calling unless your specific iRoamly plan says those services are included.
Configure eSIM for Mobile Data
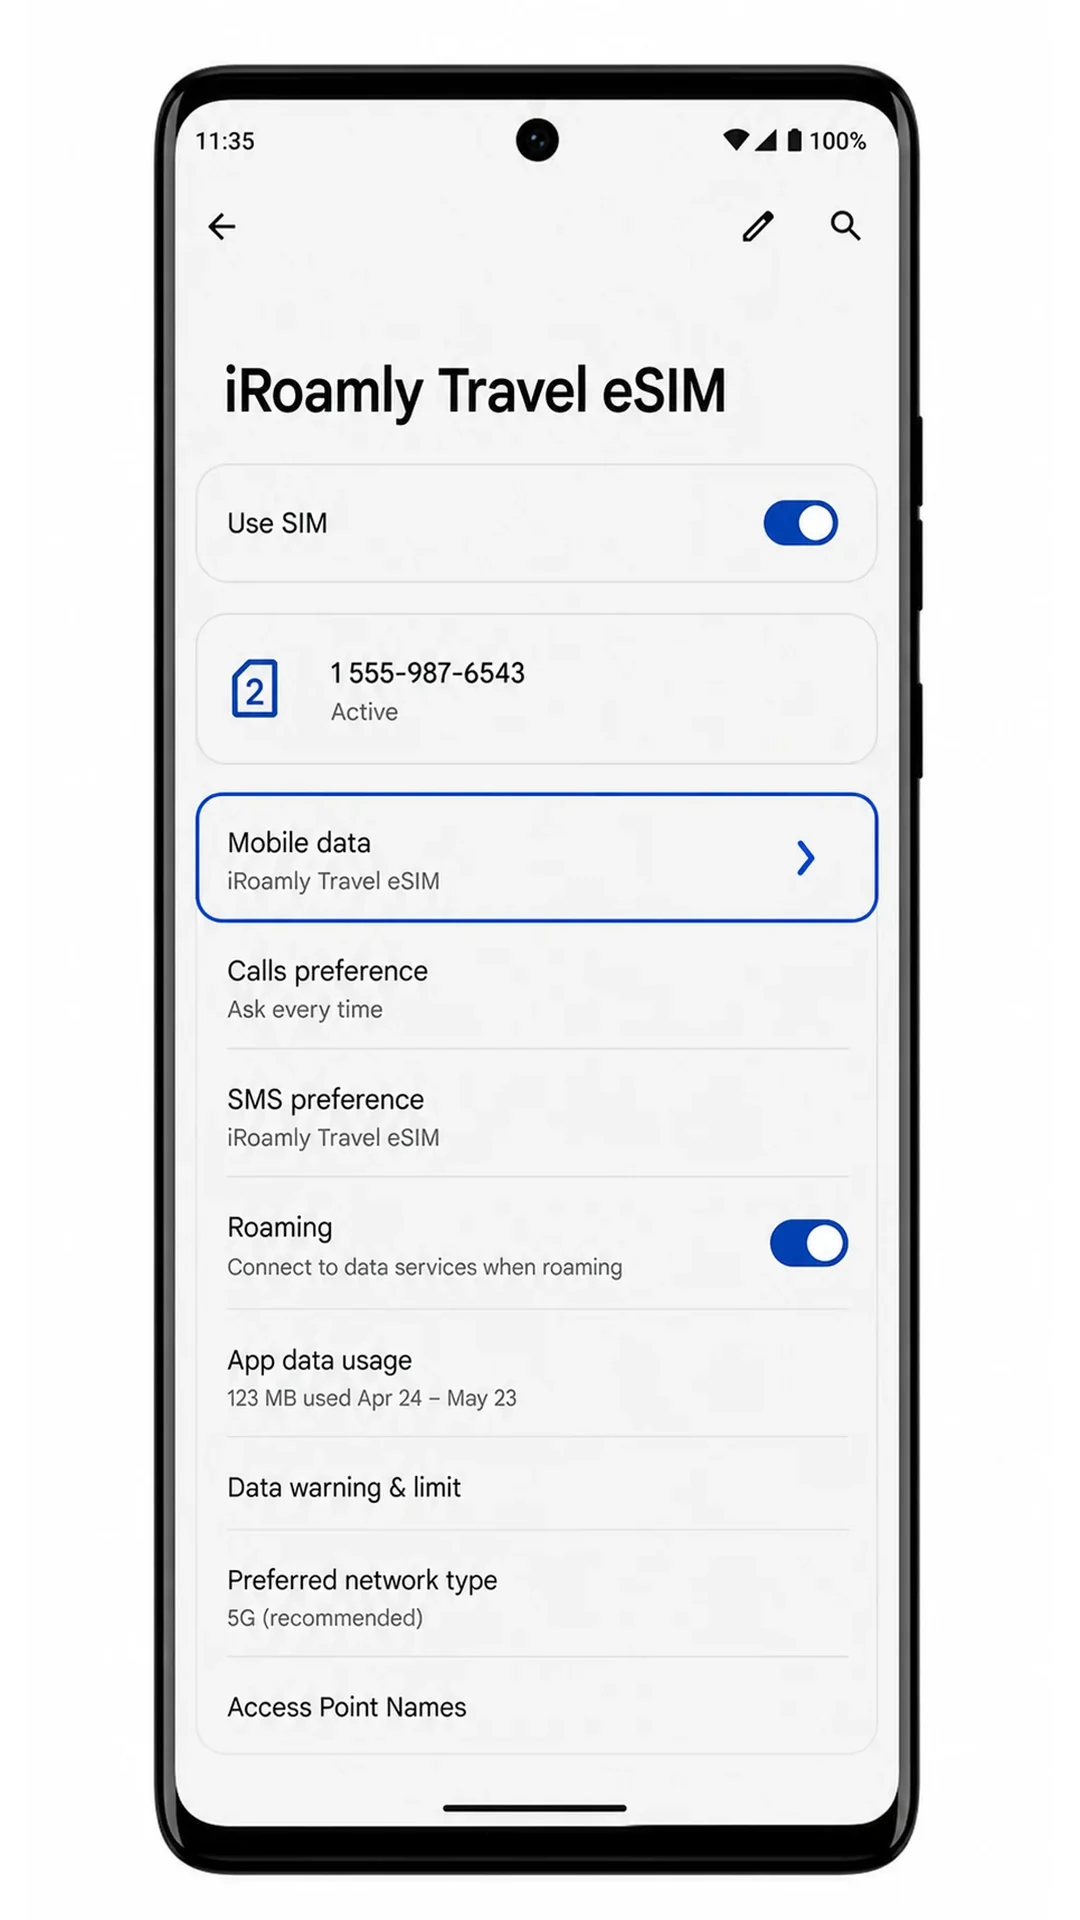
In Settings > Network & internet > SIMs, tap the iRoamly eSIM, then choose it for Mobile data.
This tells the Motorola Edge (2024) to use the iRoamly travel eSIM for internet access instead of your primary SIM.
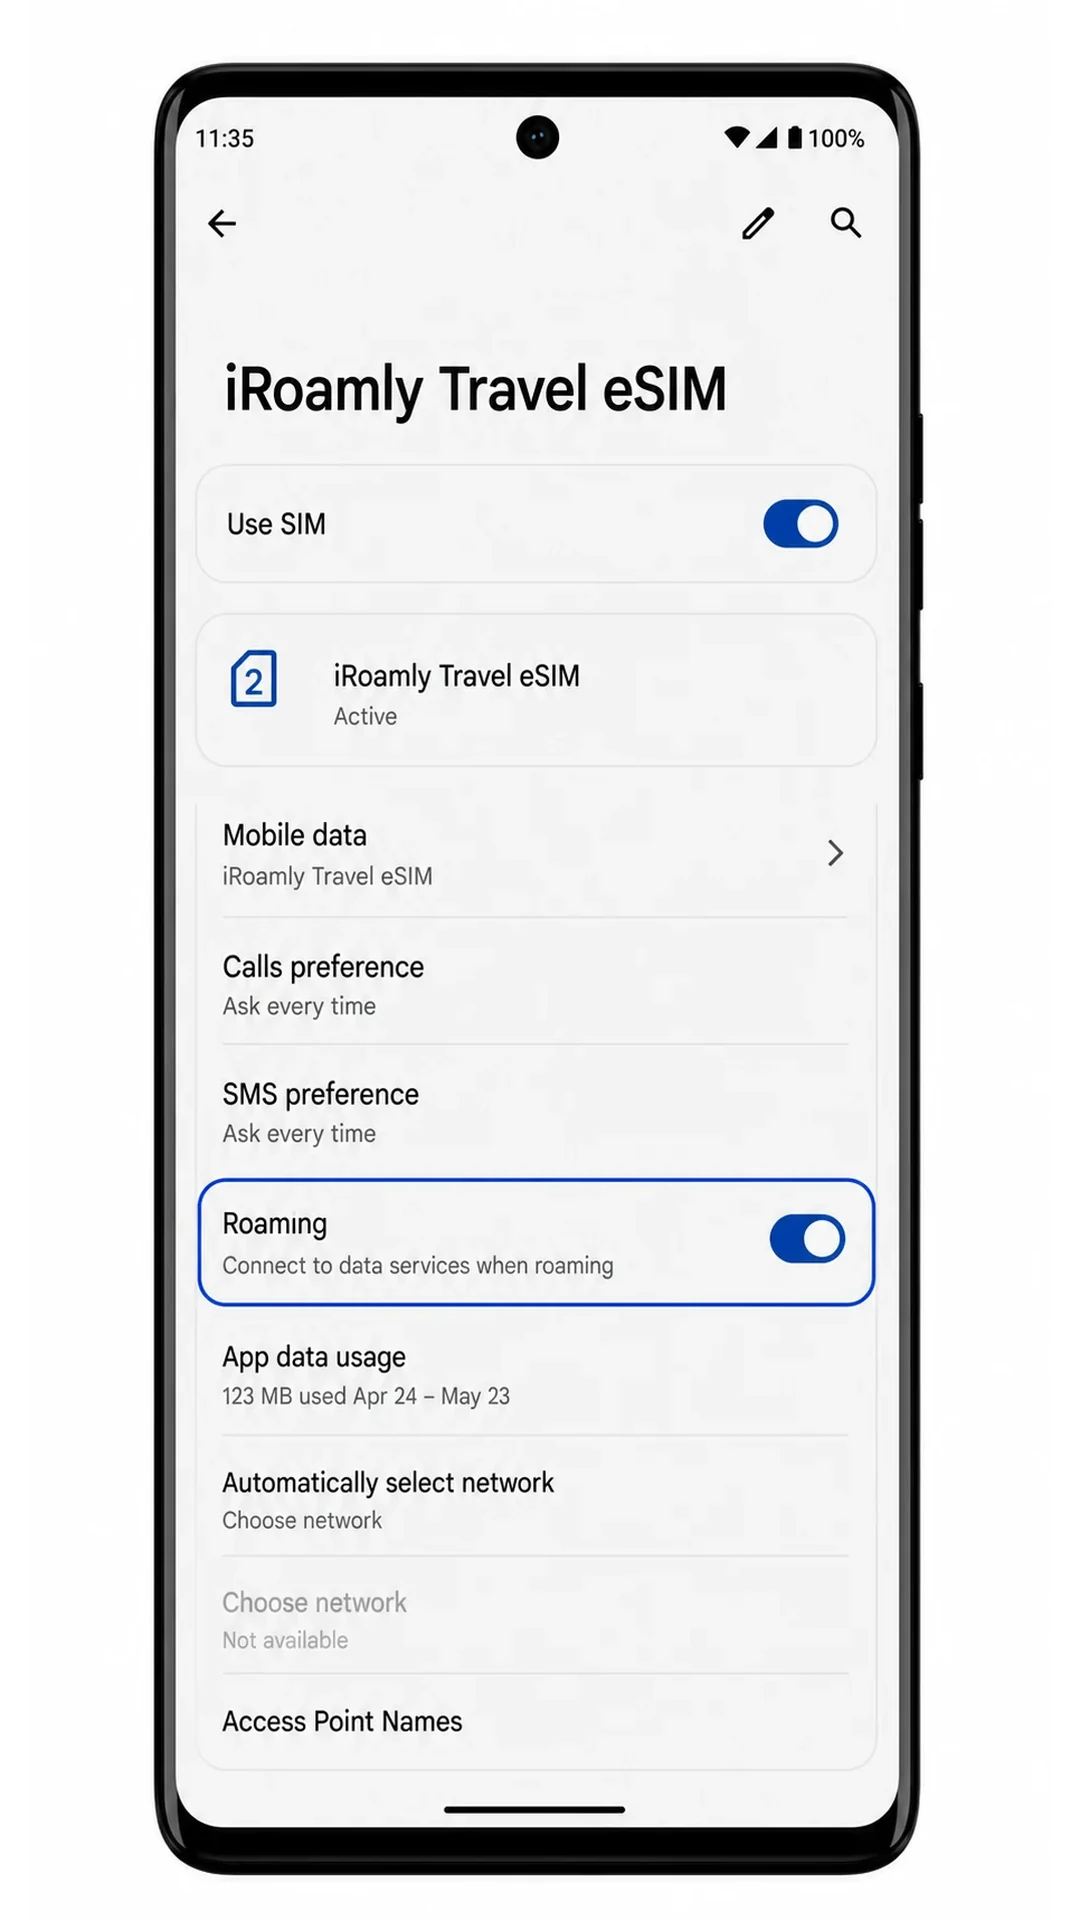
Turn on Roaming for the iRoamly eSIM if your destination plan requires it.
Many travel eSIMs need data roaming to connect to the partner network abroad. Leave roaming off for your primary SIM if you want to avoid unwanted charges.
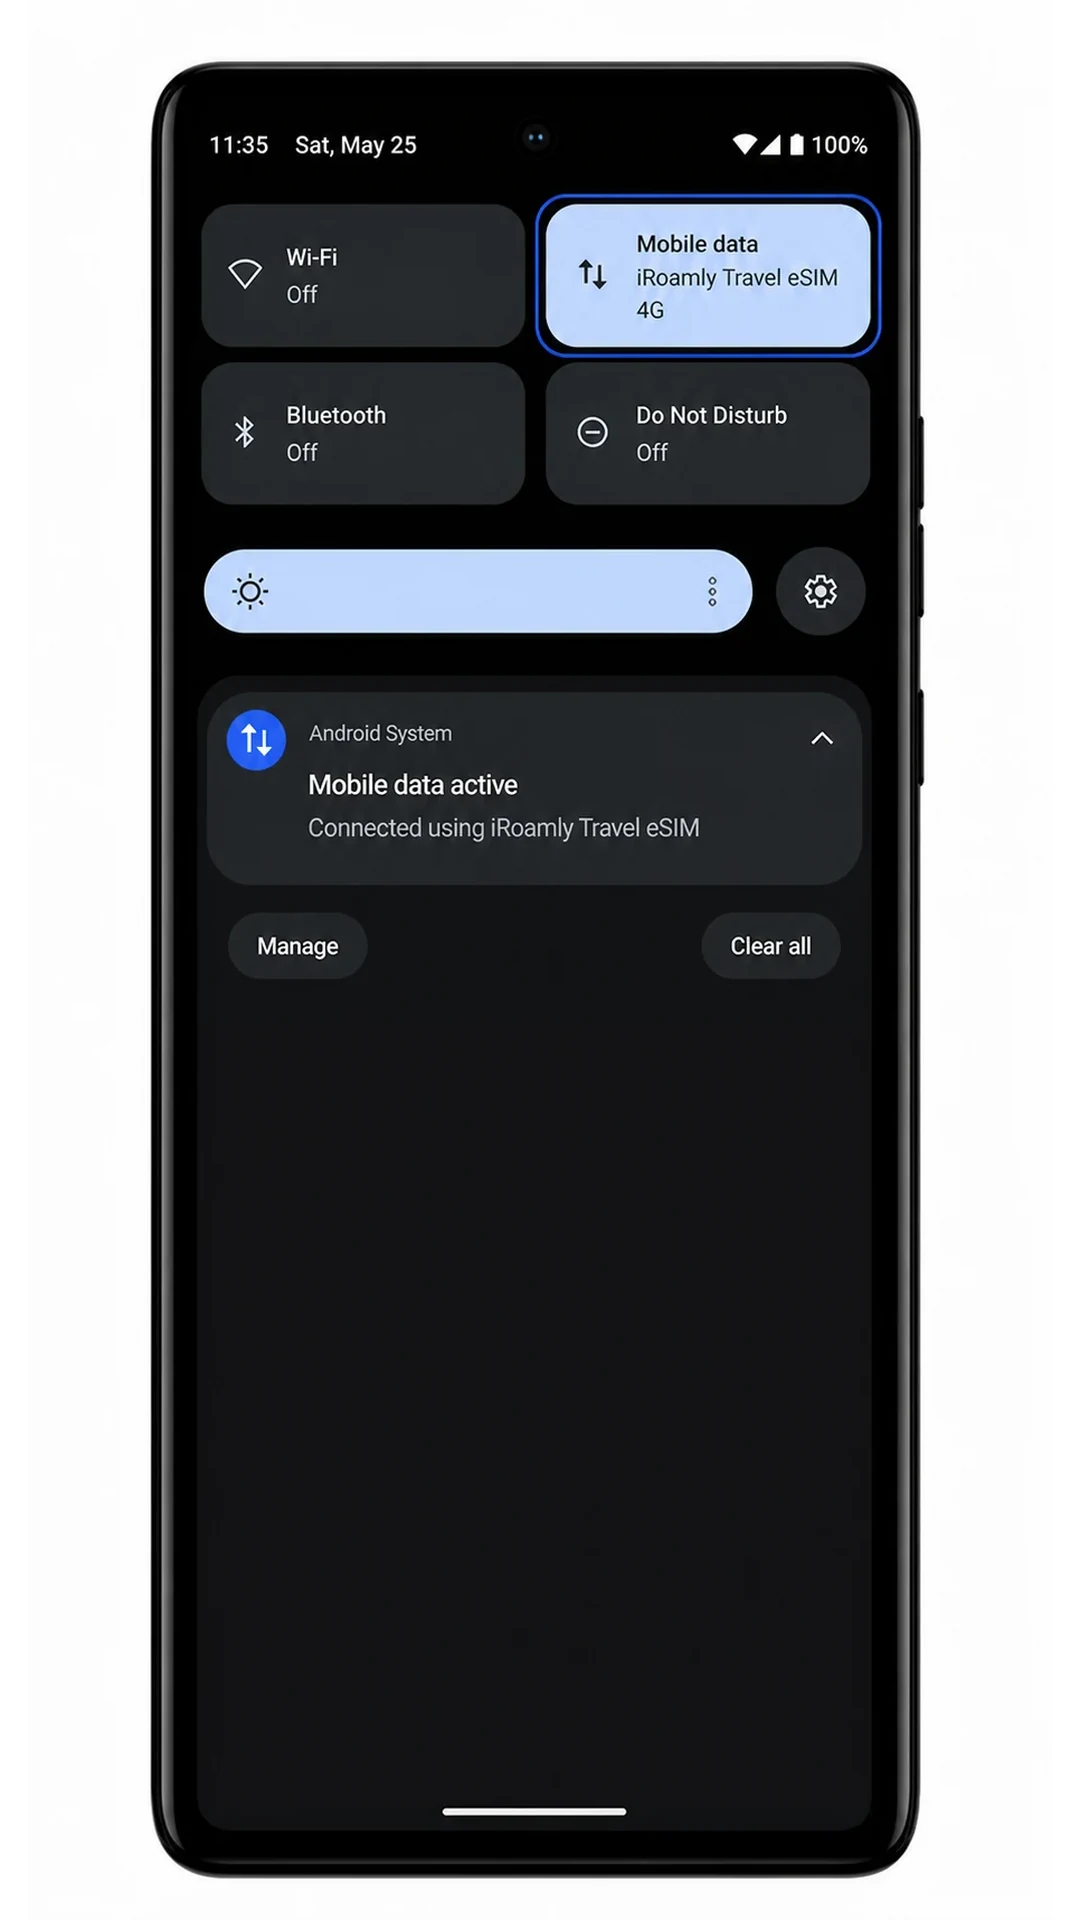
Open a browser or map app with Wi-Fi turned off and confirm that mobile data works.
If the page loads over mobile data, your iRoamly eSIM is ready for travel use on the Edge.
Troubleshooting
If Add SIM or Set up an eSIM is missing, confirm that your Motorola Edge (2024) variant supports eSIM, update Android, restart the phone, and check whether a carrier-locked model is blocking eSIM setup.
If the QR code will not scan, brighten the other screen, clean the camera lens, avoid reflections, or use the manual-entry method with the SM-DP+ Address and Activation Code.
If Android says the QR code is already used, do not delete the eSIM or keep retrying on another phone. Contact iRoamly support with your order details.
If activation stays pending, keep Wi-Fi connected, leave the eSIM installed, restart the phone, and wait until you are in the plan's supported destination if the plan activates on network connection.
If the eSIM appears but mobile data does not work, select iRoamly for Mobile data, turn on Roaming for the iRoamly line, disable automatic switching to your primary SIM if it appears, and test again with Wi-Fi off.
If you copied manual details from email, paste only the value for each field. Do not include labels such as SM-DP+ Address: in the field itself.
Conclusion
Once your iRoamly eSIM is ready on the Motorola Edge (2024), you'll have a convenient way to access travel data without removing your primary SIM card. This setup allows you to keep your regular number available while using a separate connection for international data, offering both flexibility and convenience during your trip.
Before you travel, it's worth confirming your destination coverage, activation requirements, and preferred mobile data settings. Completing these checks in advance can help you avoid common connectivity issues and enjoy a smoother mobile experience from the moment you arrive.