
The Motorola Edge 40 Neo supports eSIM on compatible regional variants, usually alongside a physical nano SIM. This guide assumes the phone is running Motorola My UX based on Android 14, where the eSIM path appears under Settings > Network & internet > SIMs.
Travelers may install an iRoamly eSIM before a trip so mobile data is ready without swapping the main SIM card. Menu names can vary slightly by software version, region, or carrier firmware, so confirm that your Edge 40 Neo shows Add SIM or Set up an eSIM before you begin.
This guide covers both supported setup methods: scanning the iRoamly QR code and entering the eSIM details manually. Manual entry is useful when the QR code is on the same phone, the camera cannot scan it, or the setup screen asks for the SM-DP+ Address and Activation Code directly.
Before You Set Up Your iRoamly eSIM
Connect the Motorola Edge 40 Neo to stable Wi-Fi before downloading the eSIM.
Confirm your phone is unlocked and that your exact regional variant supports eSIM.
Update the phone software if Settings > Network & internet > SIMs does not show eSIM options.
Keep your iRoamly QR code or manual setup details ready. Manual setup usually needs an SM-DP+ Address, an Activation Code, and sometimes an optional Confirmation Code.
Install the iRoamly eSIM 1-2 days before travel when the plan terms allow it, but check your iRoamly order details first.
iRoamly plan validity starts from activation. The exact activation trigger can vary by plan, such as installation or first connection to a supported destination network, so confirm it on the current plan or order page.
Do not delete the iRoamly eSIM after installation unless iRoamly support tells you to. Many eSIM profiles cannot be reinstalled after removal.
iRoamly travel eSIM plans may be data-only. Voice calls and SMS vary by plan, so do not assume they are included.
Method 1: Install eSIM by Scanning a QR Code
1. Open Settings on your Motorola Edge 40 Neo and tap Network & internet.
You should see the Android network settings section where SIM and mobile network options are managed.
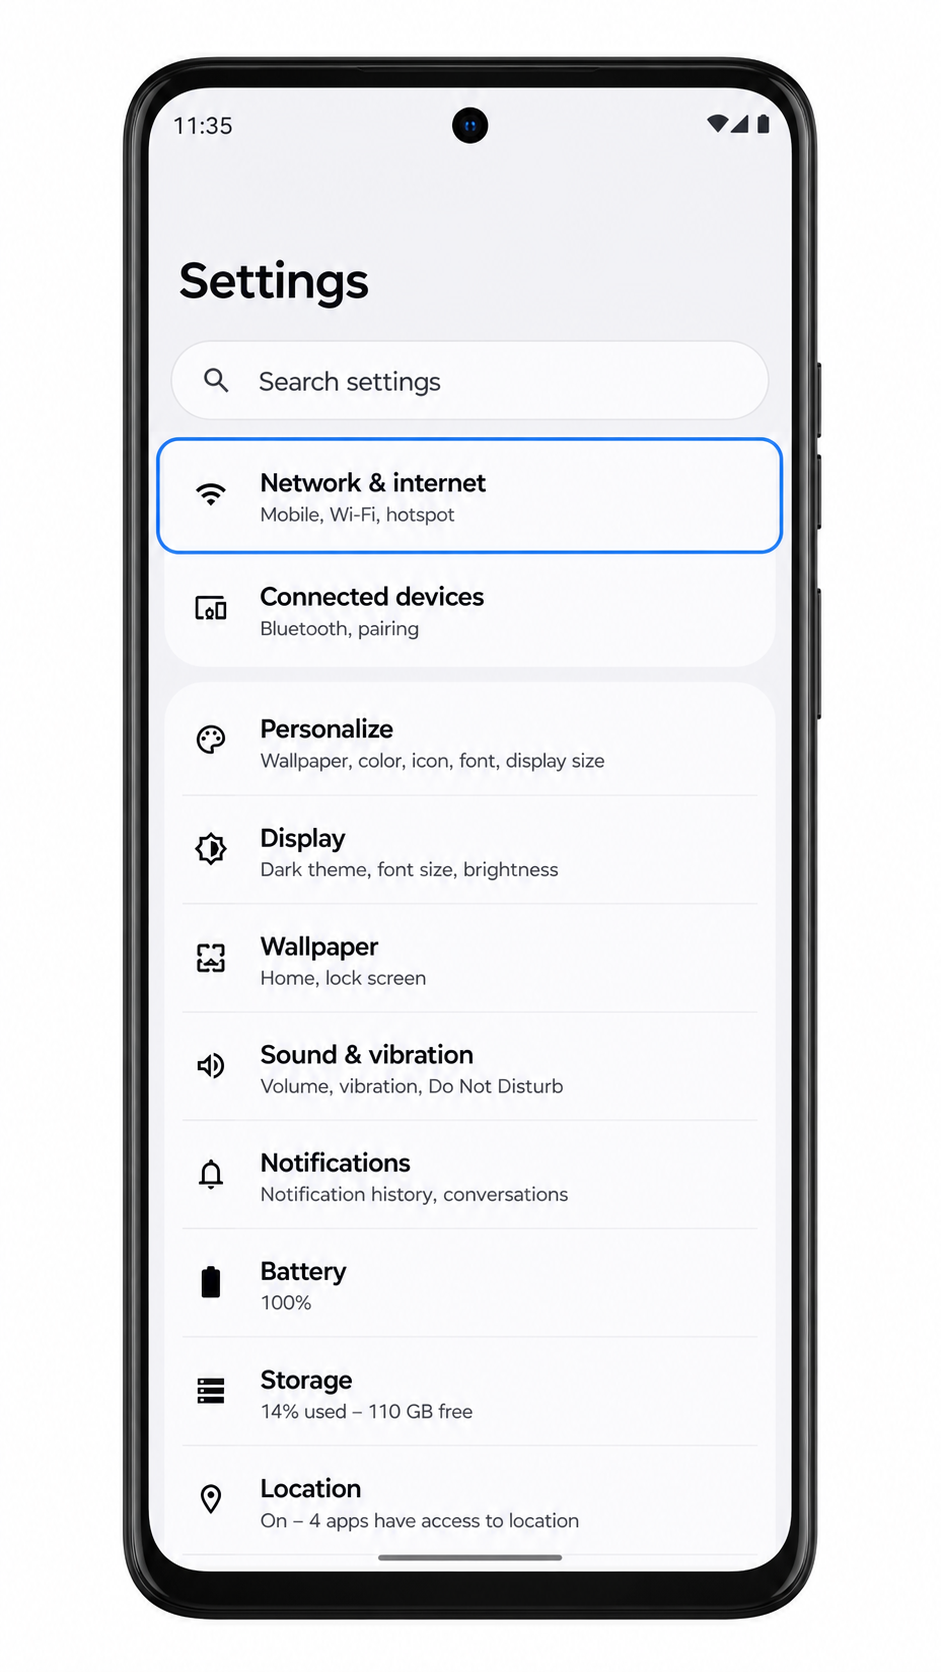
2. Tap SIMs on the Network & internet screen.
The phone should open the SIM management area for physical SIM and eSIM profiles.

3. Tap Add SIM.
The Edge 40 Neo should show setup choices for adding a physical SIM or downloading an eSIM.
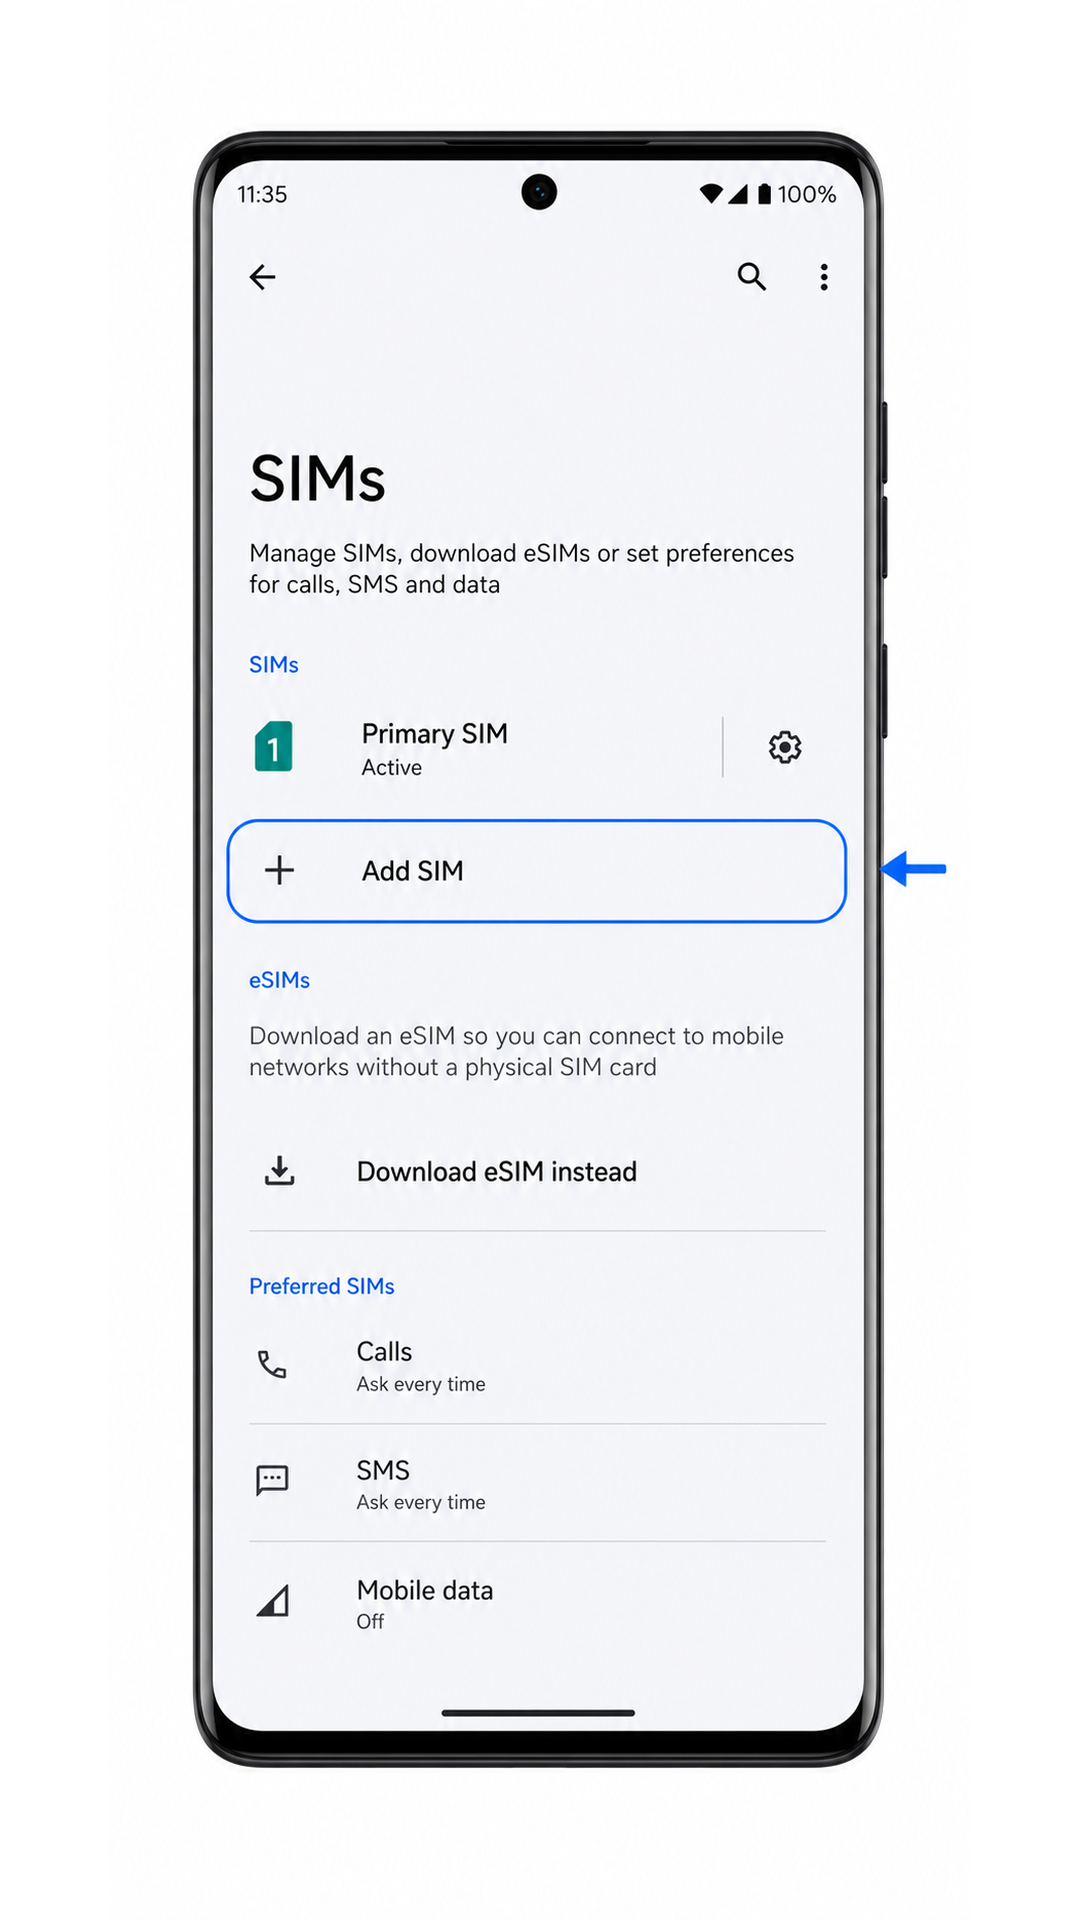
4. Tap Set up an eSIM.
The phone should open the eSIM setup flow and prepare the QR scanner.

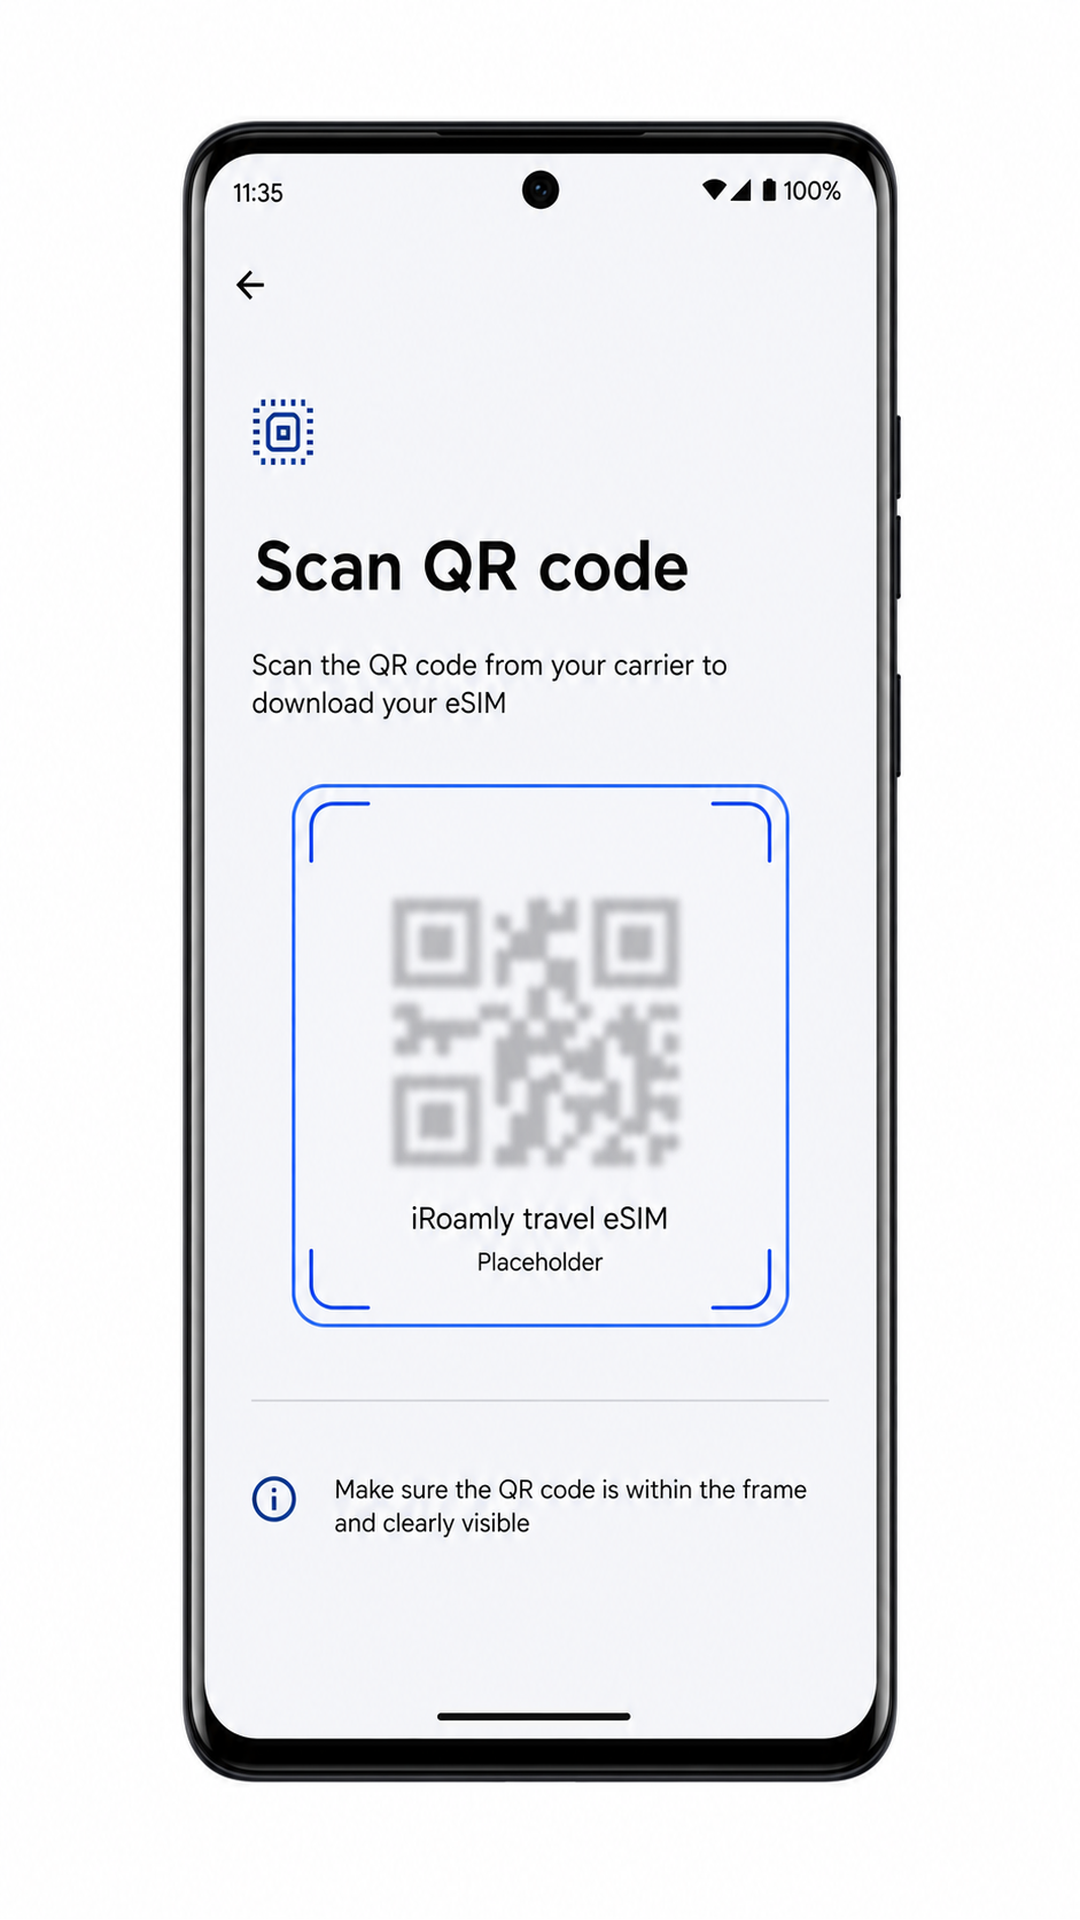
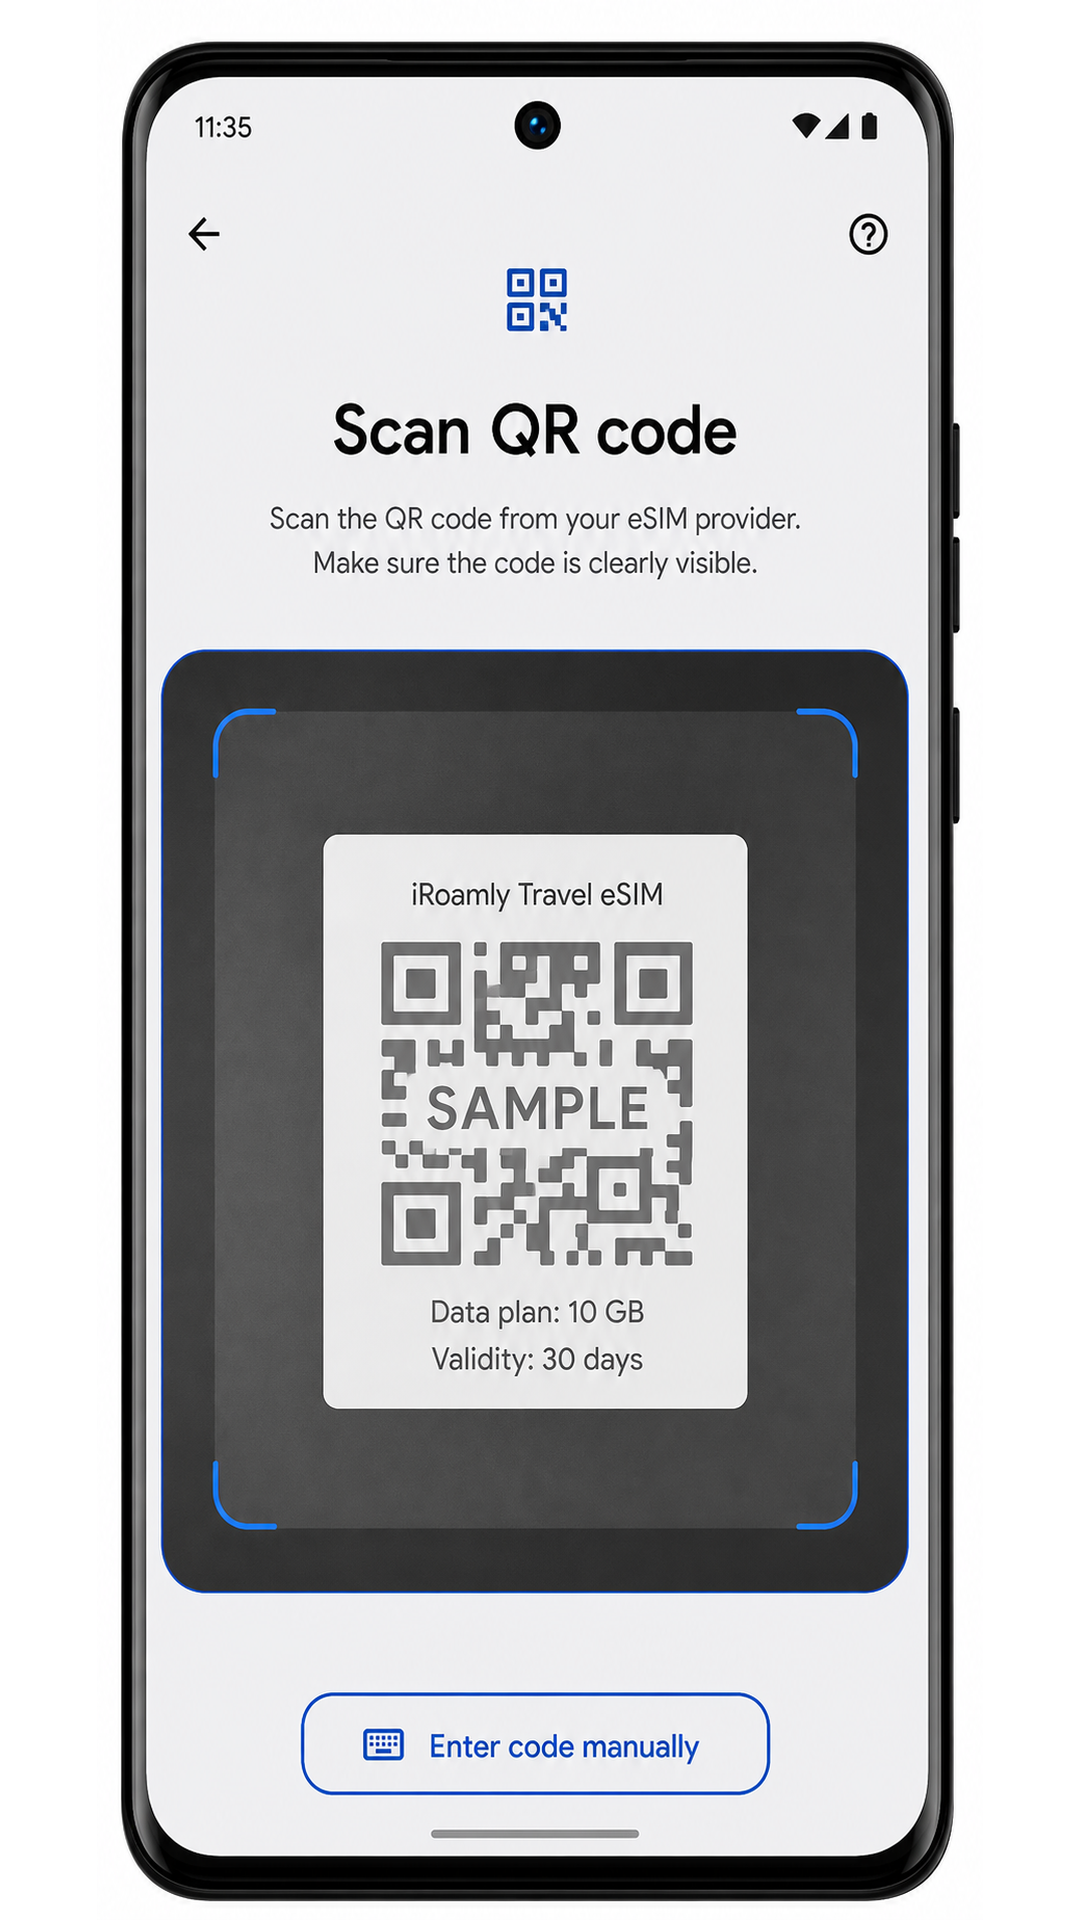
5. Point the QR scanner at the iRoamly QR code from your order email or iRoamly account.
Keep the QR code inside the frame until the phone recognizes the eSIM profile. Use a second device or printed copy if the QR code is displayed on the Edge 40 Neo itself.
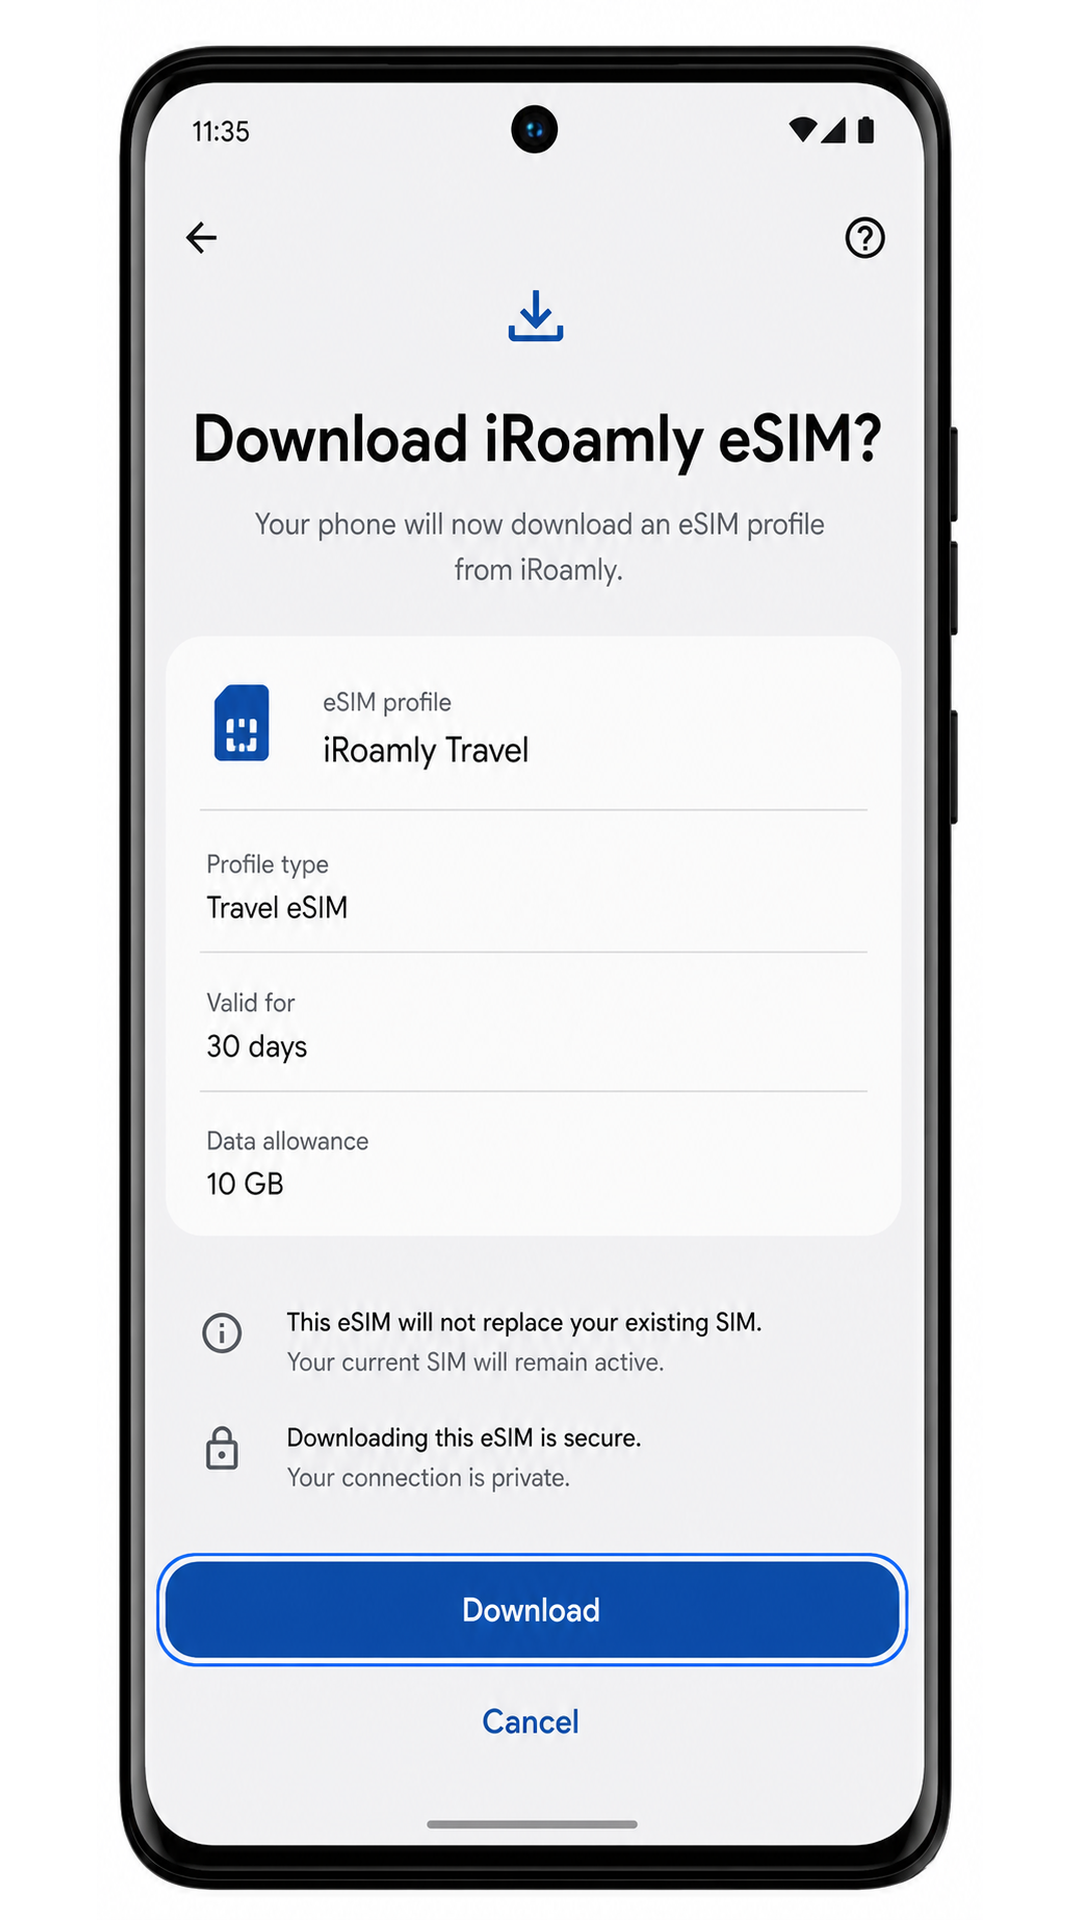
6. Review the detected iRoamly eSIM profile and tap Download.
Stay on Wi-Fi and keep the screen awake while Android downloads the eSIM profile.
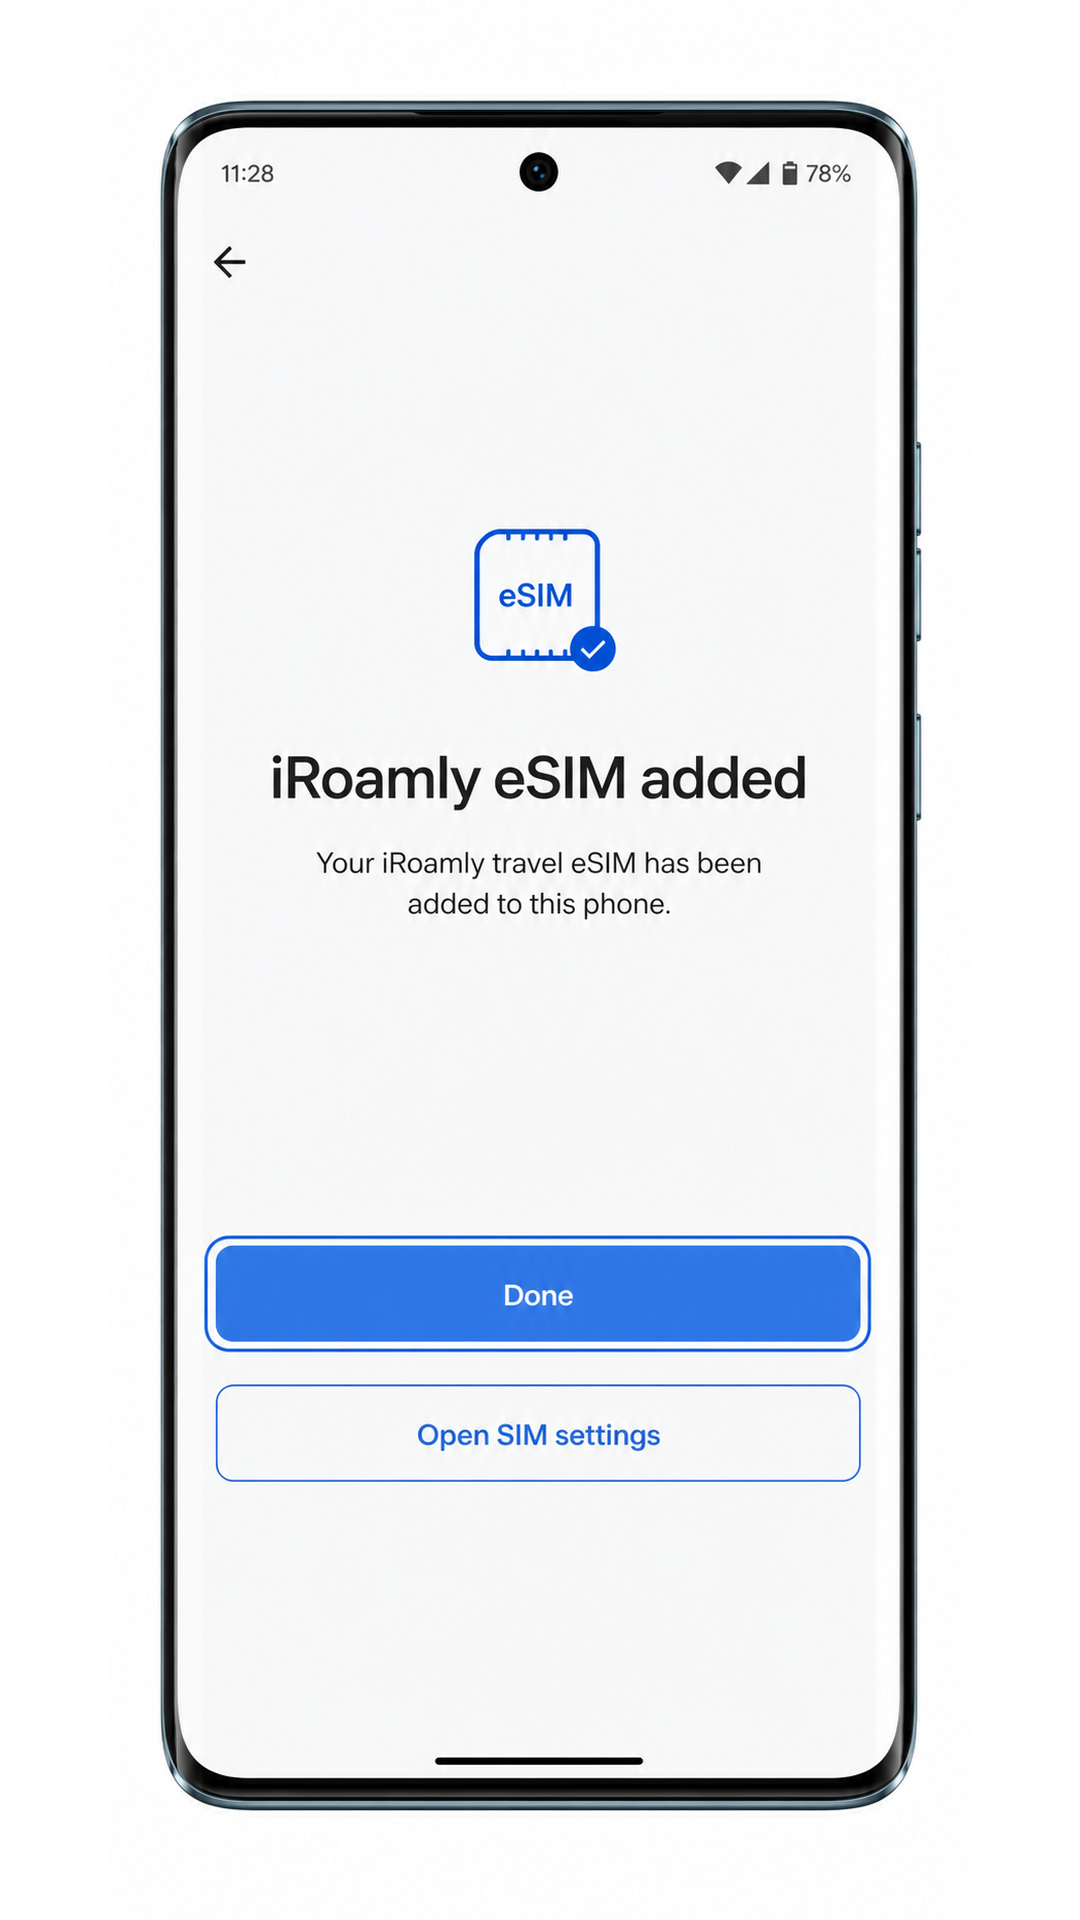
7. Tap Done when the phone says the iRoamly eSIM has been added.
The profile should now be stored on the phone, even if the travel network is not available until you arrive.
Method 2: Install eSIM Manually
1. Open Settings and tap Network & internet.
Use the same Settings path as the QR method so the phone starts from the correct SIM management area.
2. Tap SIMs.
The Edge 40 Neo should show the page where you can add or manage SIM profiles.
3. Tap Add SIM.
Android should show the option to add a new SIM or download an eSIM profile.
4. Tap Set up an eSIM.
The phone should move into the same eSIM setup flow used by QR activation.
5. On the QR scanner screen, tap Enter code manually.
Use this option when you cannot scan the iRoamly QR code or when the activation details are provided as text.
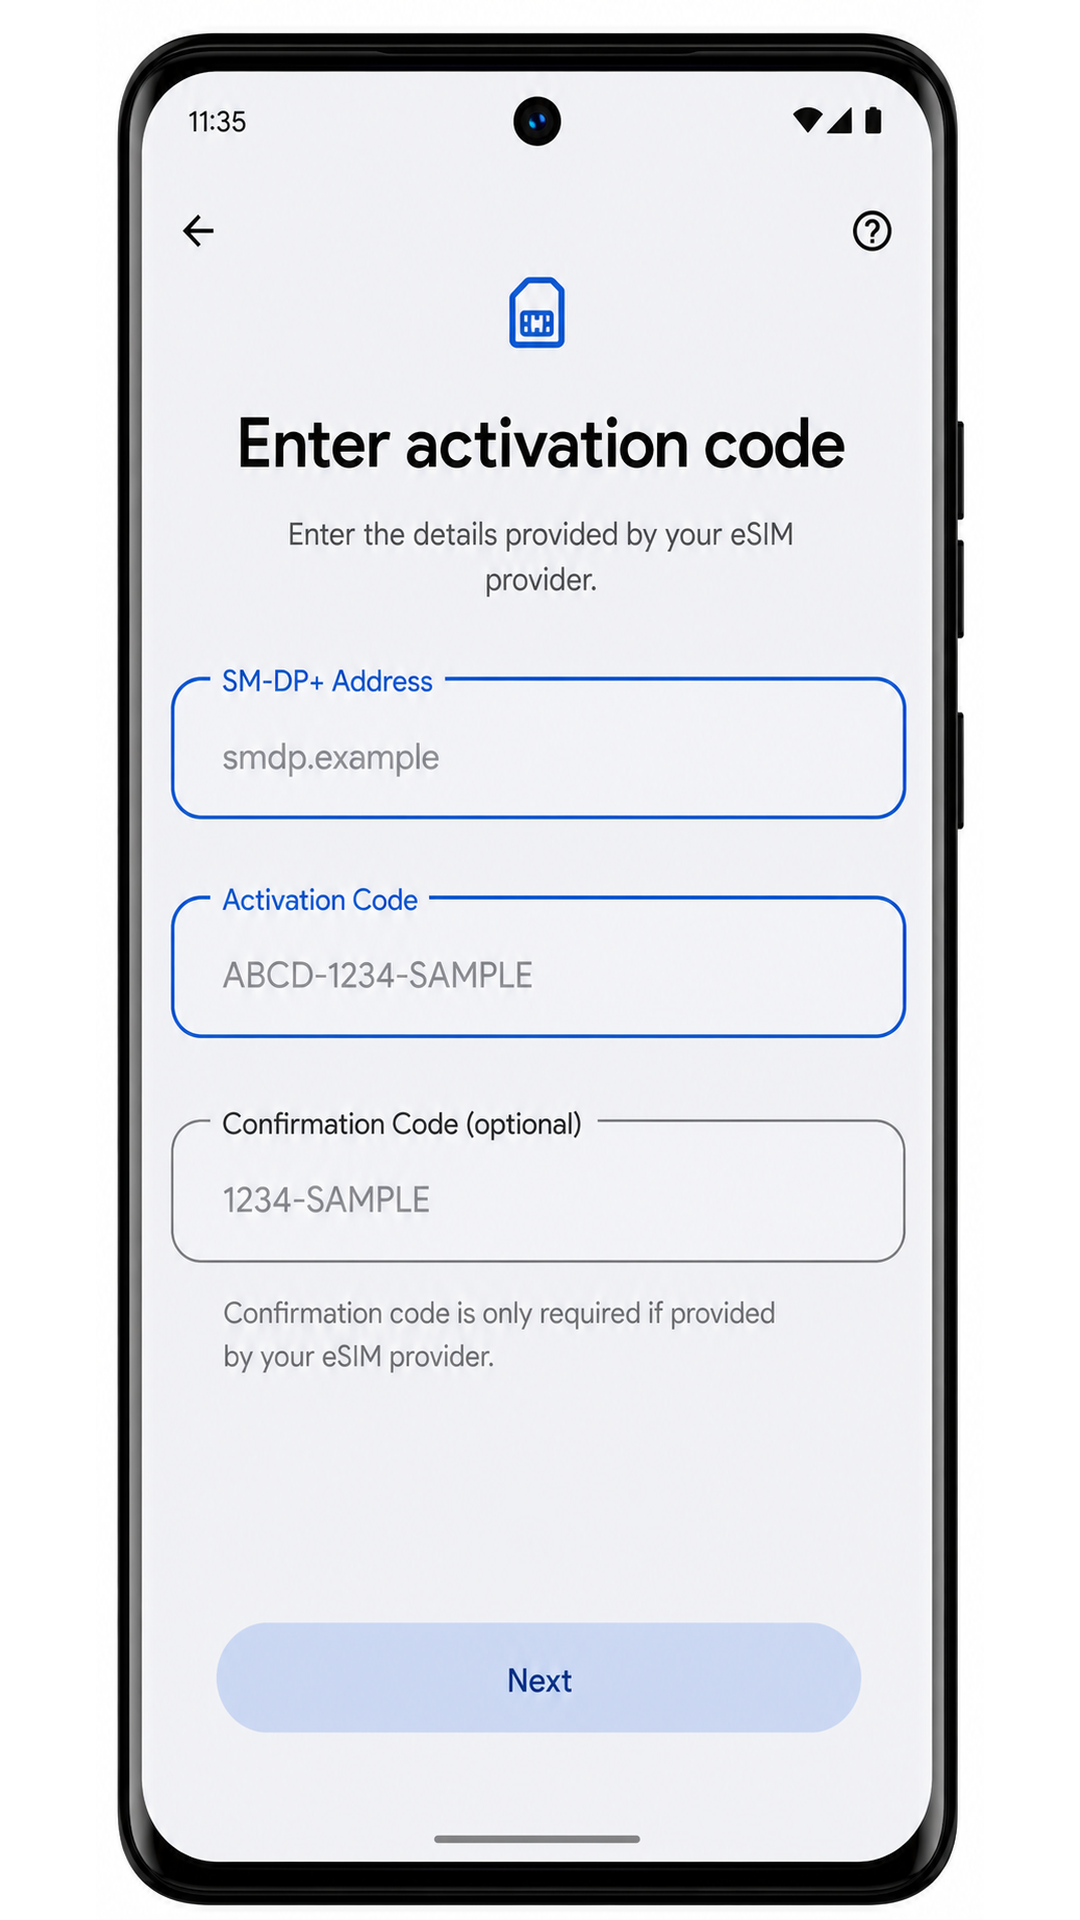
6. Enter the iRoamly SM-DP+ Address and Activation Code, then add the Confirmation Code only if iRoamly provides one.
Check each character carefully, then tap Next or the on-screen continue button. Do not add spaces unless the iRoamly details show them.
7. Review the iRoamly eSIM profile and tap Download.
Keep the phone connected to Wi-Fi until the download finishes.
8. Tap Done after Android confirms the iRoamly eSIM was added.
The manually entered eSIM should now appear in the same SIMs list as a QR-installed profile.
How to Confirm Your iRoamly eSIM Is Installed
1. Go to Settings > Network & internet > SIMs.
Look for an installed profile named iRoamly Travel, Travel eSIM, or another label you assigned during setup.
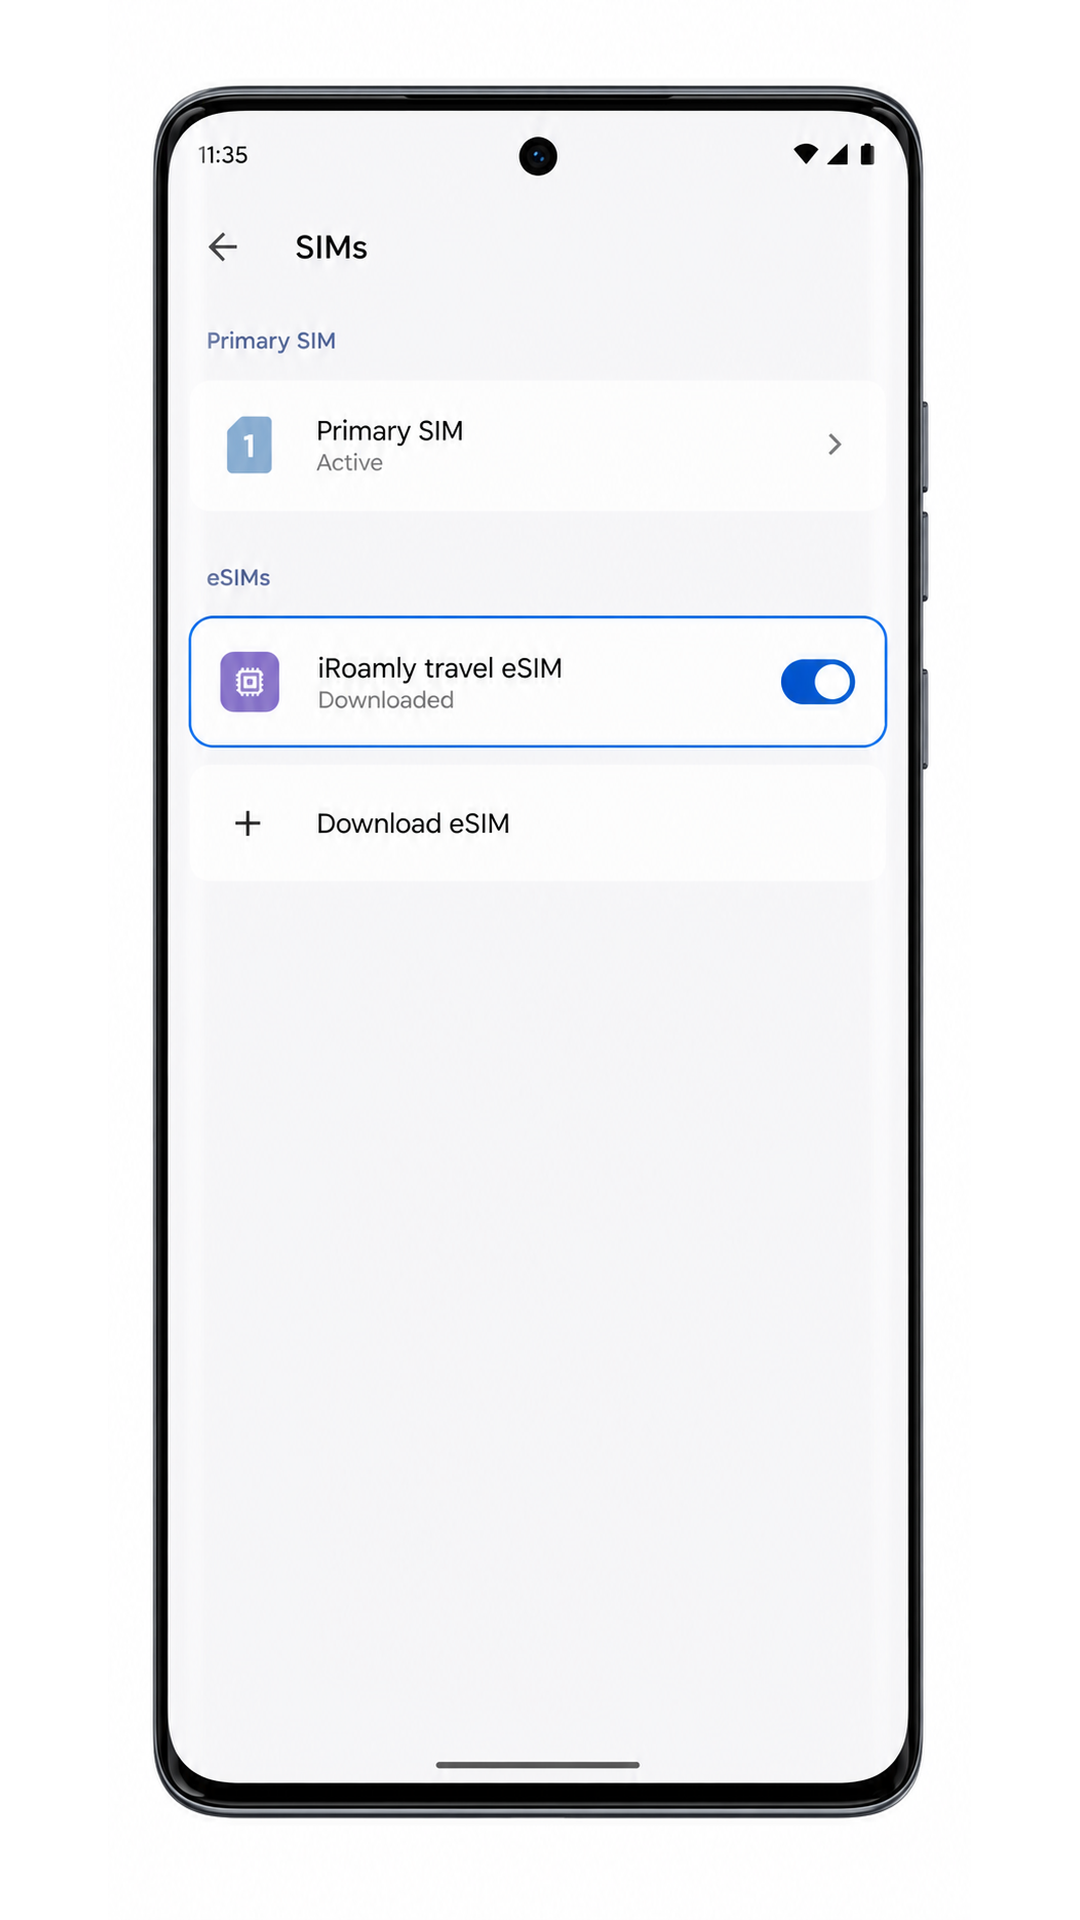
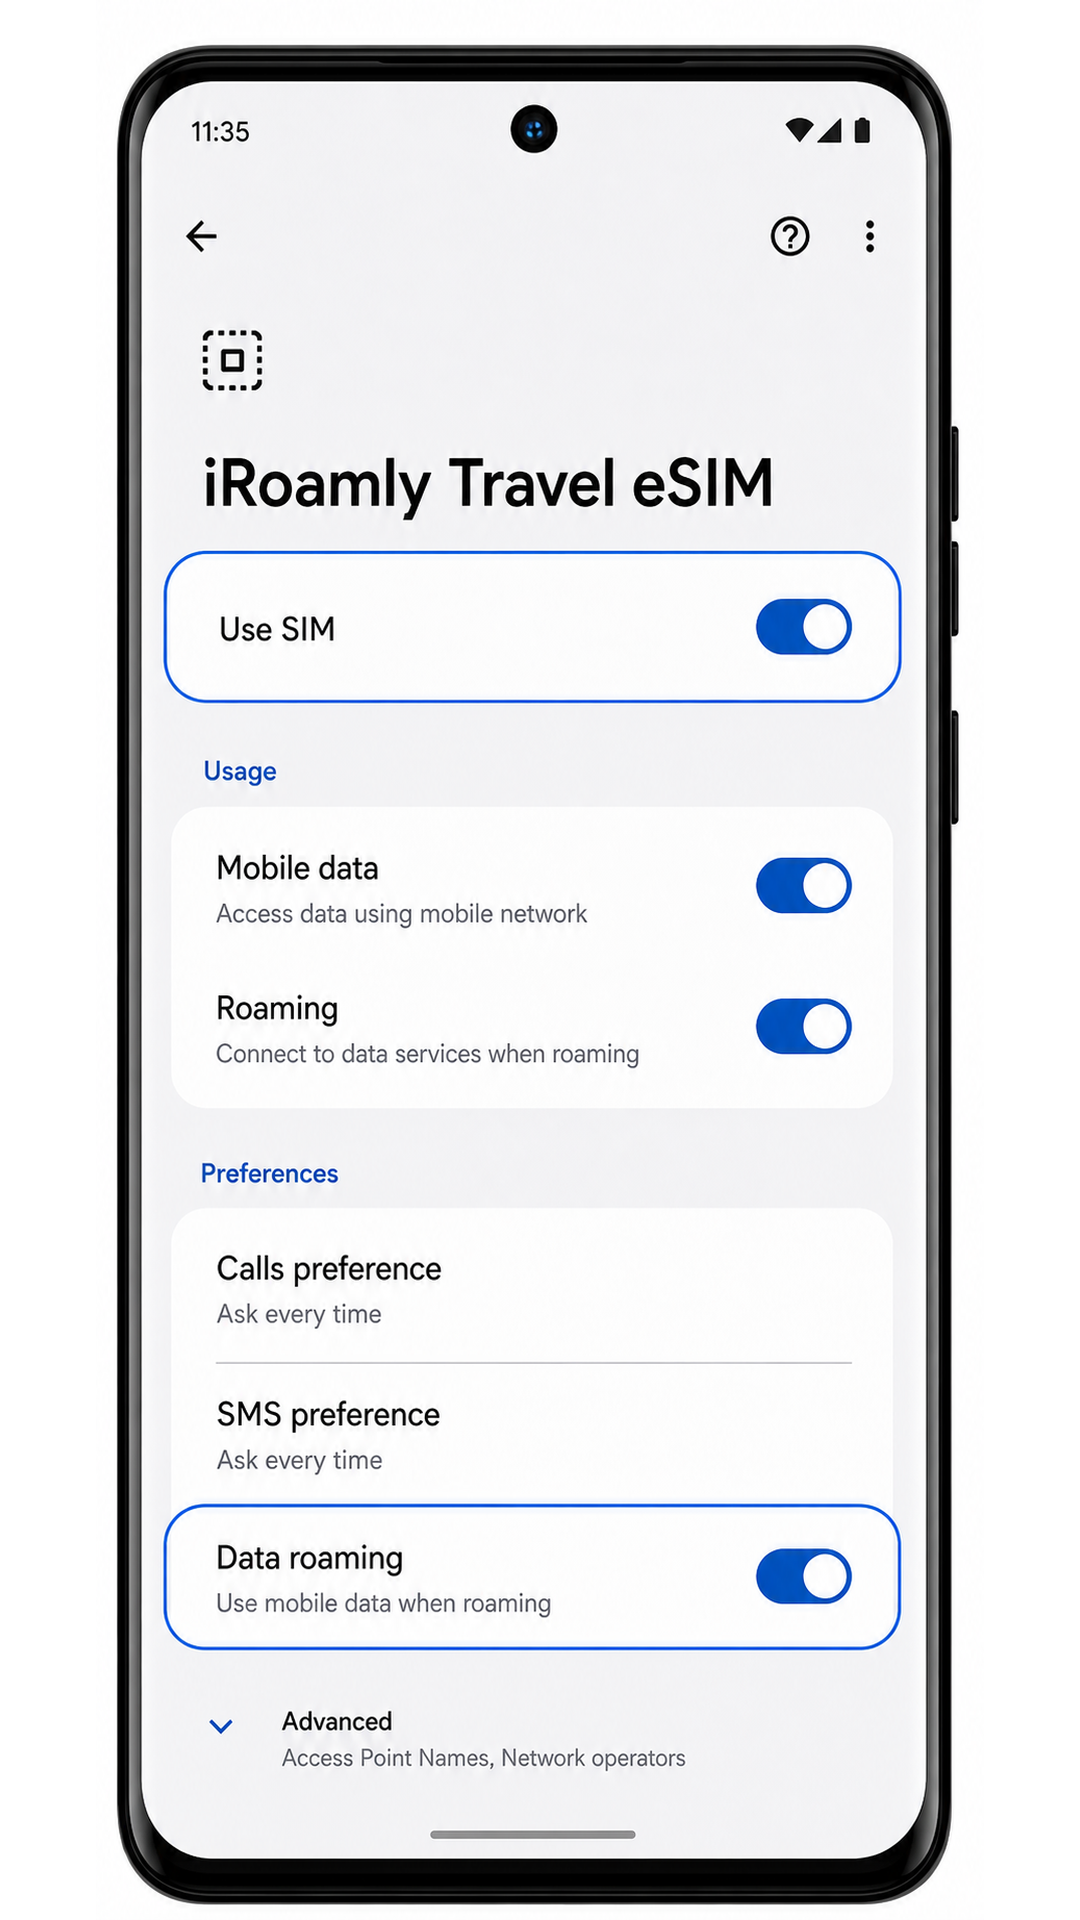
2. Tap the iRoamly eSIM profile and confirm Use SIM is switched on.
If the profile is installed but switched off, turn it on before you travel or when you reach the destination covered by your plan.
3. Check mobile data only if your iRoamly plan has already activated or you are in the covered destination.
For data-only plans, test a webpage or app using mobile data. Do not test SMS or calling unless your specific iRoamly plan says those services are included.
Configure eSIM for Mobile Data
1. Open Settings > Network & internet > SIMs, then tap the iRoamly eSIM profile.
The profile settings page should show controls such as Use SIM, Mobile data, and Data roaming.
2. Switch on Use SIM for the iRoamly eSIM and enable Data roaming if your iRoamly destination plan requires it.
Travel eSIM data often needs roaming enabled because the plan connects through partner networks abroad.
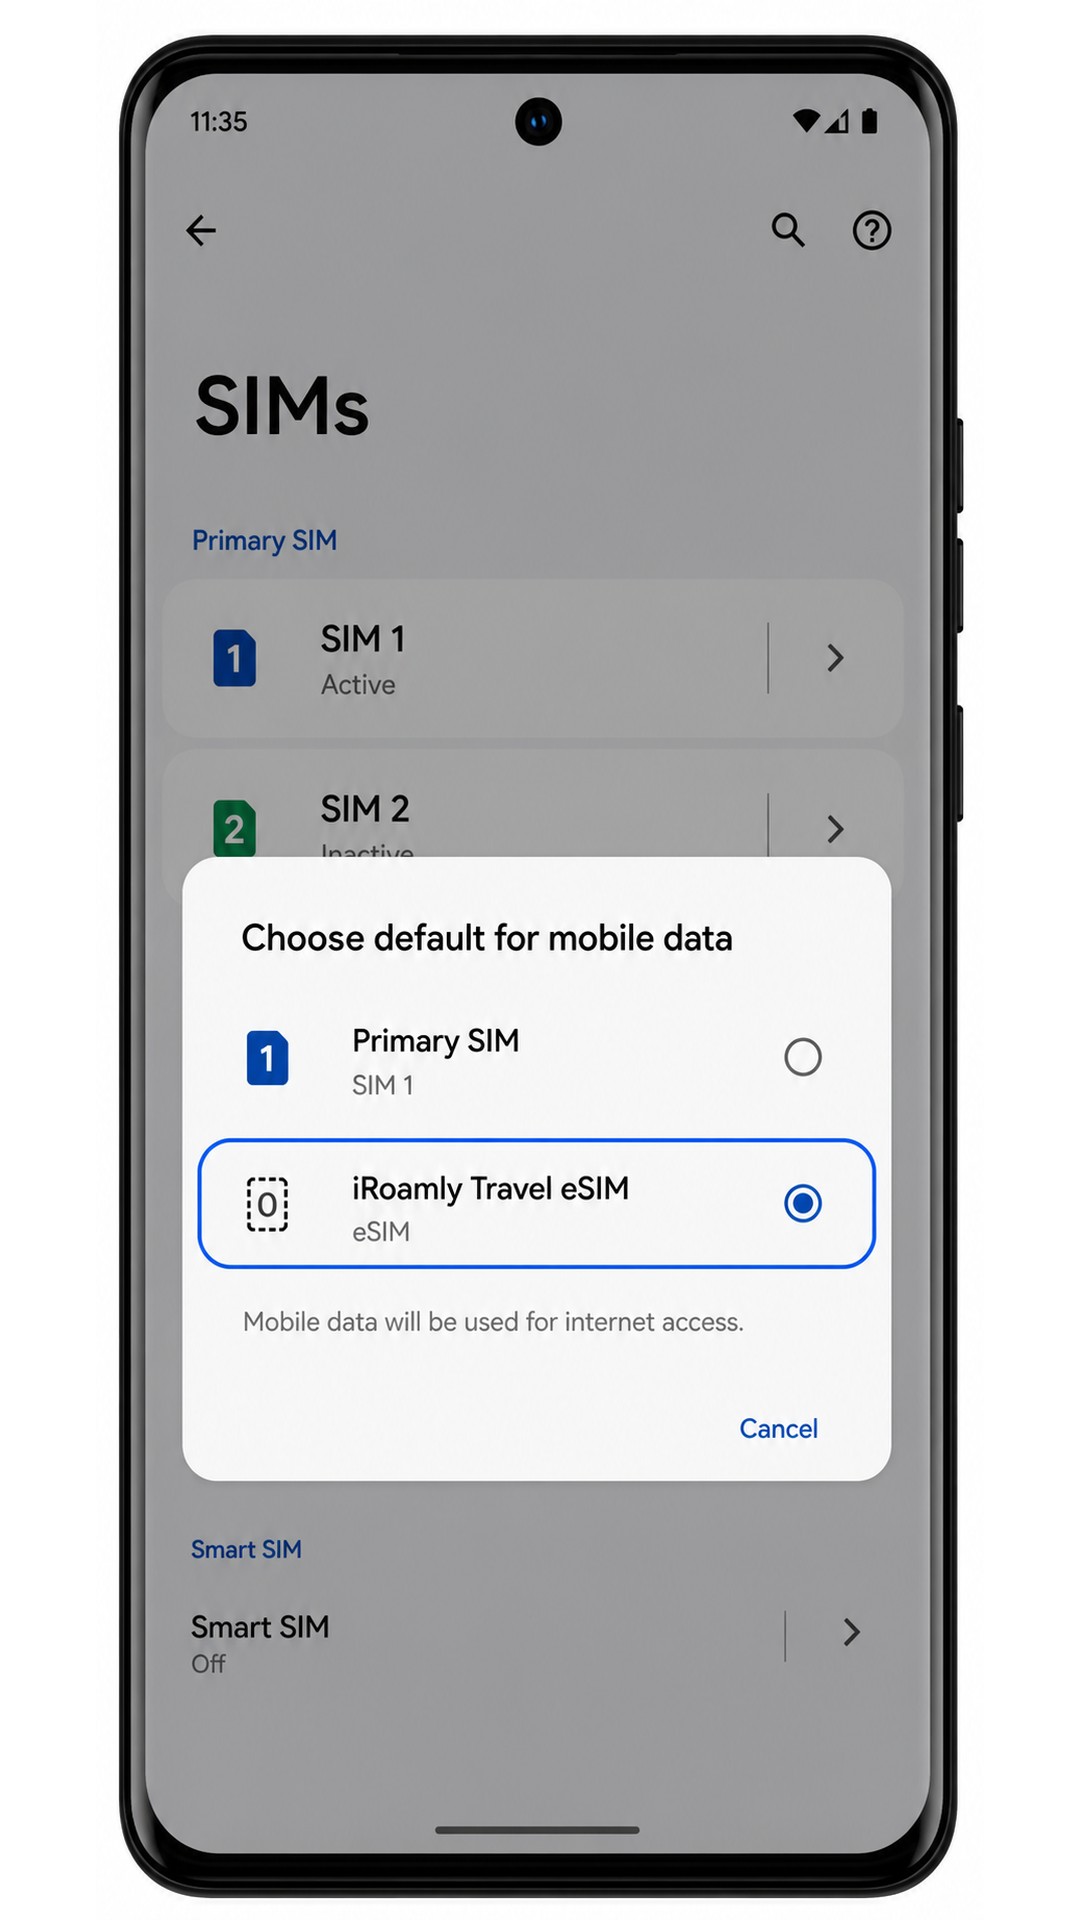
3. Set Mobile data or the default data SIM to iRoamly Travel eSIM.
This helps the Edge 40 Neo use the travel eSIM for internet access while keeping your primary SIM available for supported calls or messages.
Troubleshooting
If Add SIM or Set up an eSIM is missing, confirm that your Motorola Edge 40 Neo variant supports eSIM, update Android, restart the phone, and check whether the carrier firmware or region disables eSIM.
If the QR code will not scan, increase screen brightness on the device showing the QR code, clean the Edge 40 Neo camera lens, or use Enter code manually.
If Android says the QR code was already used, do not delete the profile. Contact iRoamly support because many eSIM QR codes can be installed only once.
If manual entry fails, compare the SM-DP+ Address, Activation Code, and optional Confirmation Code with the iRoamly order details. A single wrong character can block activation.
If the eSIM is installed but no data works, select the iRoamly eSIM for Mobile data, turn on Data roaming if required, disable Wi-Fi for a quick test, and restart the phone.
If activation stays pending, wait until you are in the covered destination and connected to a supported local network. Some plans do not fully activate until the phone reaches the destination network.
If calls or SMS do not work, check the plan details. Many iRoamly travel eSIMs are intended for mobile data and may not include voice or SMS service.
Conclusion
Now that your iRoamly eSIM is ready on the Motorola Edge 40 Neo, you have a flexible way to stay connected without relying on a new physical SIM card. Preparing your mobile service before departure can help streamline your travel experience and reduce setup time after arrival.
As eSIM adoption continues to grow, knowing how to manage digital SIM profiles can be useful beyond a single trip. The same skills can help you switch plans, add new carriers, and manage connectivity more efficiently in the future.