
The Motorola Edge 60 Stylus supports eSIM on the India model listed with Dual SIM (1 Nano SIM + eSIM). This guide assumes Android 15 with Motorola Hello UX, where eSIM setup is handled from Settings > Network & internet > SIMs.
For travel, an iRoamly eSIM lets you add a mobile data plan without removing your main physical SIM. The Edge 60 Stylus has a 6.67-inch pOLED display with 2712 x 1220 resolution, so the screenshots in this package use a tall Motorola-style Android layout.
You will see both installation options: scanning the iRoamly QR code and entering the eSIM details manually. QR setup is usually quicker, while manual entry helps when the QR code is on the same phone or cannot be scanned clearly.
Prepare Travel Data with iRoamly
iRoamly is a travel eSIM service that provides mobile data plans for trips abroad. Travelers can choose destination, local, regional, or global options, with available data allowances, validity periods, plan types, and features varying by destination.
After installation on a compatible phone, that travel data can support everyday needs such as maps, messaging, ride-hailing, bookings, and travel updates.
On a compatible Motorola Edge 60 Stylus, iRoamly can be installed as a separate travel-data eSIM while the phone keeps its existing SIM setup. The instructions below continue with the device-specific QR-code and manual-entry steps, then show how to confirm the profile and select it for mobile data when you are ready to use the plan abroad.
Before You Set Up Your iRoamly eSIM
Connect the Motorola Edge 60 Stylus to stable Wi-Fi before starting. The phone must download the eSIM profile during setup.
Confirm your device is unlocked and that your regional variant supports eSIM. Some carrier or market software builds can hide eSIM options even when the phone family supports them.
Keep your iRoamly QR code ready on another screen, printed page, or email. For manual setup, keep the SM-DP+ Address, Activation Code, and any optional confirmation code ready.
Update the phone to the latest available Android 15 software if the menu labels do not match this guide.
For a trip to Japan or France, setting up the travel eSIM before you leave can reduce the amount of phone setup needed after landing.
Install the iRoamly eSIM 1-2 days before travel when your plan terms allow it, but do not install too early. iRoamly plan validity starts from activation, and the exact trigger can vary by plan, so check the plan details before installing.
Do not delete the iRoamly eSIM profile unless iRoamly support tells you to do so. Many eSIM profiles and QR codes cannot be reused after removal.
iRoamly plans may be data-only. Voice calls and SMS availability varies by plan, so check the specific plan details before relying on calling or texting.
Method 1: Install eSIM by Scanning a QR Code
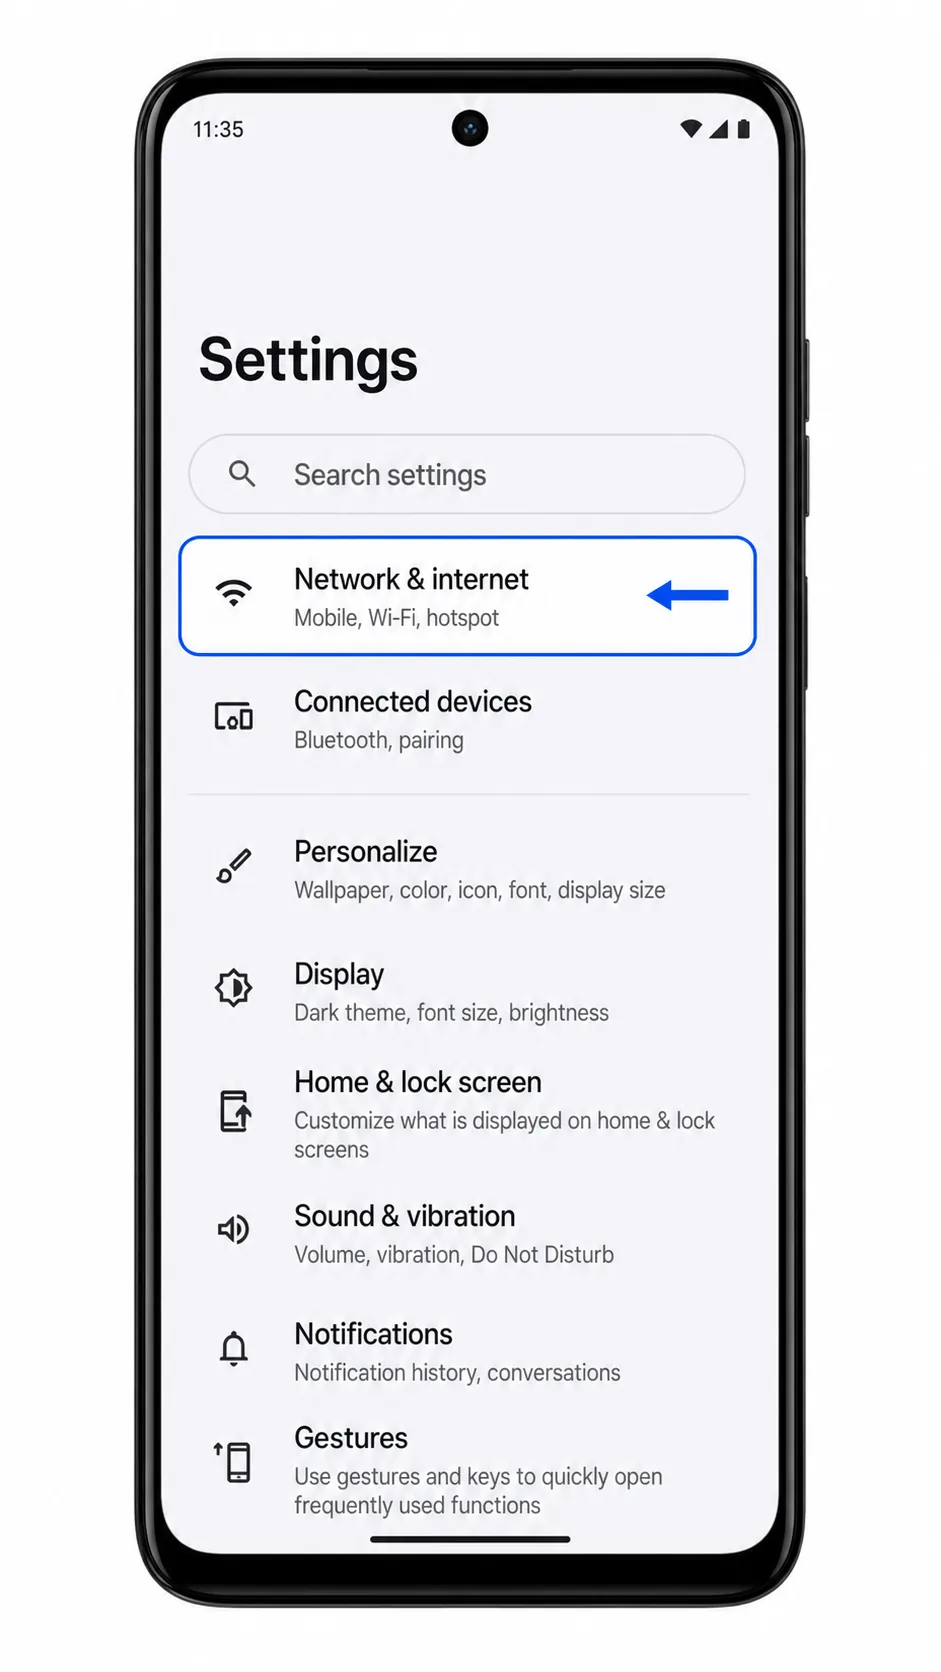
Open Settings, then tap Network & internet. You should see the phone's Wi-Fi, SIM, hotspot, and connectivity settings.
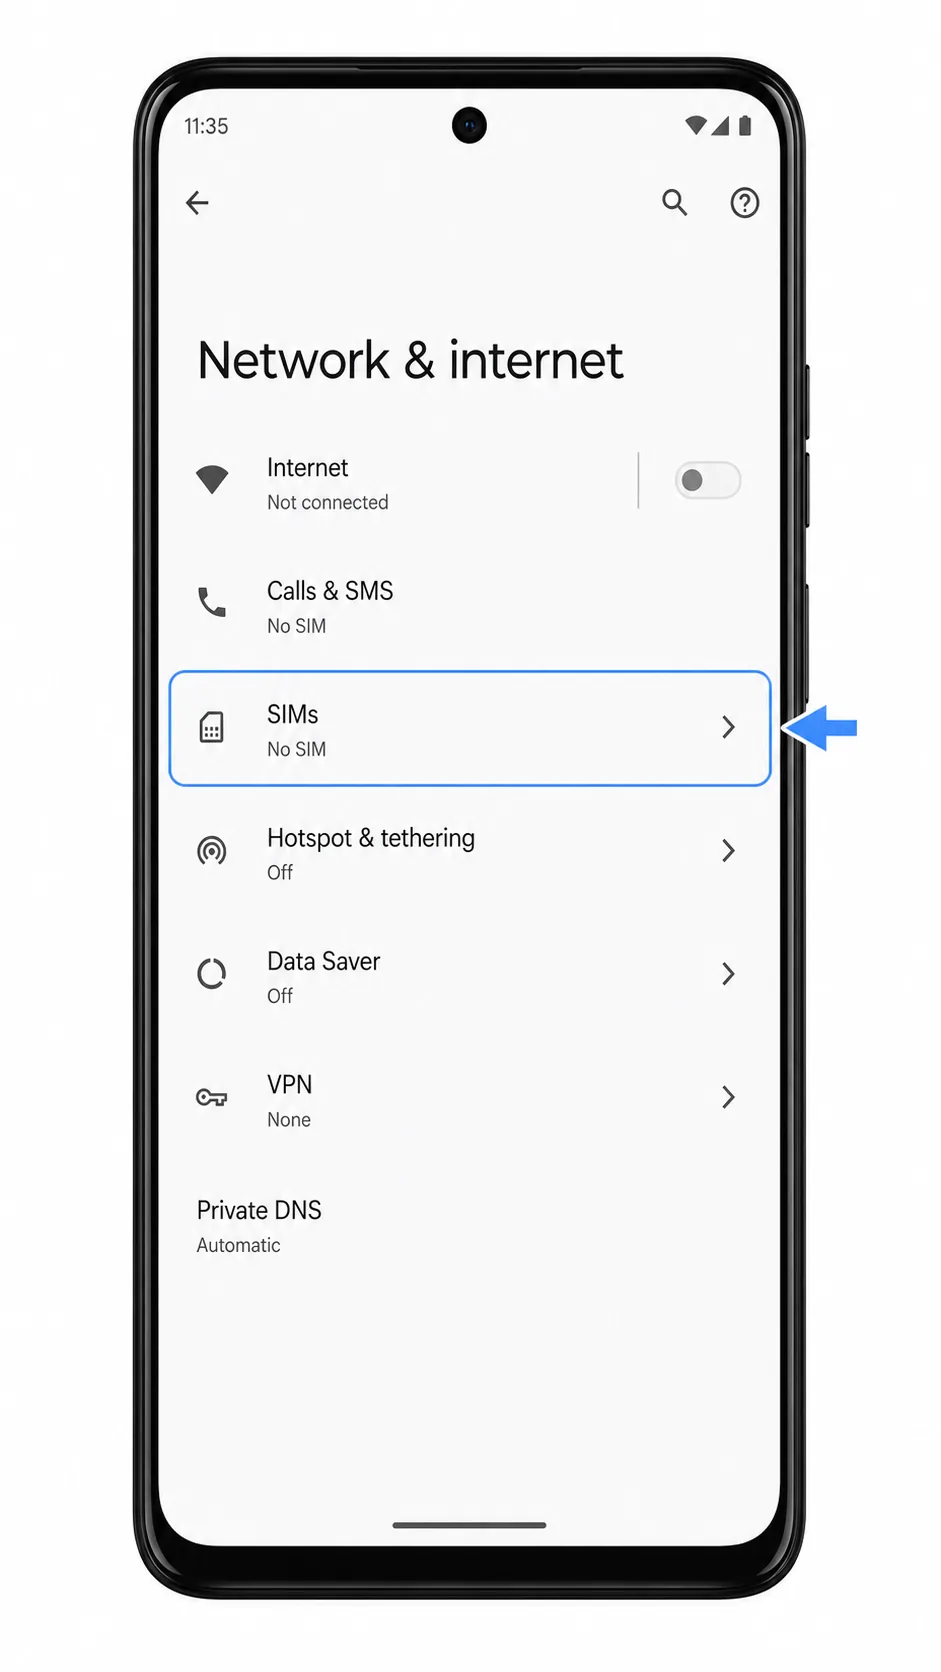
Tap SIMs. The phone opens the page where physical SIMs and downloaded eSIM profiles are managed.
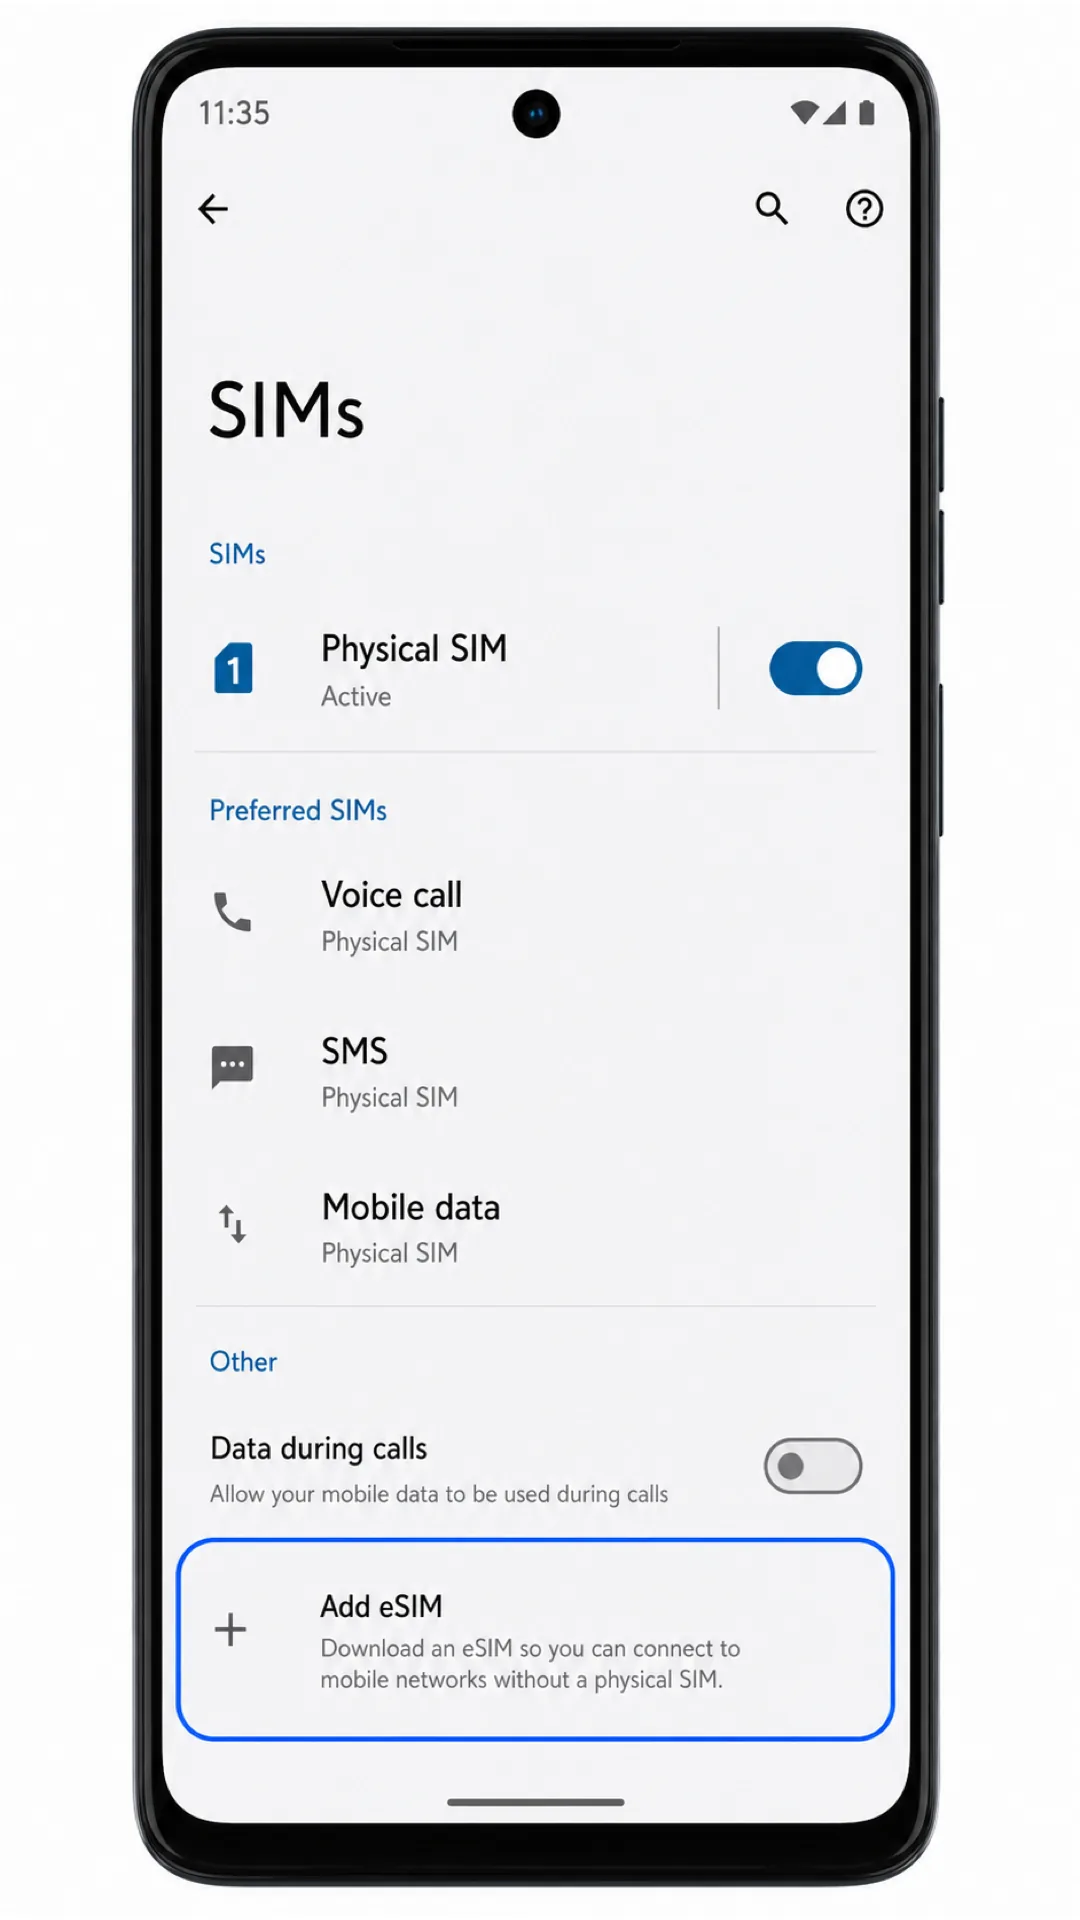
Tap Add eSIM. If your software shows Add SIM instead, tap it and choose the eSIM setup option on the next screen.
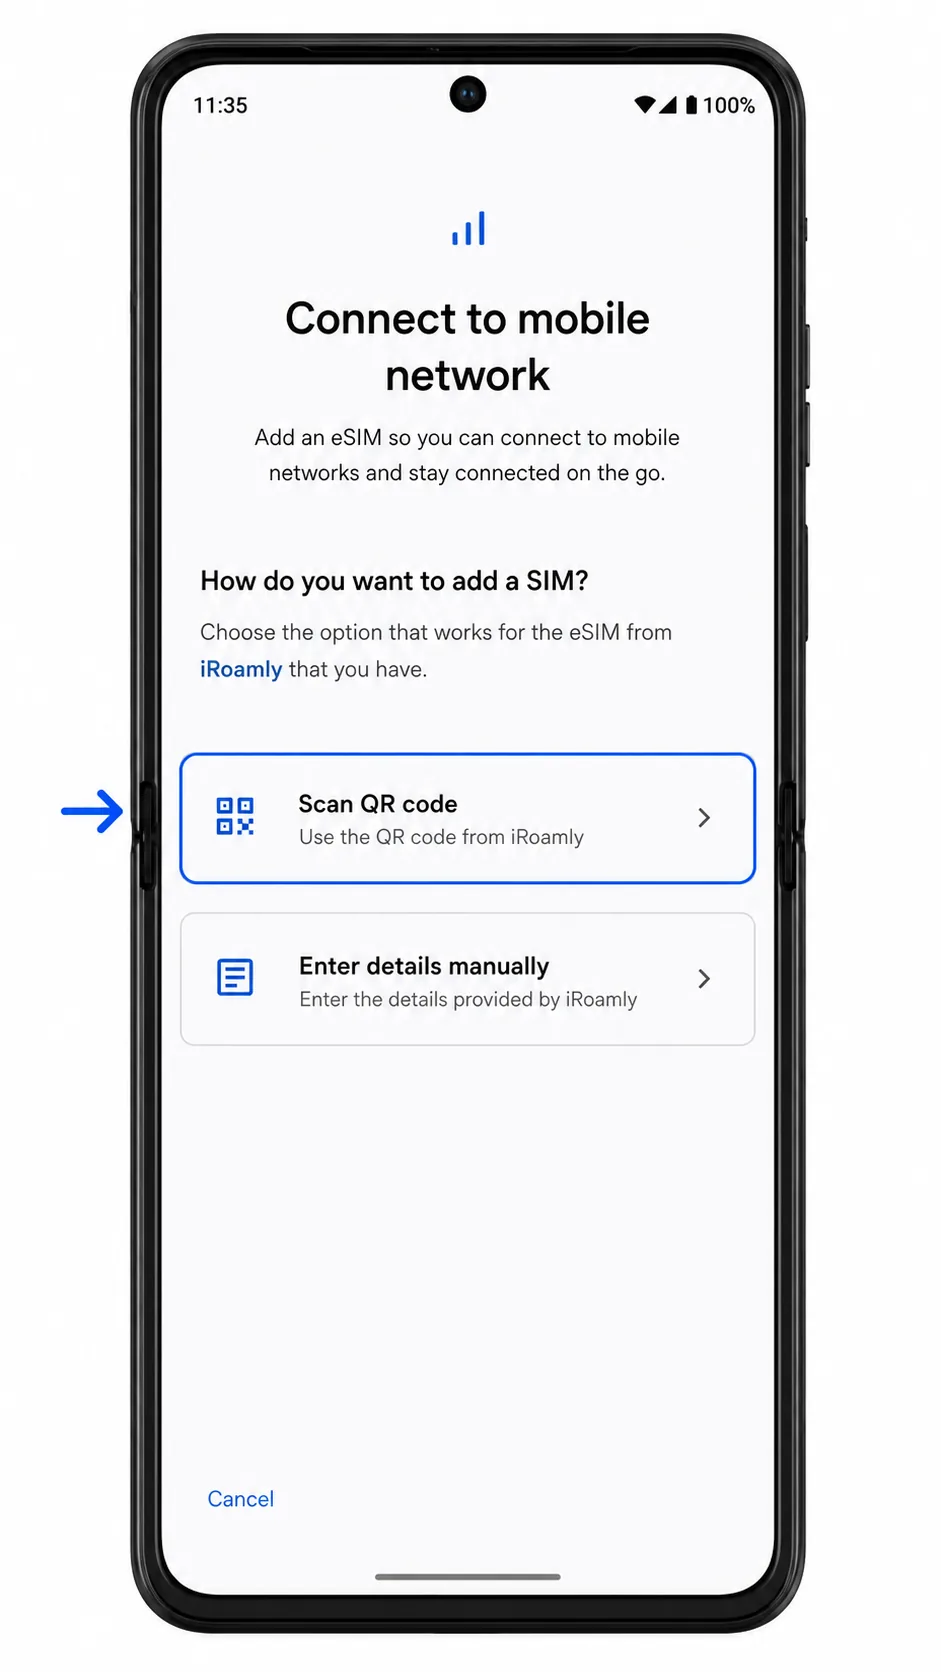
On the eSIM setup screen, tap Scan QR code. The phone should open the eSIM scanner.
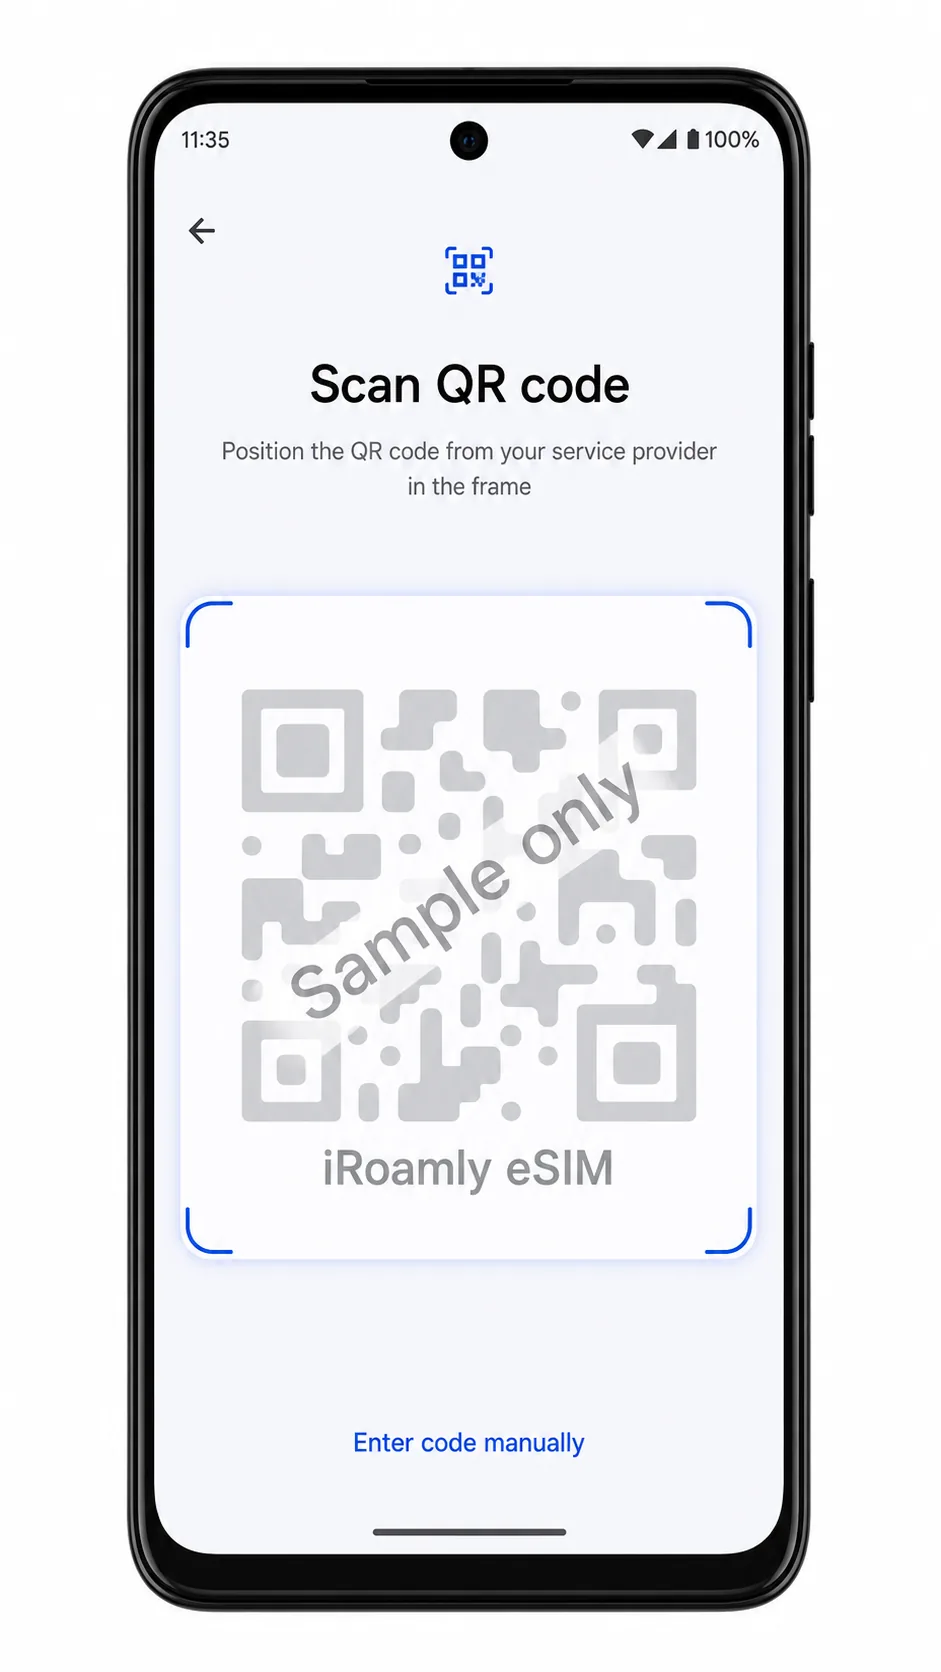
Point the scanner at the iRoamly QR code. Keep the QR code flat, bright, and fully inside the scan frame until the phone reads it.
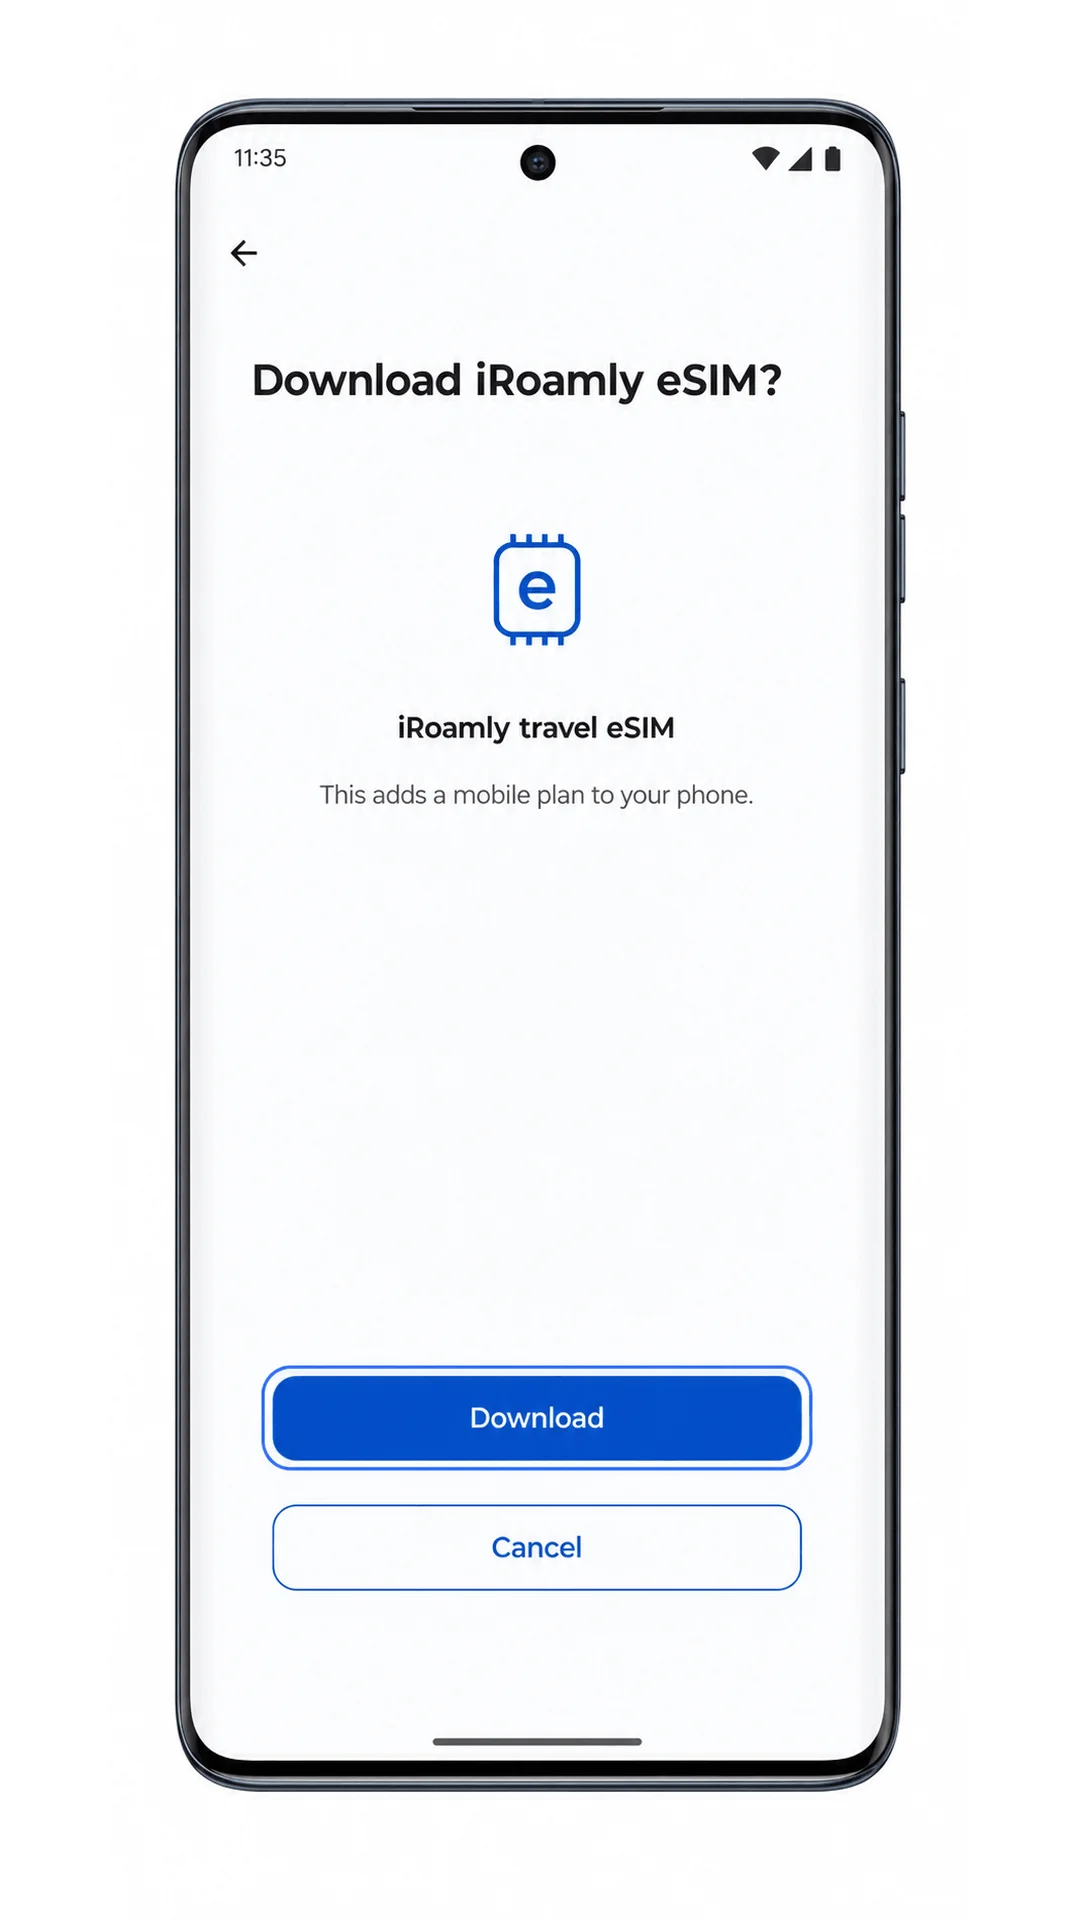
Review the iRoamly eSIM profile and tap Download. Keep Wi-Fi connected until the download finishes.
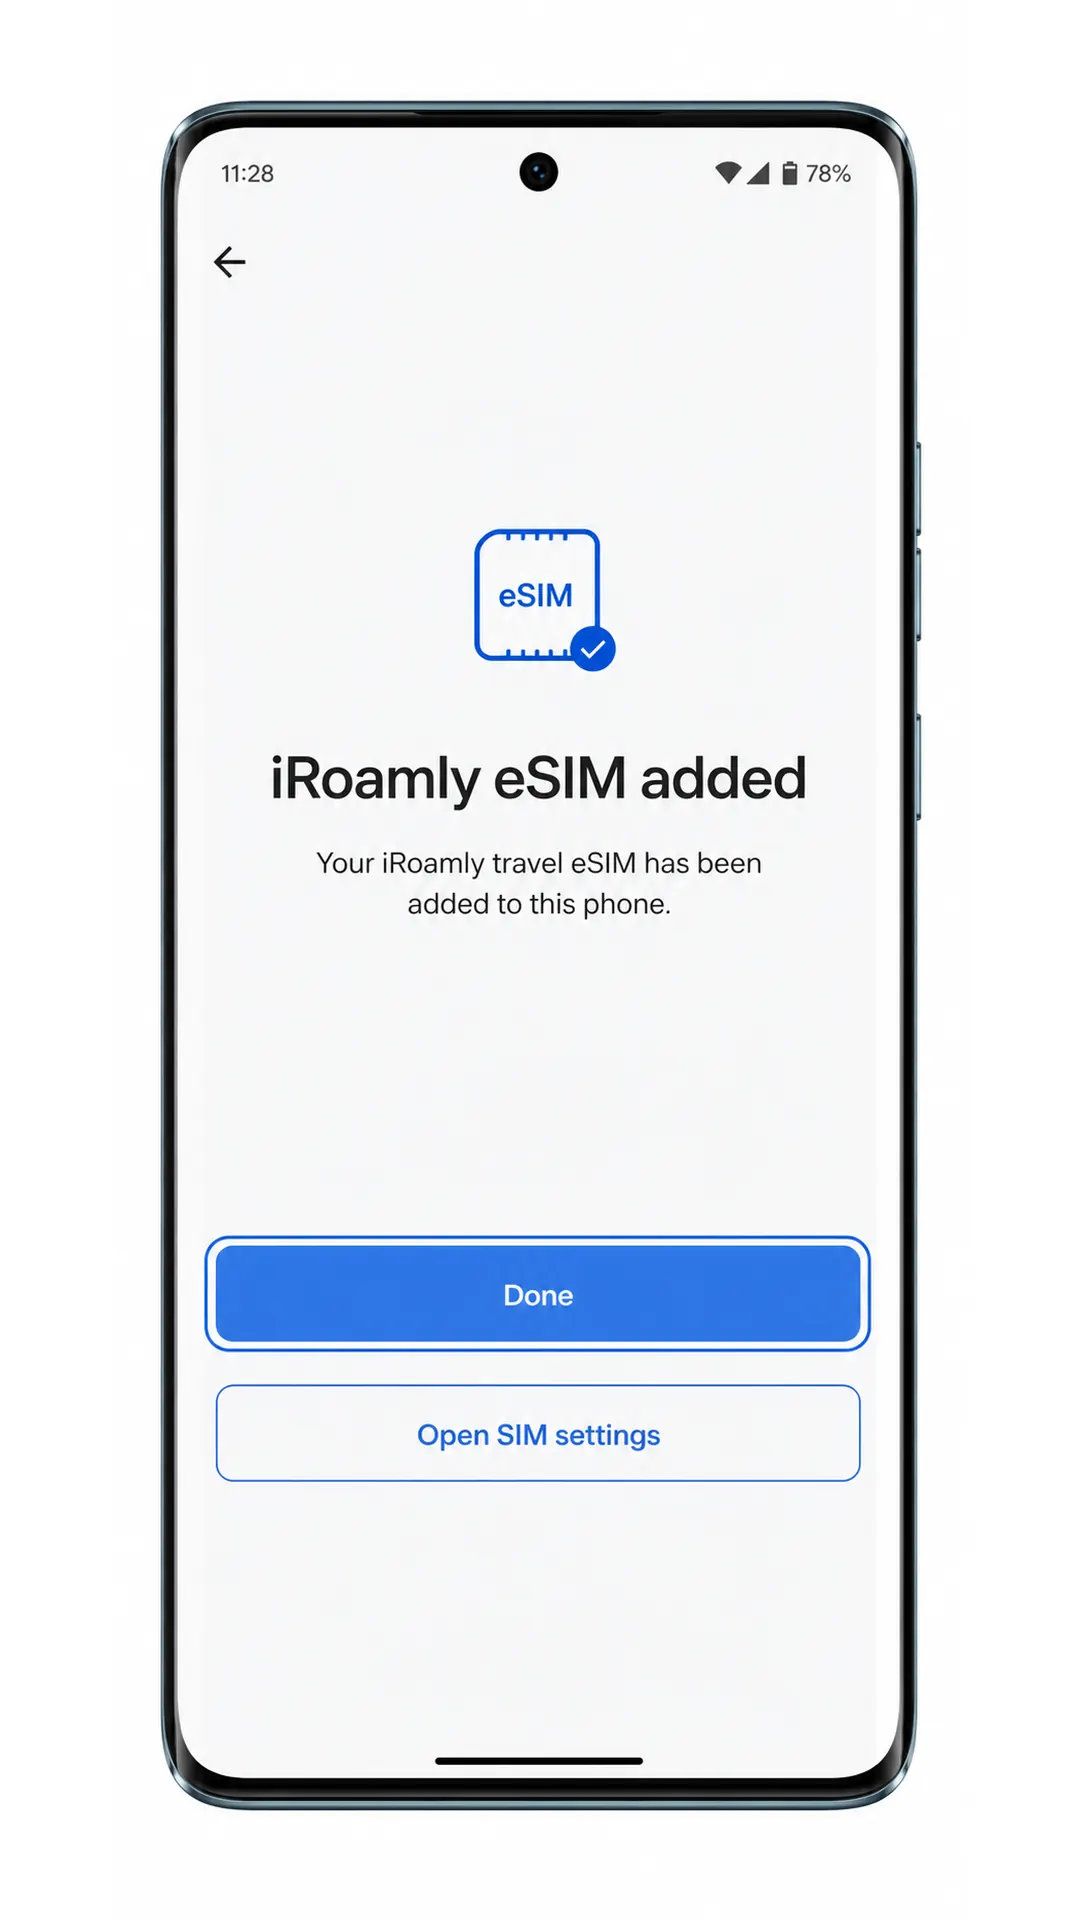
Tap Done when the Motorola Edge 60 Stylus confirms the iRoamly eSIM has been added.
Method 2: Install eSIM Manually
Open Settings, then tap Network & internet. Start from this page even if you already used it during the QR method.
Tap SIMs to open SIM and eSIM management.
Tap Add eSIM. If the page uses Add SIM, tap Add SIM and choose eSIM setup when prompted.
On the eSIM setup screen, tap Enter details manually. Some Android builds may phrase this as Enter activation code manually.
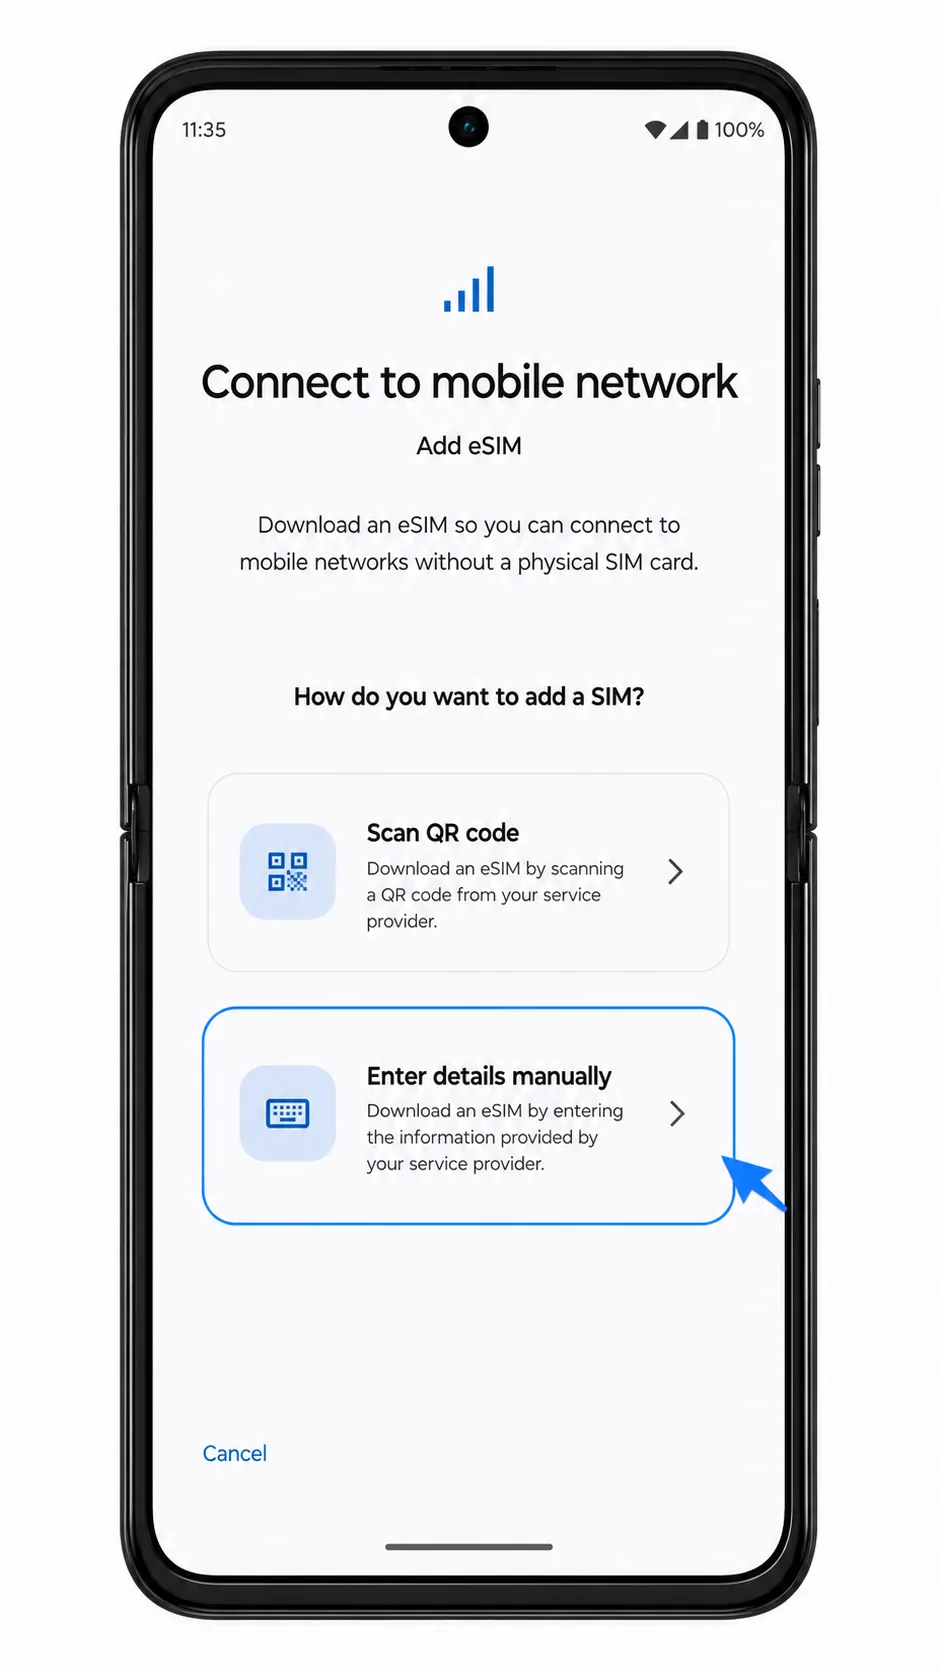
Enter the SM-DP+ Address and Activation Code from iRoamly. If iRoamly provides a confirmation code, enter it in the optional field, then tap Continue.
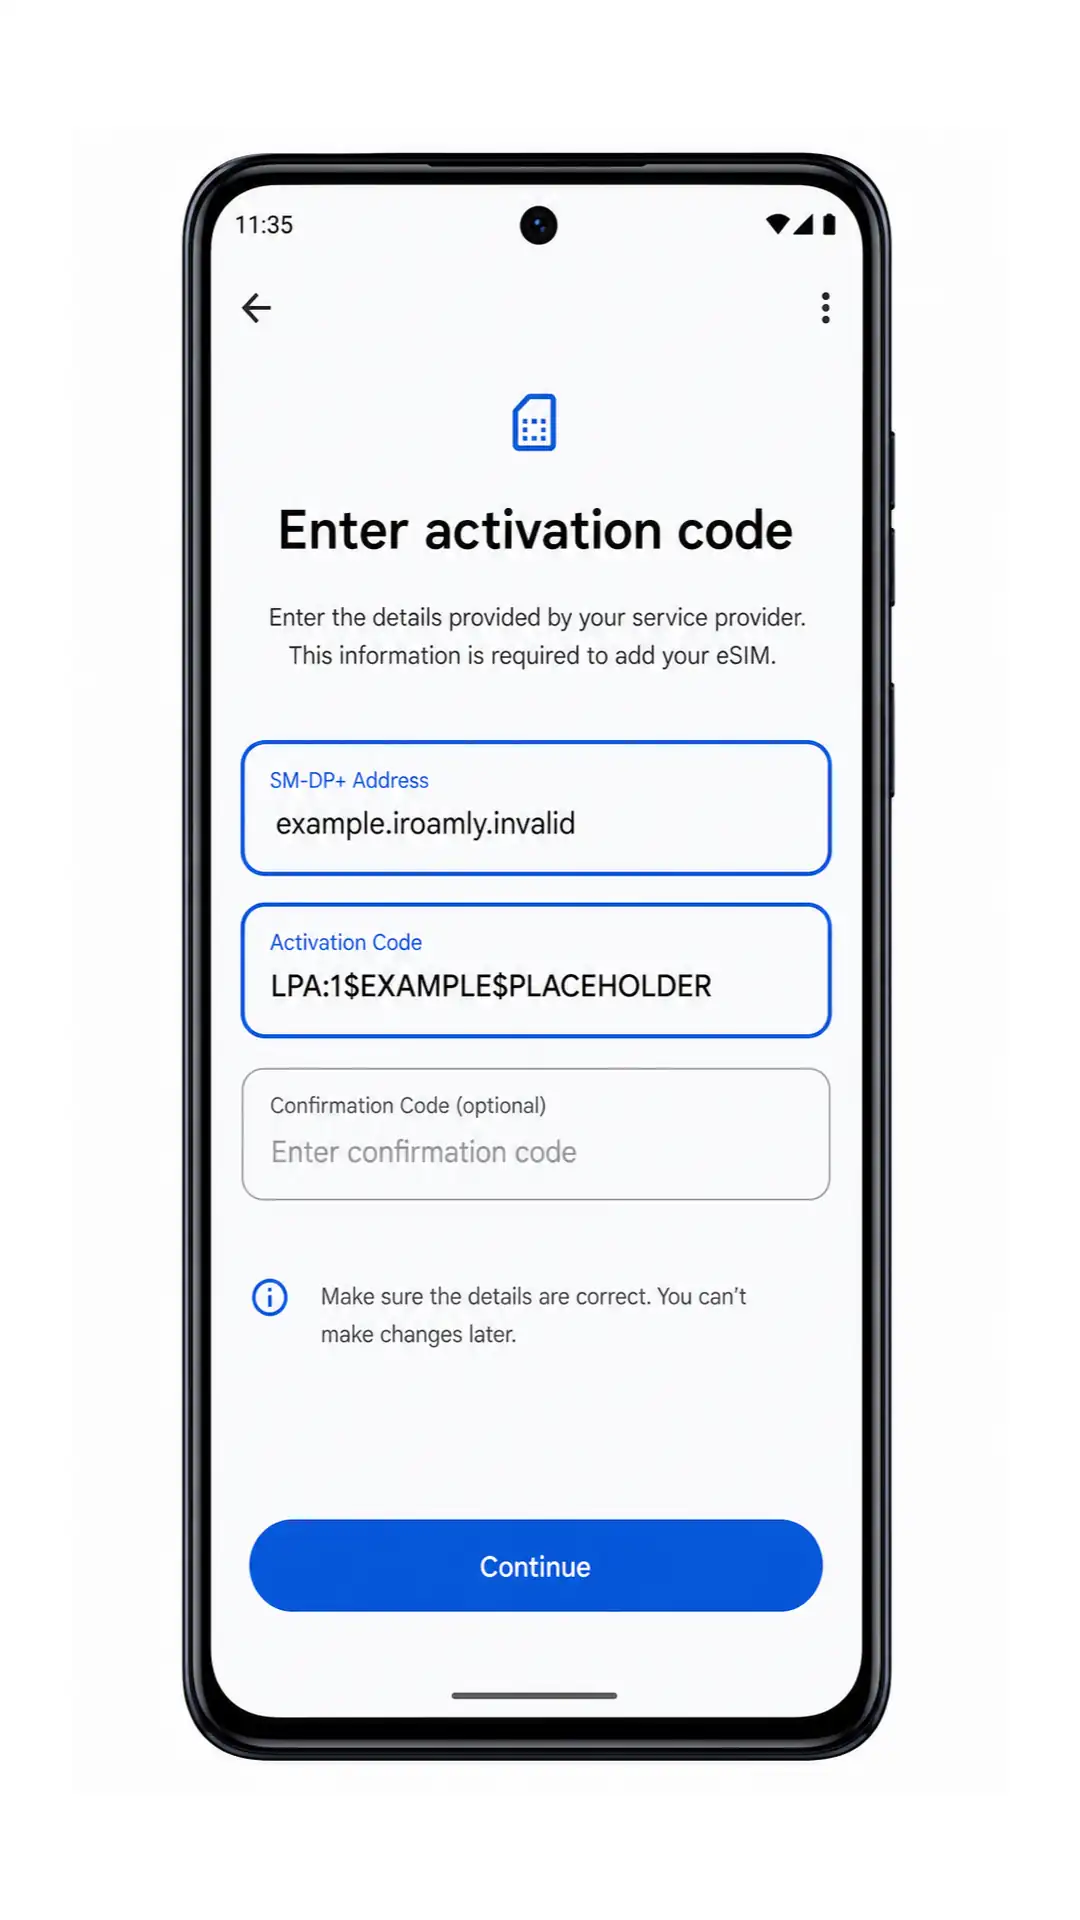
Review the iRoamly eSIM profile and tap Download. Keep Wi-Fi connected until the download finishes.
Tap Done when the Motorola Edge 60 Stylus confirms the iRoamly eSIM has been added.
How to Confirm Your iRoamly eSIM Is Installed
Go to Settings > Network & internet > SIMs. Look for iRoamly travel eSIM or a newly downloaded eSIM profile in the SIM list.
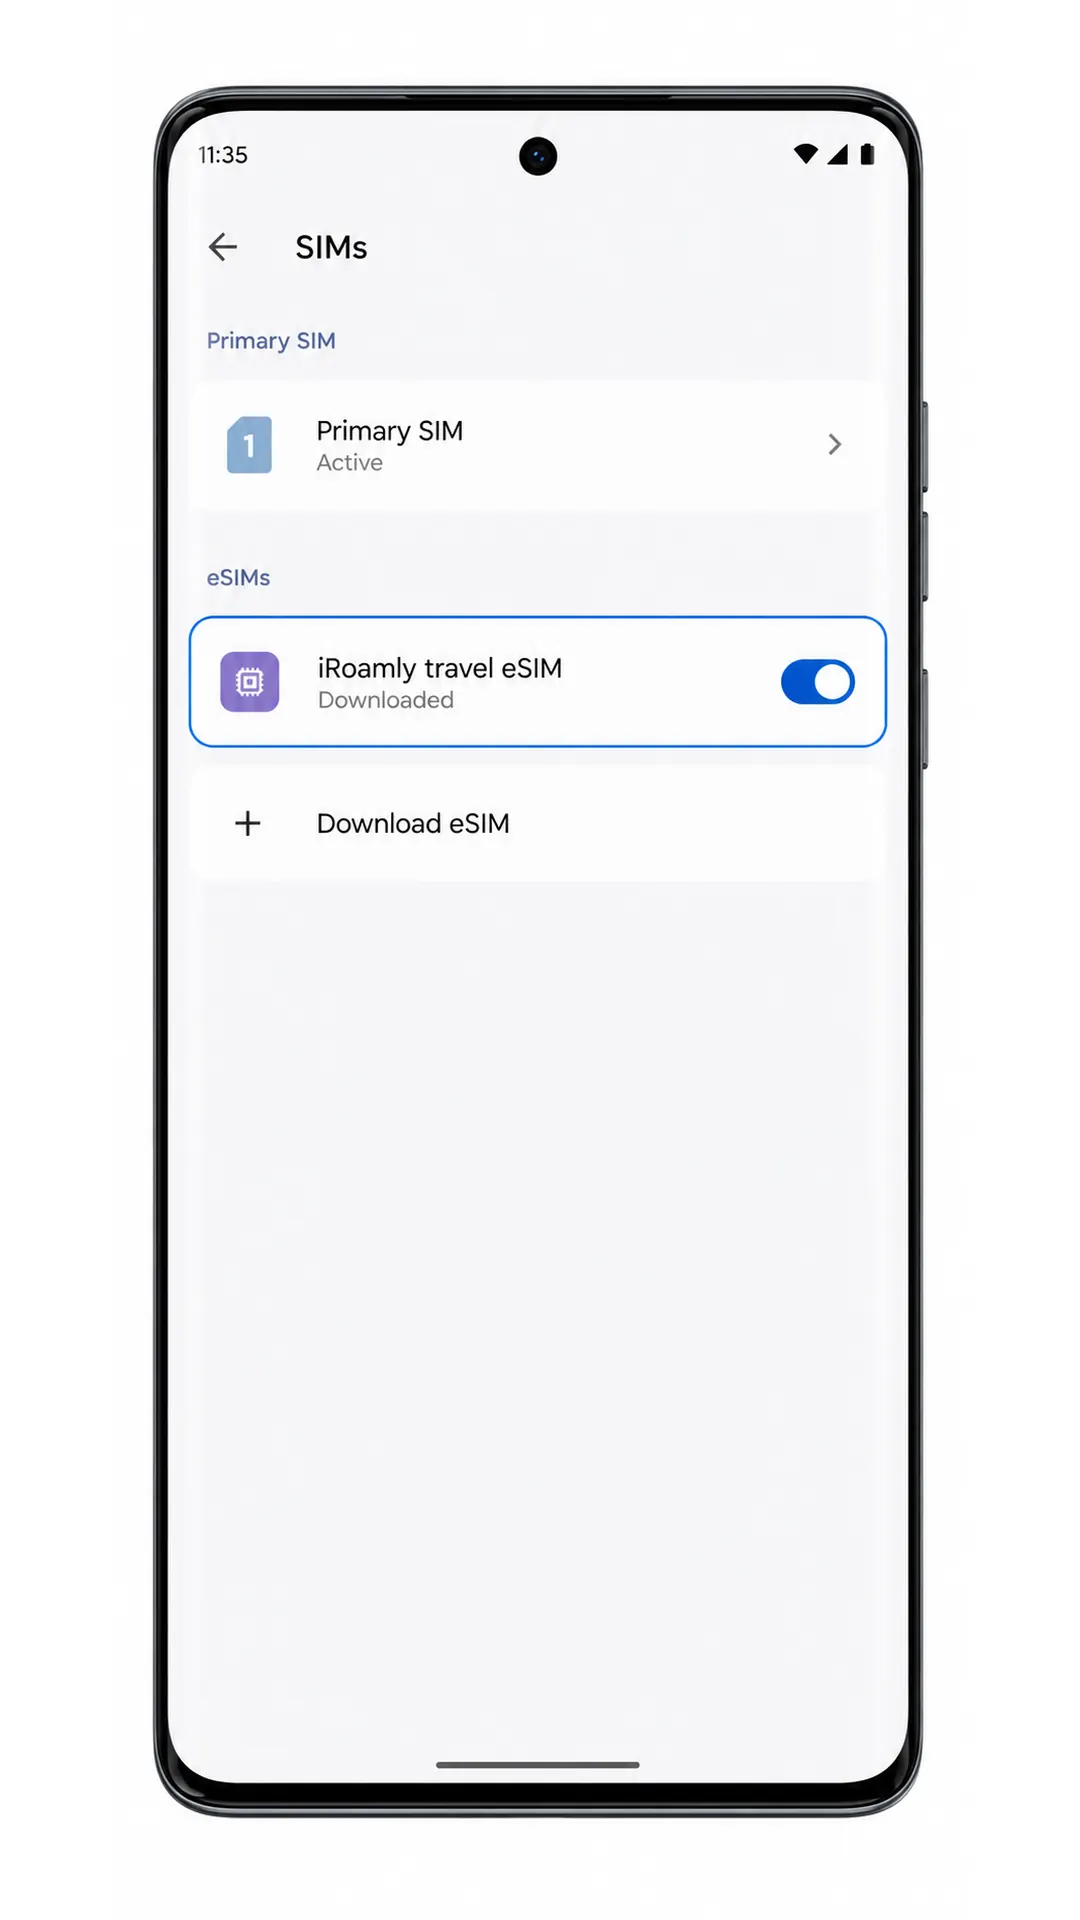
Tap the iRoamly eSIM profile and check that the line can be turned on. If the plan includes data only, do not use SMS or calling tests as proof of failure.
Configure eSIM for Mobile Data
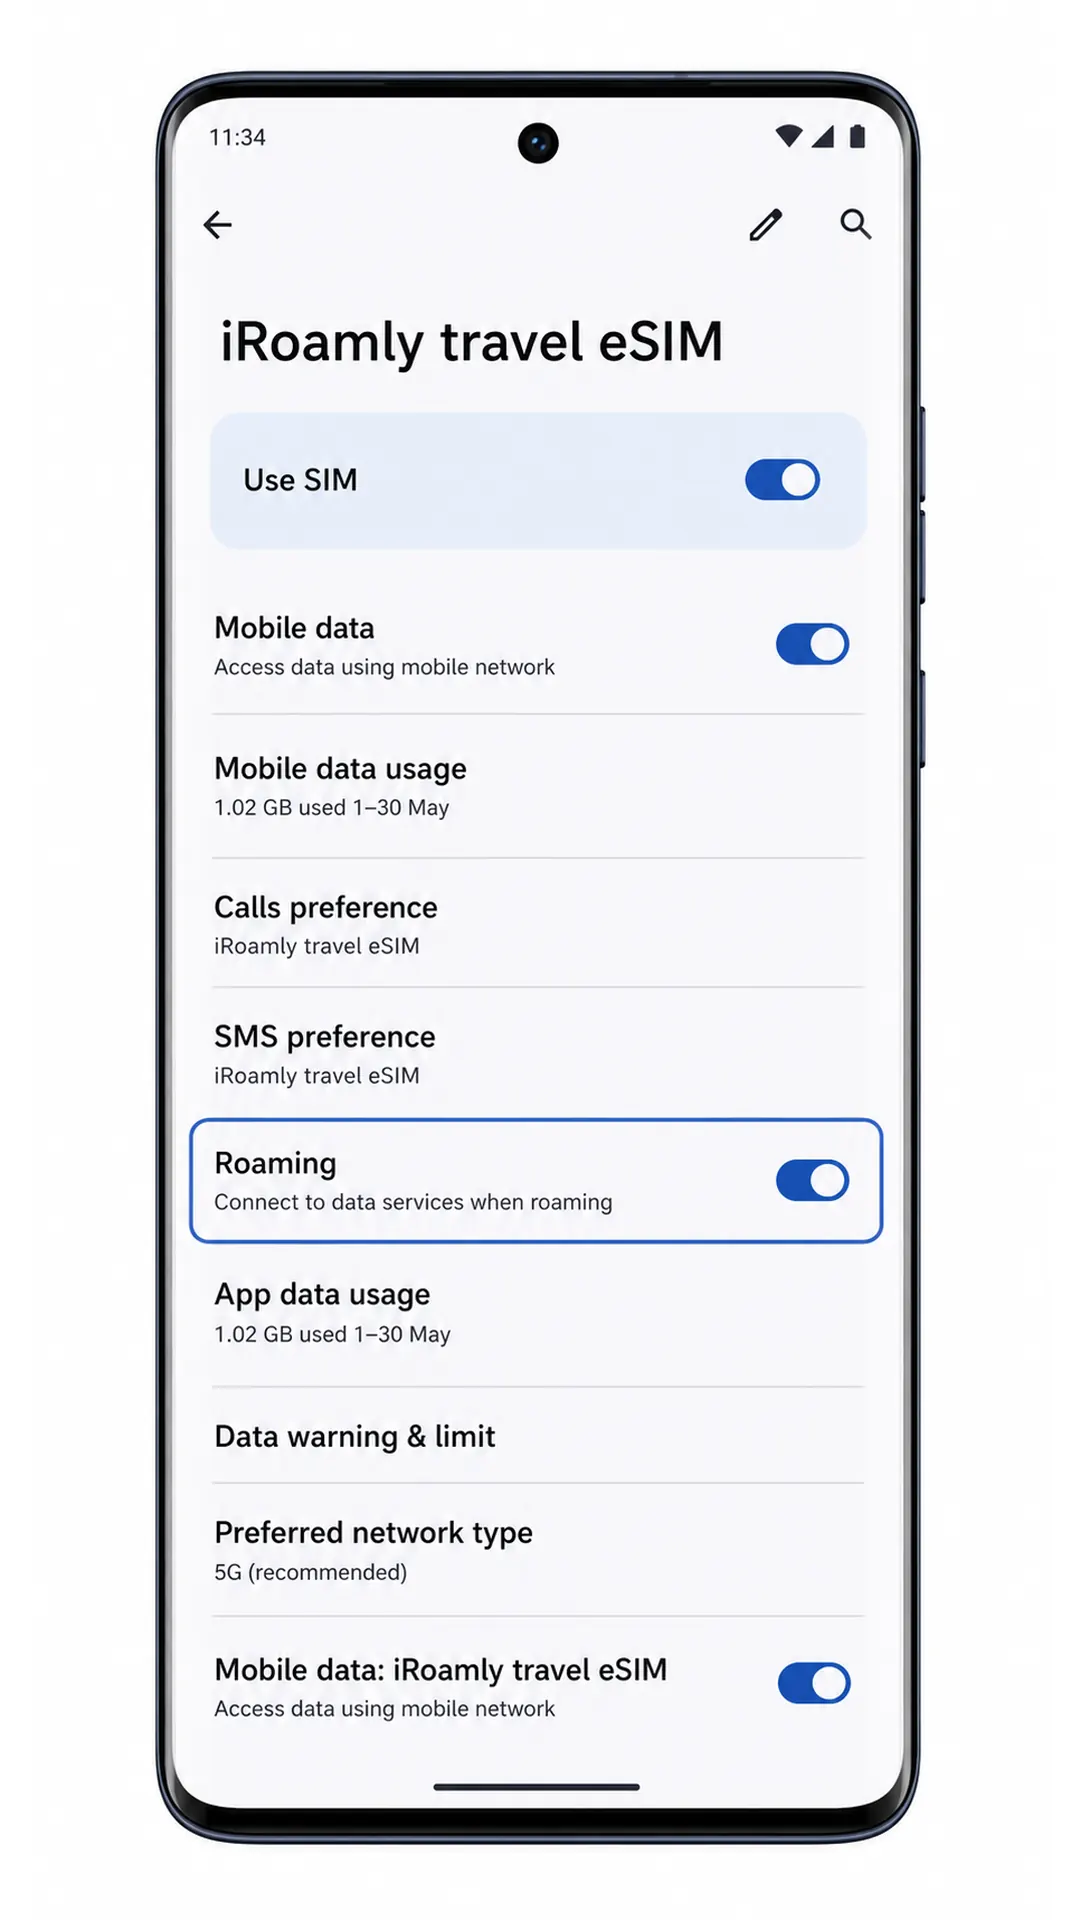
In Settings > Network & internet > SIMs, tap iRoamly travel eSIM and turn on Use SIM if it is off.
Tap Mobile data, then select iRoamly travel eSIM as the data SIM. This prevents the phone from using your primary SIM for travel data.
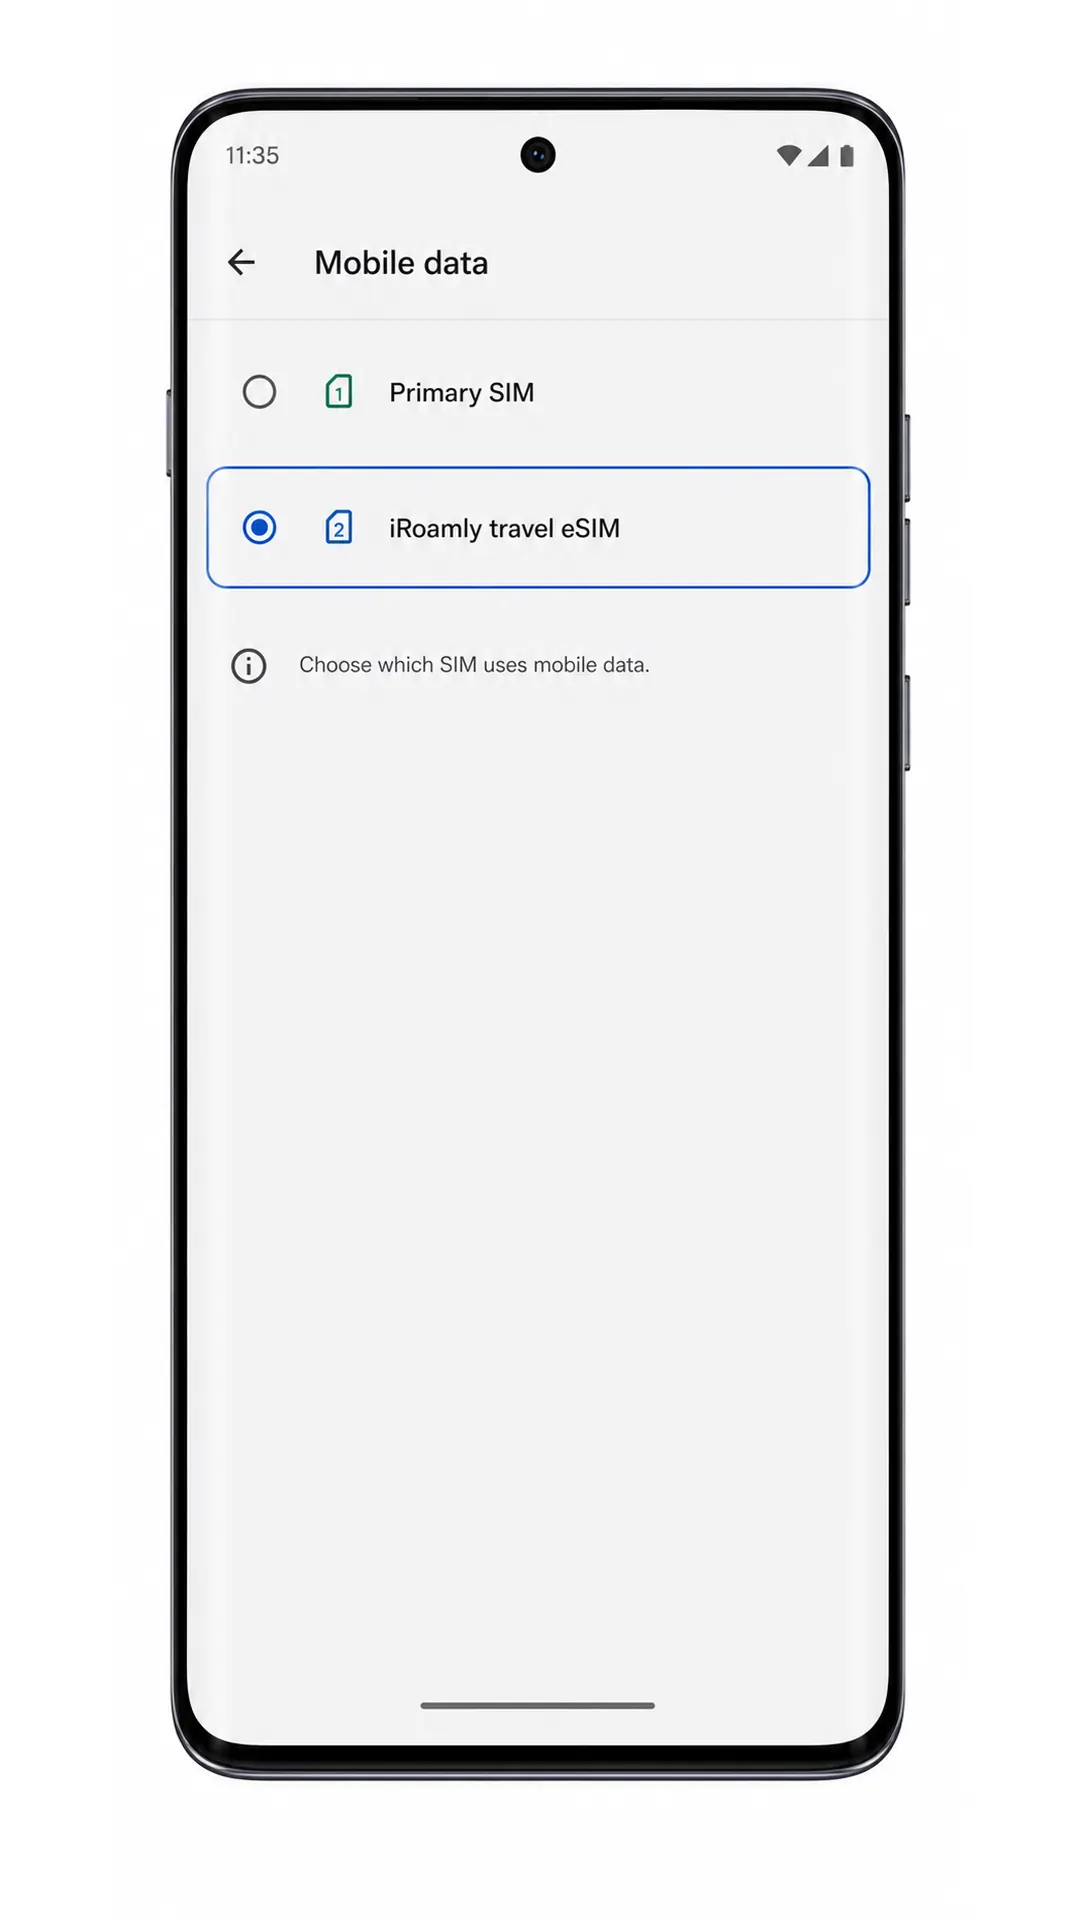
Return to the iRoamly eSIM detail page and turn on Roaming if your destination plan requires it. Then open a browser or maps app to test mobile data after you arrive in the covered country or region.
Troubleshooting
Add eSIM is missing: confirm your Motorola Edge 60 Stylus variant supports eSIM, install the latest software update, restart the phone, and check whether carrier firmware blocks eSIM setup.
QR code does not scan: increase screen brightness on the device showing the QR code, clean the camera lens, hold the code flat, or use manual entry instead.
QR code was already used: do not delete the installed profile. If the QR code was used on another device or the install failed after activation, contact iRoamly support before trying again.
Manual entry fails: check the SM-DP+ Address and Activation Code exactly as shown by iRoamly. Avoid extra spaces, line breaks, or swapped characters.
eSIM remains activating: keep Wi-Fi on, wait a few minutes, restart the phone if the screen suggests it, then check Settings > Network & internet > SIMs again.
eSIM does not appear after setup: return to the SIMs page, restart the phone, and confirm the setup reached the final Done screen.
No data after installation: select iRoamly travel eSIM for Mobile data, turn on Roaming when required by the plan, disable unwanted automatic switching to the primary SIM, and test again in the plan's covered destination.
Voice or SMS does not work: many travel eSIM plans are data-only. Check your iRoamly plan details before expecting calls or texts.
You deleted the eSIM by mistake: do not keep trying the same QR code. Contact iRoamly support because many eSIM QR codes are single-use.
More Motorola Edge eSIM Setup Guides
Setting up another Motorola phone? These eSIM activation guides may help.
Conclusion
With your iRoamly eSIM installed, your Motorola Edge 60 Stylus is ready to use travel data whenever your plan activates in a supported destination. Preparing everything before you leave means you can spend less time adjusting settings after arrival and more time focusing on your trip.
Before departure, keep your activation information until you've confirmed everything is working properly, and review your plan's coverage and included services. A few final checks can help you avoid common connectivity issues and make your travel experience much more seamless.