
The Motorola Razr 50 Ultra supports eSIM on compatible regional variants, which makes it a practical phone for travelers who want mobile data without swapping a physical SIM. This guide assumes the phone is unfolded and running Android 14 with Motorola Hello UI, where the eSIM path appears under Settings > Network & internet > SIMs.
An iRoamly travel eSIM can be installed before a trip so the data line is ready when you arrive. The fastest setup is usually scanning the iRoamly QR code, but manual entry is useful if you are reading the QR code on the same phone, the camera cannot scan clearly, or the QR code has to be entered from account details.
The steps below cover both QR code installation and manual eSIM entry on the Motorola Razr 50 Ultra. Menu names can vary slightly by software build, region, or carrier firmware, so use the labels shown here as the expected Android 14 path.
Before You Set Up Your iRoamly eSIM
Connect the Motorola Razr 50 Ultra to stable Wi-Fi before starting. eSIM download can fail on weak or captive networks.
Confirm your Razr 50 Ultra model supports eSIM in your region and is carrier-unlocked if you plan to use a travel eSIM.
Keep your iRoamly QR code, SM-DP+ Address, Activation Code, and optional Confirmation Code available before opening Settings.
Install the iRoamly eSIM 1-2 days before travel when possible, but do not casually delete it after installation. Many eSIM profiles cannot be reinstalled after removal.
Check the specific iRoamly plan details before installing. Plan validity starts from activation, and for many travel eSIM plans activation means the eSIM is installed or first connects to a supported destination network, depending on the plan rules.
iRoamly plans may be data-only. Voice calls and SMS availability varies by plan, so do not assume calls or texts are included unless your selected plan says so.
Method 1: Install eSIM by Scanning a QR Code
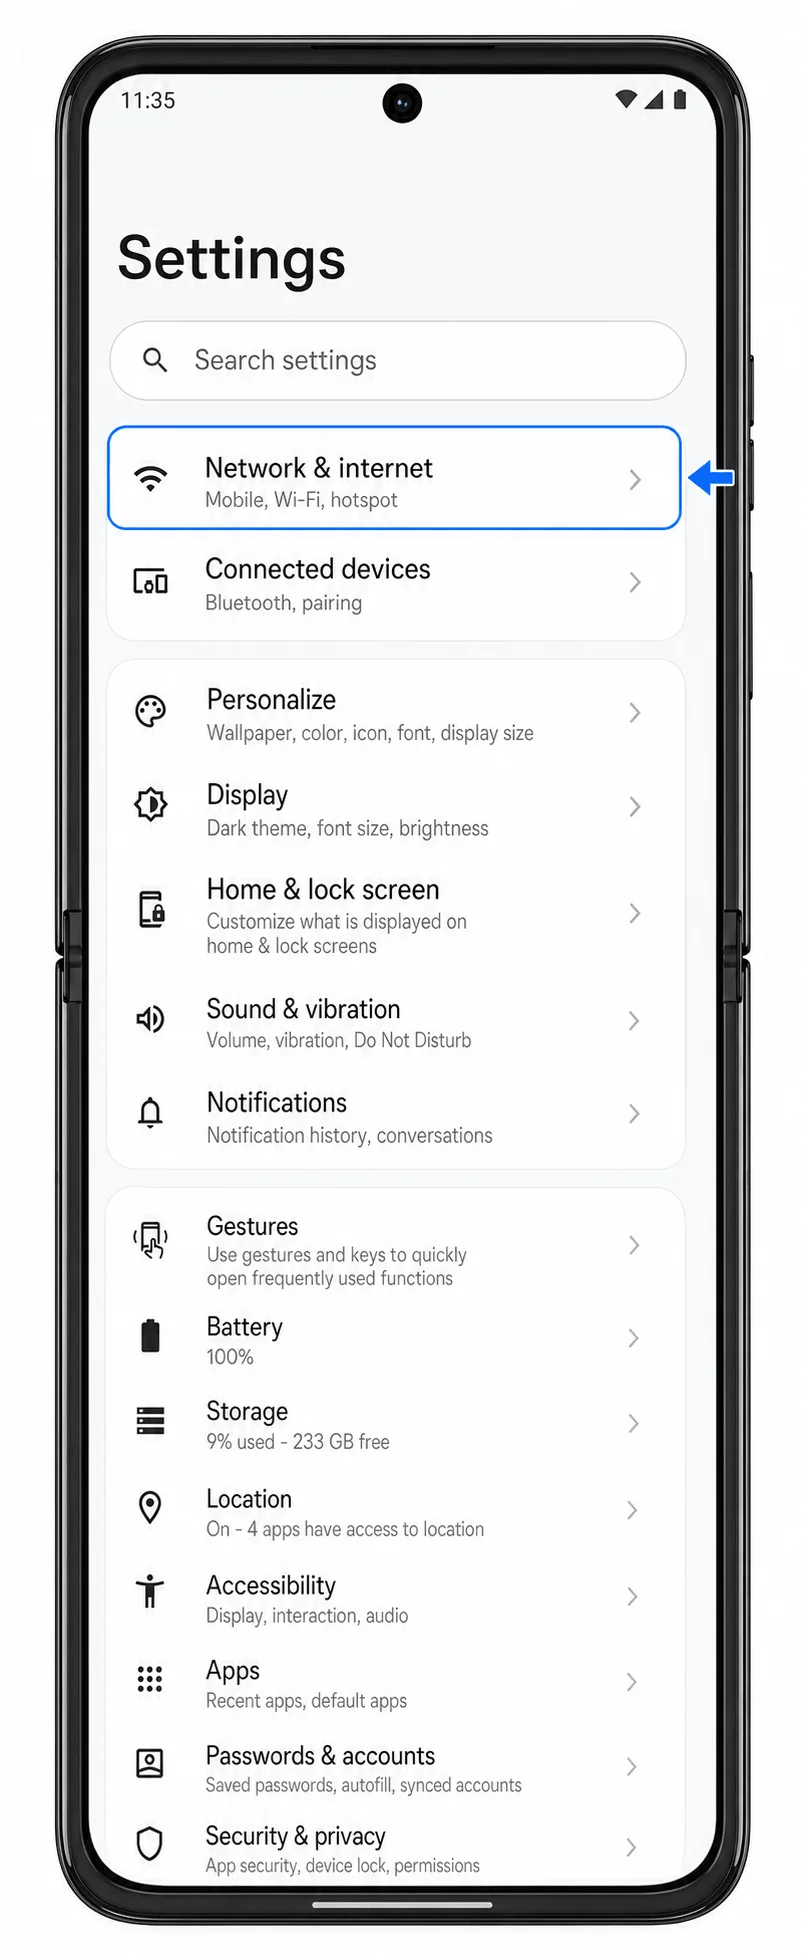
Open Settings, then tap Network & internet. You should see the network settings menu with internet, SIM, hotspot, and VPN options.
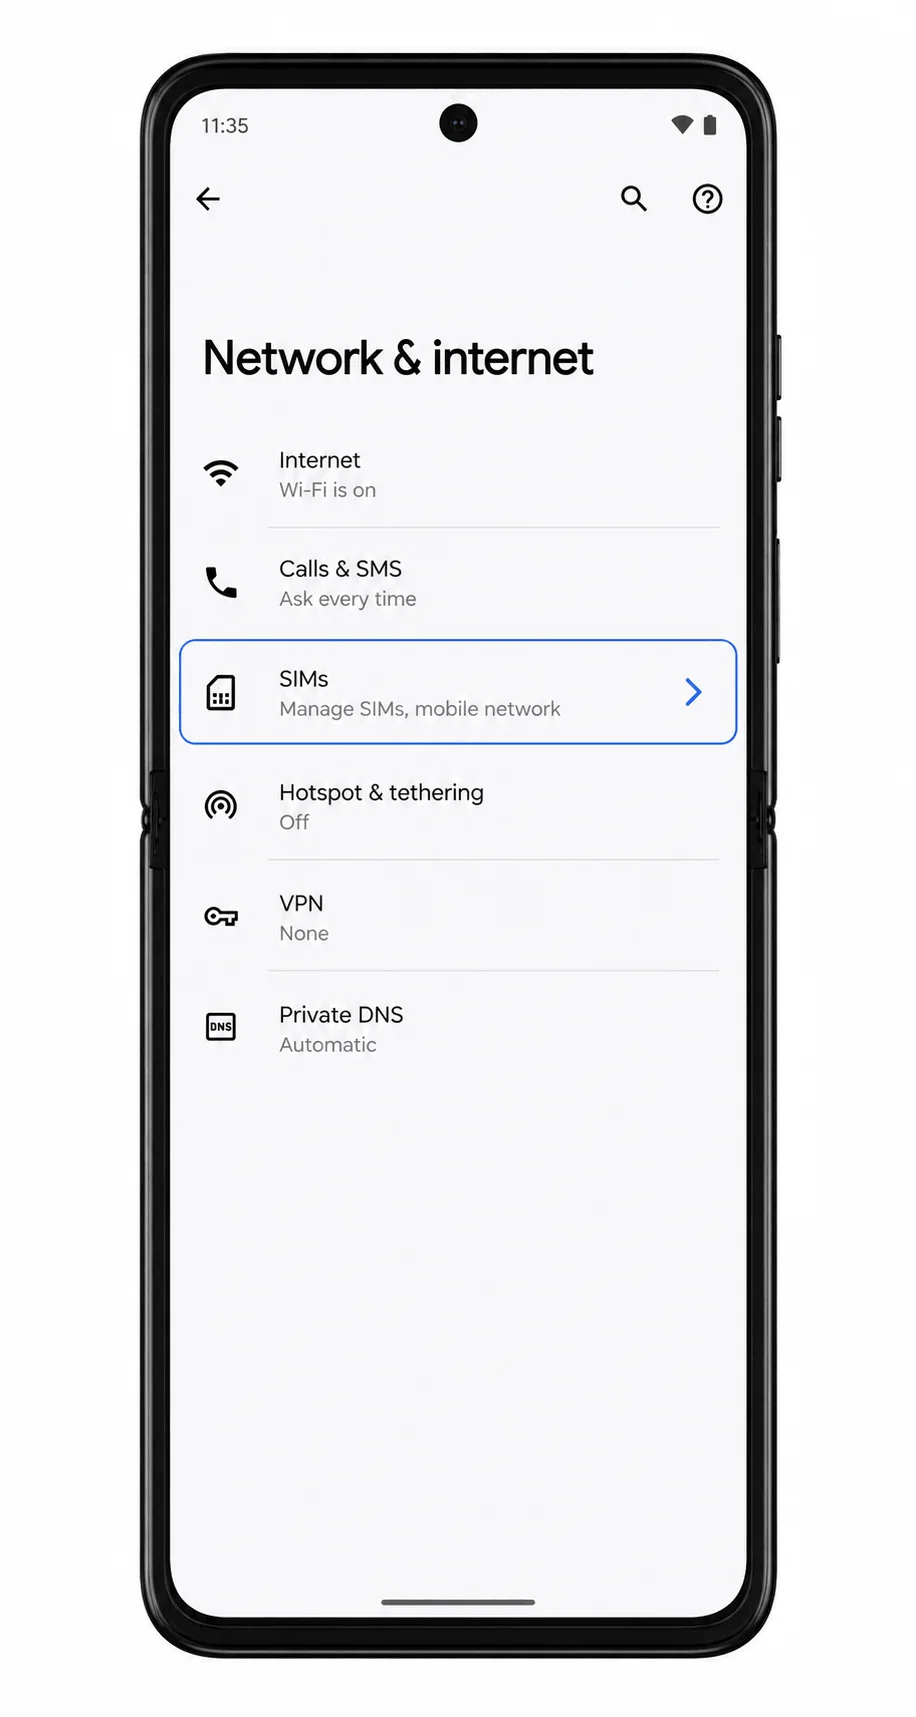
Tap SIMs. The phone should open the SIM management page where physical SIMs and downloaded eSIMs are managed.
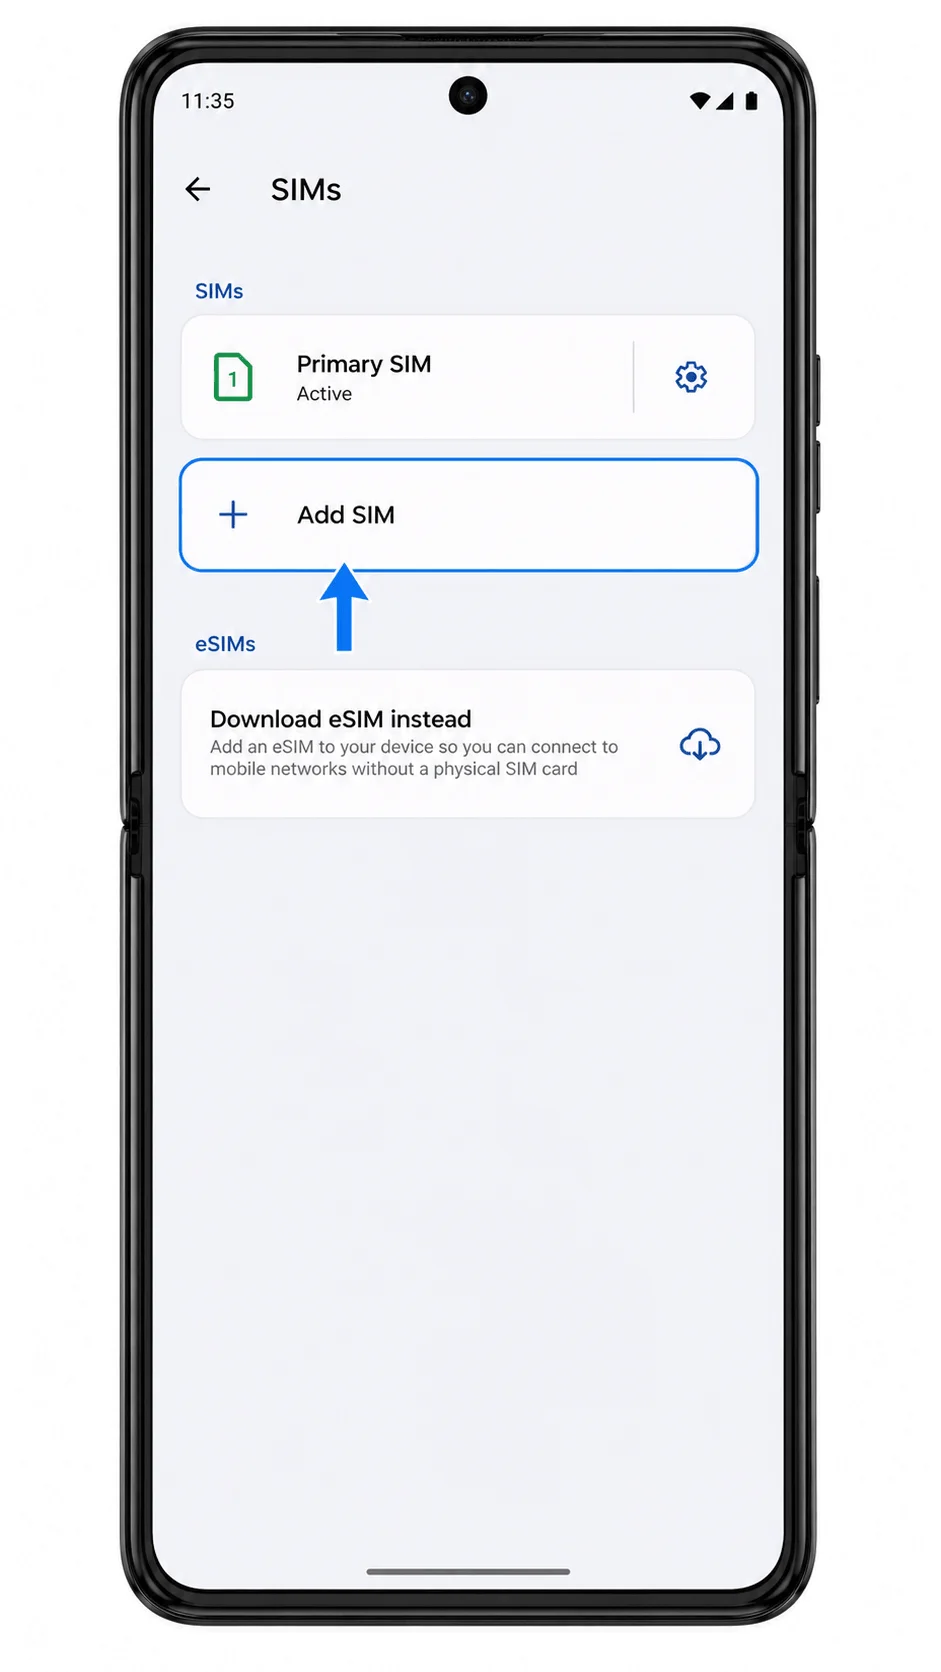
Tap Add SIM. The Razr 50 Ultra should start the add-SIM flow for a physical SIM or eSIM.
Choose the eSIM option. If the phone asks whether to use a physical SIM or download a SIM, tap Download a SIM instead; if it shows setup options directly, tap Scan QR code.
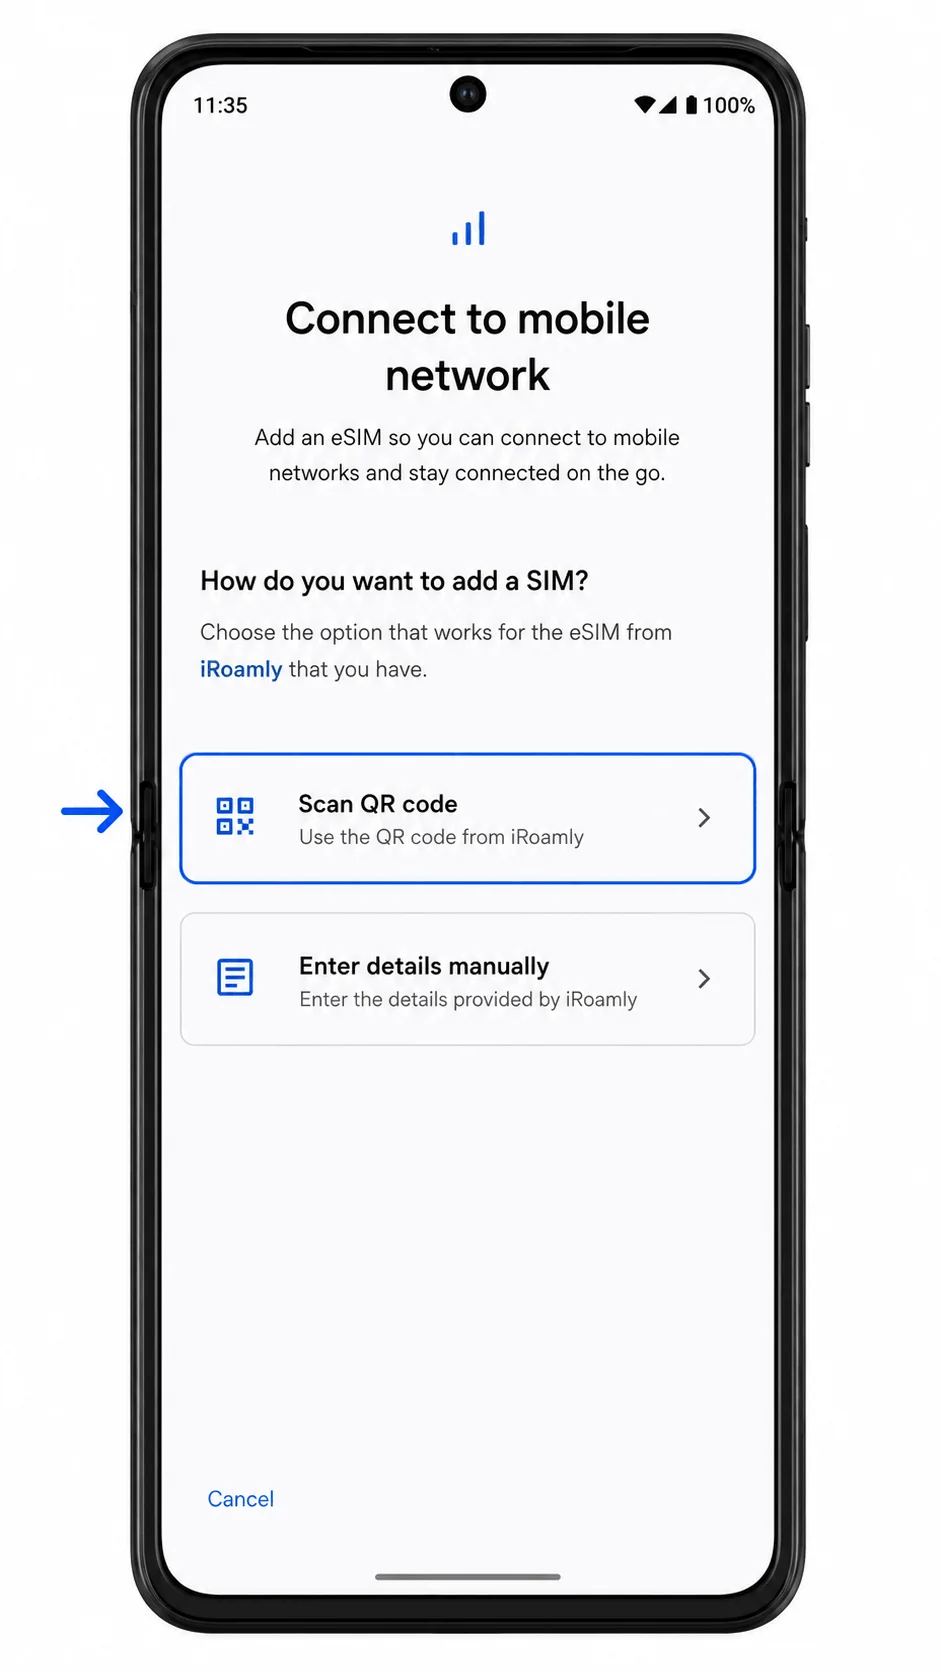
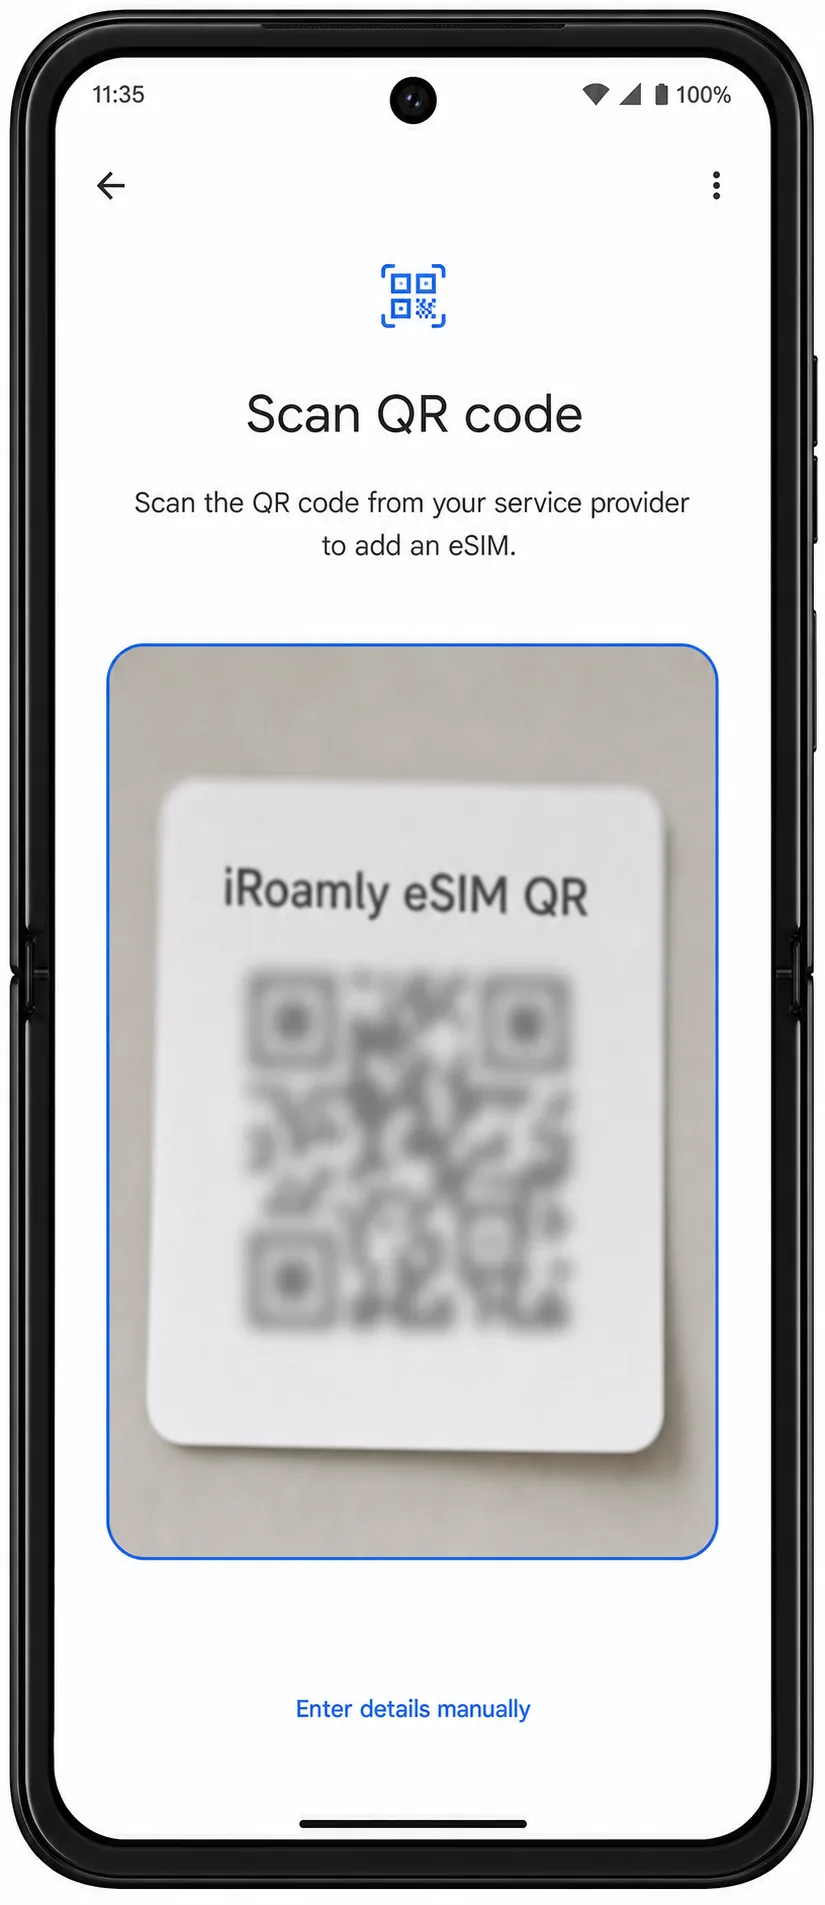
Point the Razr 50 Ultra camera at the iRoamly QR code from your order email or iRoamly account. Keep the QR code flat, bright, and fully inside the scan frame until the phone recognizes it.
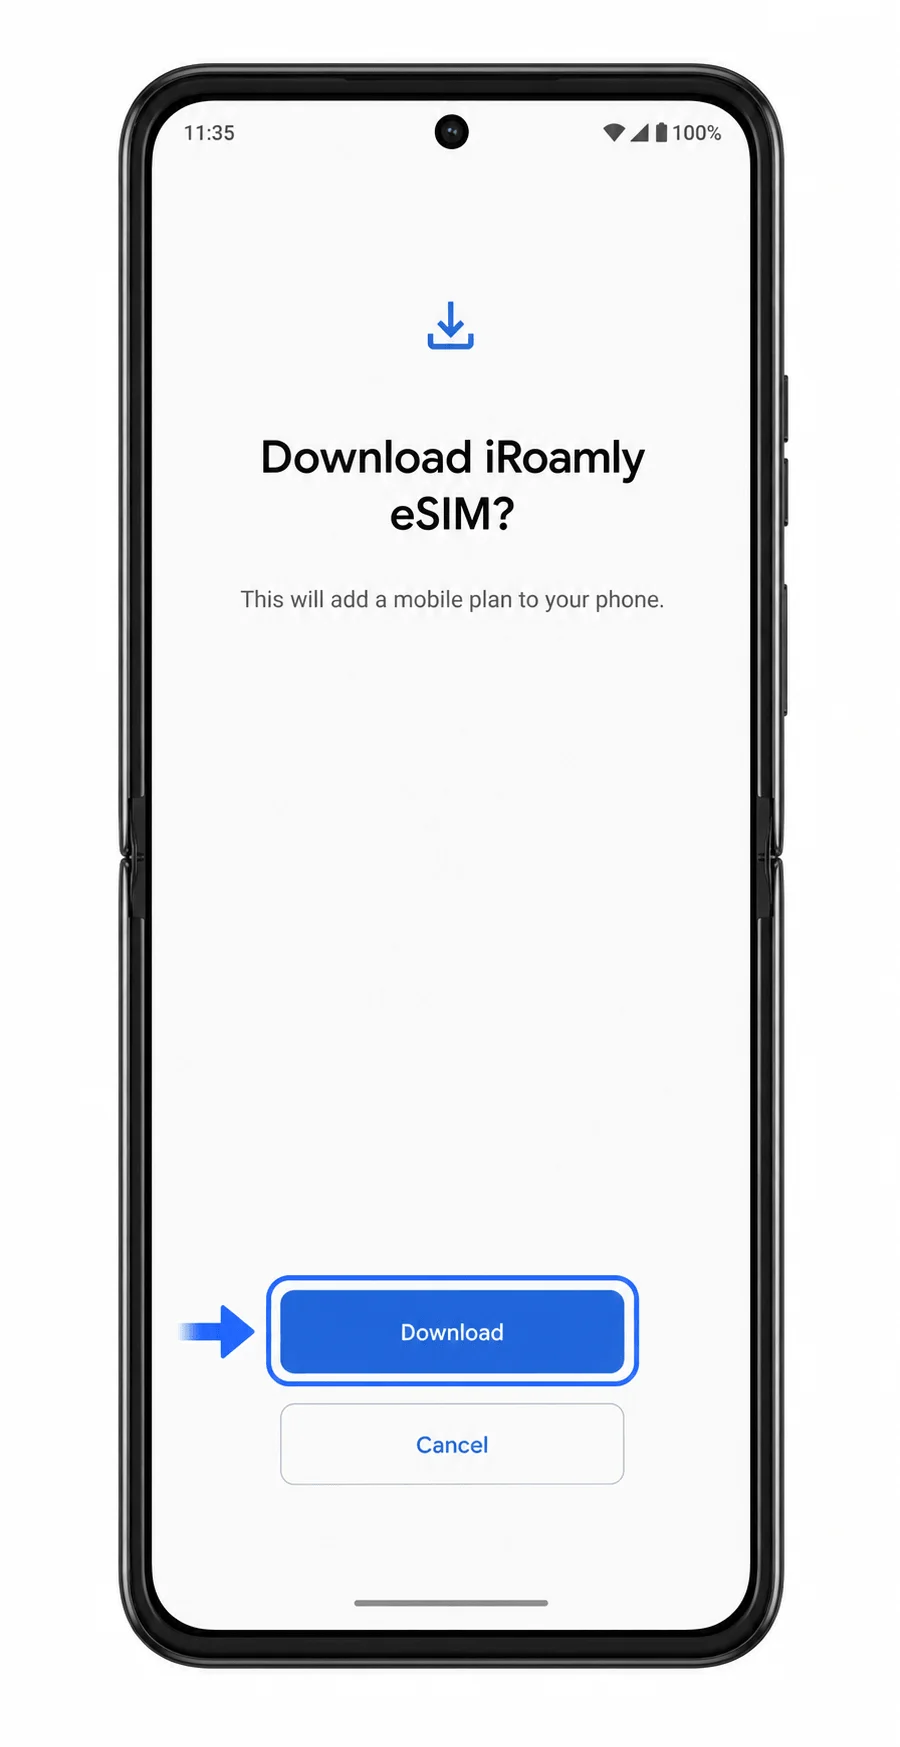
When the phone shows the iRoamly eSIM download confirmation, tap Download. Wait on Wi-Fi until the eSIM finishes downloading and the phone returns to the SIM settings page or shows a setup-complete message.
Method 2: Install eSIM Manually
Open Settings, then tap Network & internet. This starts from the same verified Motorola Android path as the QR method.
Tap SIMs. You should see the page that lists existing SIMs and lets you add another SIM profile.
Tap Add SIM. The phone should open the SIM setup flow.
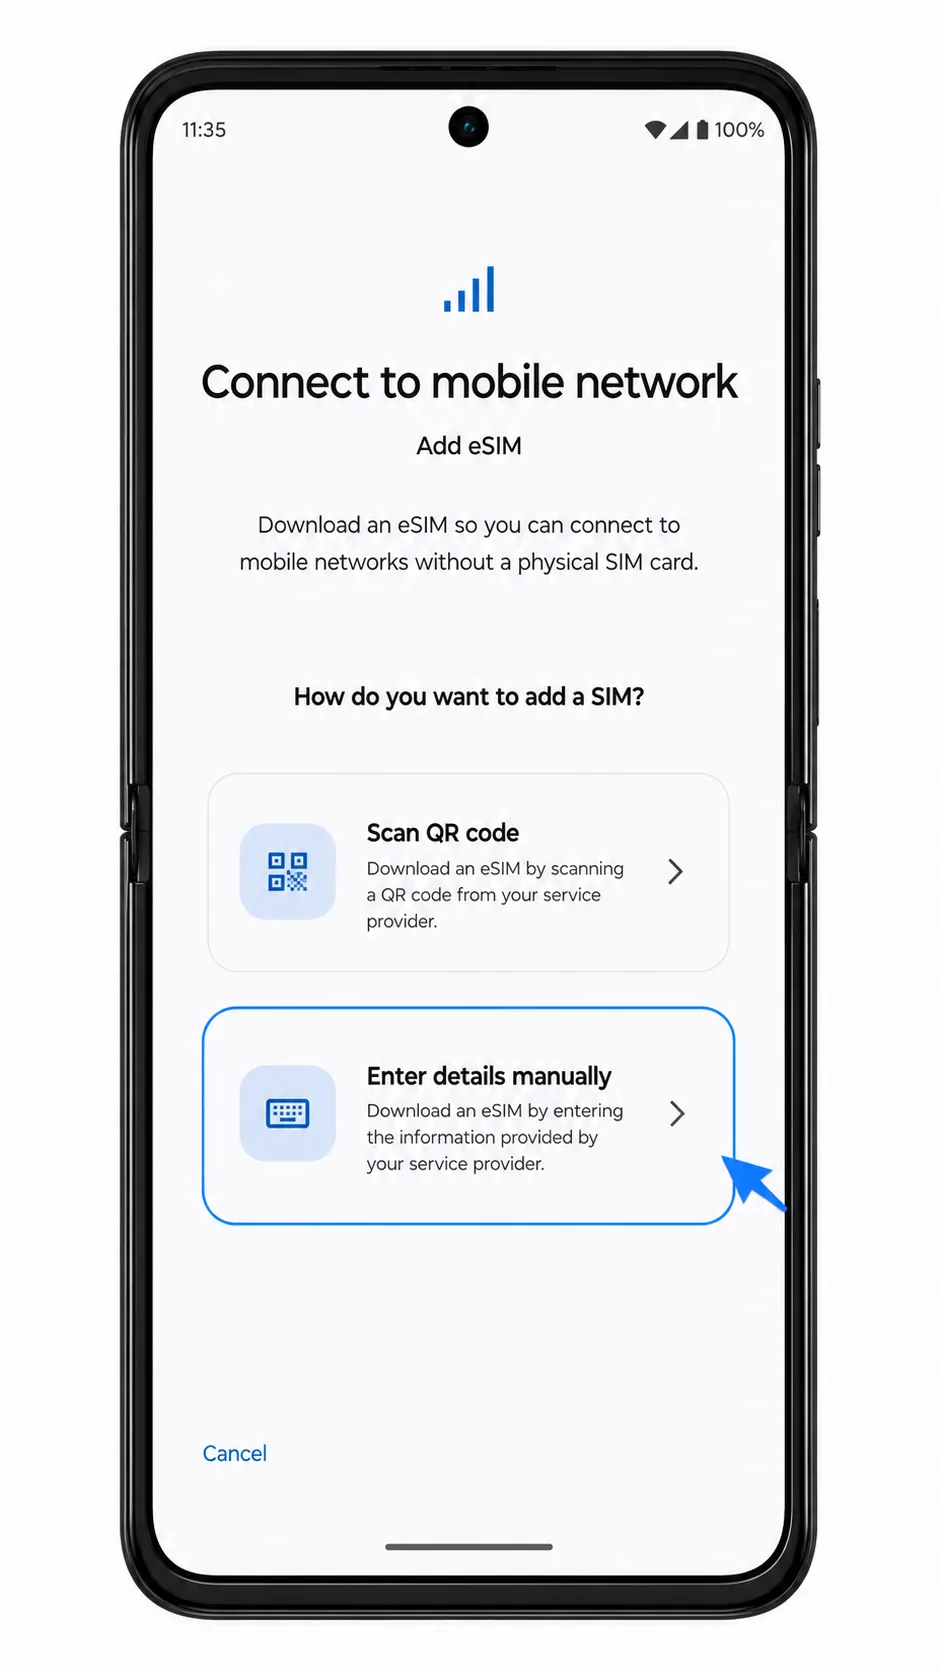
Choose the manual option. If the phone first shows a QR scanner, tap Enter details manually; if it shows setup choices, tap Enter details manually there.
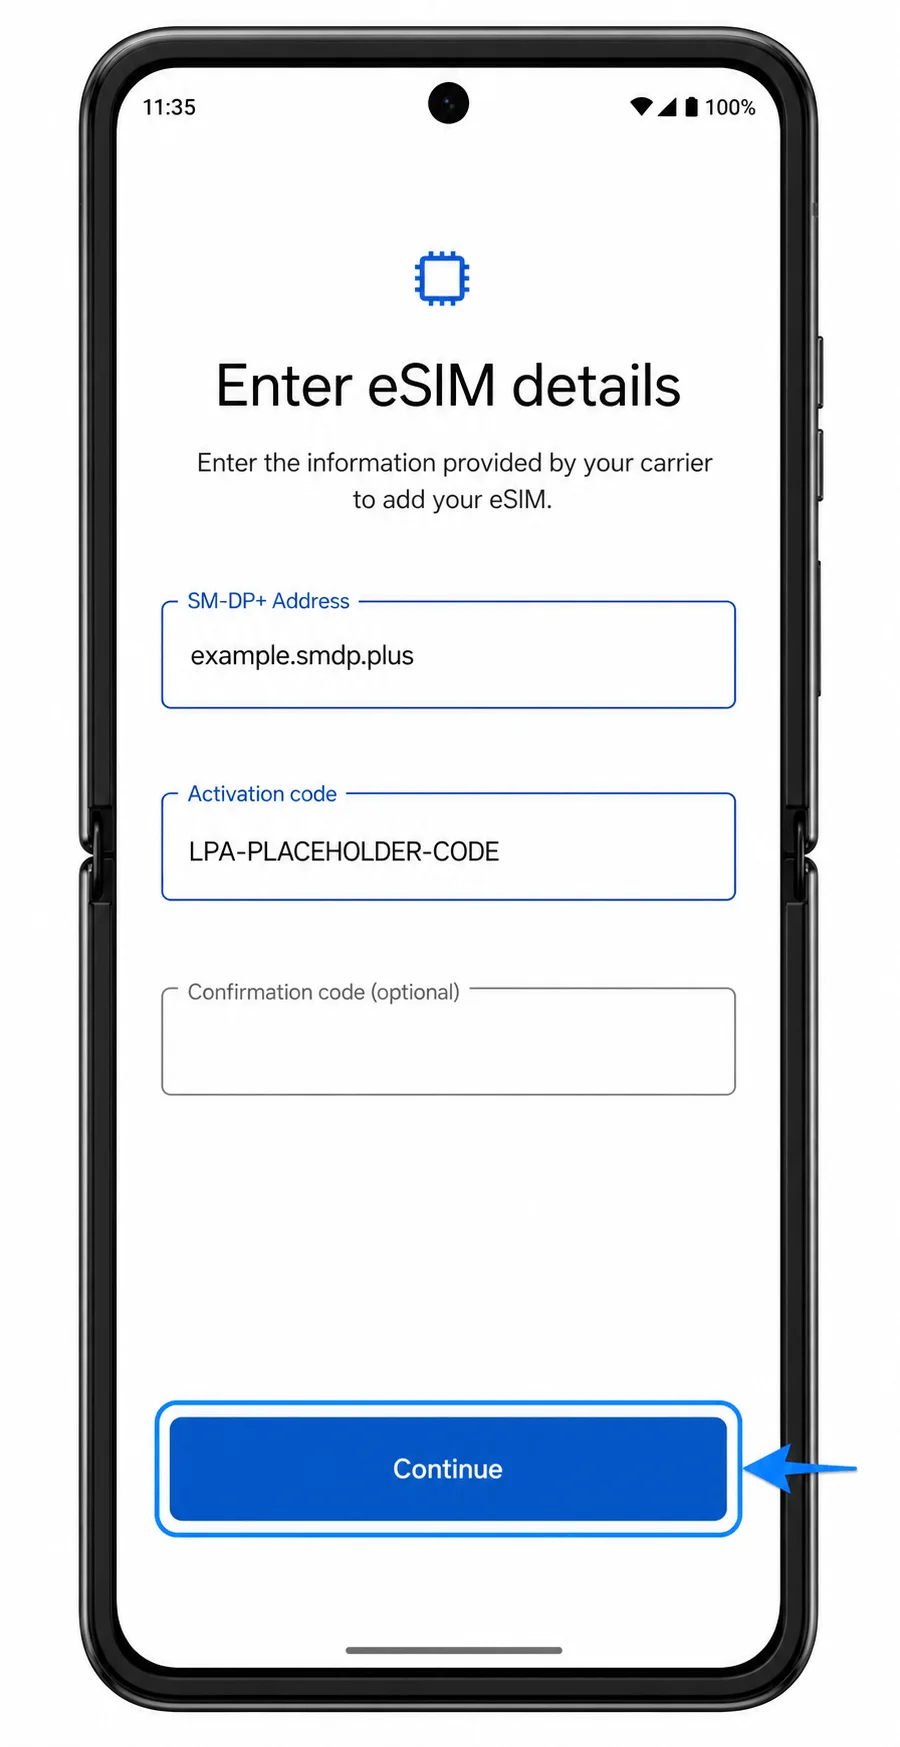
Enter the iRoamly SM-DP+ Address and Activation Code exactly as provided. If iRoamly gives a Confirmation Code, enter it in the optional confirmation field; otherwise leave that field blank, then tap Continue.
Review the eSIM download confirmation, then tap Download. Keep the phone connected to Wi-Fi until the iRoamly eSIM profile is added.
How to Confirm Your iRoamly eSIM Is Installed
Go to Settings > Network & internet > SIMs. Look for a new eSIM entry, usually shown as iRoamly Travel eSIM, Downloaded SIM, or a similar label from the installed profile.
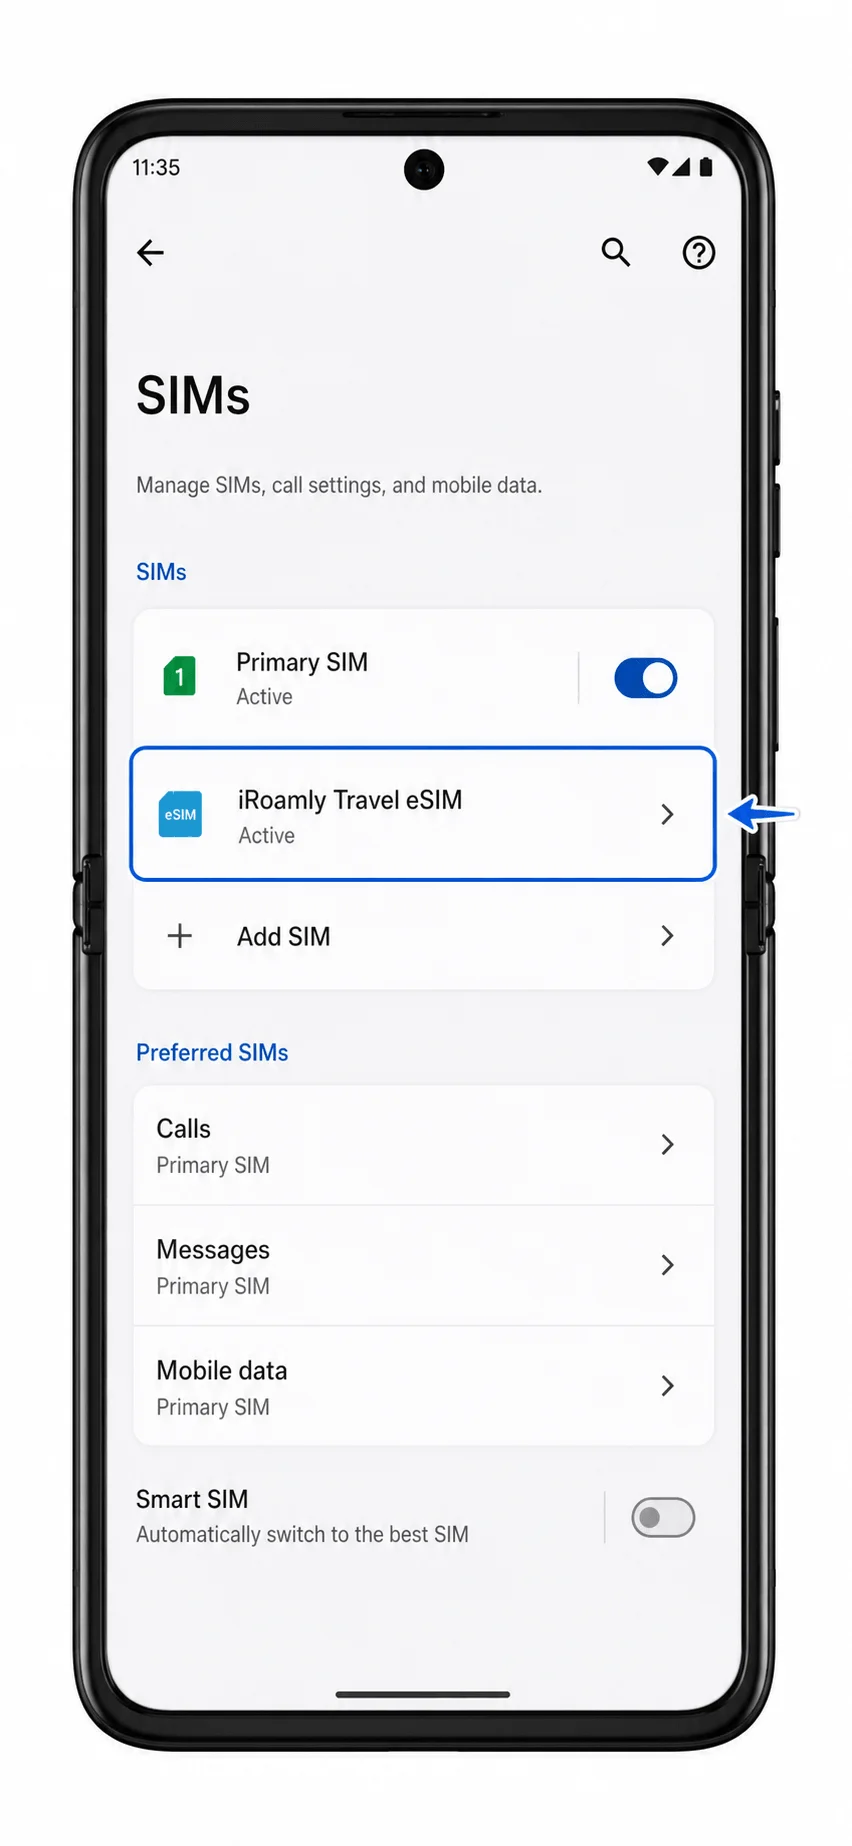
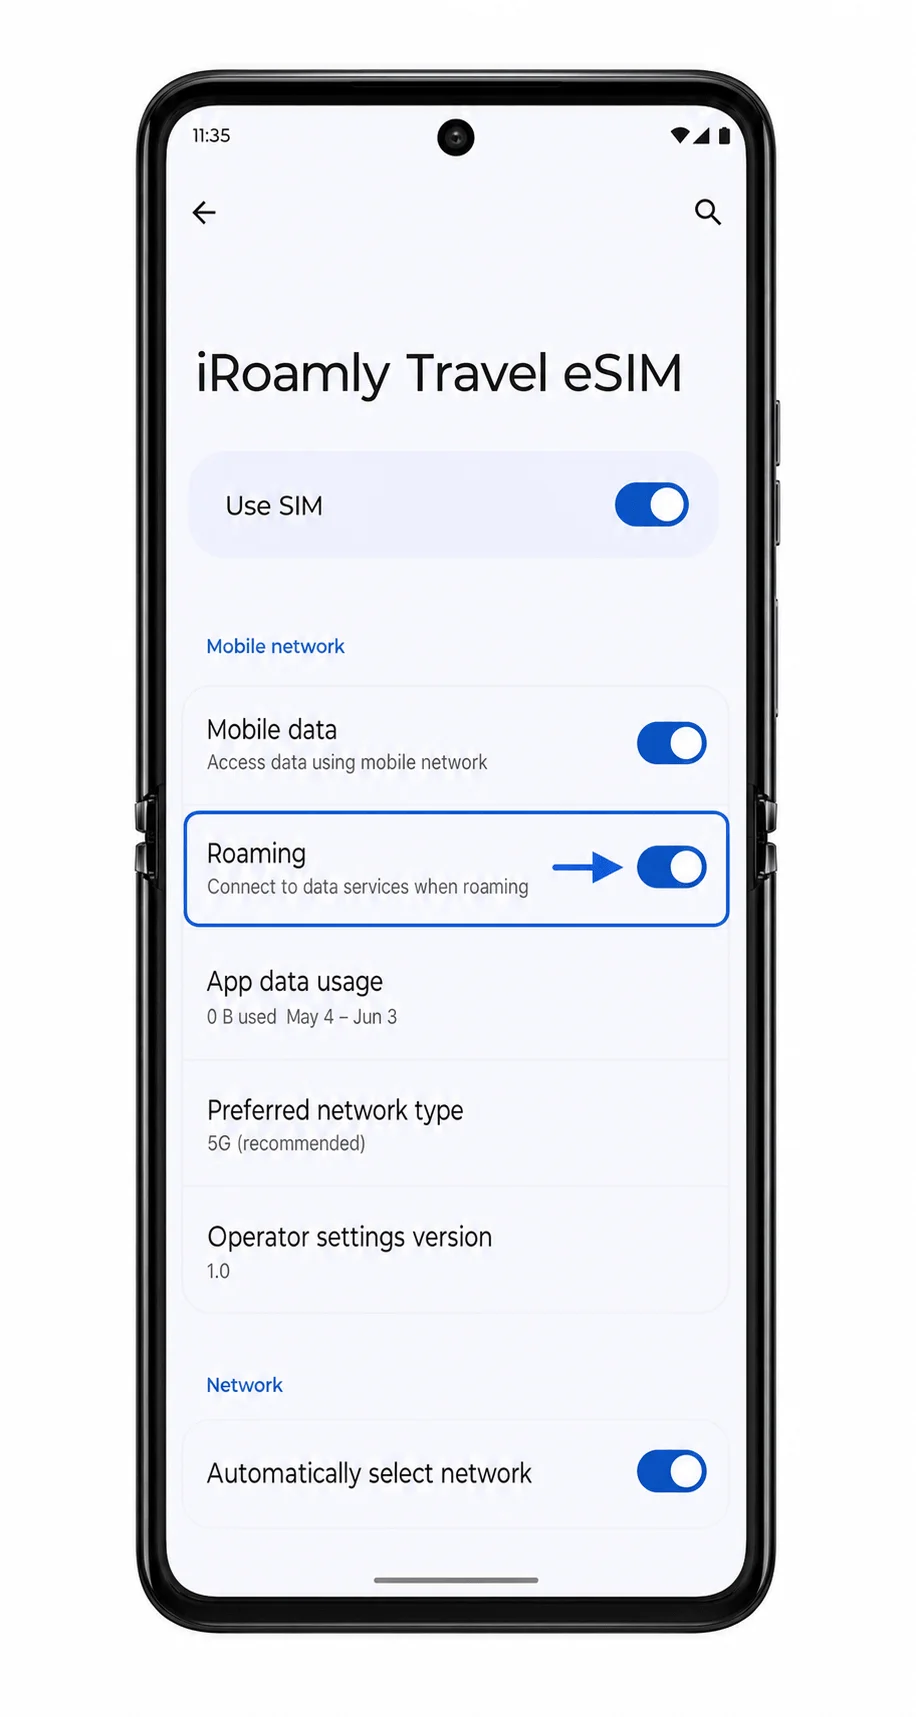
Tap the iRoamly eSIM entry and confirm Use SIM is turned on. If you have not reached your destination yet, signal may remain limited or pending until the plan can connect to a supported local network.
After arrival, turn off Wi-Fi briefly and open a web page or map app to test mobile data. Test SMS or calls only if your iRoamly plan specifically includes those services.
Configure eSIM for Mobile Data
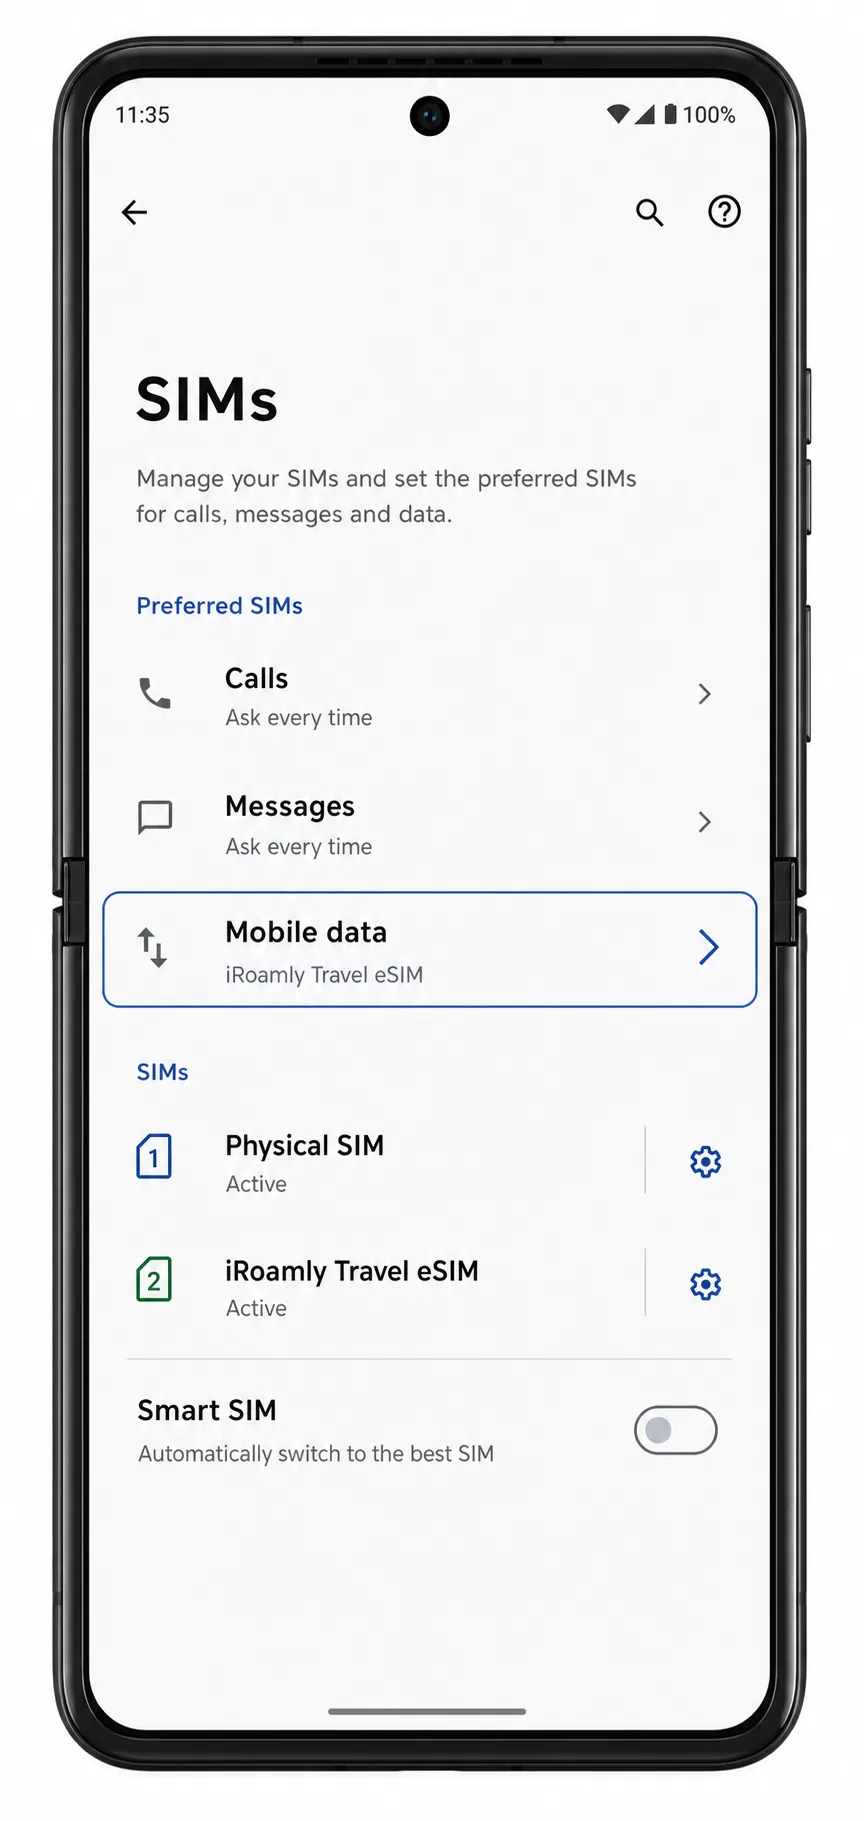
Open Settings > Network & internet > SIMs, then find the Preferred SIMs or mobile data section. Set Mobile data to the iRoamly eSIM so travel data uses the new profile.
Tap the iRoamly eSIM entry and turn on Roaming if your iRoamly plan or destination instructions require it. Travel eSIM data often needs roaming enabled because it connects through partner networks.
Keep automatic data switching or smart SIM switching off if you want to prevent the Razr 50 Ultra from returning to your primary SIM for mobile data. Recheck the Mobile data row before leaving Wi-Fi.
Troubleshooting
If Add SIM or the eSIM download option is missing, confirm your exact Razr 50 Ultra variant supports eSIM, update the phone software, restart the phone, and check whether the carrier firmware or region blocks eSIM.
If the QR code does not scan, increase screen brightness on the device showing the QR code, clean the Razr camera lens, and keep the code inside the scan frame. Use manual entry if scanning still fails.
If the QR code says it has already been used, do not delete the installed profile. Contact iRoamly support from the account or order page because many eSIM QR codes are single-use.
If manual setup fails, check every character in the SM-DP+ Address and Activation Code. Extra spaces, changed capitalization, or missing punctuation can stop activation.
If the eSIM appears but mobile data does not work, confirm Use SIM is on, set Mobile data to the iRoamly eSIM, enable Roaming when required, and restart the phone after landing.
If activation remains pending, wait until the phone is in the destination country and connected to a supported network. Some plans cannot fully activate before they reach the covered area.
If calls or SMS do not work, check your iRoamly plan details. Many travel eSIMs provide data only, so calling and texting may need your primary SIM or an internet calling app.
Conclusion
Setting up an iRoamly eSIM on the Motorola Razr 50 Ultra only takes a few minutes, but completing the process before you travel can save you time and reduce connectivity issues later. Whether you install the eSIM by scanning a QR code or entering the activation details manually, following each step carefully helps ensure the profile is downloaded and ready for use.
Once you arrive, make sure the iRoamly eSIM is enabled, selected for mobile data, and configured according to your plan's requirements. With the setup complete, your Motorola Razr 50 Ultra can connect to supported networks without requiring you to replace your physical SIM, making it easier to stay online for navigation, messaging, work, and everyday travel needs.