
The Oppo Reno 9A is a Japan-market Android phone that supports eSIM on the SIM-free model, using ColorOS 13 based on Android 13. Its mobile plan controls are found under Settings and the mobile network area, where eSIM profiles can be added, checked, and selected for data.
For travelers, an iRoamly travel eSIM is useful because it lets you prepare mobile data before departure without changing your physical SIM. The easiest setup is usually scanning the QR code from your iRoamly order, but manual entry is a good backup when the QR code is on the same phone or the camera cannot scan it.
This guide covers both methods for Oppo Reno 9A, plus the checks to confirm the profile installed correctly and the data settings to review before you use it abroad. Menu names may vary slightly by carrier build or ColorOS update, especially on carrier-sold models.
Before You Set Up Your iRoamly eSIM
Connect the Oppo Reno 9A to stable Wi-Fi before starting.
Confirm that your phone is unlocked and that your model supports eSIM. The SIM-free Reno 9A lists nanoSIM + eSIM; carrier variants may differ.
Keep your iRoamly QR code, SM-DP+ Address, and Activation Code ready. These are usually shown in your iRoamly account or order email.
Install the eSIM 1 to 2 days before travel when your plan allows it, but check the plan details first. iRoamly eSIM validity starts from activation, and the exact activation trigger can vary by plan.
Do not delete the iRoamly eSIM after installation unless support tells you to. Many eSIM profiles cannot be downloaded again after removal.
Check the plan details for voice calls and SMS. Many travel eSIM plans are data-only, and voice/SMS availability varies by plan.
Method 1: Install eSIM by Scanning a QR Code
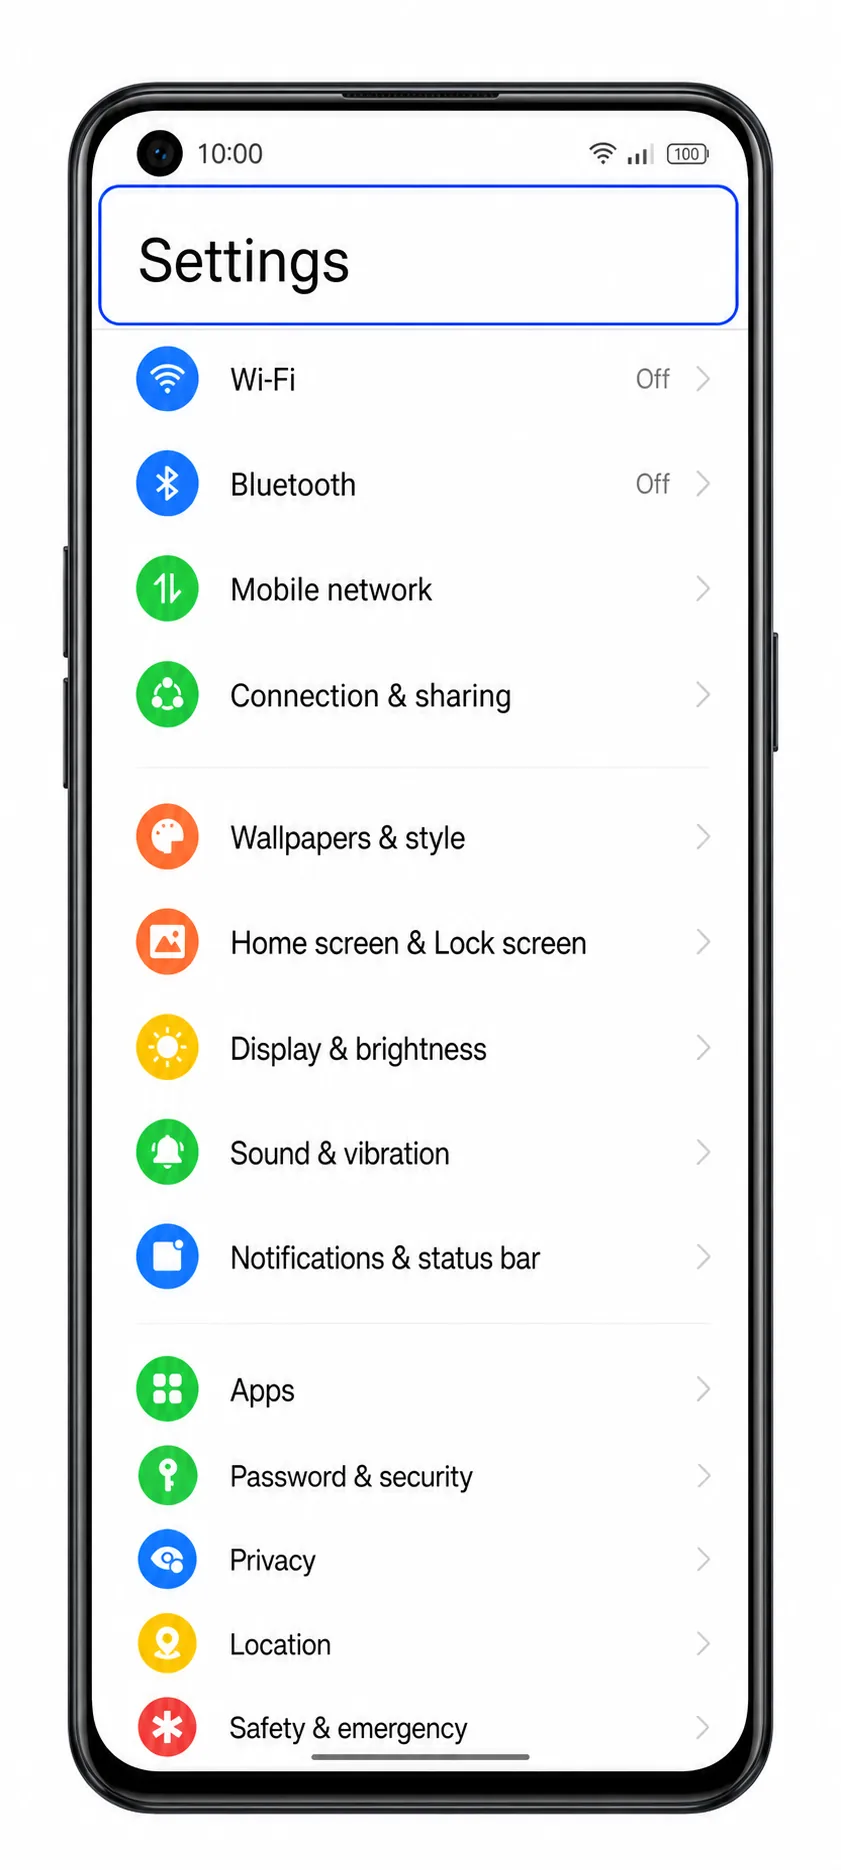
1. Open Settings on the Oppo Reno 9A.
You should see the main ColorOS Settings list.
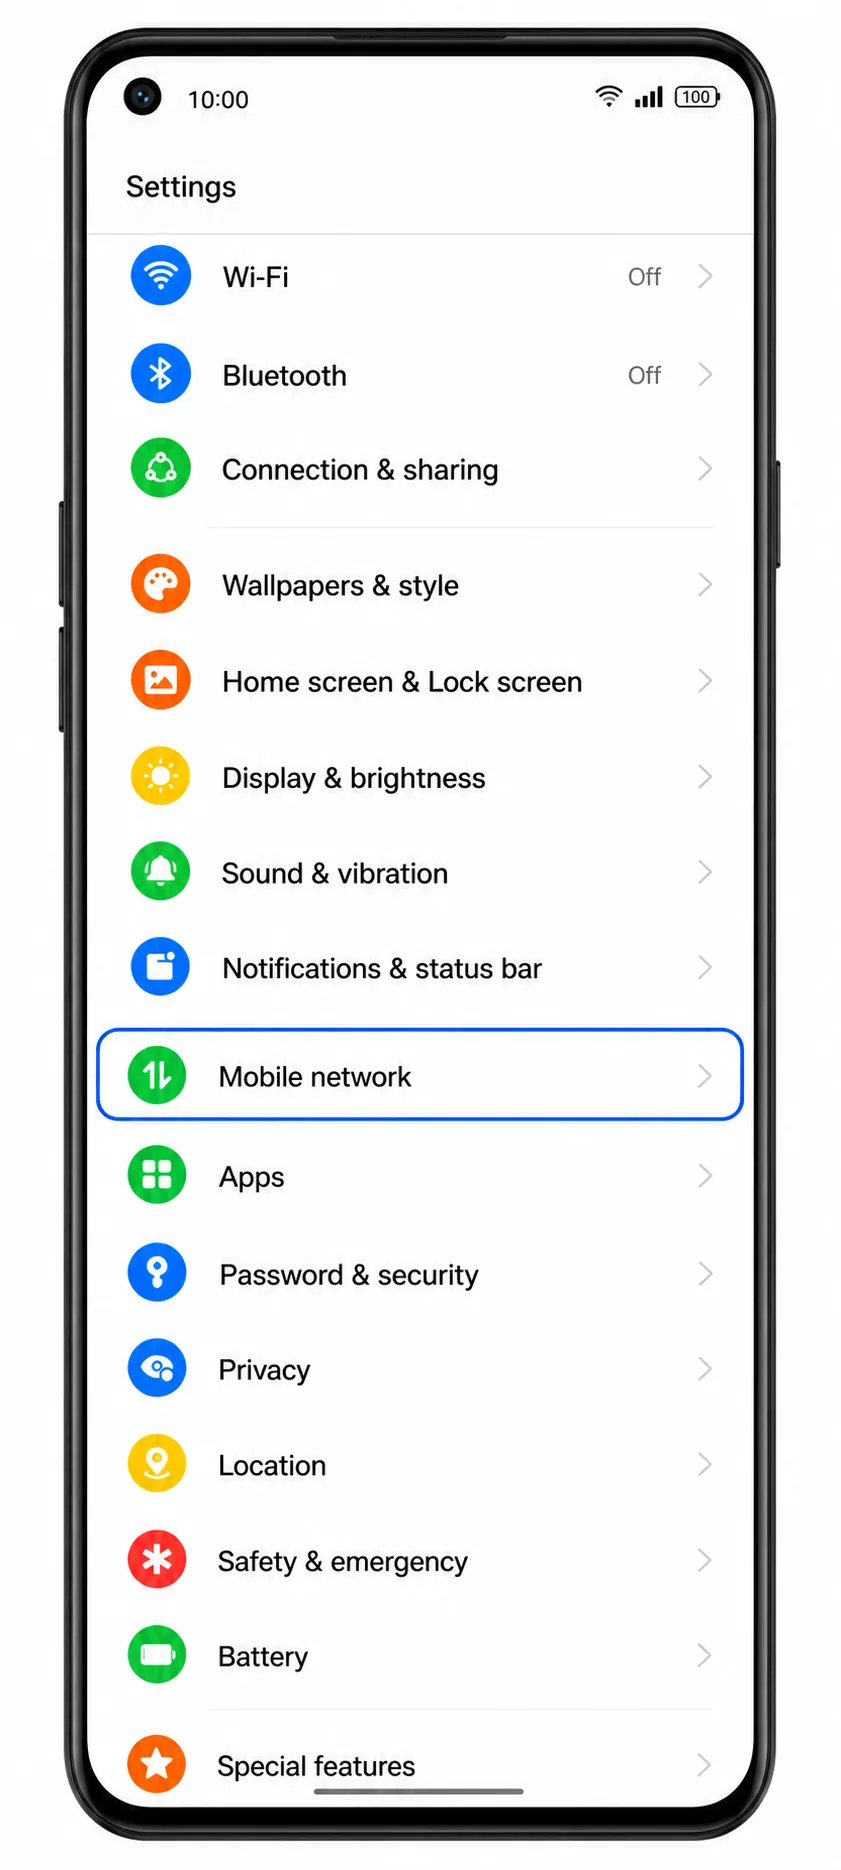
2. Tap Mobile network.
The phone opens the mobile network page where SIM and eSIM settings are managed.
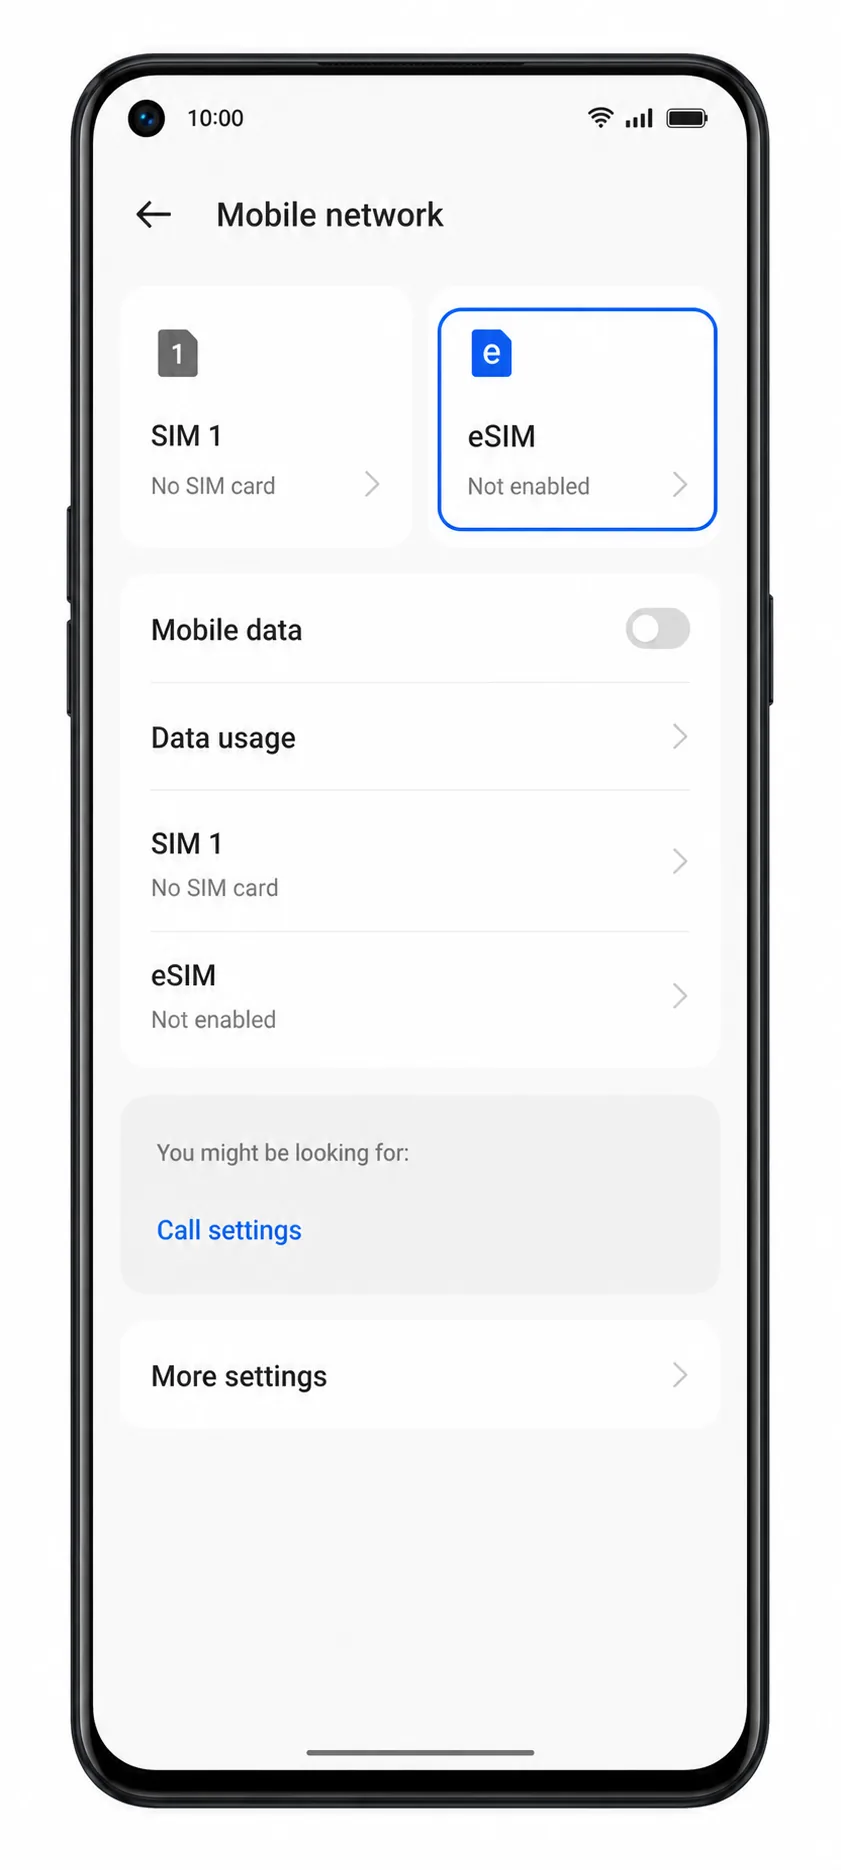
3. Tap eSIM.
You should see the eSIM management screen for adding or reviewing downloaded eSIM profiles.
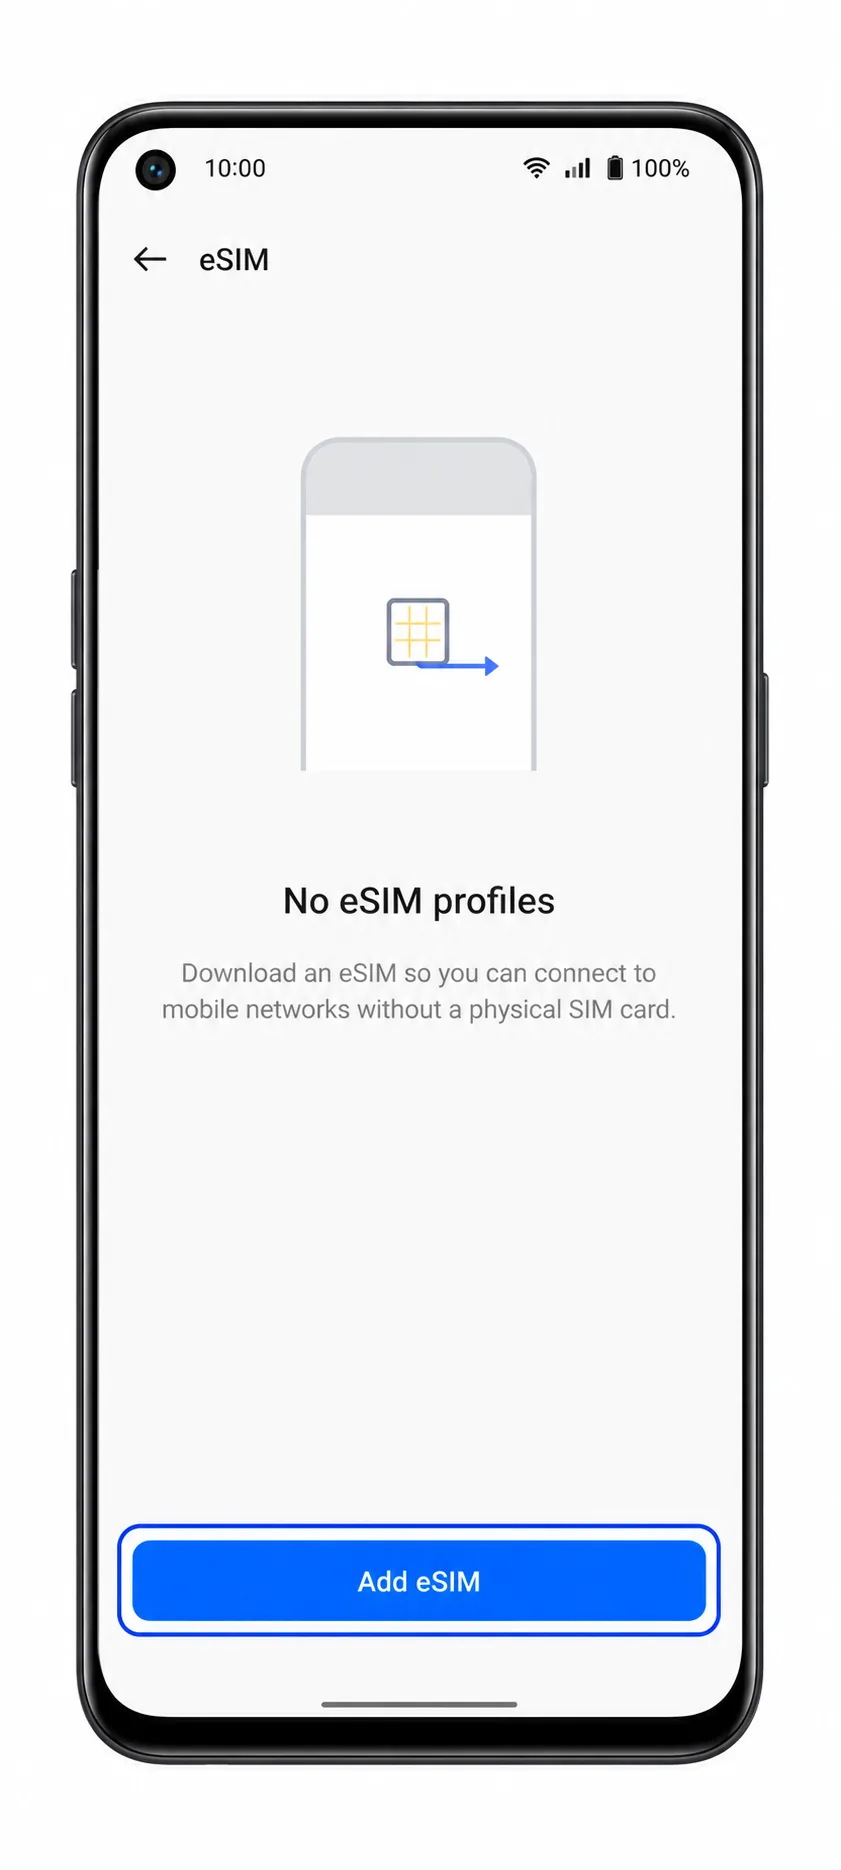
4. Tap Add eSIM.
The Reno 9A should open the setup screen for downloading a new eSIM profile.
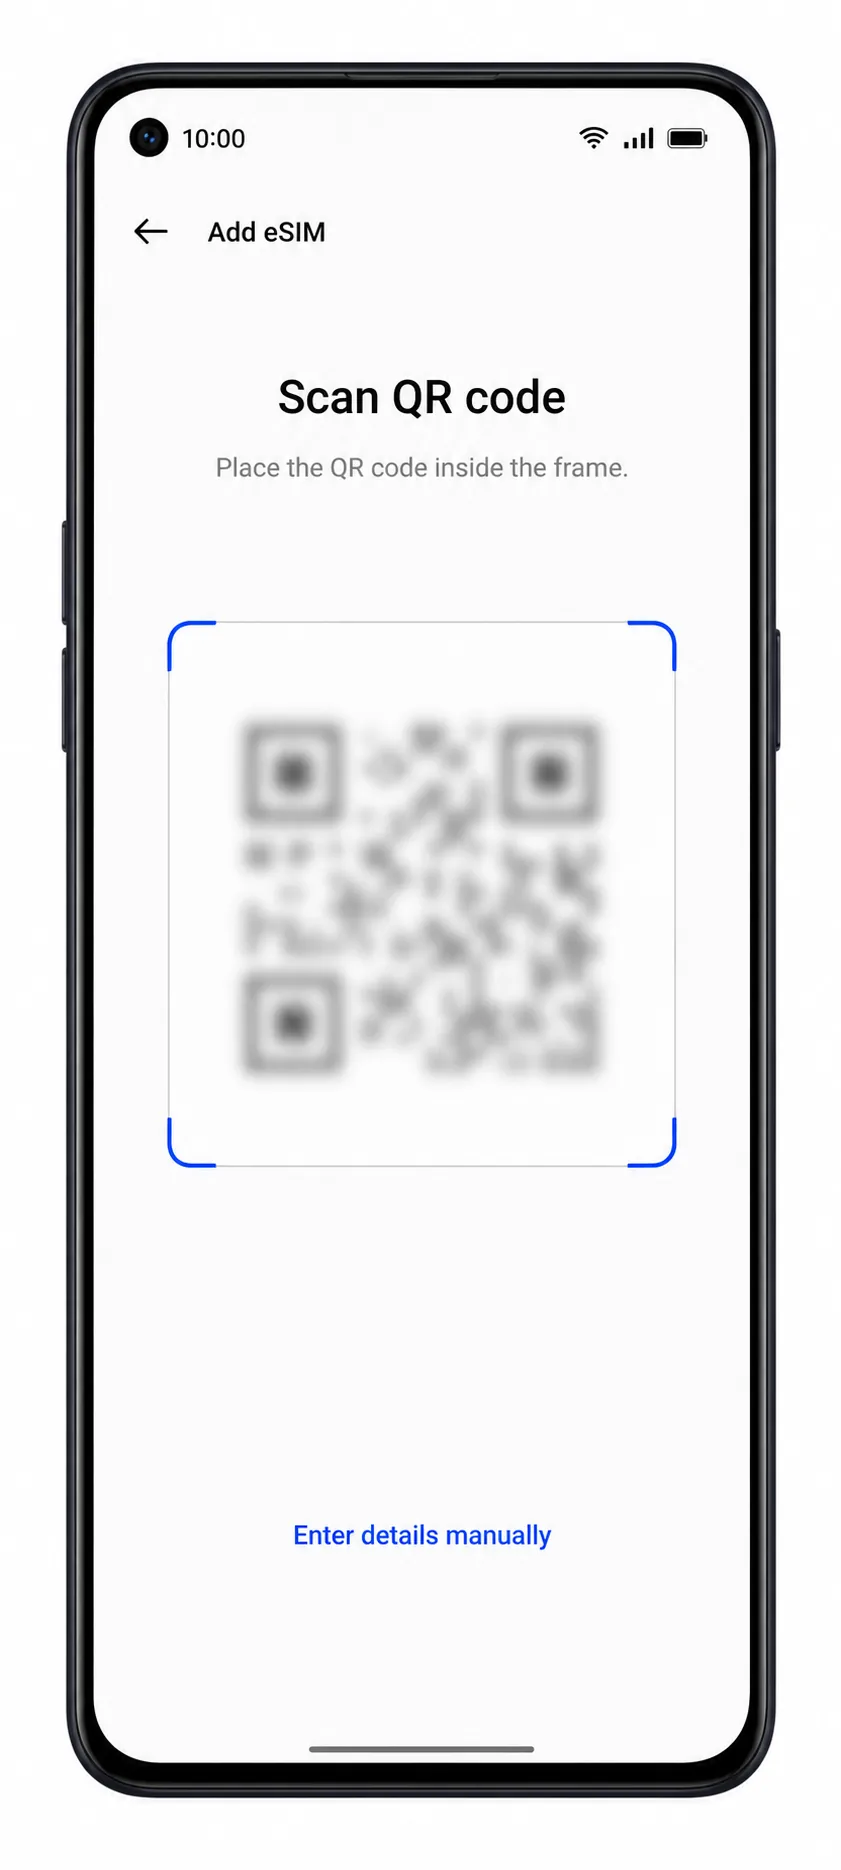
5. Choose Scan QR code, then scan the iRoamly QR code from another screen or printed copy.
Keep the QR code flat and well lit. Do not use a QR code that has already been installed on another device.
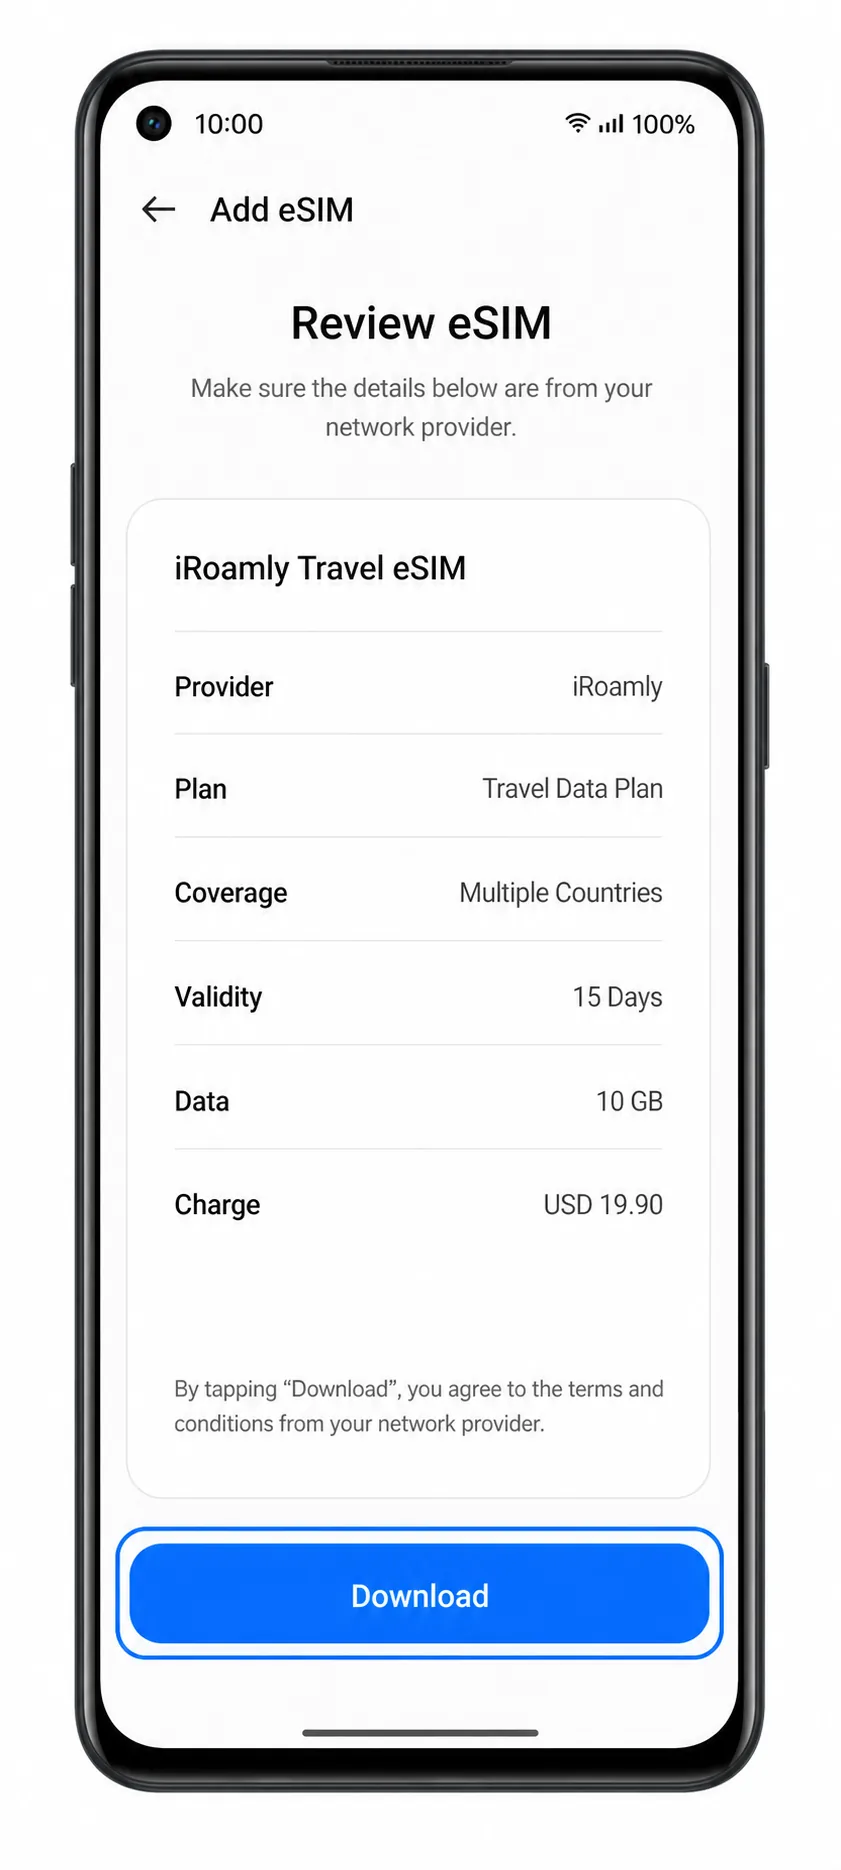
6. Review the detected iRoamly eSIM details, then tap Download or Add.
Wait on Wi-Fi while ColorOS downloads the eSIM profile. If the phone asks for confirmation, approve the download.
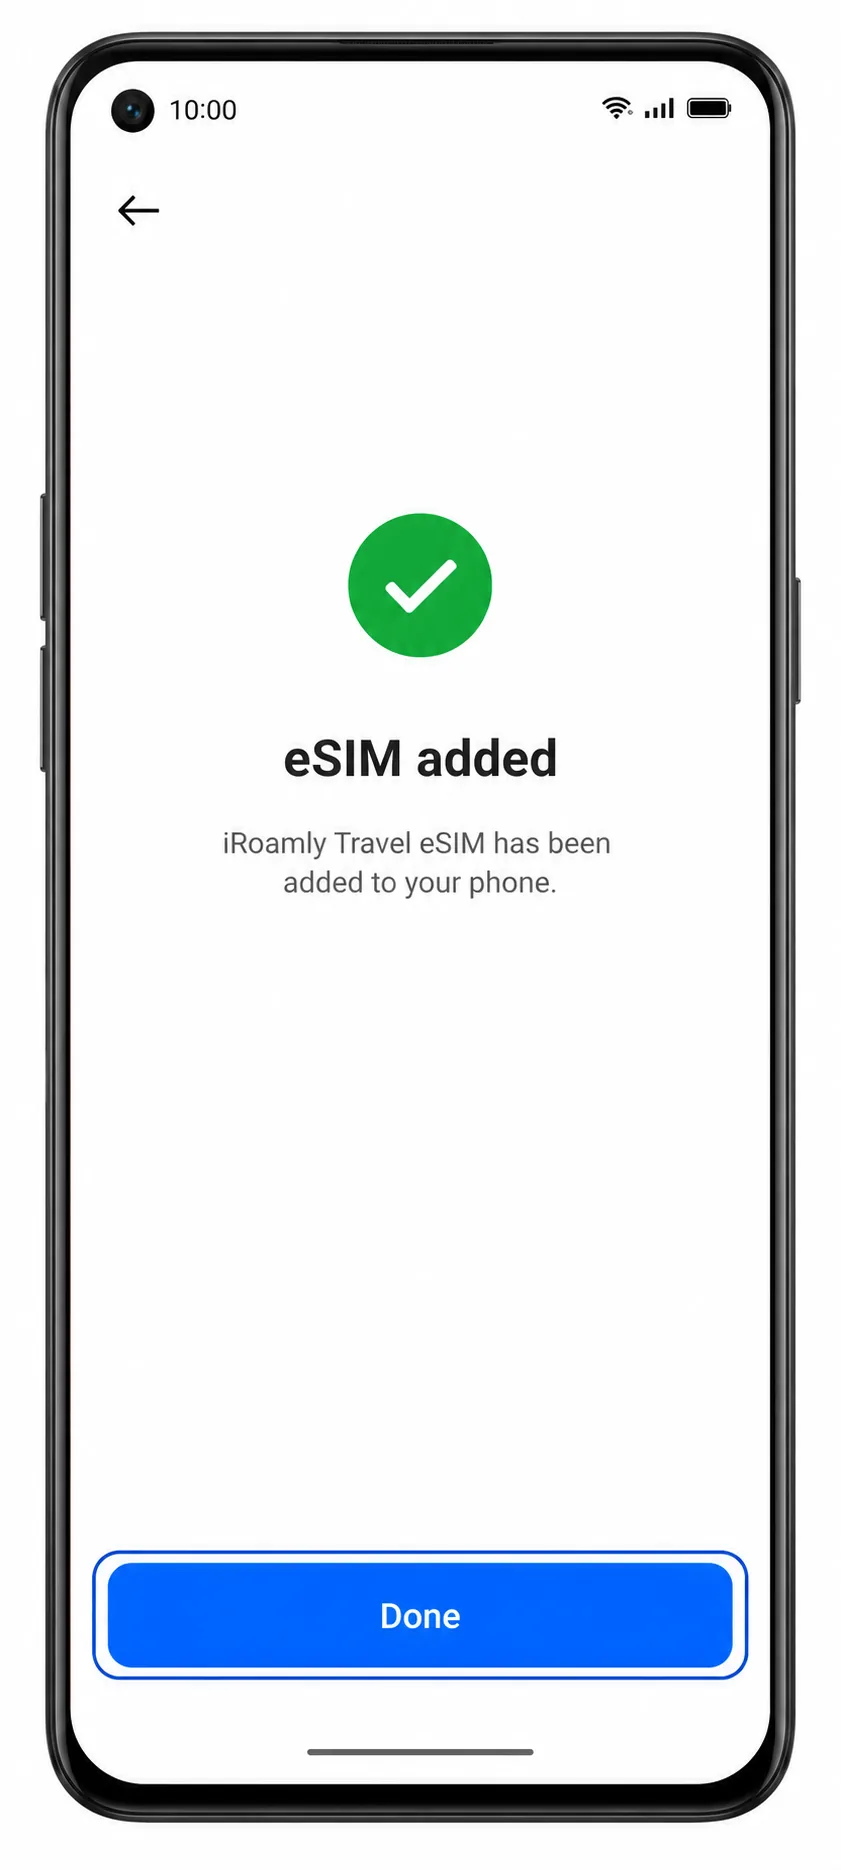
7. When the setup finishes, tap Done.
The iRoamly eSIM should now appear in the eSIM list on your Oppo Reno 9A.
Method 2: Install eSIM Manually
1. Open Settings on the Oppo Reno 9A.
Start from the same Settings screen even if you already tried QR setup.
2. Tap Mobile network.
This returns you to the ColorOS page for SIM and mobile data settings.
3. Tap eSIM.
The eSIM management screen opens again.
4. Tap Add eSIM.
ColorOS opens the eSIM setup screen.
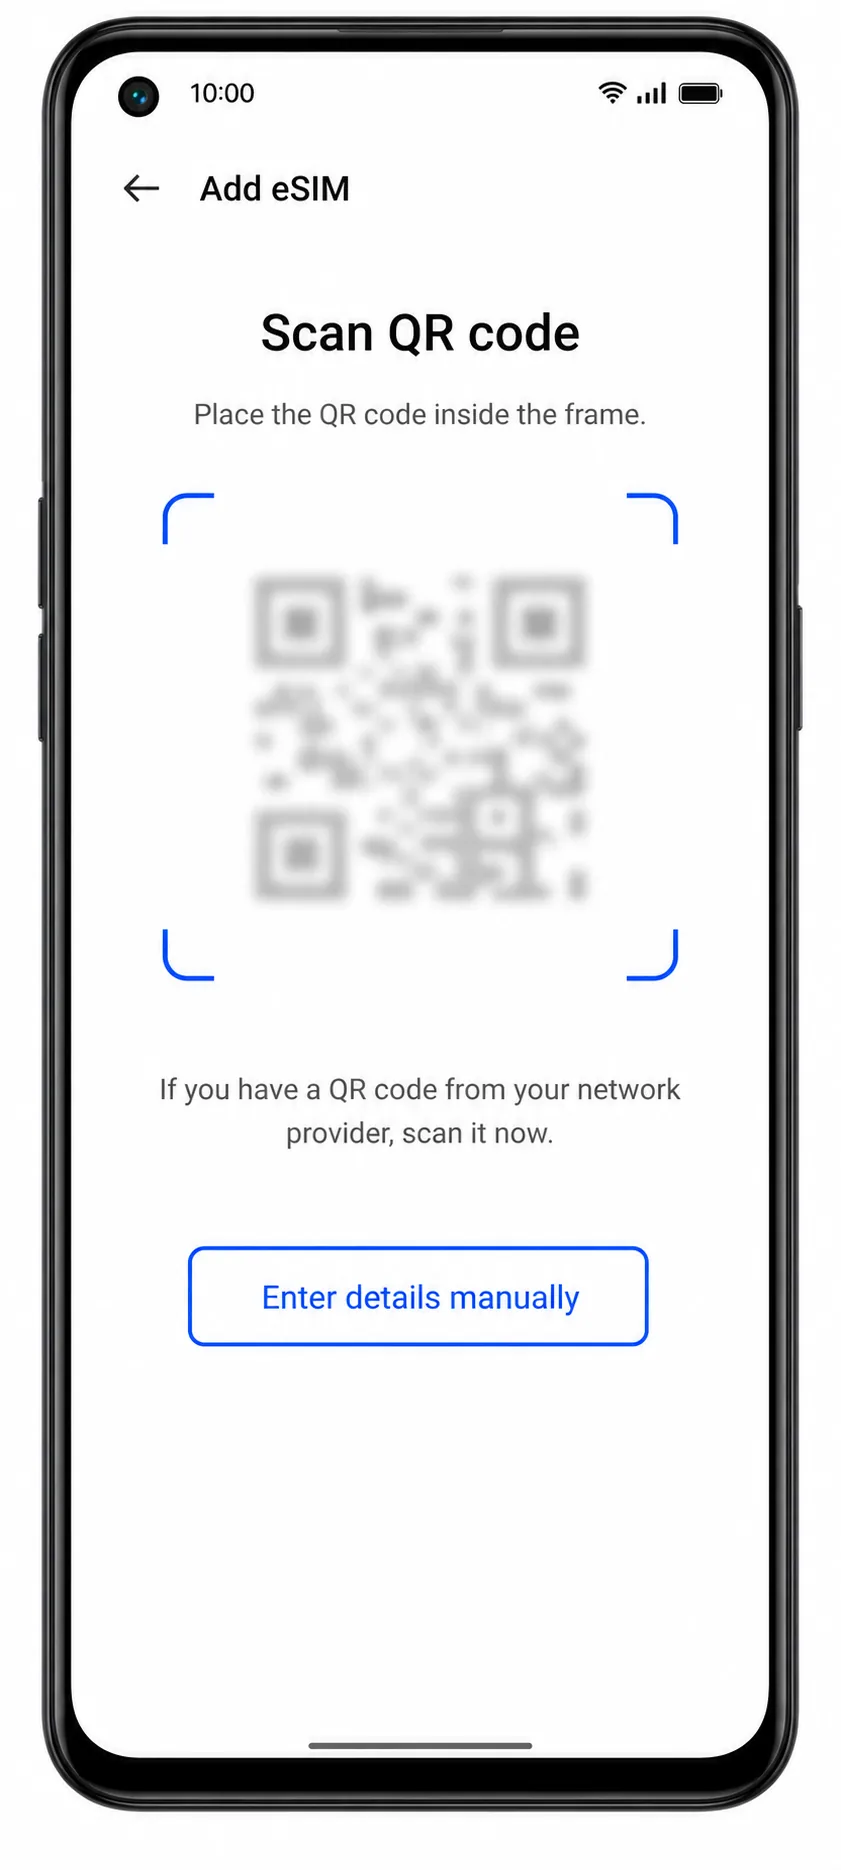
5. Tap Enter details manually or Enter activation code.
Use this option when the QR code is on the Oppo Reno 9A screen or the scanner cannot read it.
6. Enter the SM-DP+ Address and Activation Code exactly as iRoamly provides them, then tap Continue.
If ColorOS shows a single activation-code field instead, paste the full activation code string from iRoamly. Only enter a confirmation code if iRoamly provides one.
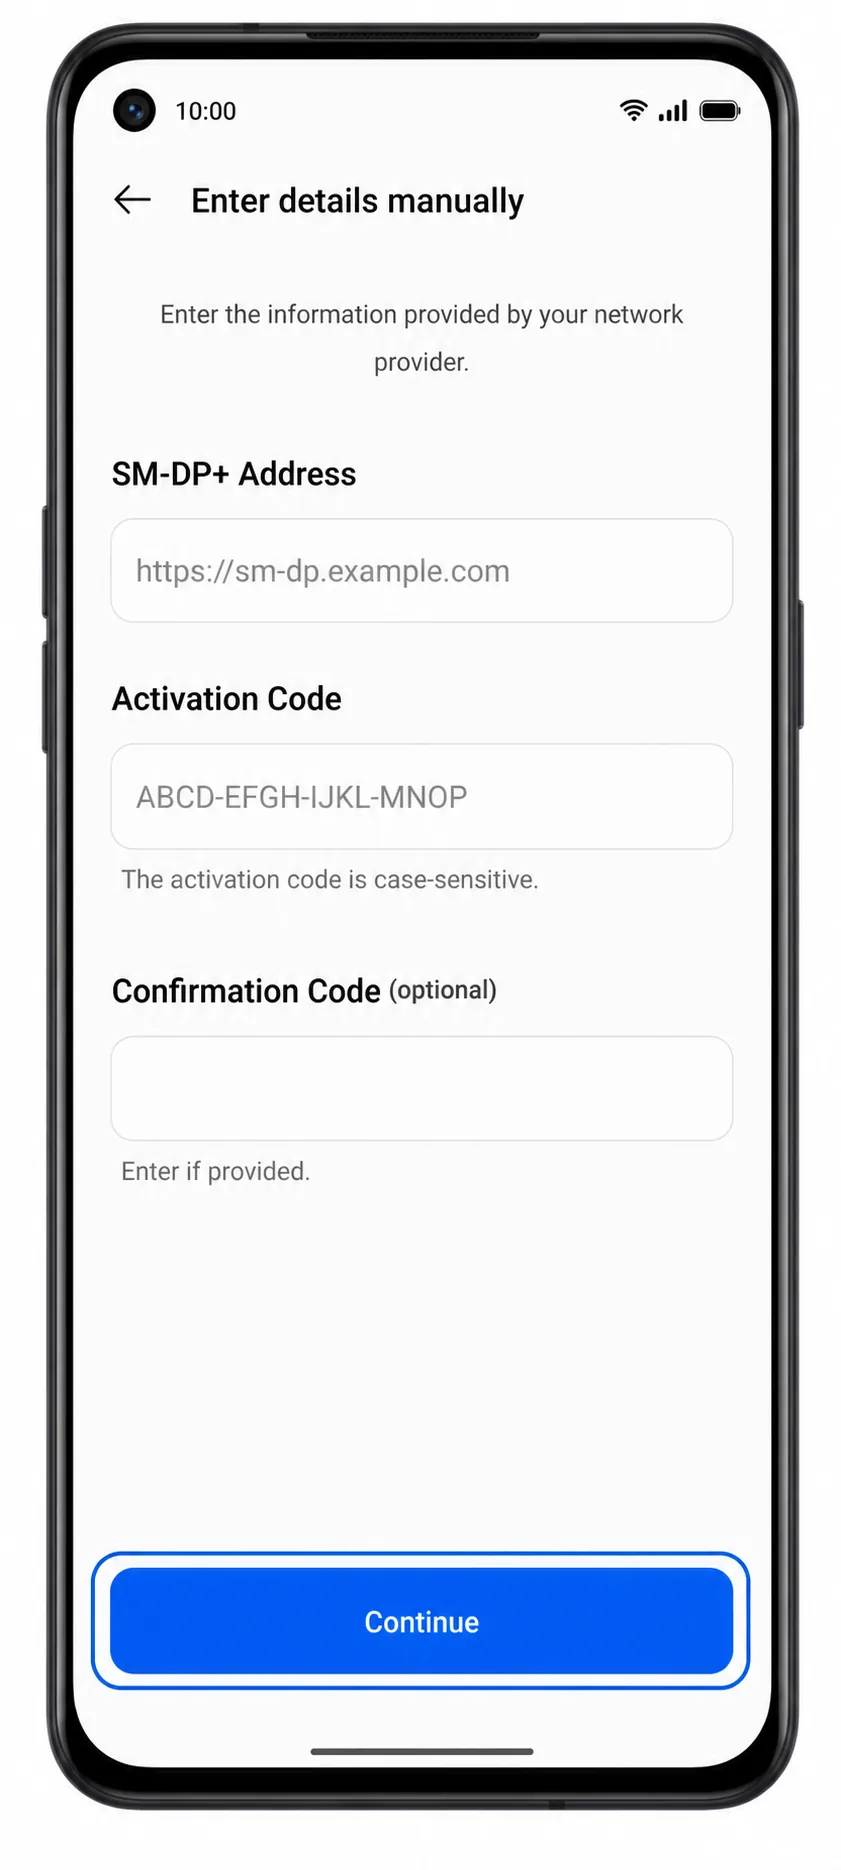
7. Review the iRoamly eSIM information, then tap Download or Add.
Keep Wi-Fi connected until the download completes.
8. Tap Done after ColorOS confirms the profile has been added.
The manually entered iRoamly eSIM should appear in the same eSIM list as a QR-installed profile.
How to Confirm Your iRoamly eSIM Is Installed
1. Go to Settings > Mobile network > eSIM.
Look for the newly added iRoamly eSIM profile in the eSIM list. It may appear with a generic label until you rename it.
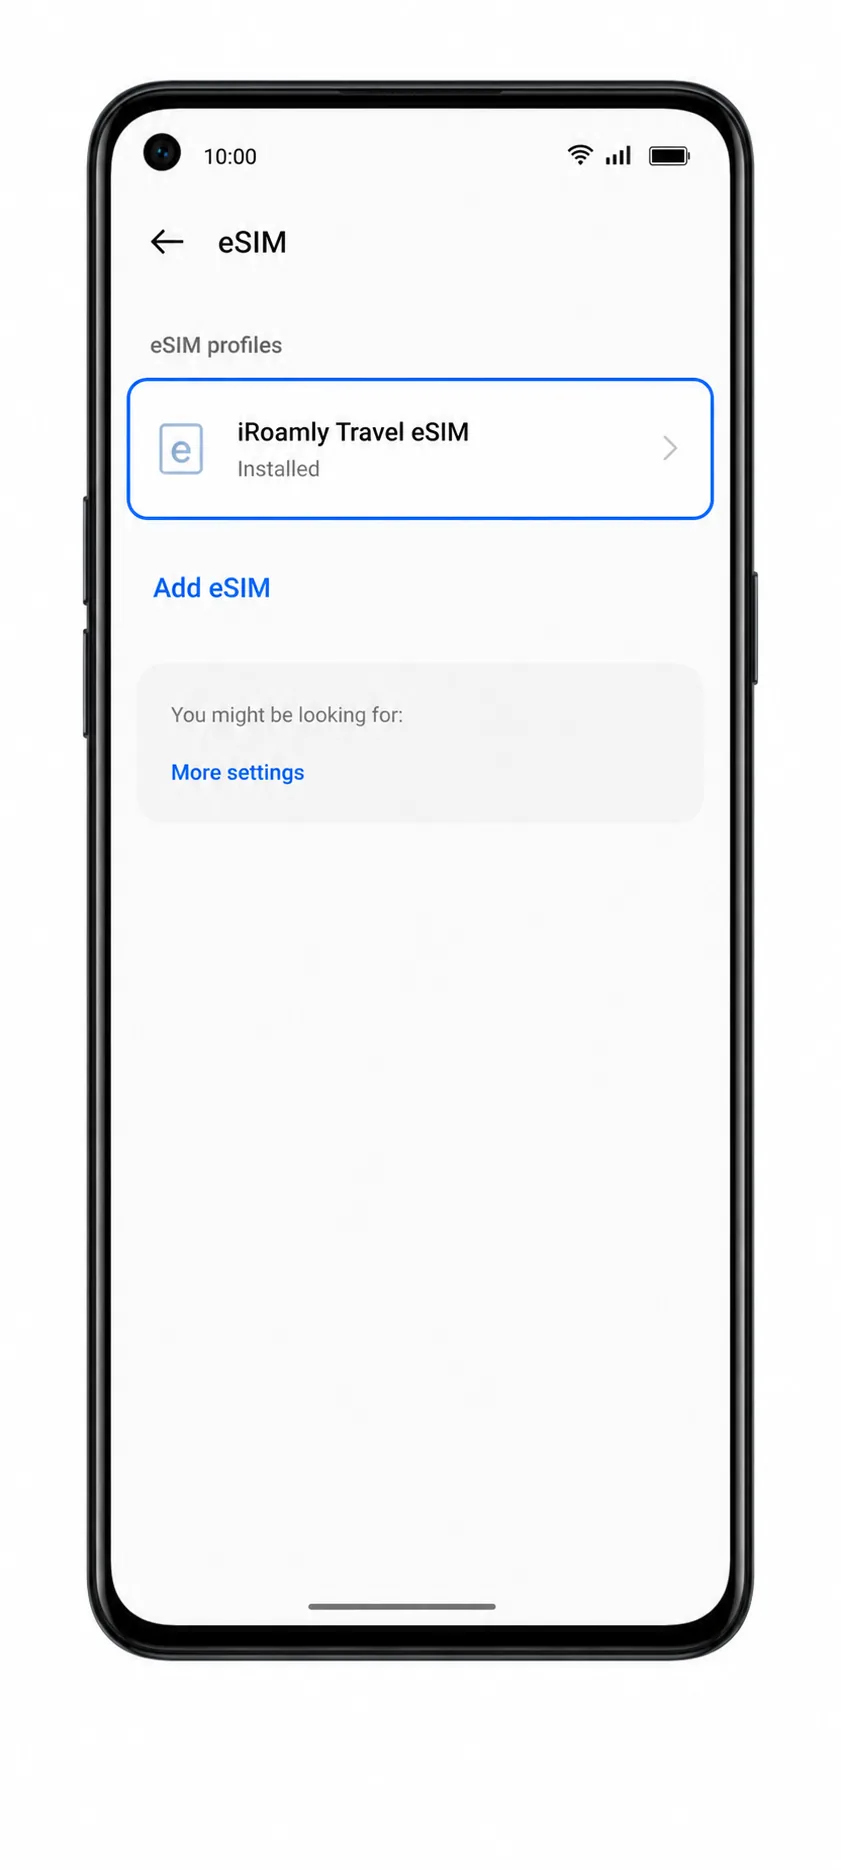
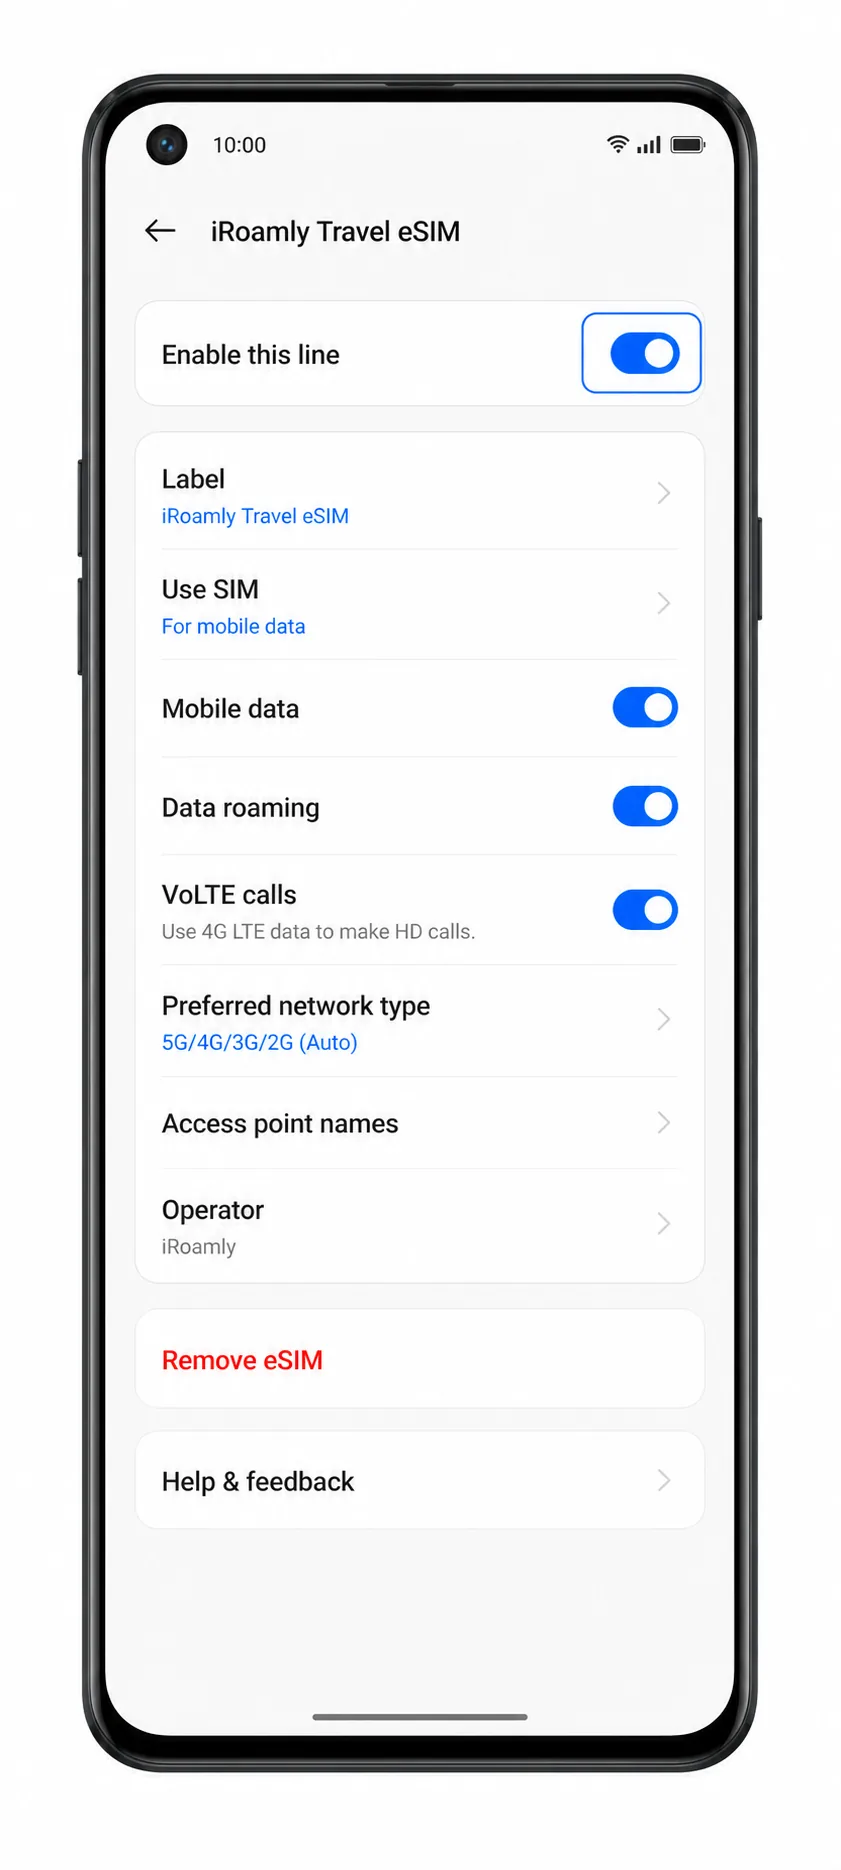
2. Tap the iRoamly eSIM profile and confirm the line is available.
The profile should show as installed. If the plan is not meant to activate until you arrive, it may not show service until it connects to a supported destination network.
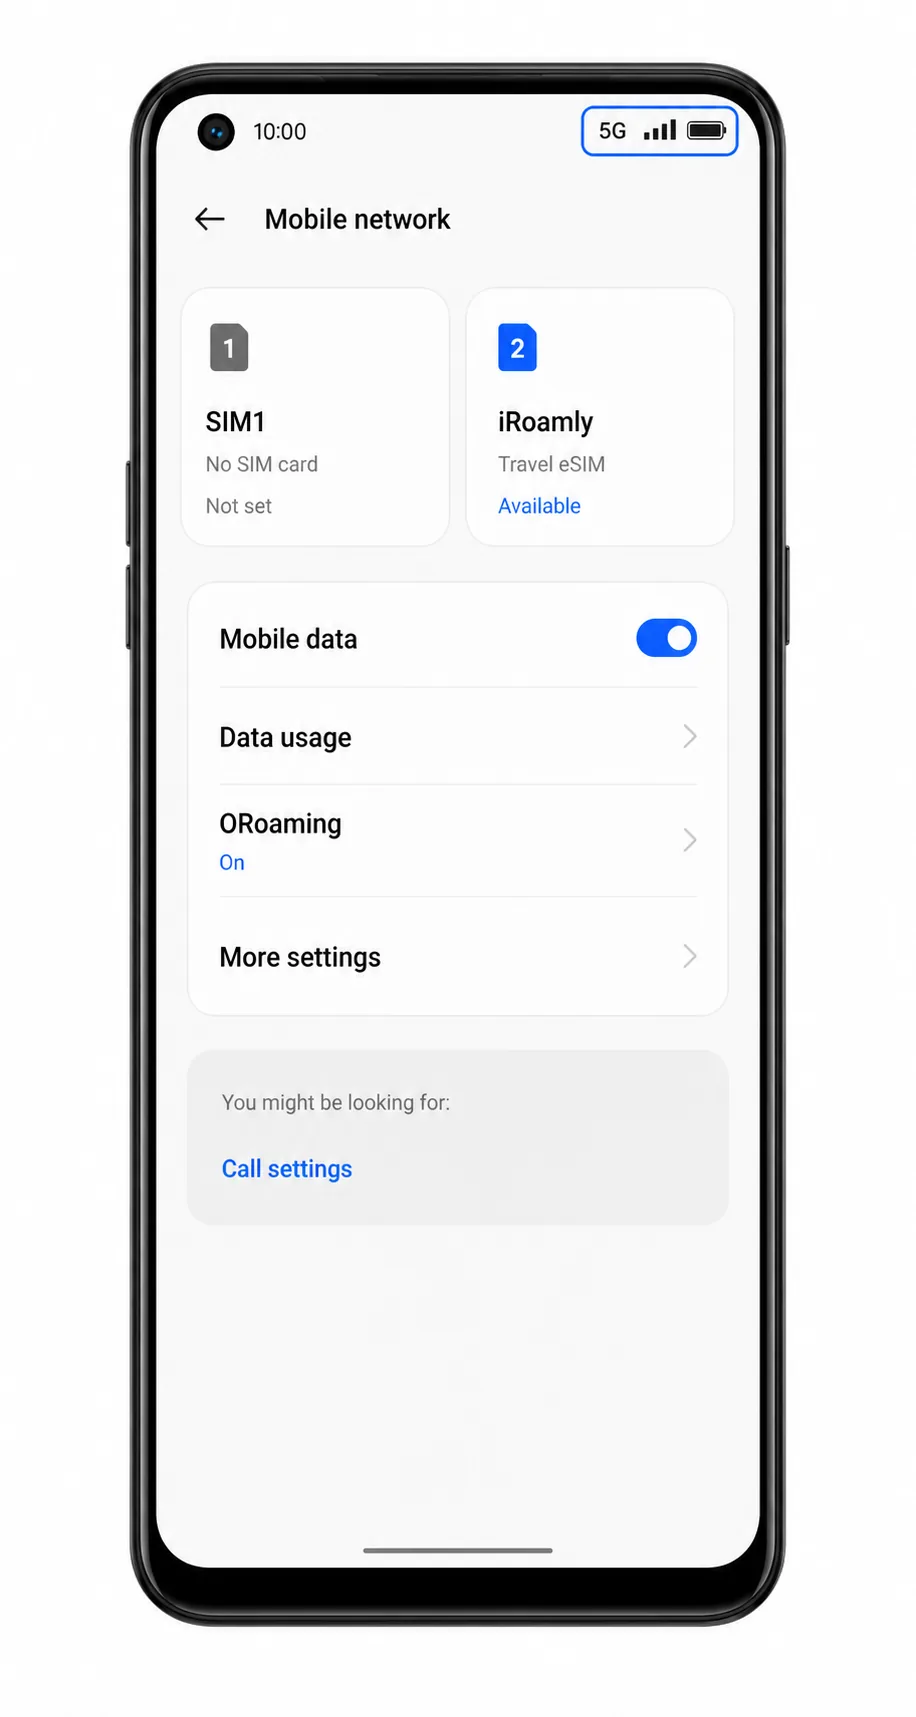
3. Check the status bar after arrival or after activating the plan.
You should see mobile signal for the iRoamly line when it connects to an available partner network. Test SMS or calls only if your iRoamly plan specifically includes them.
Configure eSIM for Mobile Data
1. Open Settings > Mobile network.
Return to the page where ColorOS lists available SIMs and mobile data options.
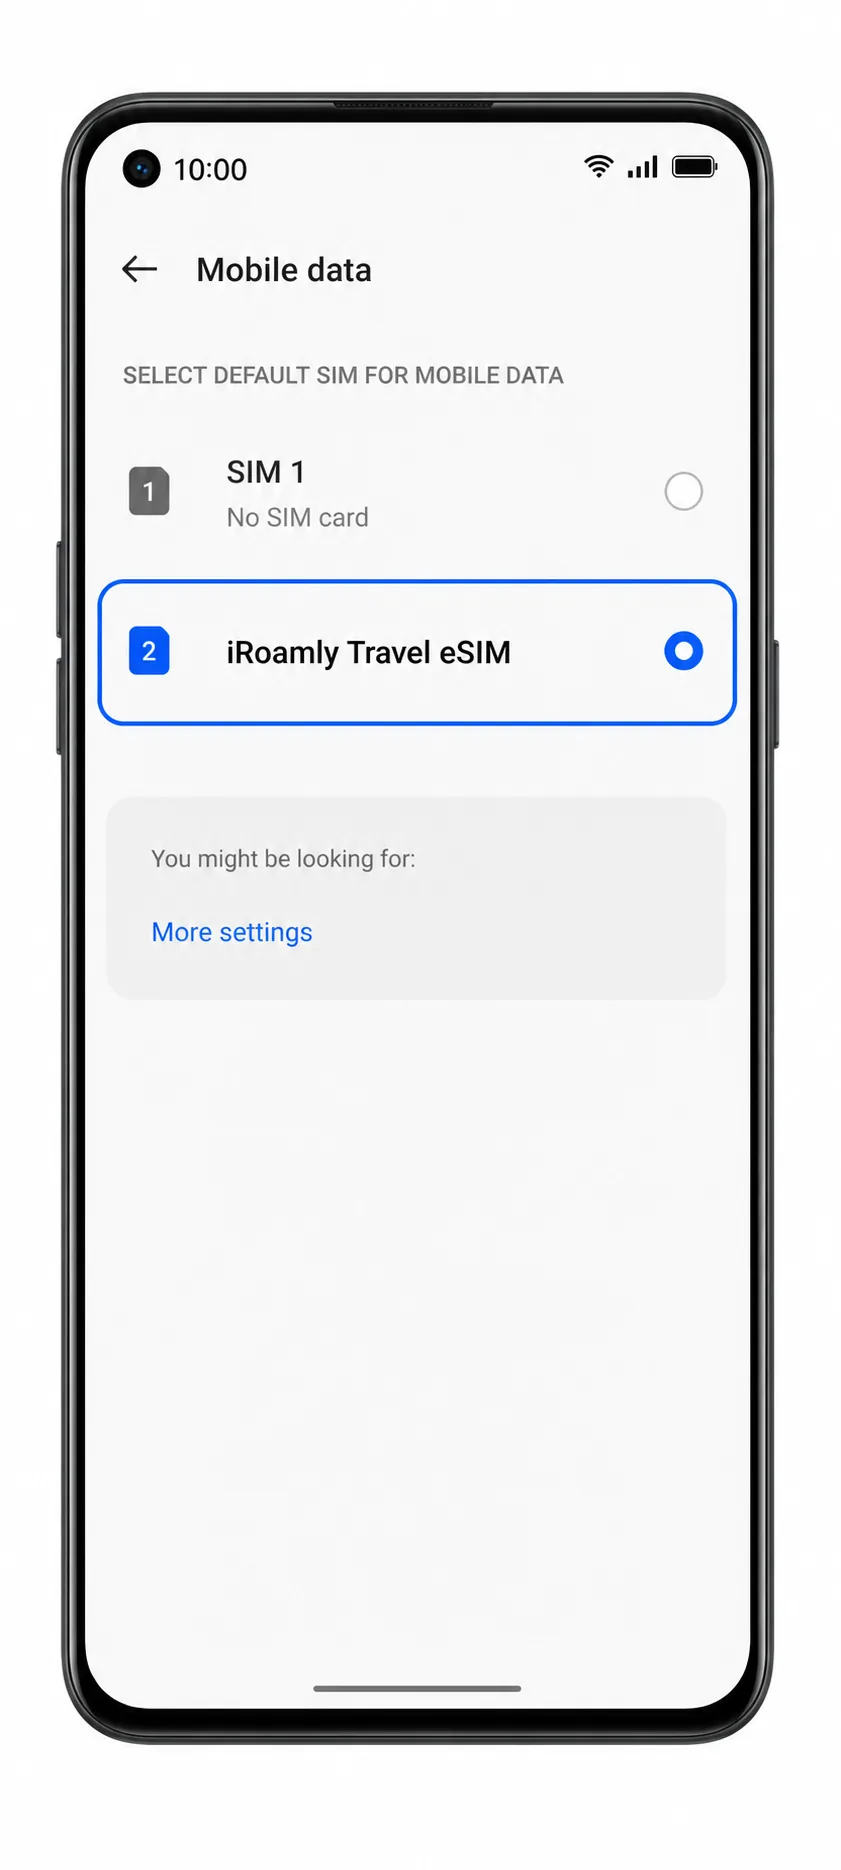
2. Tap Mobile data or Default mobile data.
Choose the iRoamly eSIM as the line for mobile data while traveling.
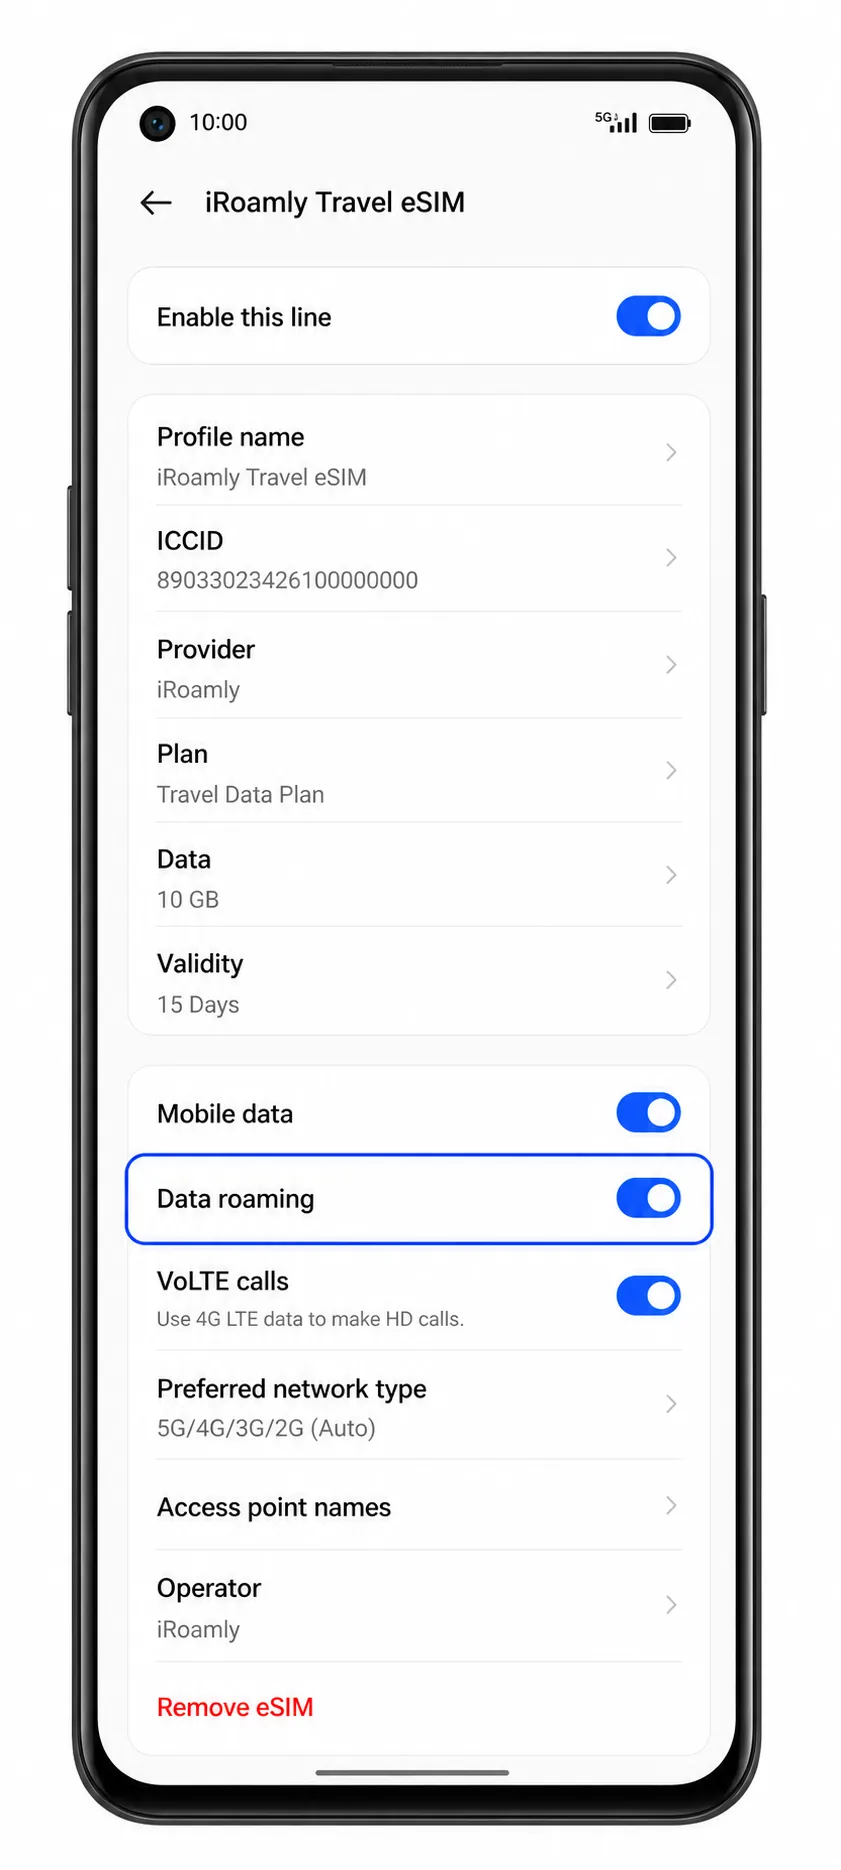
3. Open the iRoamly eSIM line settings and turn on Data roaming if your destination plan requires it.
Many travel eSIM plans need roaming enabled to connect to the partner network abroad.
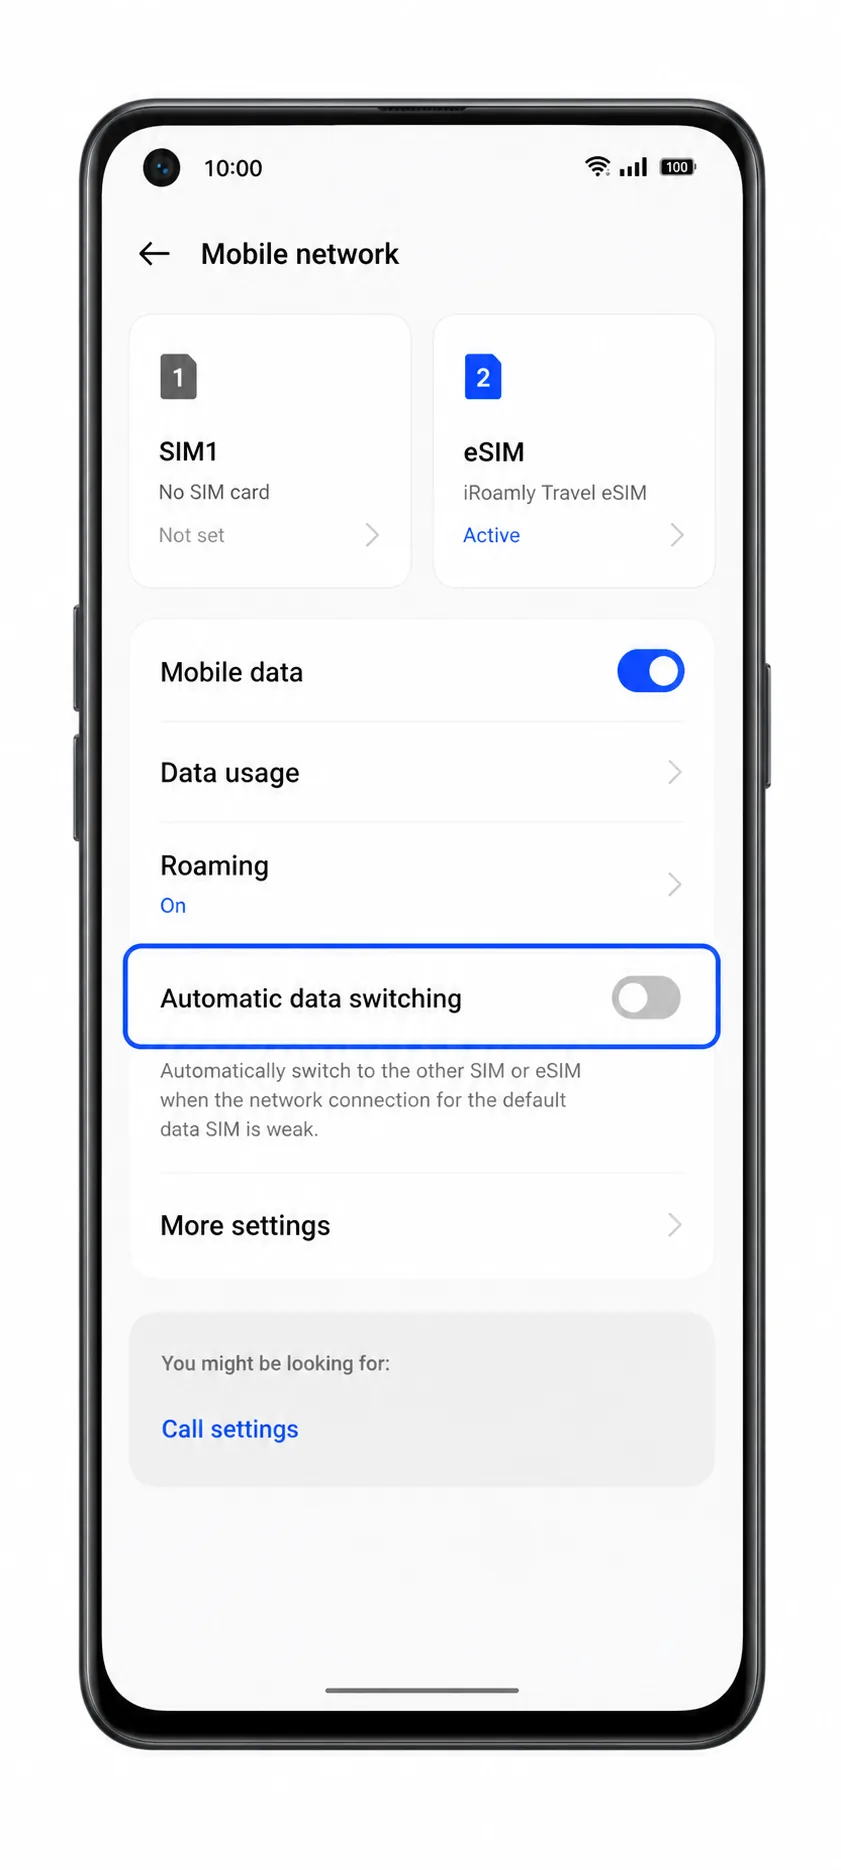
4. Turn off unwanted data switching if ColorOS offers an automatic switching option.
This helps prevent the phone from falling back to your primary SIM for travel data.
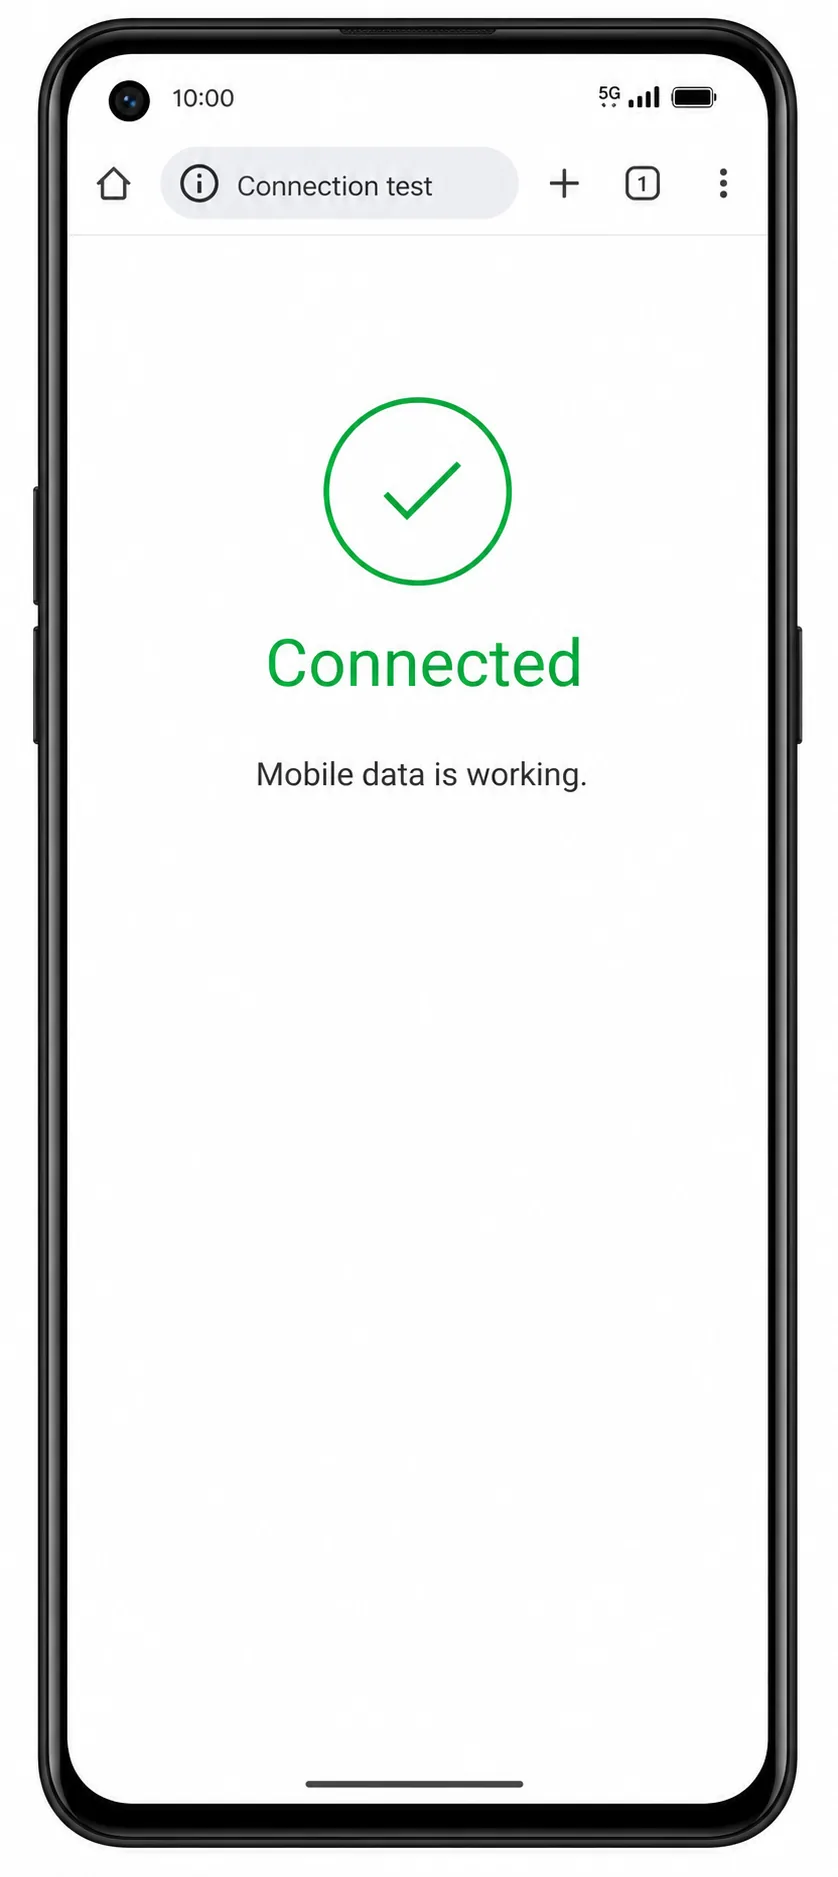
5. Open a browser or map app and test mobile data.
If pages load on mobile data with Wi-Fi off, the iRoamly eSIM is ready for travel use.
Troubleshooting
Add eSIM is missing: confirm that your Oppo Reno 9A variant supports eSIM, update ColorOS, and check whether your carrier model hides eSIM settings.
QR code will not scan: increase brightness on the screen showing the QR code, clean the camera lens, or use manual entry.
QR code was already used: do not delete and retry repeatedly. Contact iRoamly support because many eSIM profiles cannot be reinstalled after removal.
Activation is pending: stay on Wi-Fi and wait a few minutes. Some travel plans only complete network activation when you reach the covered destination.
No mobile data after installation: select the iRoamly eSIM for mobile data, enable data roaming if required, turn Wi-Fi off, and restart the phone.
Manual entry fails: check every character in the SM-DP+ Address and Activation Code. Do not add spaces unless iRoamly shows them.
Calls or SMS do not work: check your iRoamly plan details. Many travel eSIM products are data-only.
Conclusion
Now that your iRoamly eSIM has been added to your Oppo Reno 9A, your travel connection is available whenever your plan begins. The profile remains on your phone, making it easy to use mobile data in supported destinations without making any additional installation changes during your trip.
From checking local attractions to sharing photos and keeping up with your itinerary, your iRoamly eSIM provides a flexible way to stay online throughout your travels while letting you keep your primary SIM exactly where it is.