
Whether you’re traveling, working remotely, or simply need mobile data outside of Wi-Fi, setting up an eSIM on your iPad mini is a convenient and flexible solution.
eSIM allows you to activate a data plan digitally, so you can get connected without handling a physical SIM card. This makes the process quicker and more adaptable to different situations.
If you’re using an iRoamly eSIM, the steps below will guide you through installation and activation so your iPad mini is ready to use in no time.

Prepare Your Travel Data with iRoamly
iRoamly Travel eSIM is a travel eSIM service that provides mobile data for trips abroad. Travelers can choose from available destination, regional, and global plans, with data amounts, validity periods, and supported features varying by location.
After installation on a compatible iPad, the eSIM data line can help with navigation, messages, bookings, translations, and travel updates.
On iPad mini models that support eSIM, iRoamly can be added through iPadOS without inserting a physical SIM card. The steps below show the QR-code and manual-input paths so you can install the plan and check the connection from the device settings.
Preparations Before Setting Up iRoamly eSIM
Before starting, ensure you have the following. If Indonesia is your next destination, preparing the travel eSIM before departure can help you arrive with the profile already installed.
A stable internet connection (Wi-Fi recommended)
A valid eSIM QR code or manual activation details (SM-DP+ address and activation code) provided by your carrier
Your iPad mini powered on and unlocked
The device updated to the latest iPadOS version (recommended for compatibility)
Demo device used in this guide: iPad mini 7 (2024)
Method 1: Install eSIM via QR Code Scanning
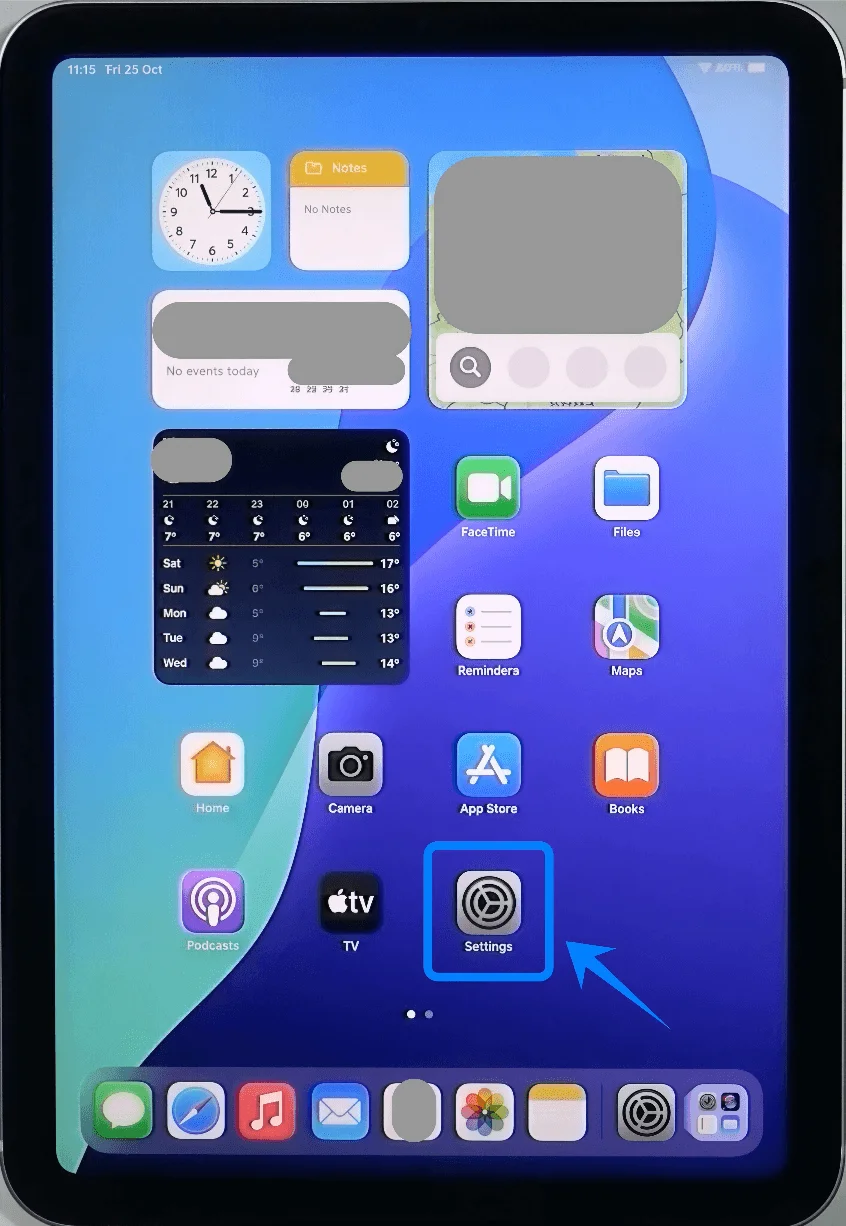
Step 1: Open Cellular Settings
Tap Settings
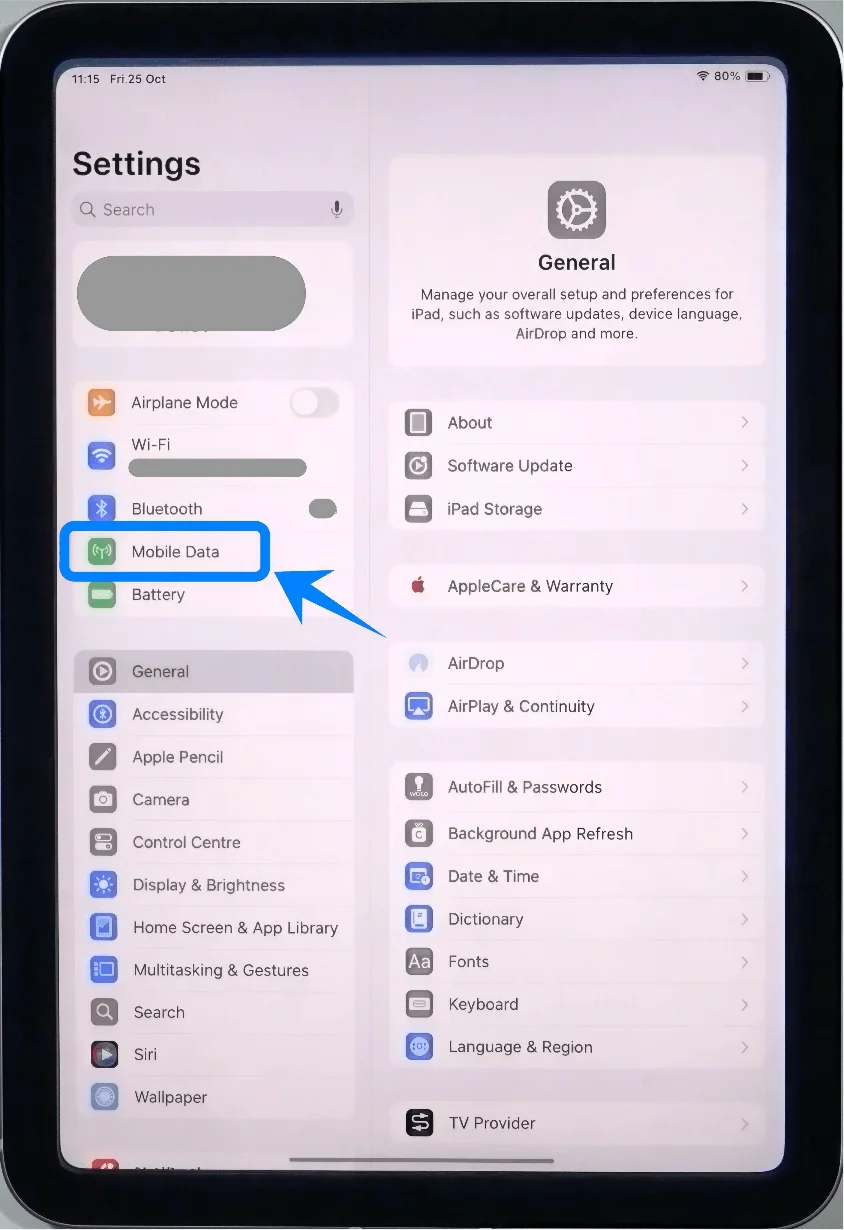
Tap Mobile Data (On some devices or iPadOS versions, this may appear as “Cellular Data.”)
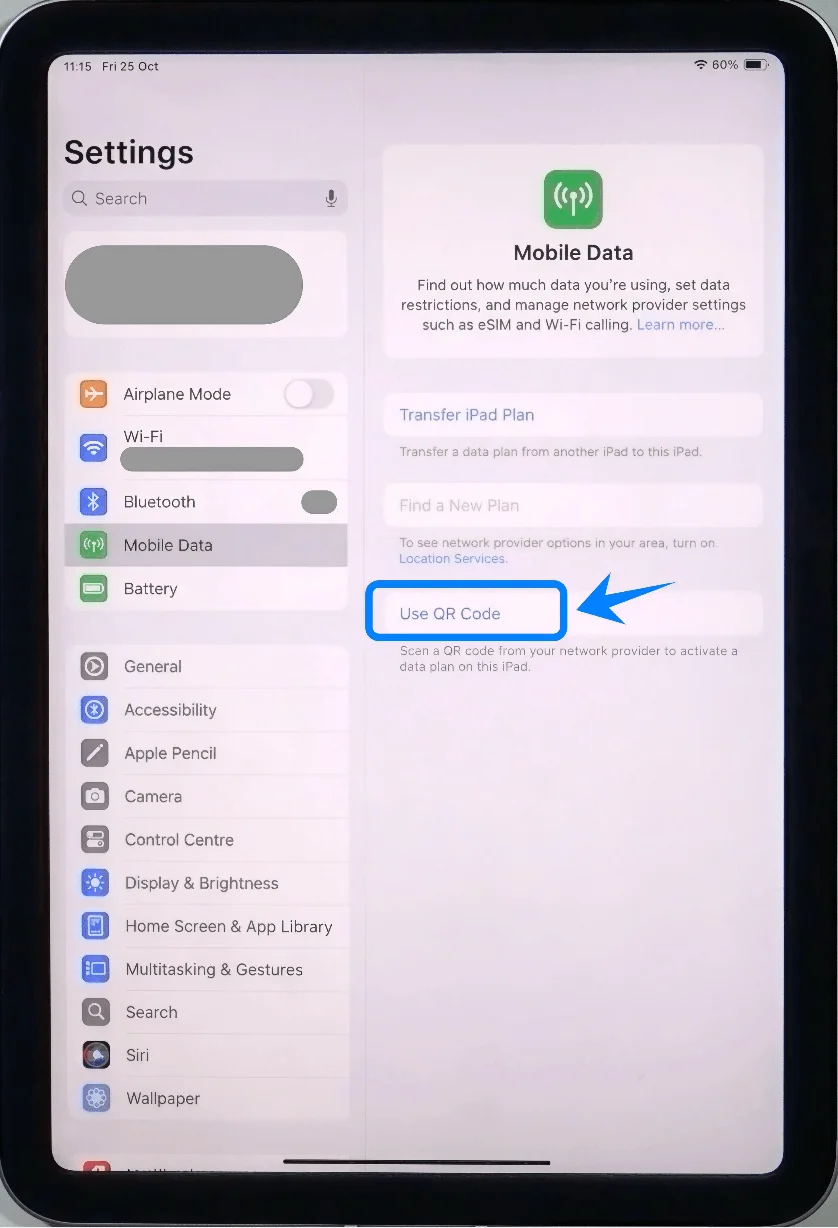
Step 2: Choose QR Code Option
Tap Use QR Code
Step 3: Scan the QR Code
Position your iPad so the QR code is visible within the camera frame
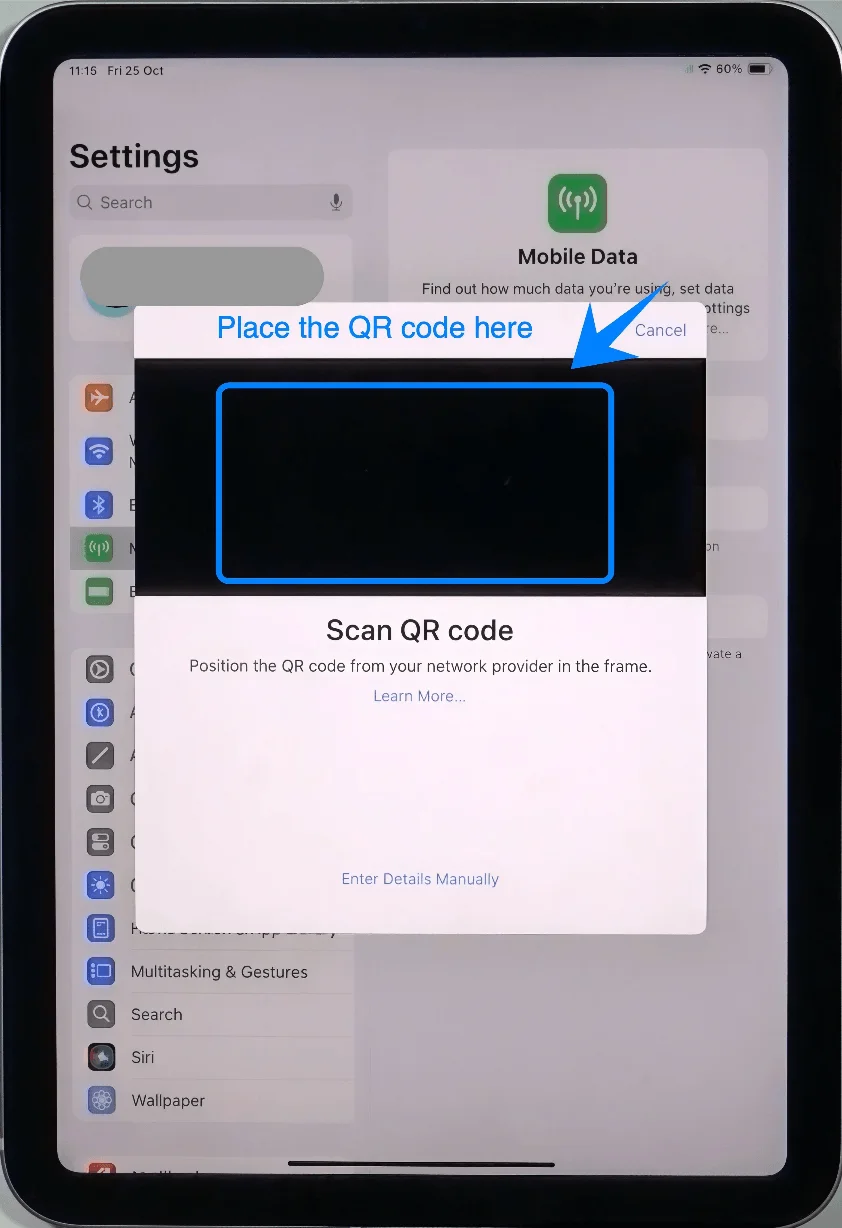
Wait for the device to automatically recognize the code
Step 4: Confirm Activation
When prompted, tap Continue
Then tap Add Cellular Plan
Step 5: Complete Carrier Activation
Wait while the iPad communicates with the carrier
If prompted, enter any additional verification details provided by your carrier
Method 2: Install eSIM via Manual Input
Step 1: Open Cellular Settings
Tap Settings
Tap Mobile Data (On some devices or iPadOS versions, this may appear as “Cellular Data.”)
Step 2: Select Manual Entry
Tap Enter Details Manually
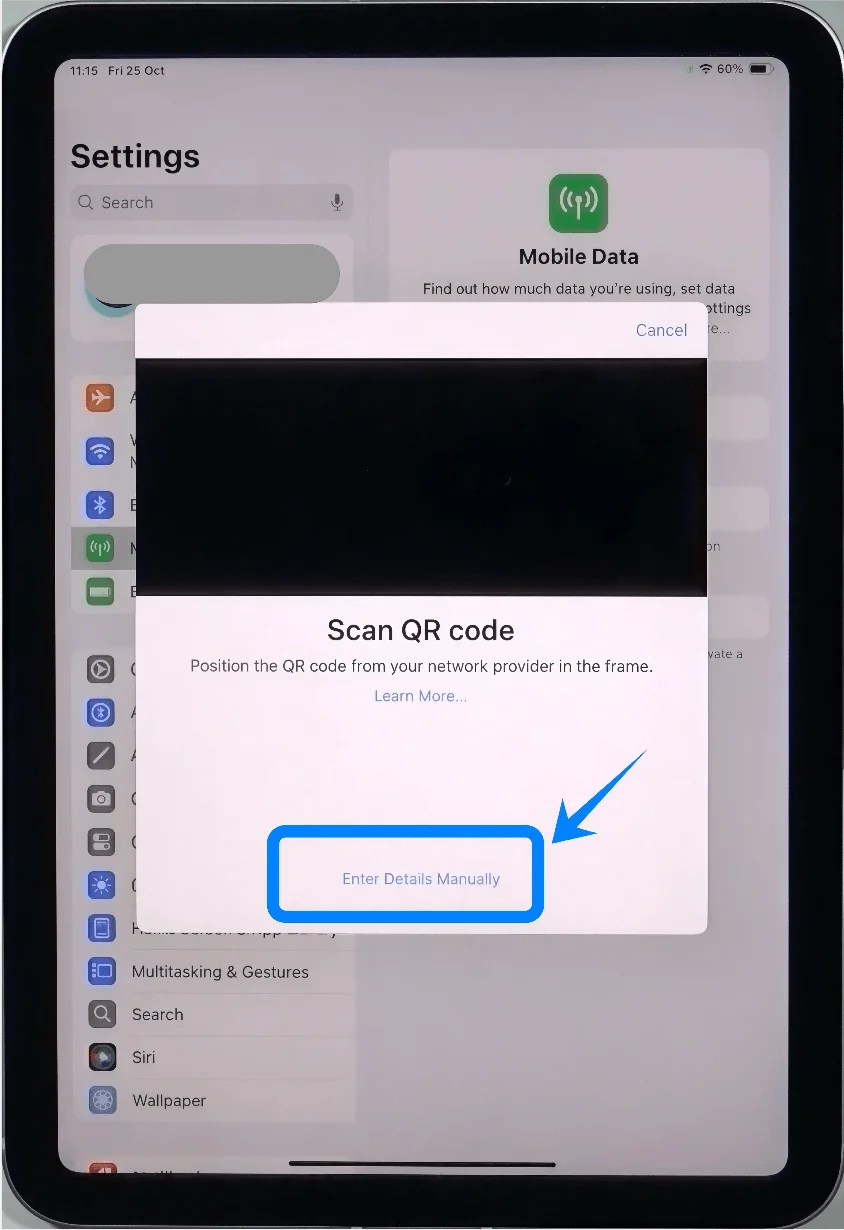
Step 3: Enter Activation Information
In the SM-DP+ Address field, enter the address provided by your carrier
In the Activation Code field, enter the activation code exactly as given
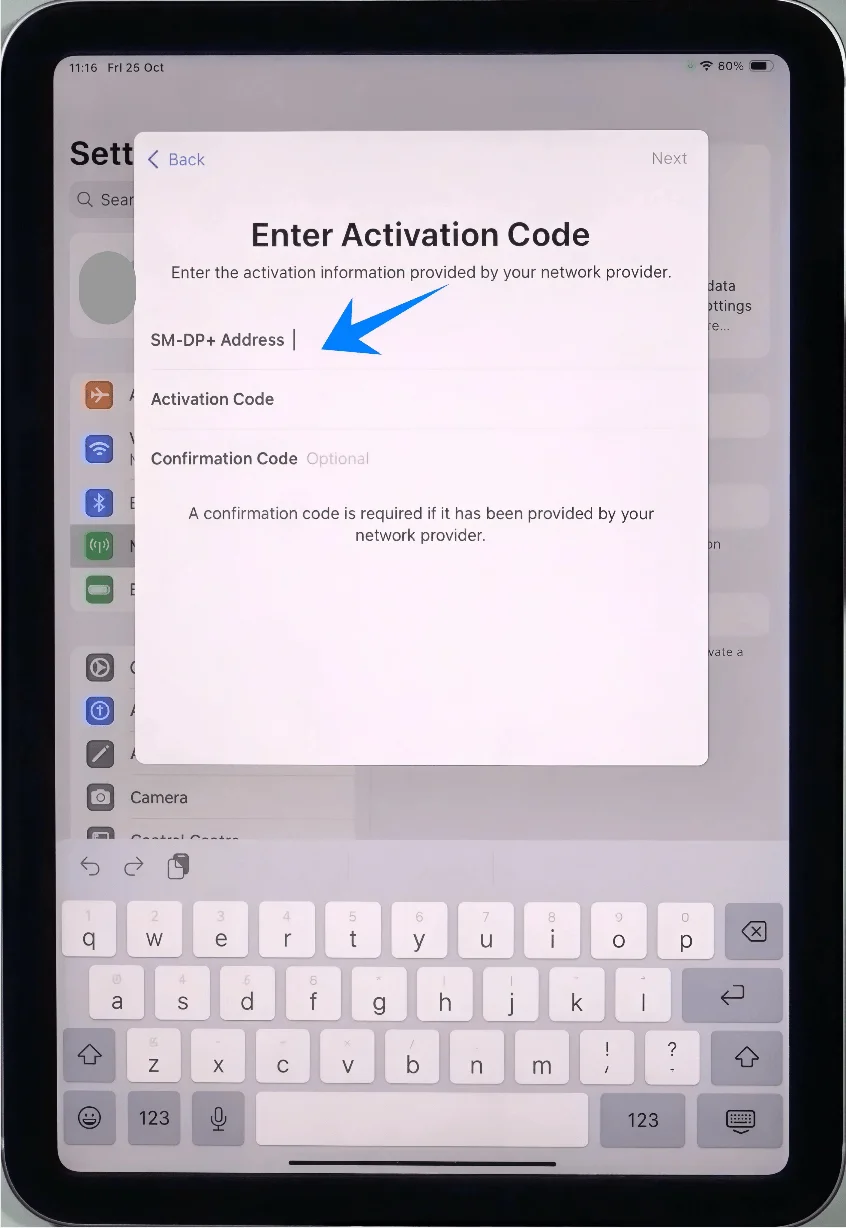
Tap Next
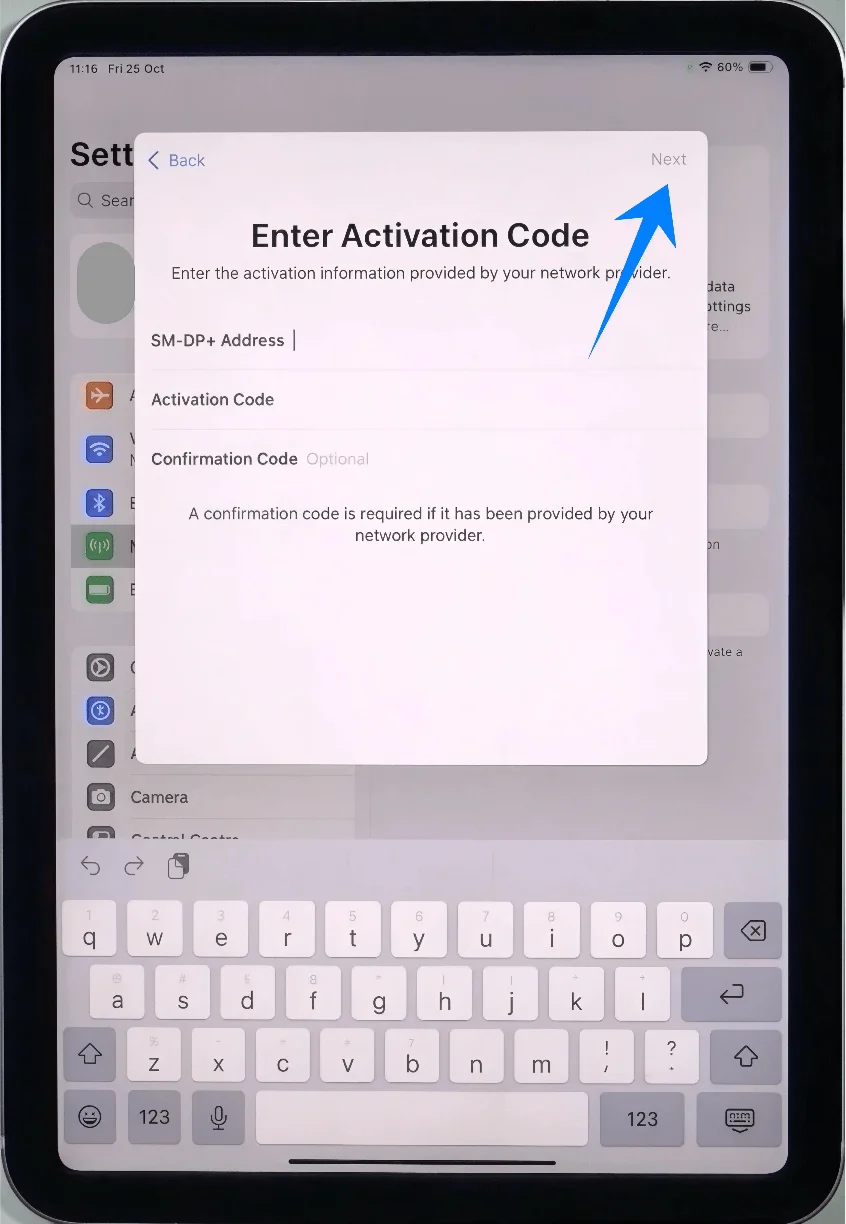
Step 4: Confirm Installation
Tap Add Cellular Plan when prompted
Step 5: Wait for Activation
The iPad will connect to the carrier network and install the eSIM profile
Do not exit the settings screen during this process
How to Confirm Successful eSIM Installation
Check Cellular Plan Status
Go to Settings → Mobile Data (On some devices or iPadOS versions, this may appear as “Cellular Data.”)
Confirm that a new plan appears under Cellular Plans
Check Network Connection
Look for a signal indicator (bars) in the top-right corner of the screen
Ensure the carrier name is displayed
Test Data Connectivity
Open Safari
Attempt to load a webpage without Wi-Fi (turn Wi-Fi off to confirm cellular usage)
Optional: Label the Plan
Go to Settings → Mobile Data (On some devices or iPadOS versions, this may appear as “Cellular Data.”)
Tap the newly added plan
Tap Cellular Plan Label and assign a name (e.g., “Work” or “Travel”)
More iPad eSIM Setup Guides
Using another iPad? These eSIM setup and activation guides may help.
Conclusion
Once you’ve followed the steps, your iRoamly eSIM should be fully installed and active on your iPad mini.
The setup process is straightforward and doesn’t require any additional tools or technical knowledge, making it accessible even for first-time users.
If you need to check your connection, switch plans, or make adjustments later, everything can be managed easily within your device settings.
With your eSIM ready, your iPad mini is now set up for a more flexible and convenient mobile data experience.