
The Vivo X80 Pro is useful for travel, but the global model information points to Funtouch OS 12 based on Android 12 and dual physical SIM operation rather than a verified eSIM download menu.
That means an iRoamly travel eSIM should not be installed on the Vivo X80 Pro unless your exact regional variant clearly shows eSIM support in Settings.
Travelers often reach this guide after buying or considering an iRoamly eSIM and expecting to scan a QR code.
The better workflow is to check the Vivo X80 Pro first, keep the activation details unused if the phone only shows physical SIM slots, and then install the plan on a confirmed eSIM-compatible unlocked phone.
This guide covers both iRoamly setup paths in a safe way: the QR-code method and the manual-entry method. For the Vivo X80 Pro, those methods are treated as unavailable unless the phone exposes a real Add eSIM, Download SIM, or manual activation screen.

Check Travel eSIM Readiness with iRoamly
iRoamly is a travel eSIM service that provides mobile data plans for destinations around the world. Depending on the trip, available options may include destination, regional, and global plans, with data allowances, validity periods, and plan types varying by location.
Installed travel data can support maps, messaging, translations, ride-hailing, bookings, and travel updates when used on a compatible device.
Because the Vivo X80 Pro may not expose a verified eSIM download menu on every regional model, use iRoamly activation details only after confirming that your exact phone supports eSIM setup.
The instructions below keep the QR-code and manual-entry paths in place, while emphasizing the compatibility checks needed before any installation attempt.
Before You Set Up Your iRoamly eSIM
Connect the Vivo X80 Pro to Wi-Fi before checking any mobile network settings.
Confirm the exact device name and software version, because Vivo settings can vary by region and firmware.
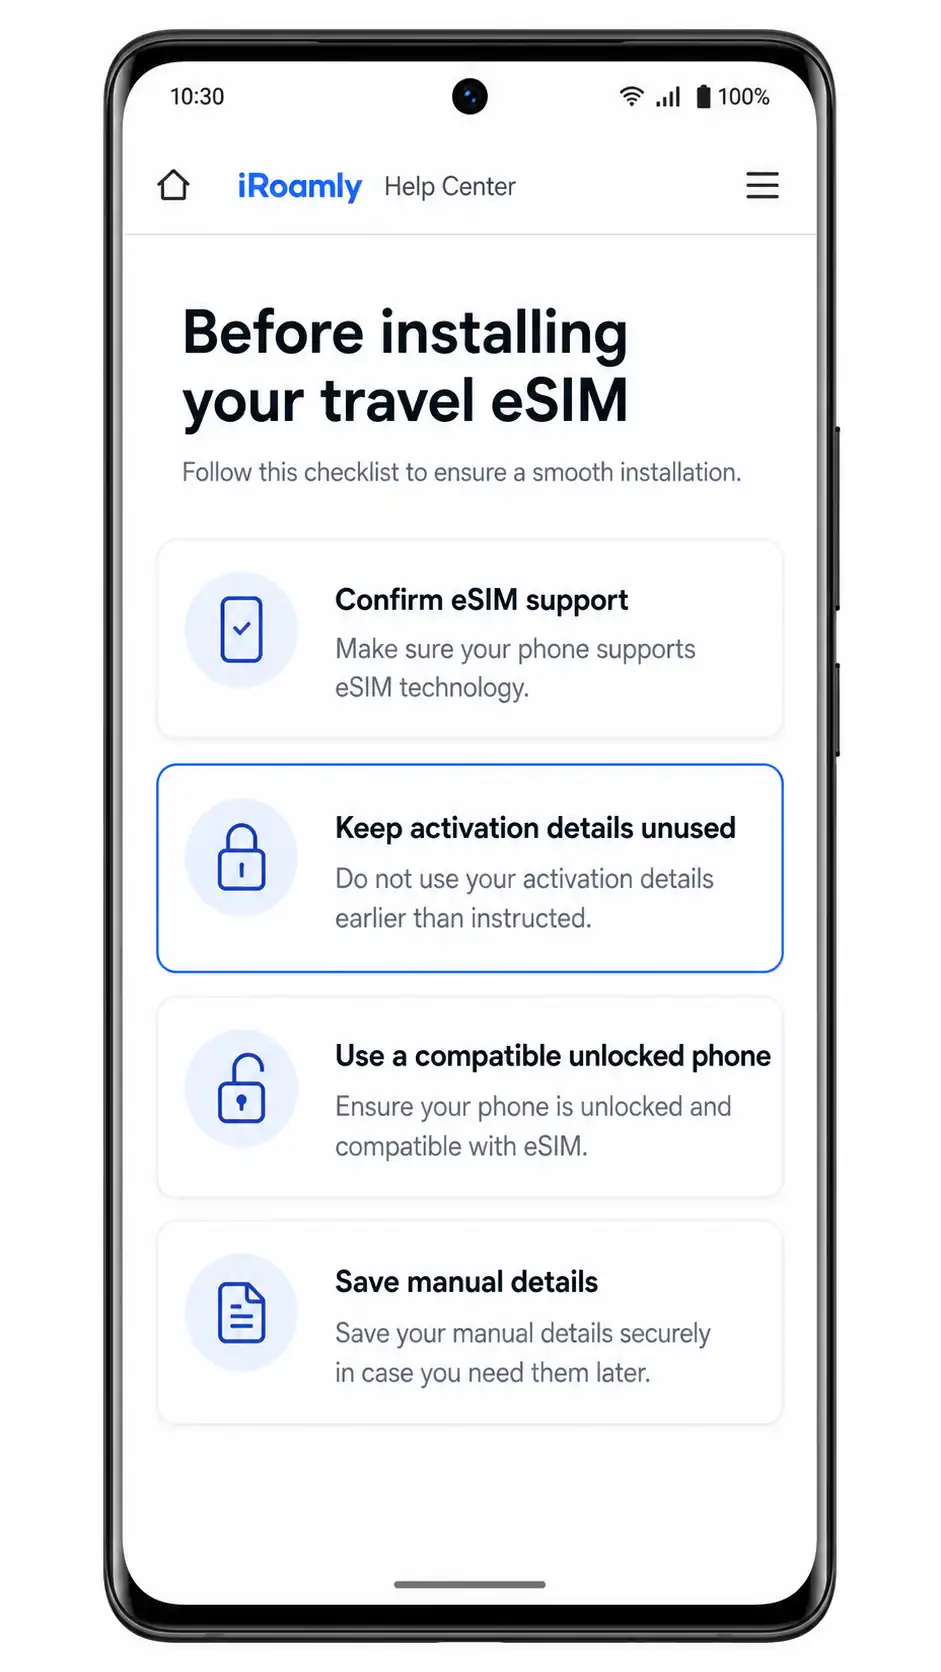
Keep the iRoamly QR code, SM-DP+ address, activation code, and confirmation code private.
Do not scan the iRoamly QR code on a phone that does not show an eSIM setup path.
Check whether the destination plan is data-only. Voice calls and SMS vary by plan and should not be assumed.
iRoamly plan validity starts from activation; the exact activation trigger can vary by destination plan, so check the plan details before installing.
If France or the United States is your destination, prepare the travel eSIM only after confirming you have an eSIM-compatible device for installation.
If the Vivo X80 Pro is not eSIM-capable, use a different unlocked phone that supports eSIM.
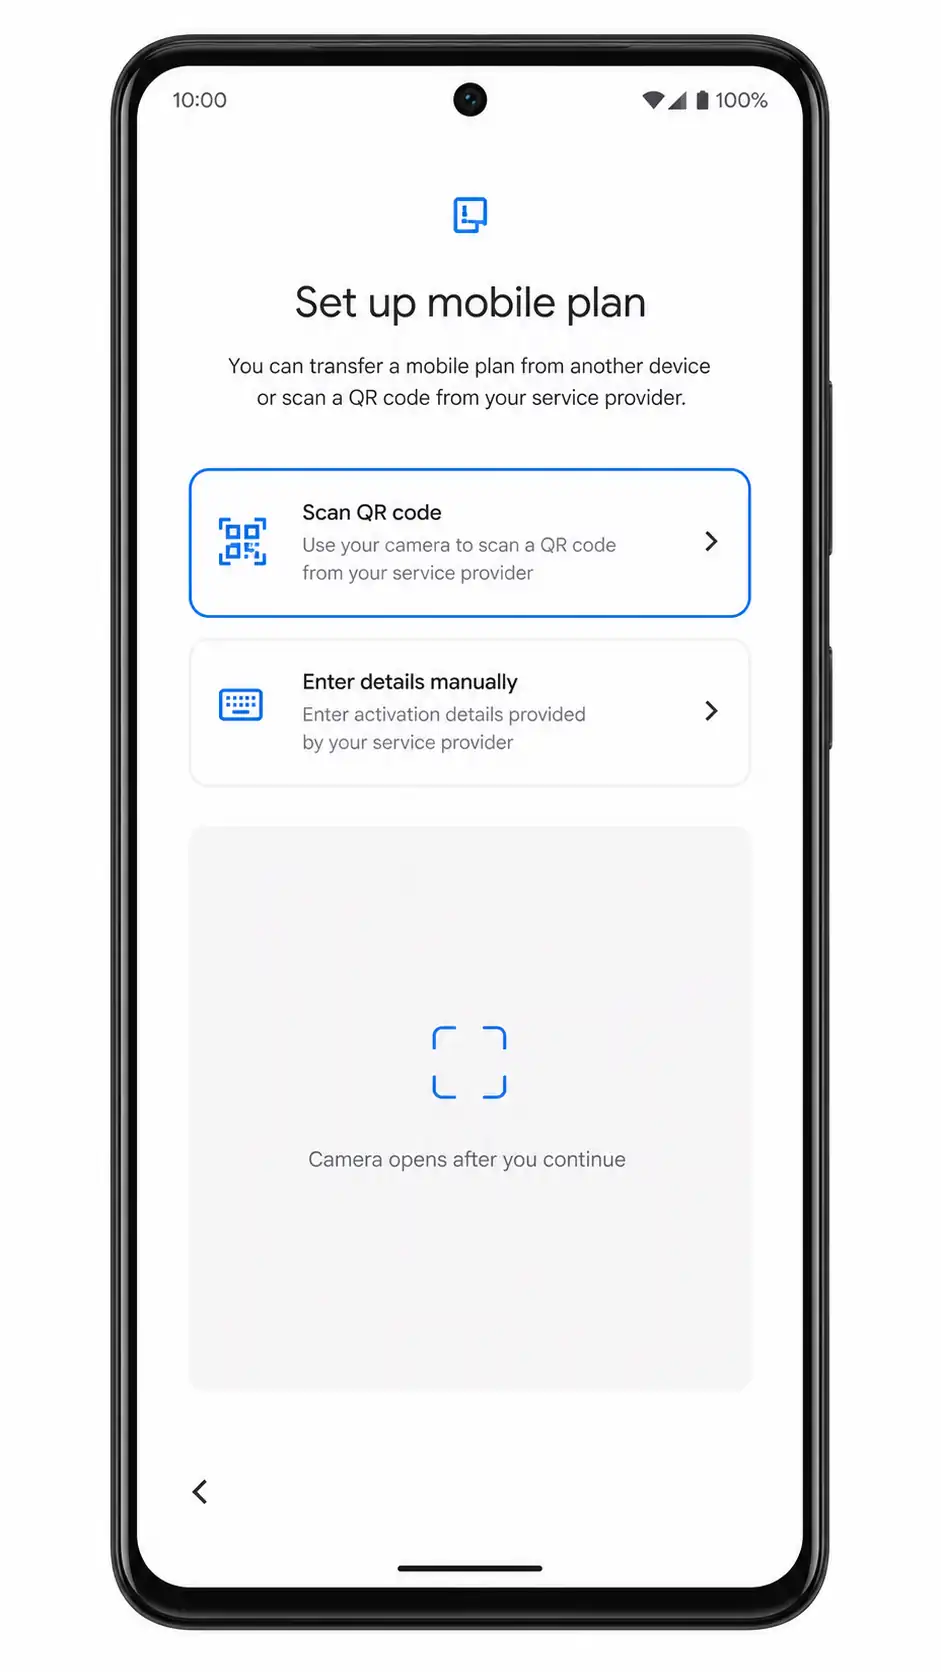
Method 1: Install eSIM by Scanning a QR Code
For this model, the QR-code method starts with a compatibility check, not with the QR scanner. If the Vivo X80 Pro does not expose an eSIM menu, stop before scanning the iRoamly QR code and move the installation to a compatible phone.
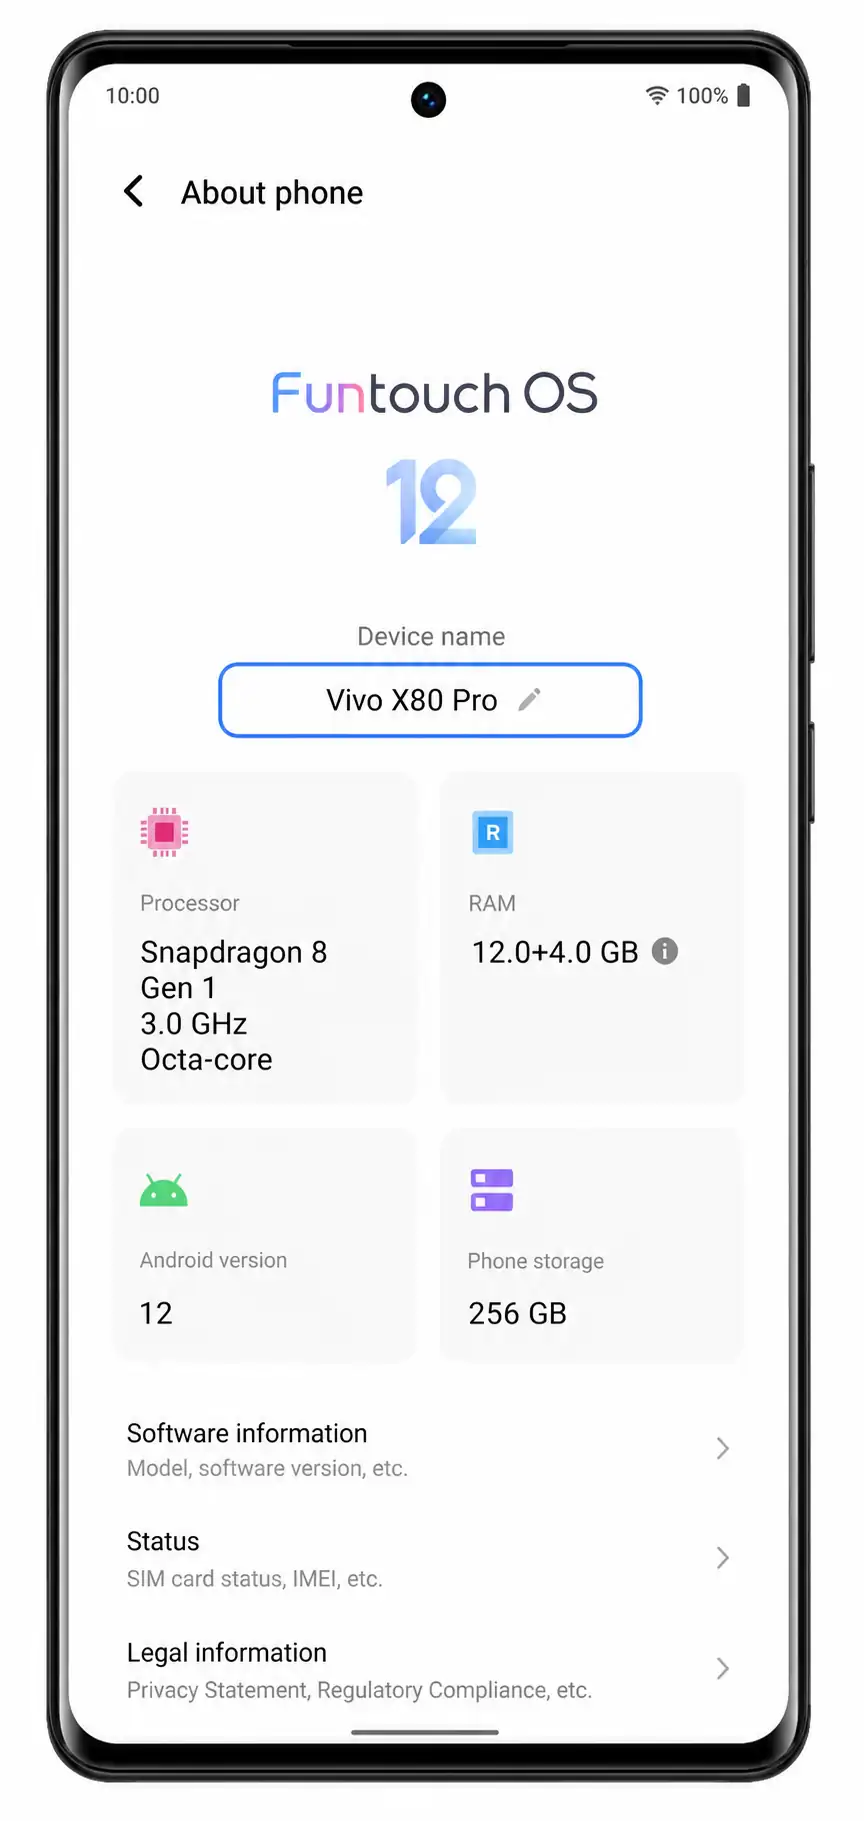
Open Settings > About phone and confirm the device name is Vivo X80 Pro.
Also check that the software is Funtouch OS 12 or the version installed on your phone. If your menu names differ, use the closest matching network settings labels on your device.
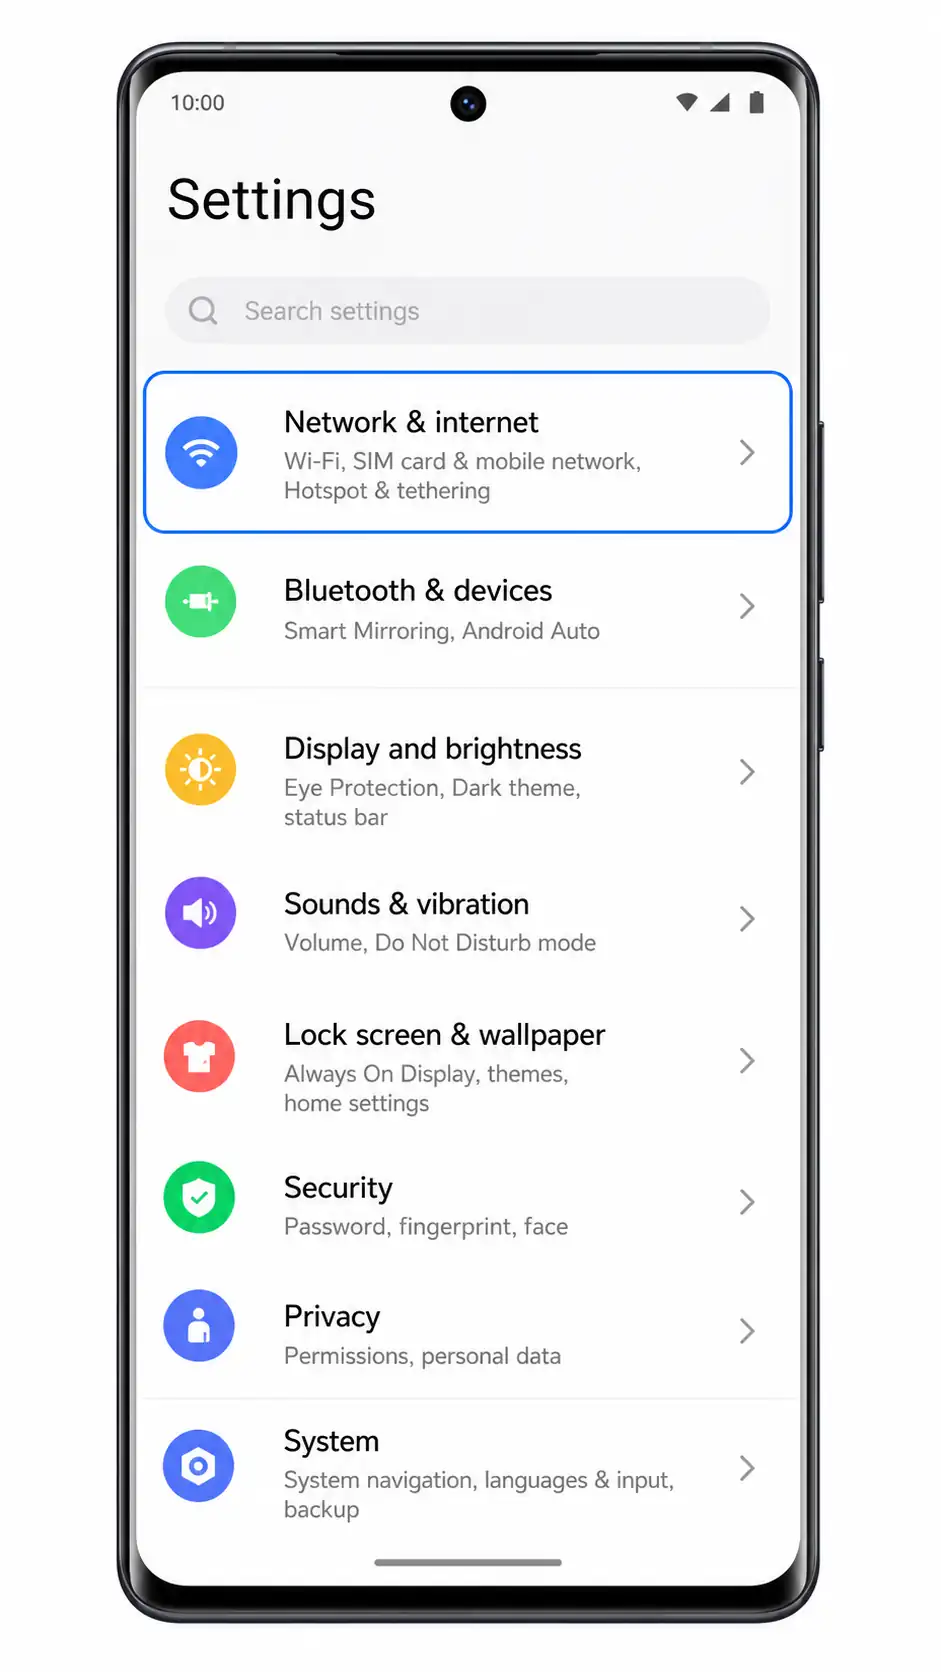
Return to Settings and tap Network & internet.
This is where Funtouch OS groups Wi-Fi, SIM, mobile network, and hotspot controls.
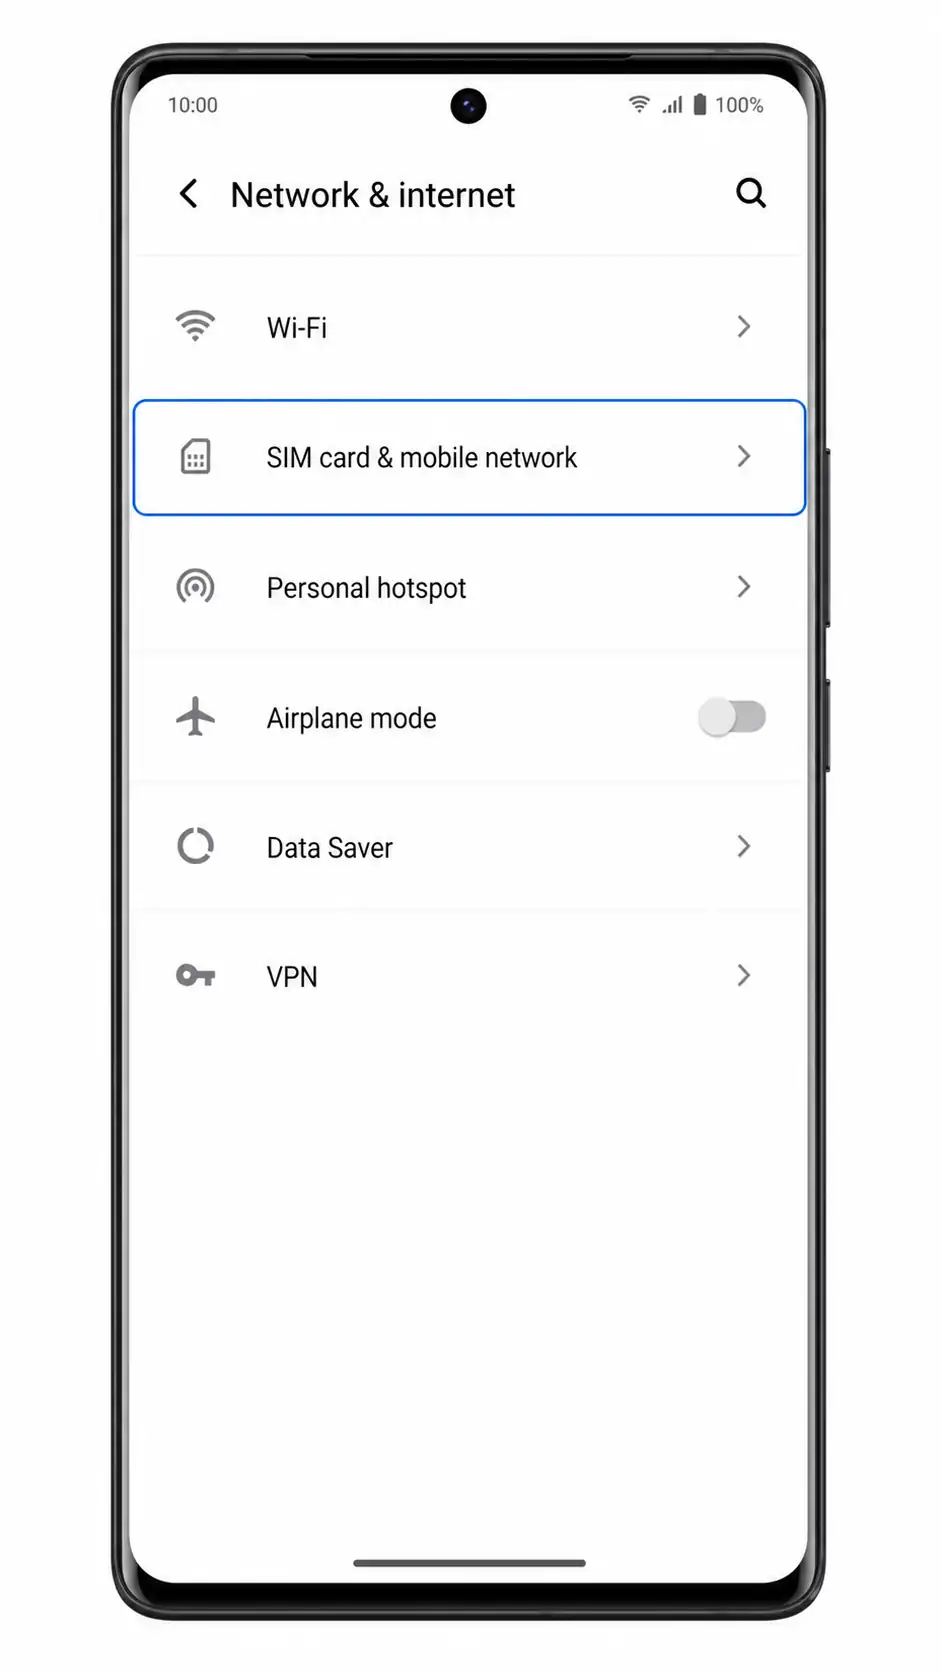
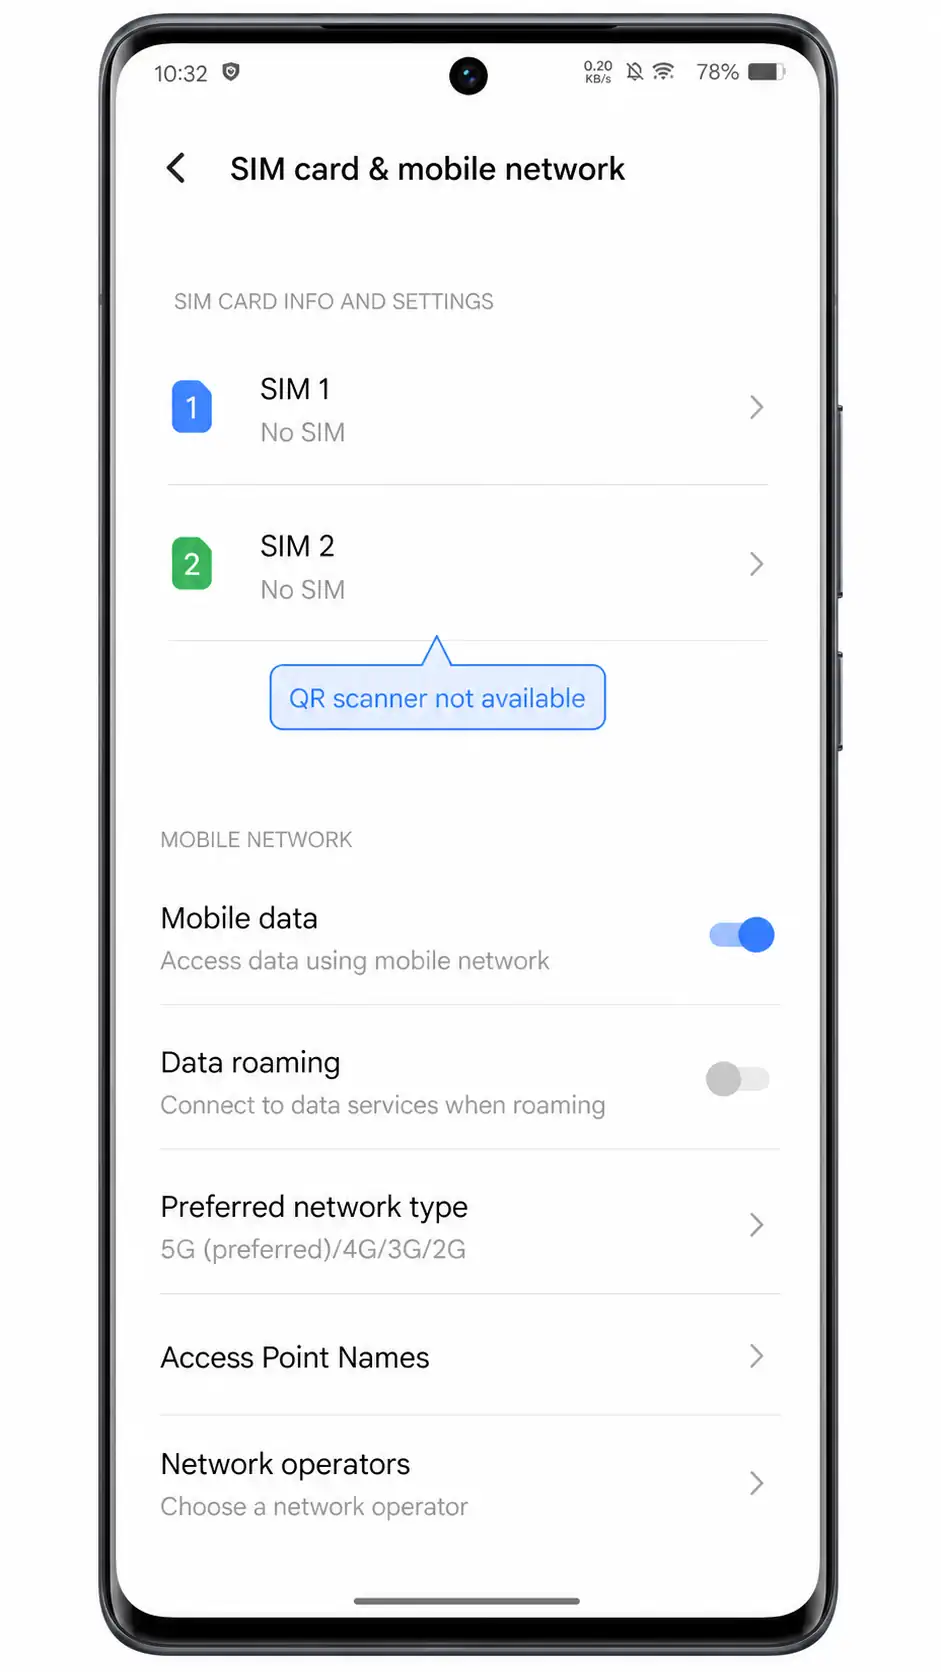
Tap SIM card & mobile network.
The QR-code route would need to continue from this SIM management area if the phone supported eSIM profile downloads.
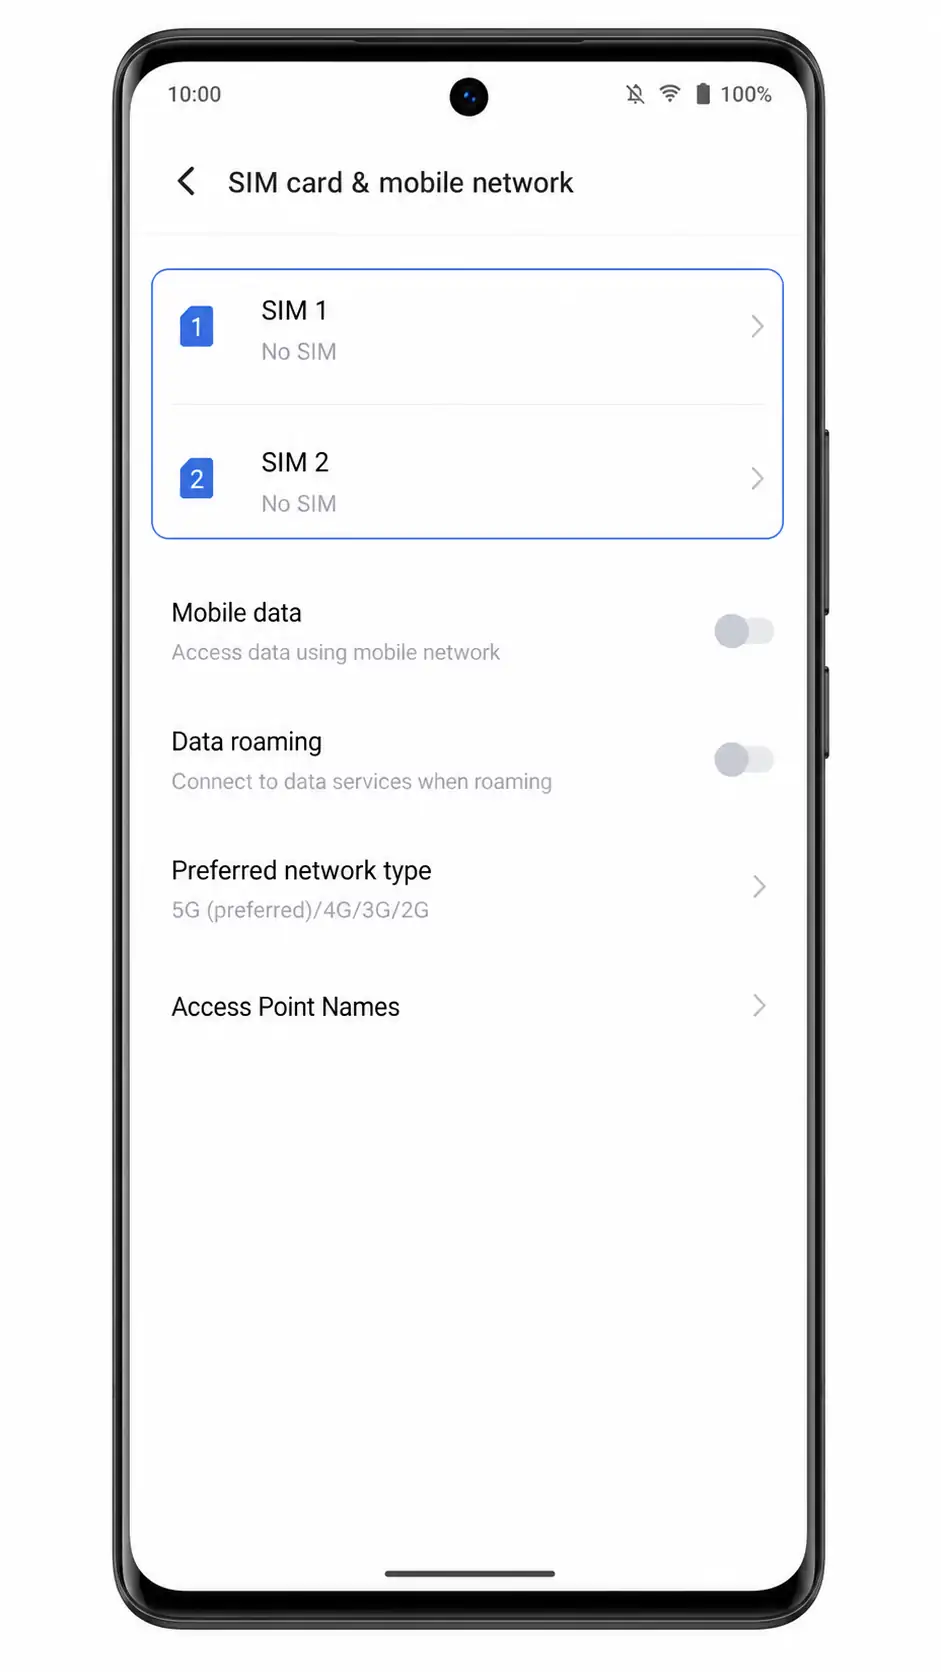
Check whether the page shows only SIM 1 and SIM 2.
If you see only physical SIM slots, the Vivo X80 Pro is not showing a usable iRoamly QR-code installation path. Do not open or scan the iRoamly QR code on this phone.
Use Settings search to look for Add eSIM.
If the search returns no matching settings, treat the Vivo X80 Pro as unsupported for iRoamly eSIM installation unless Vivo or your carrier confirms otherwise for your exact variant.
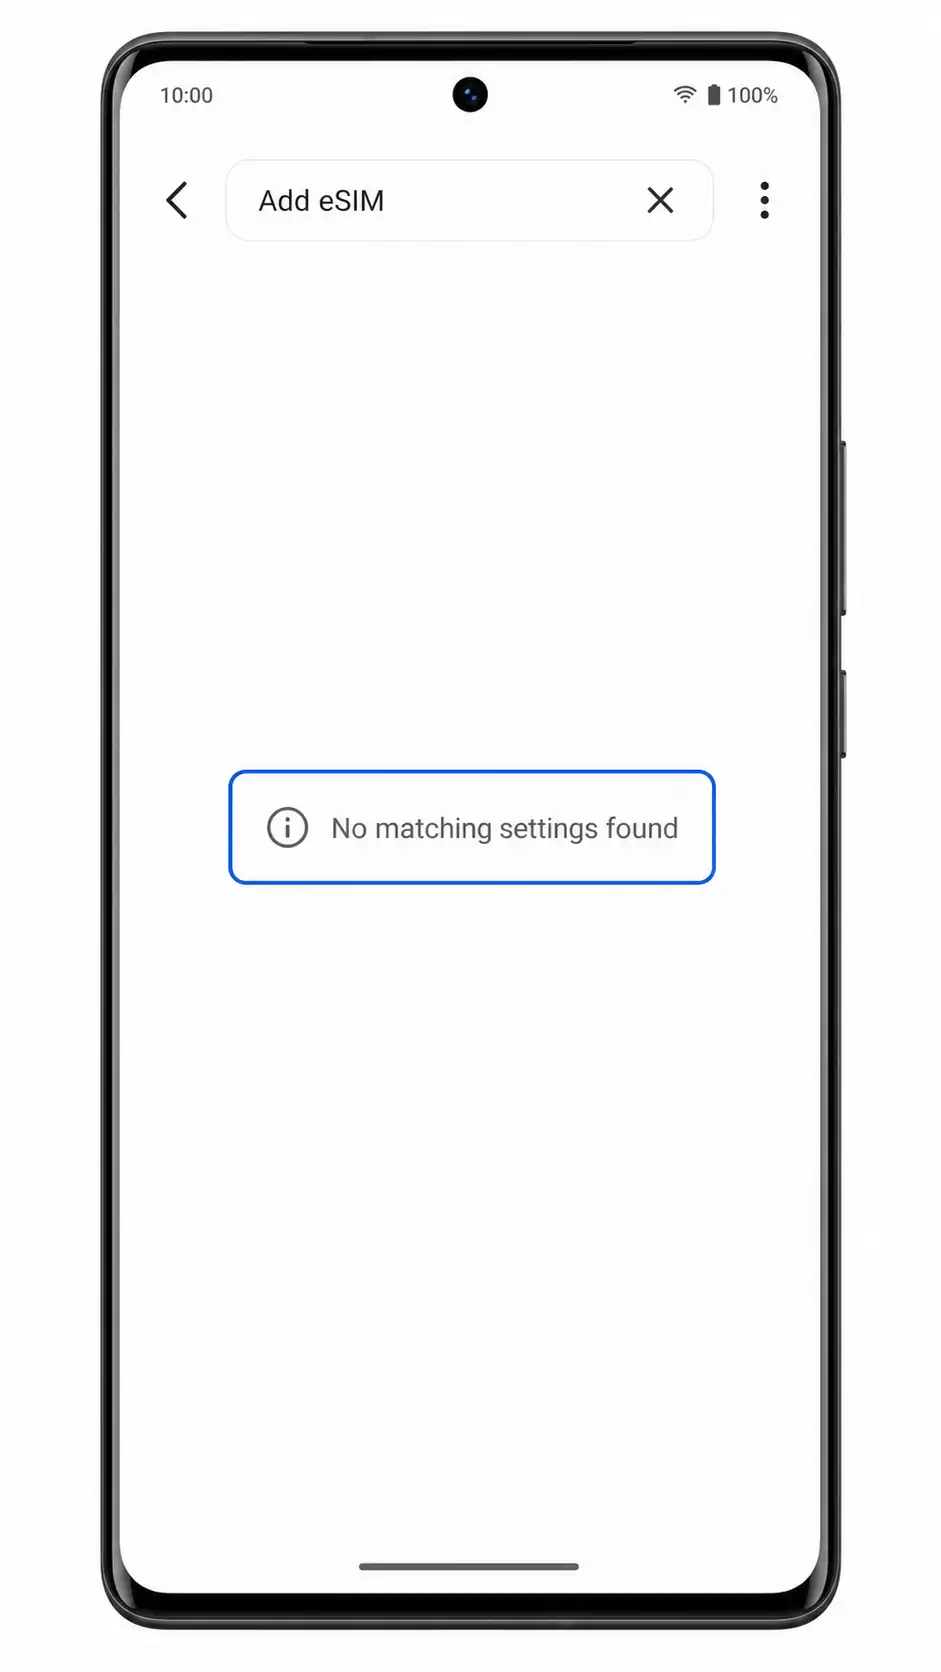
Stay on the SIM settings page and confirm that no QR scanner route appears.
An eSIM-capable phone would usually show a way to add or download a SIM profile. If there is no QR scanner or add-plan button, the QR-code method cannot continue on this Vivo X80 Pro.
Open your iRoamly order or help page and keep the activation details unused.
Do not scan the QR code, copy activation data into unrelated fields, or delete any existing eSIM from another device. Save the iRoamly details for a phone that is confirmed to support eSIM.
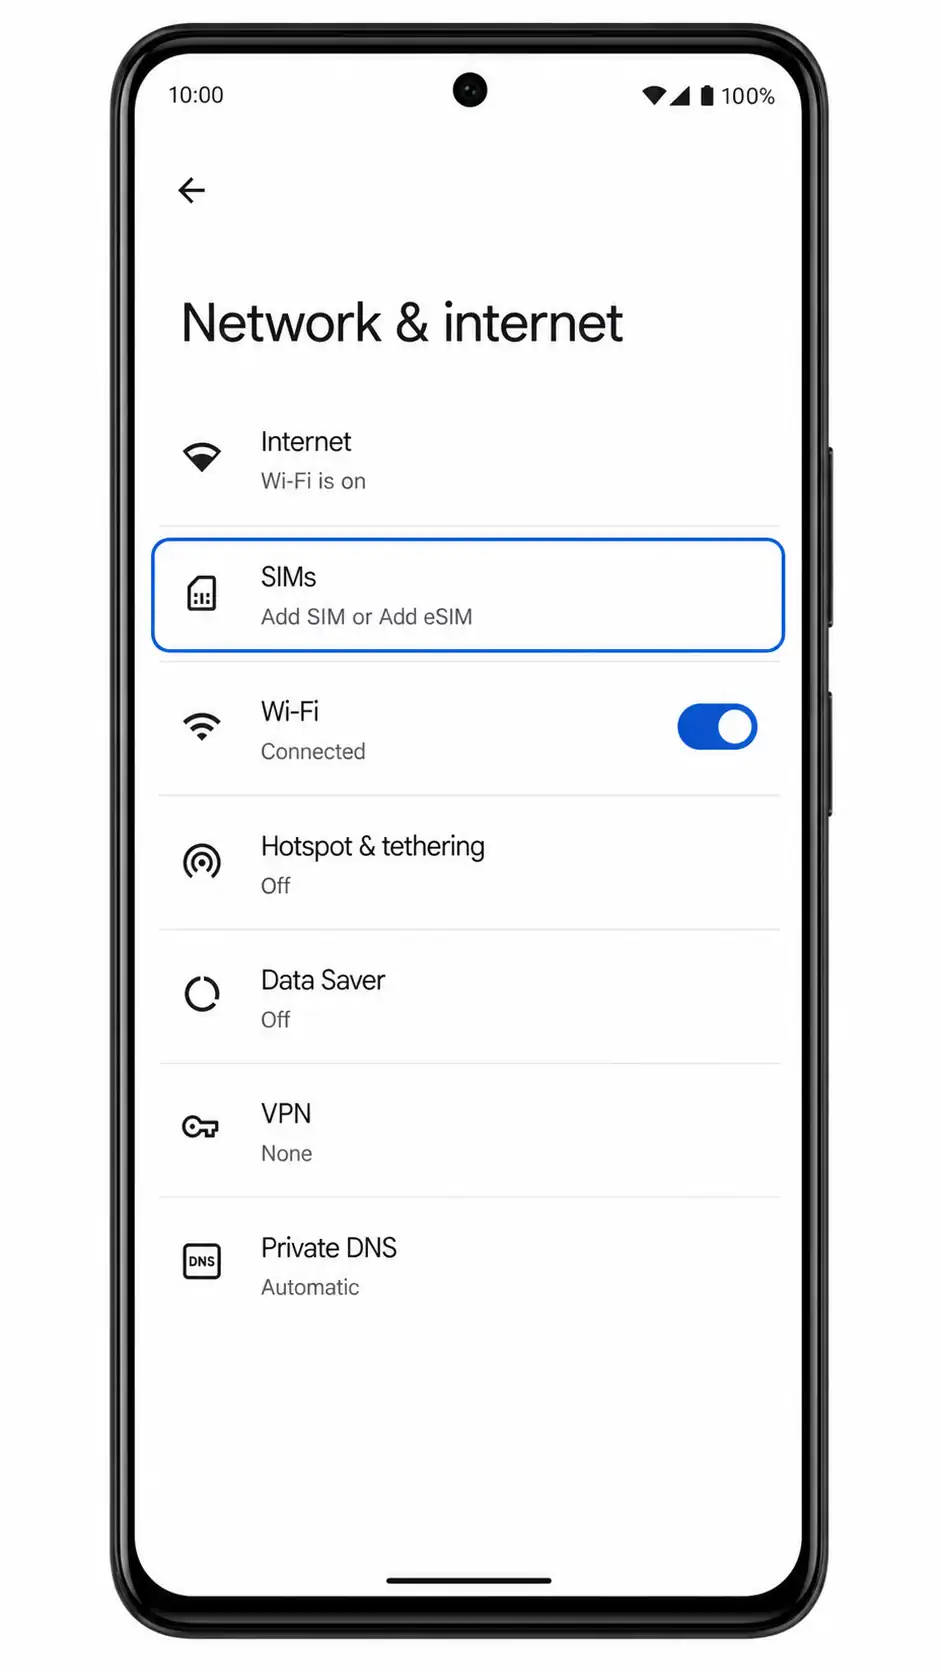
On a confirmed compatible Android phone, open Settings > Network & internet and tap SIMs or Add SIM.
This step happens on the compatible phone, not on the Vivo X80 Pro. The phone should clearly show an option to add a SIM or eSIM before you continue.
Tap Scan QR code on the compatible phone.
Use the iRoamly QR code only at this point. Keep the compatible phone connected to Wi-Fi while the eSIM profile downloads.
Method 2: Install eSIM Manually
Manual installation is not a workaround for missing eSIM hardware. It still requires an eSIM-capable device with a manual-entry screen. On a compatible Android phone, the manual route usually asks for separate SM-DP+ Address, Activation Code, and optional Confirmation Code fields.
On the Vivo X80 Pro, confirm again that there is no Add eSIM, Download SIM, Enter manually, or Enter activation code option in Settings > Network & internet > SIM card & mobile network.
If those labels are missing, the manual method cannot be performed on the Vivo X80 Pro.
On a confirmed compatible Android phone, choose Enter details manually from the eSIM setup screen.
Do this only after the compatible phone displays an eSIM setup page. Do not enter iRoamly details into unrelated SIM, APN, or carrier settings.
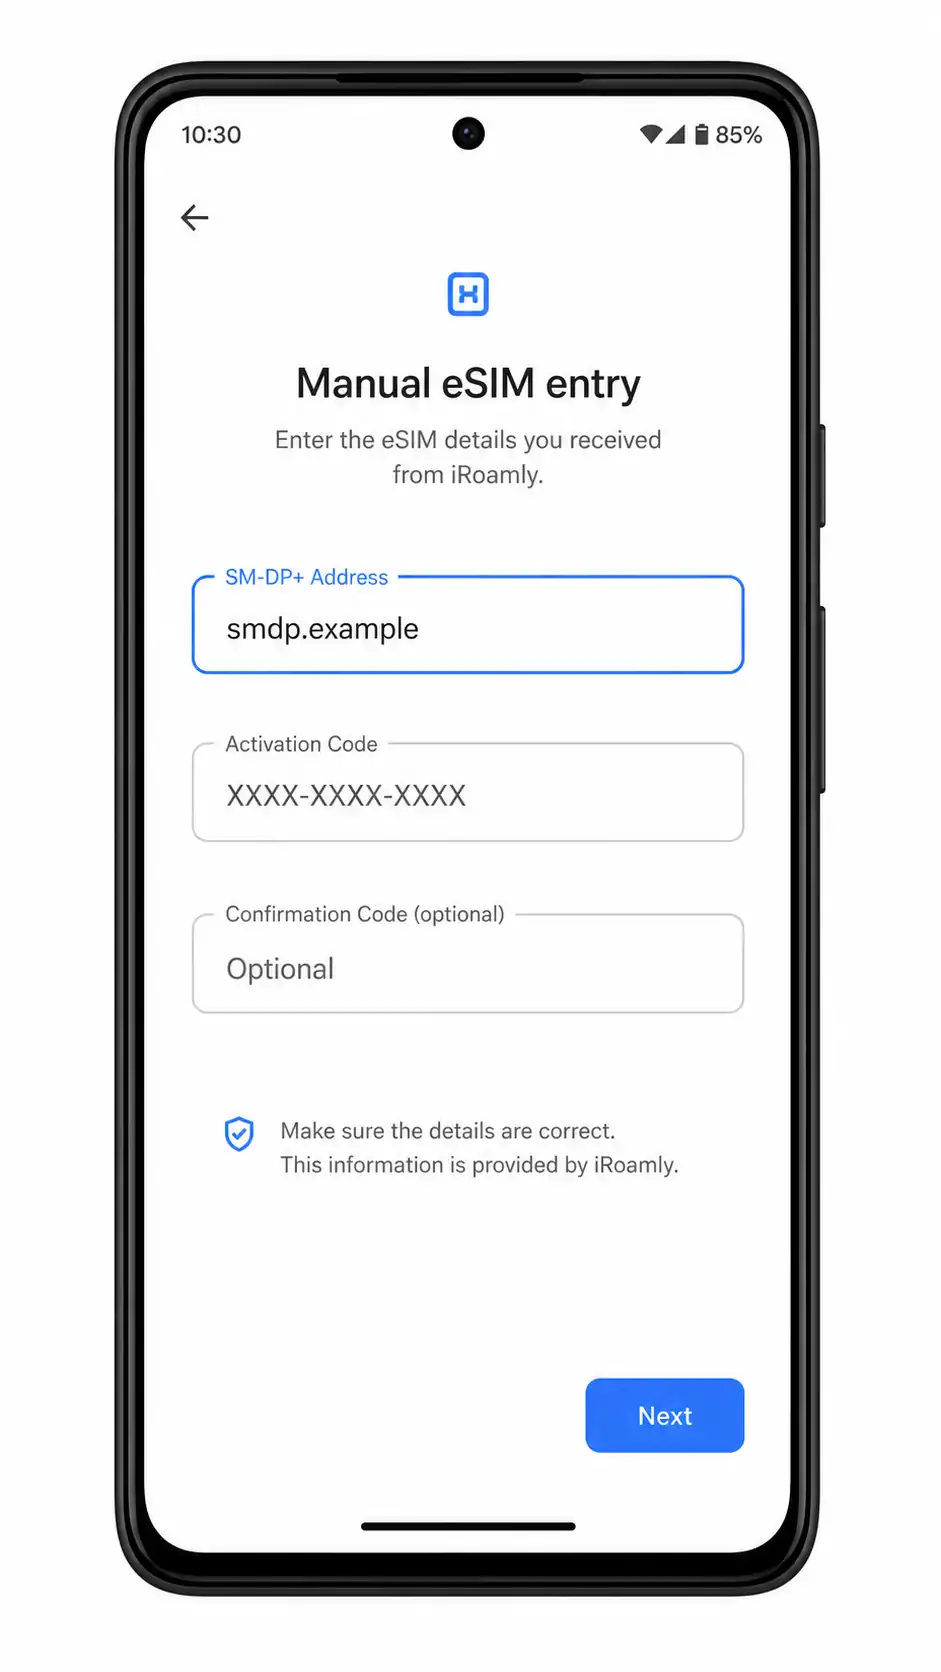
Enter the iRoamly SM-DP+ Address, Activation Code, and Confirmation Code if one is provided, then tap Next.
Use the exact values from your iRoamly order or account page. Stay on Wi-Fi until the compatible phone finishes downloading the eSIM profile.
How to Confirm Your iRoamly eSIM Is Installed
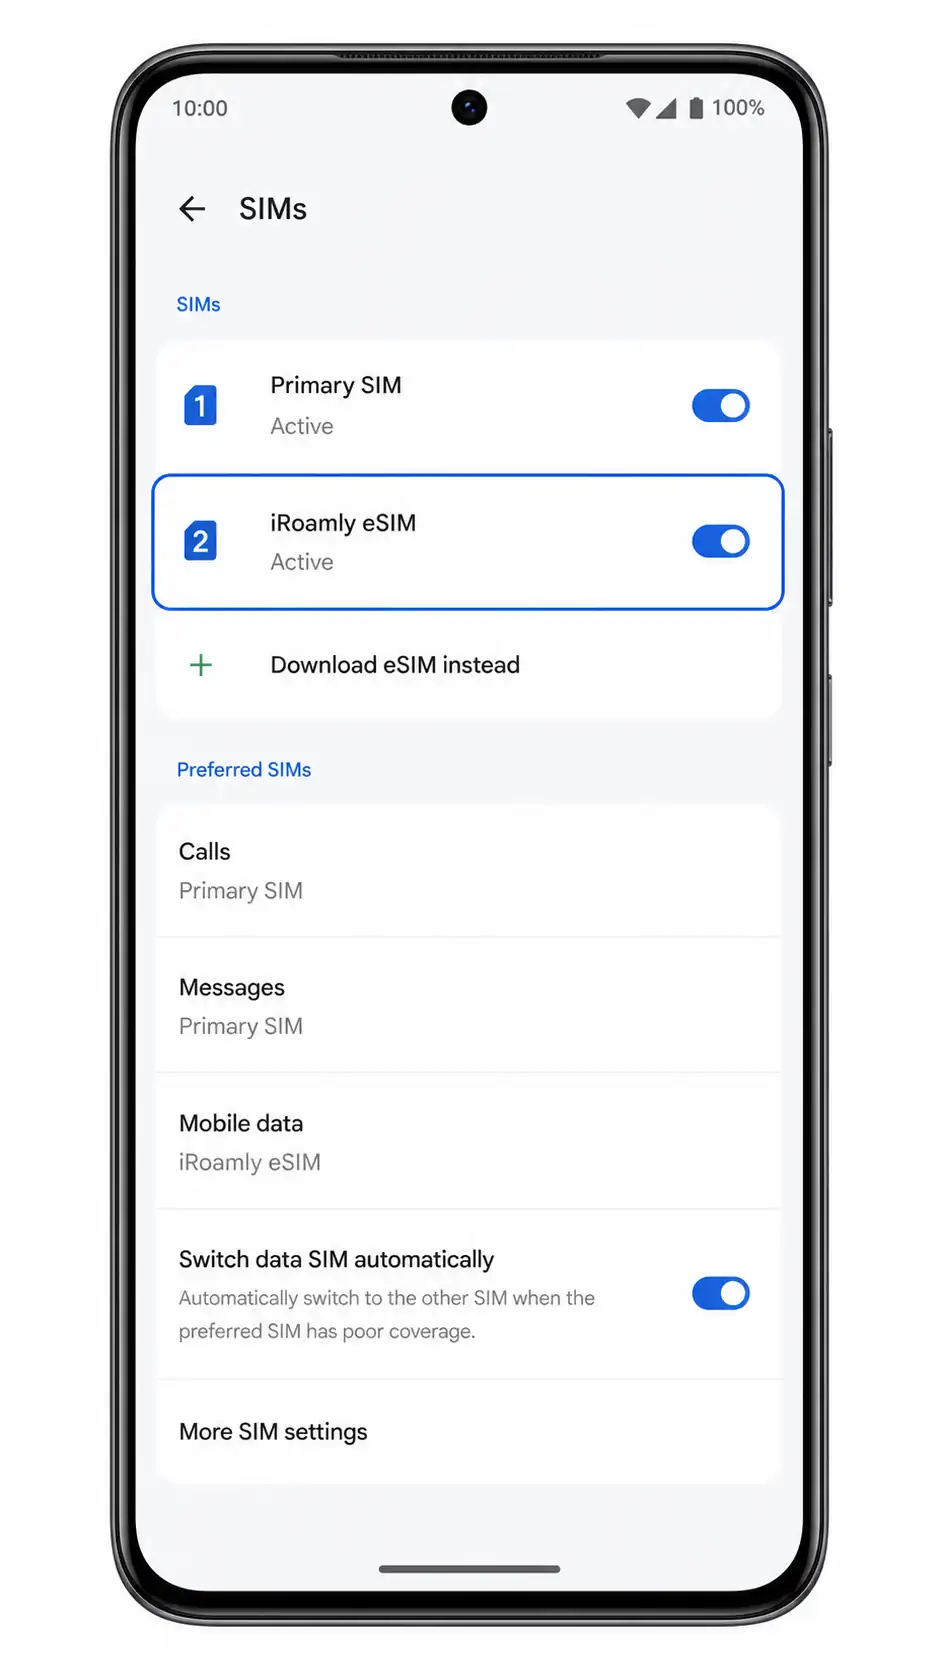
The iRoamly eSIM is installed only when it appears as a separate eSIM line on the compatible phone. The Vivo X80 Pro physical SIM page alone cannot confirm installation.
On the compatible phone, open the SIMs page after QR or manual setup completes.
Look for an active line named iRoamly eSIM or a similar travel eSIM label. If it does not appear, the profile has not been installed.
Configure eSIM for Mobile Data
After installation, choose the iRoamly eSIM for travel data on the compatible phone. Keep your primary SIM for calls and messages unless your iRoamly plan specifically includes voice or SMS.
Open the compatible phone's Mobile data or Preferred SIMs page and select iRoamly eSIM.
This makes the travel eSIM the line used for mobile data instead of the primary SIM.
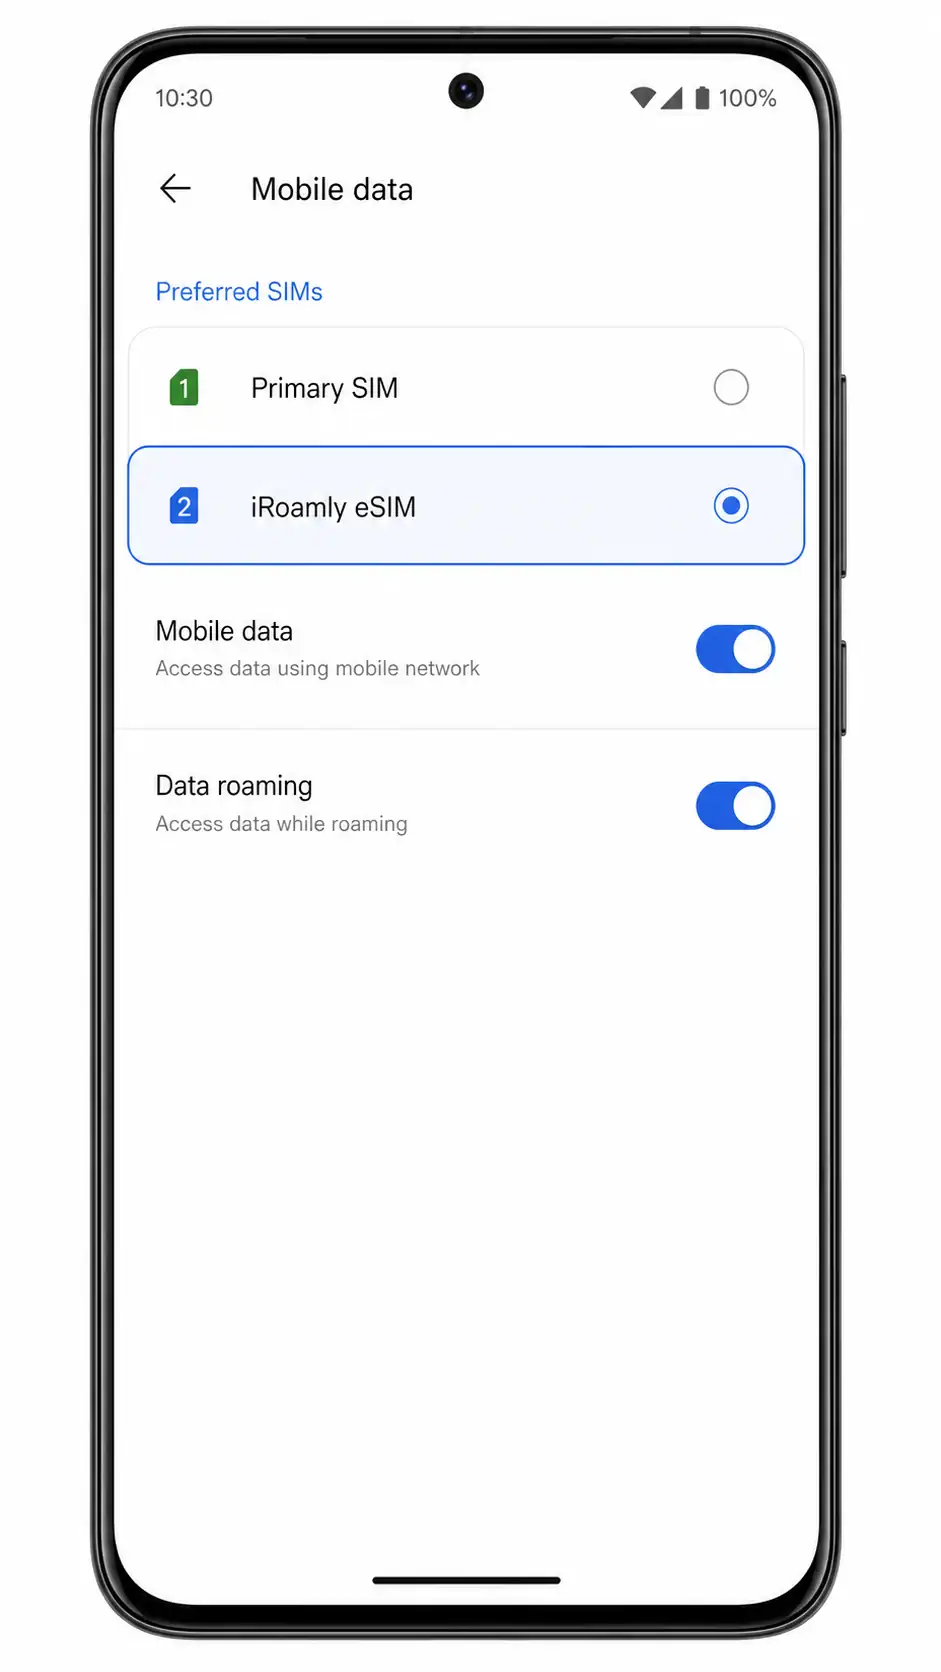
Turn on Data roaming if the iRoamly plan or destination instructions require it.
Test a webpage or map app after arrival. If data does not work, restart the phone and check any APN instructions provided by iRoamly.
Troubleshooting
Add eSIM is missing on Vivo X80 Pro: Use a confirmed eSIM-compatible phone instead of forcing the setup.
The QR scanner never appears: The Vivo X80 Pro is not exposing a QR-based eSIM installation route.
Manual fields are missing: You cannot enter the iRoamly SM-DP+ address or activation code without an eSIM manual-entry screen.
The QR code was scanned on the wrong phone: Stop and contact iRoamly support before trying again, because eSIM reuse and reinstall rules vary.
The compatible phone installs the eSIM but has no data: Select iRoamly eSIM for mobile data, enable data roaming if required, restart the phone, and check APN instructions.
Activation stays pending: Keep the compatible phone on Wi-Fi and wait for the eSIM download to finish. Some plans activate at installation, while others activate when they connect to a supported destination network.
Calls or SMS do not work: Check the iRoamly plan details. Many travel eSIM plans are data-only.
Your Vivo X80 Pro variant shows eSIM options: Follow the actual labels on your phone, but confirm device support with Vivo, your carrier, or iRoamly before using the QR code.
More Vivo eSIM Setup Guides
Using another Vivo phone? These eSIM setup and activation guides may help.
Conclusion
For the Vivo X80 Pro, the easiest safe path is to check Settings > Network & internet > SIM card & mobile network before touching the iRoamly QR code. If the page only shows SIM 1 and SIM 2, the Vivo X80 Pro does not provide a verified place to scan the QR code or enter the SM-DP+ and activation details.
Keep the iRoamly activation details unused, install the travel eSIM on a confirmed compatible unlocked phone, then confirm that iRoamly eSIM appears in the compatible phone's SIMs page. After that, select it for mobile data, enable data roaming when the plan requires it, and test data before relying on it during travel.