
Motorola Edge 60 supports eSIM on compatible regional models, making it a practical phone for travelers who want mobile data without changing a physical SIM card. This guide assumes Motorola Edge 60 on Android 15 with Motorola's stock-like Settings layout.
For travel, an iRoamly eSIM can be installed before departure so the data line is ready when you arrive. Check your exact iRoamly plan before installation because plan validity starts from activation, and voice calls or SMS may not be included unless your selected plan says so.
This guide covers both setup routes: scanning the iRoamly QR code and entering the eSIM details manually. Menu names can vary slightly by software version, region, or carrier firmware, but the expected path is Settings > Network & internet > SIMs > Add SIM > Set up an eSIM.

Stay Connected Abroad with iRoamly
iRoamly eSIM is a travel eSIM service for mobile data in destinations worldwide. Depending on where you are going, available options may include local, regional, and global plans with different validity periods, data allowances, and plan features.
With a travel data line installed, you can use your phone for maps, messaging, translations, bookings, and travel updates without swapping a physical SIM.
For Motorola Edge 60 users with an eSIM-capable regional model, iRoamly can be installed before departure and selected for mobile data when you are ready to use it abroad. The steps below show both supported setup paths in the Motorola settings flow: QR code installation and manual entry.
Before You Set Up Your iRoamly eSIM
Connect the Motorola Edge 60 to stable Wi-Fi before downloading the eSIM.
Confirm your Motorola Edge 60 model and region support eSIM. Some carrier or regional variants may disable eSIM.
Keep your iRoamly QR code available on another screen or printed page if you plan to scan it.
Keep the manual details from iRoamly available, including the SM-DP+ Address, Activation Code, and any optional confirmation code if provided.
Install the eSIM 1-2 days before travel when possible, but avoid activating the travel data line too early if your plan validity starts from activation.
Use the QR code or manual details provided with the specific plan you purchased. For example, if you're setting up an eSIM for France or Italy, make sure the installation details match that order before adding the eSIM to your Motorola Edge 60.
Do not delete the iRoamly eSIM after installation unless iRoamly support tells you to. Many eSIM profiles cannot be reinstalled after removal.
Method 1: Install eSIM by Scanning a QR Code
Open Settings on the Motorola Edge 60, then tap Network & internet. You should see the page that contains mobile network and SIM options.
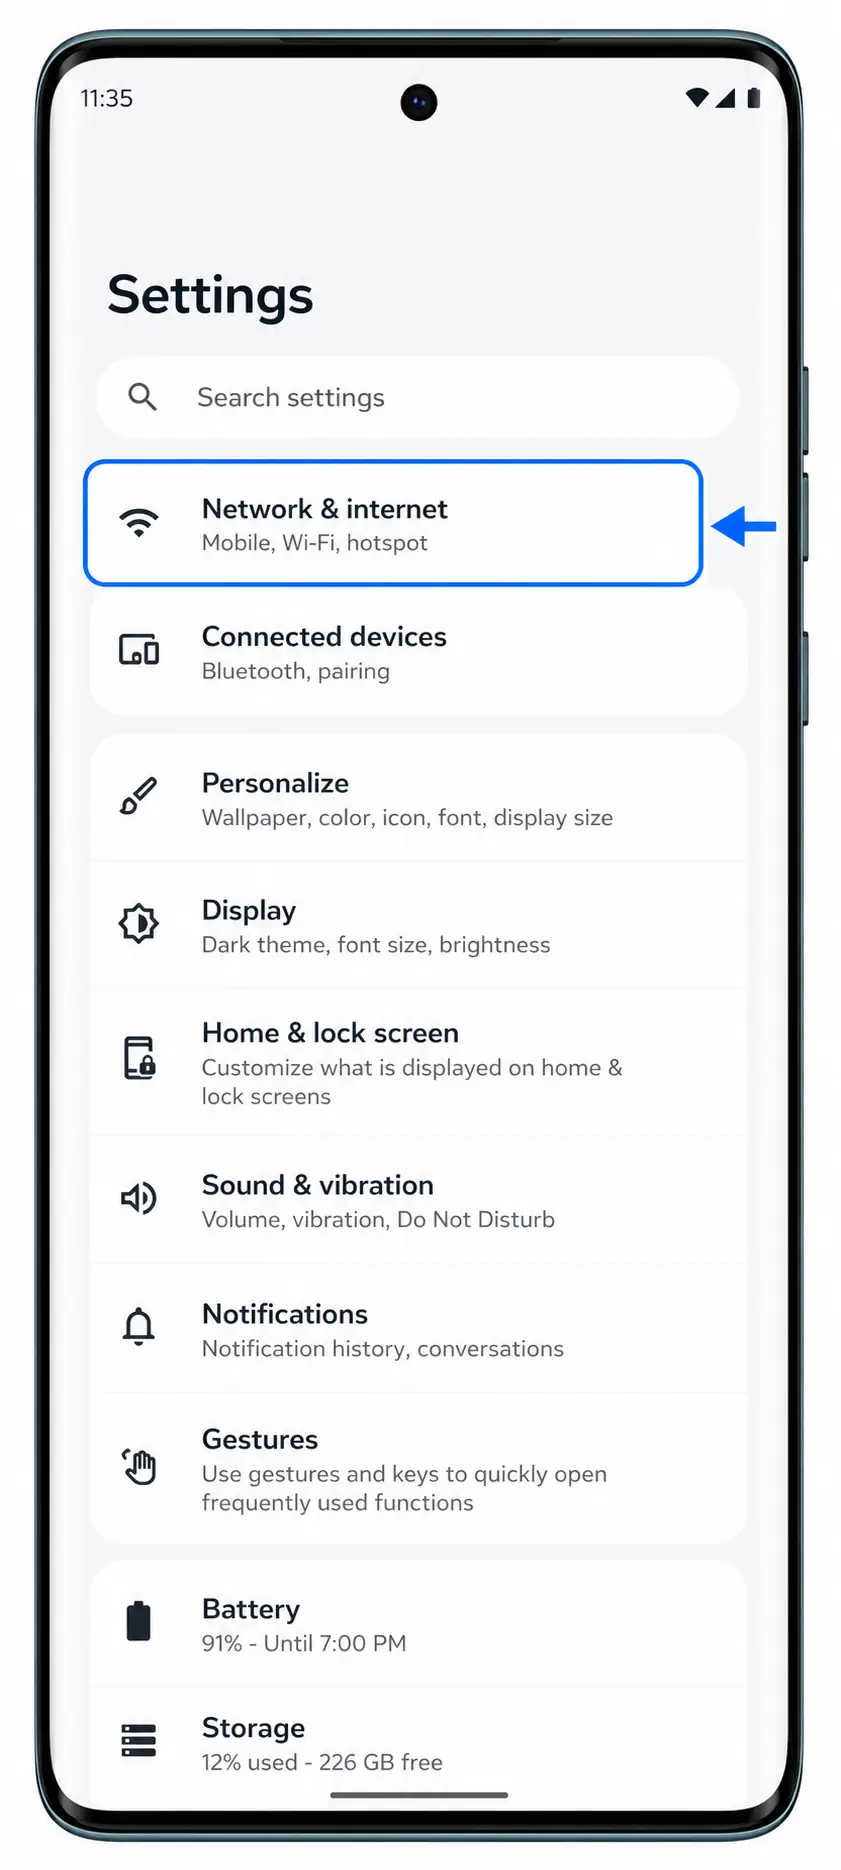
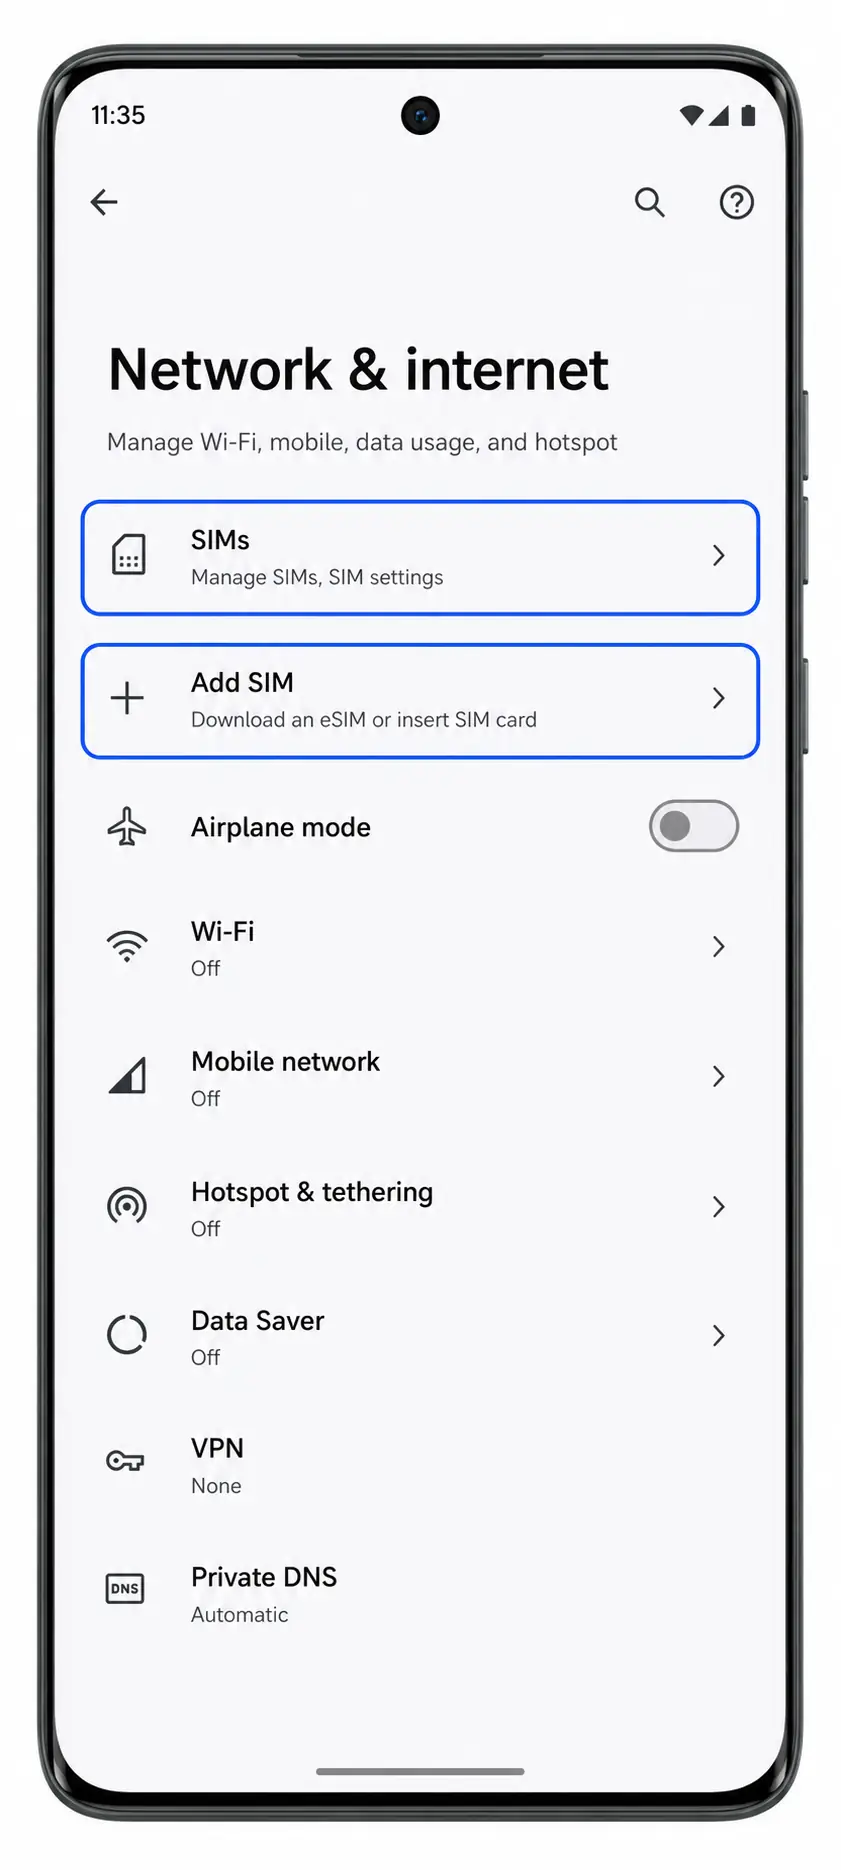
Tap SIMs, then tap Add SIM. The phone should open the SIM setup flow.
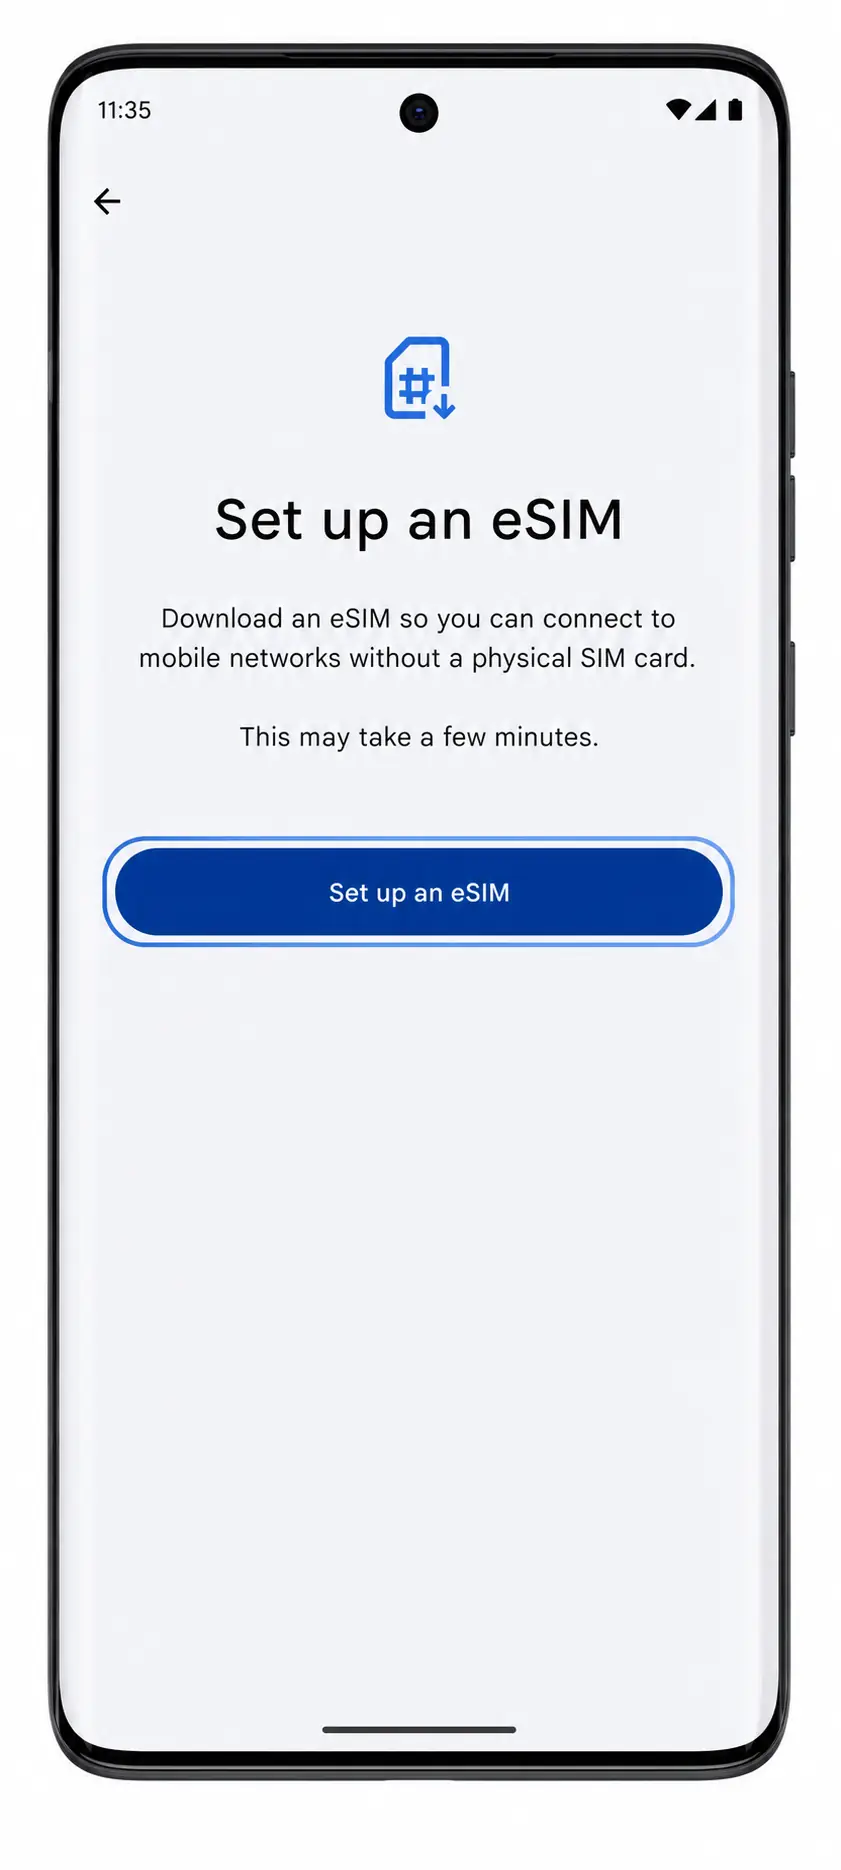
Tap Set up an eSIM. The phone should prepare the eSIM setup screen instead of asking for a physical SIM card.
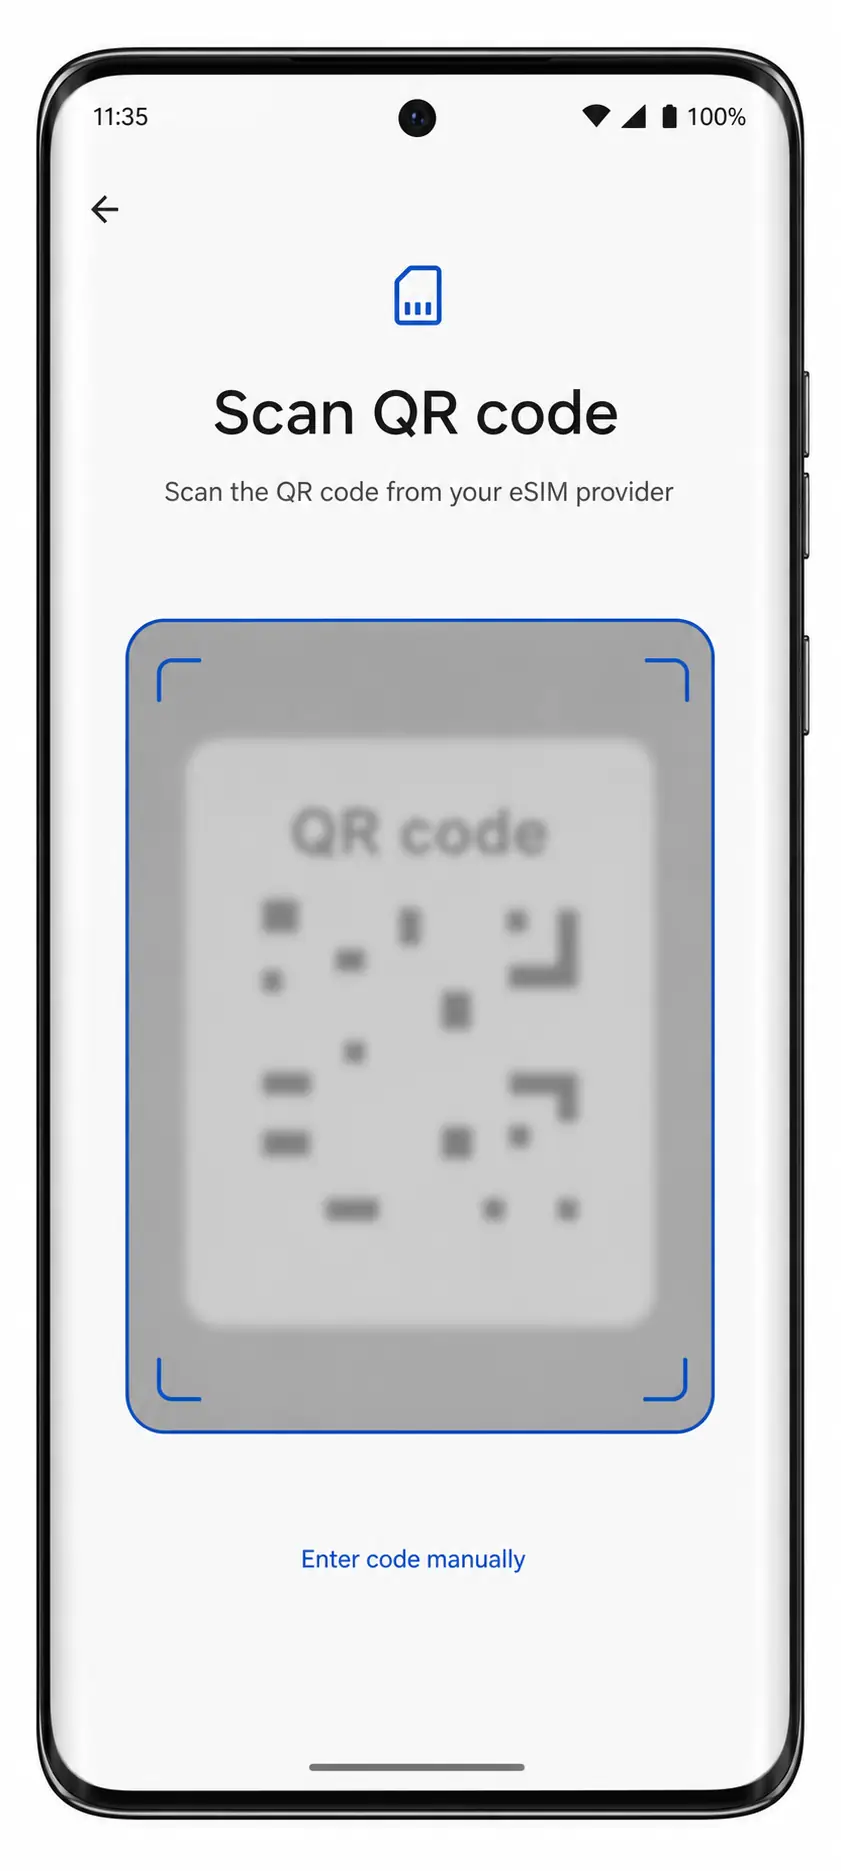
Choose Scan QR code, then point the camera at the iRoamly QR code. Keep the code flat and fully inside the scanner frame until the phone detects it.
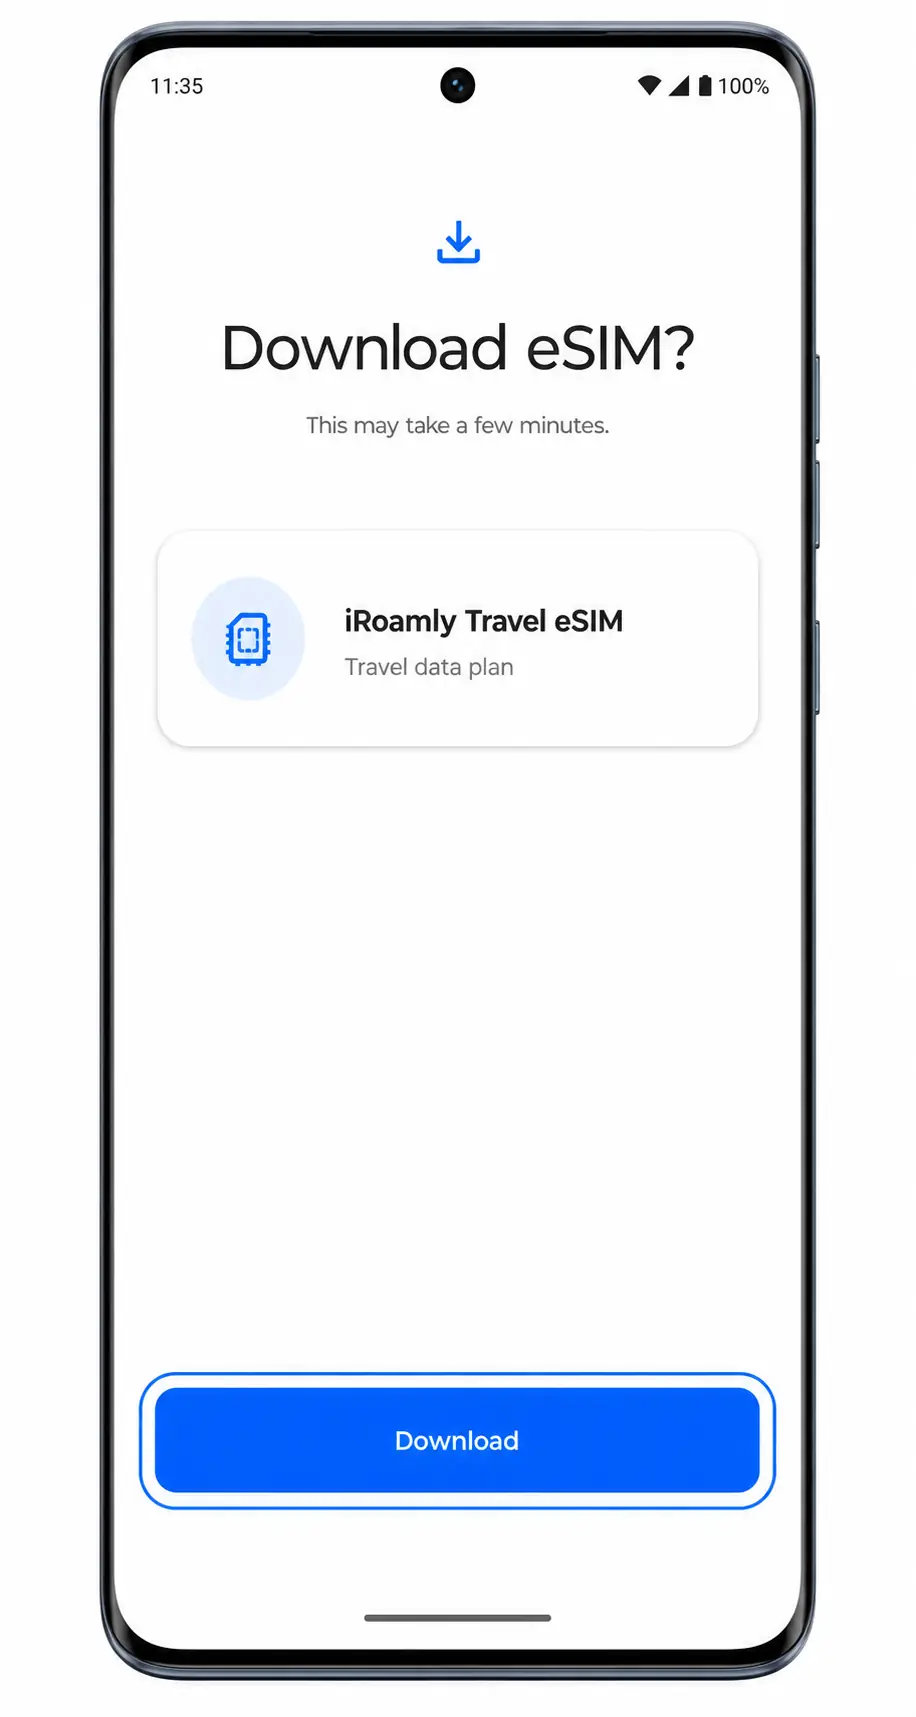
Review the detected iRoamly eSIM profile, then tap Download or Activate. Wait until Android finishes adding the eSIM profile.
Method 2: Install eSIM Manually
Open Settings, tap Network & internet, then tap SIMs. This takes you back to the same SIM management area used for QR setup.
Tap Add SIM, then tap Set up an eSIM. The Motorola Edge 60 should show the eSIM setup screen.
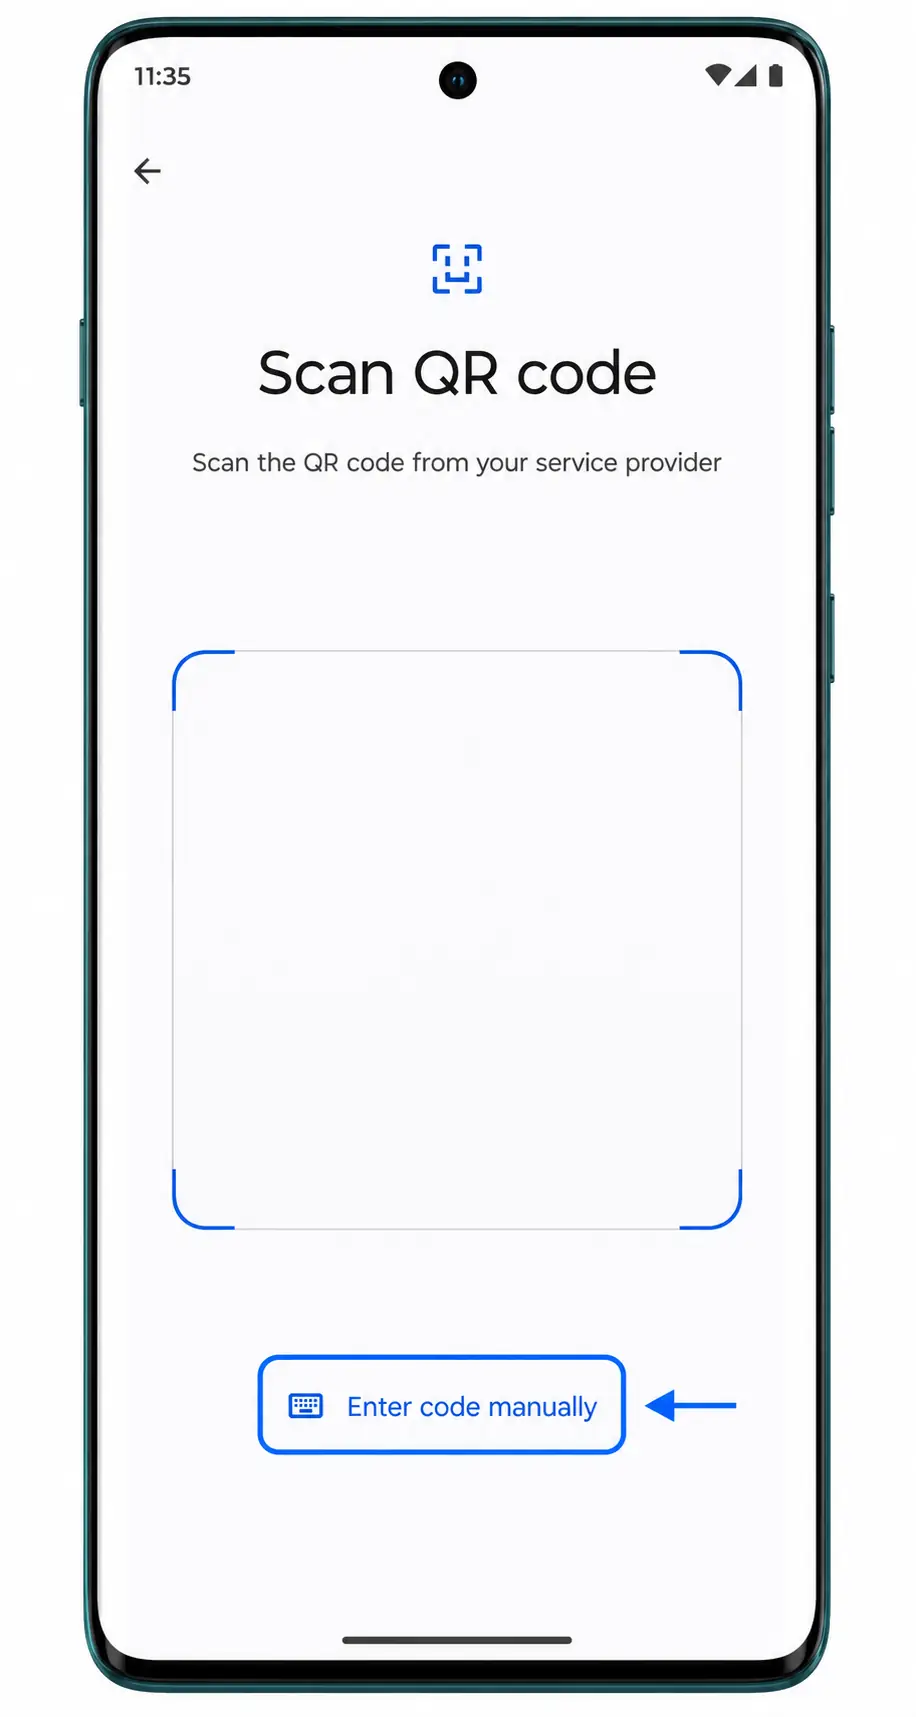
On the QR setup screen, tap Need help? or Enter code manually if shown. Choose the manual entry option to open the activation-code fields.
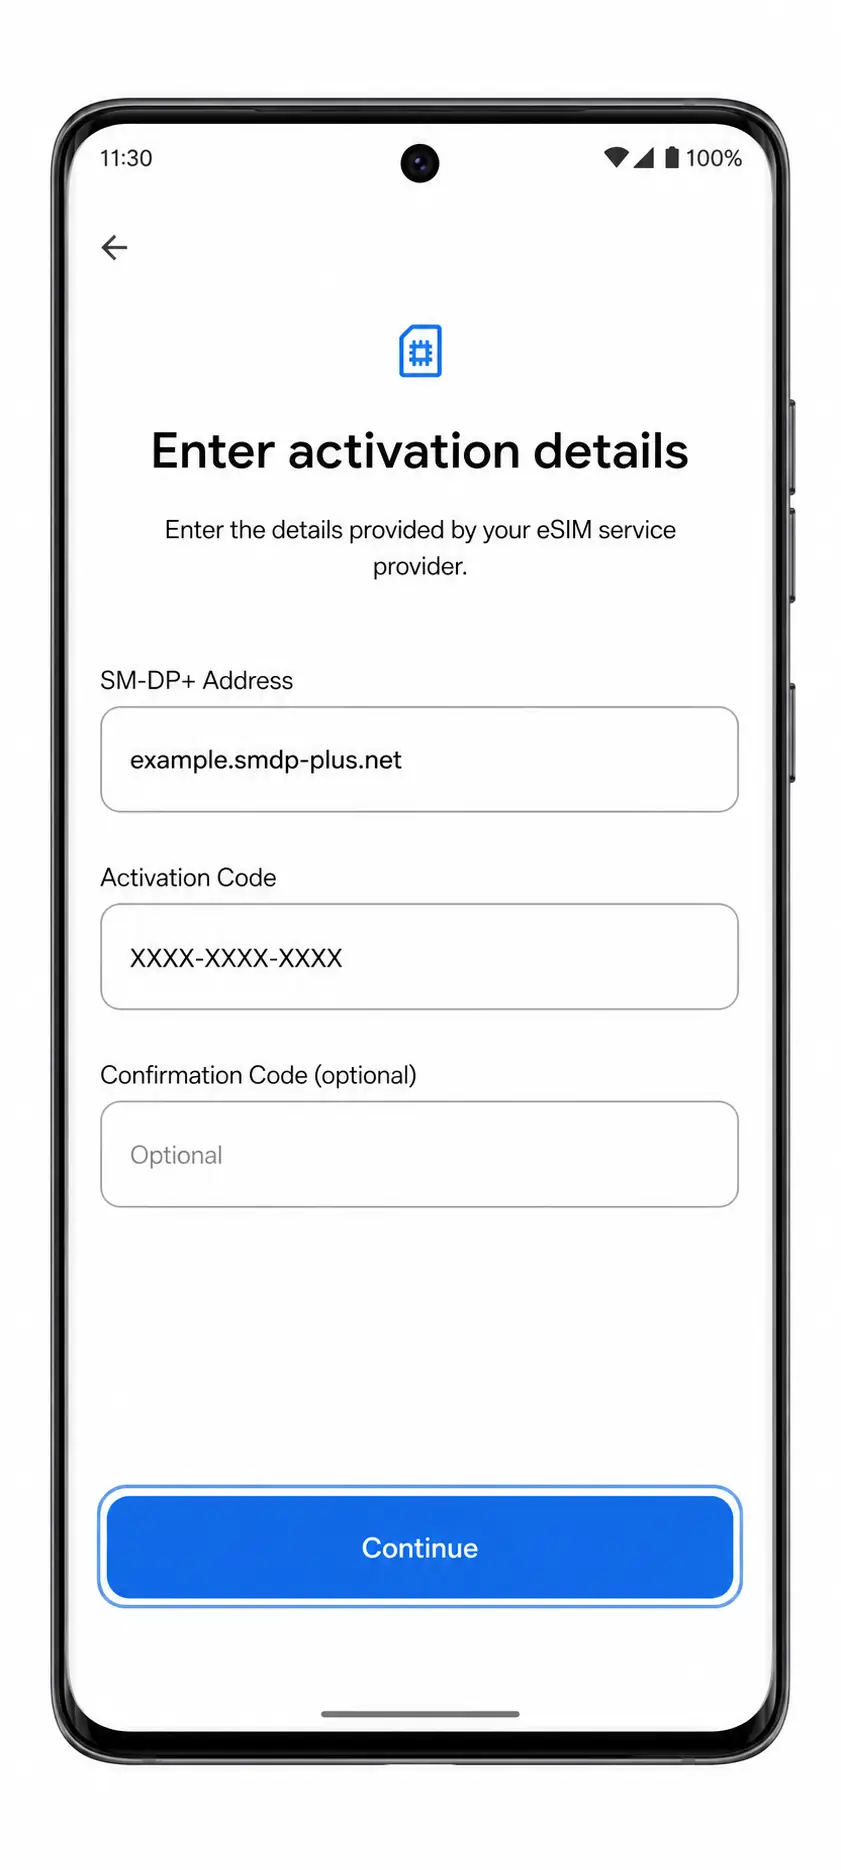
Enter the iRoamly SM-DP+ Address and Activation Code exactly as provided. If iRoamly gives a confirmation code, enter it in the optional confirmation-code field, then tap Continue.
Review the iRoamly eSIM details, then tap Download or Activate. Keep the phone online until the installation is complete.
How to Confirm Your iRoamly eSIM Is Installed
Go to Settings > Network & internet > SIMs. Look for the new iRoamly eSIM profile in the SIM list, and make sure the profile is switched on.
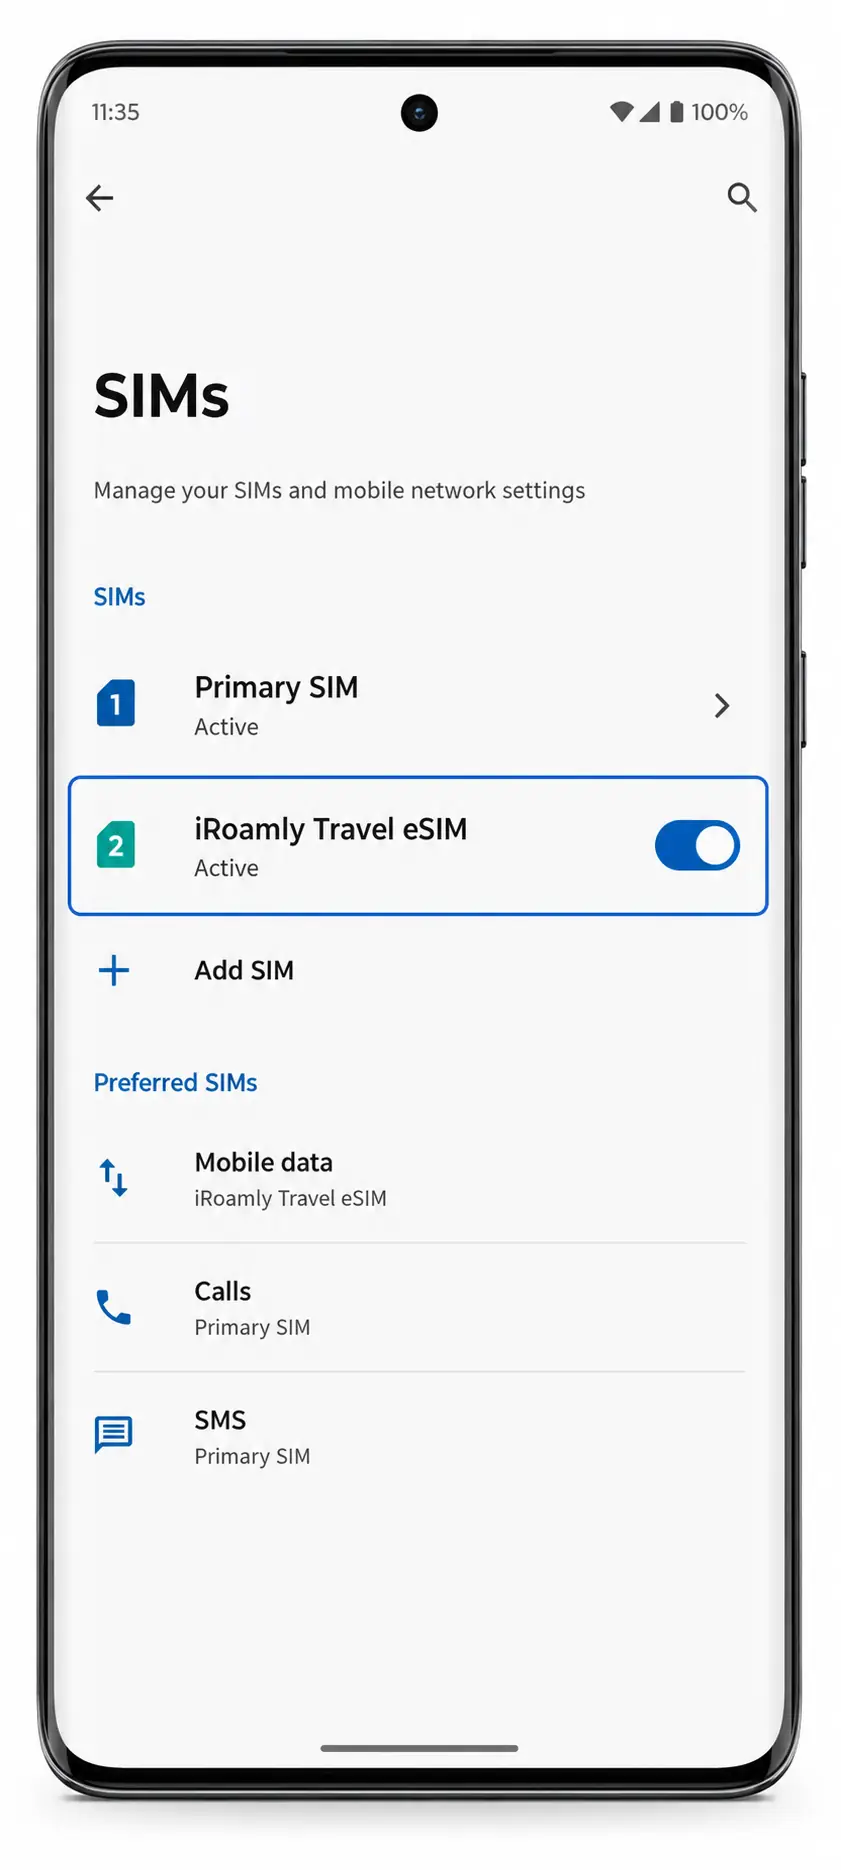
Open the iRoamly eSIM profile. Check that the line shows as available, and do a quick mobile data test only after you are ready to use the plan. Test calls or SMS only if your iRoamly plan specifically includes them.
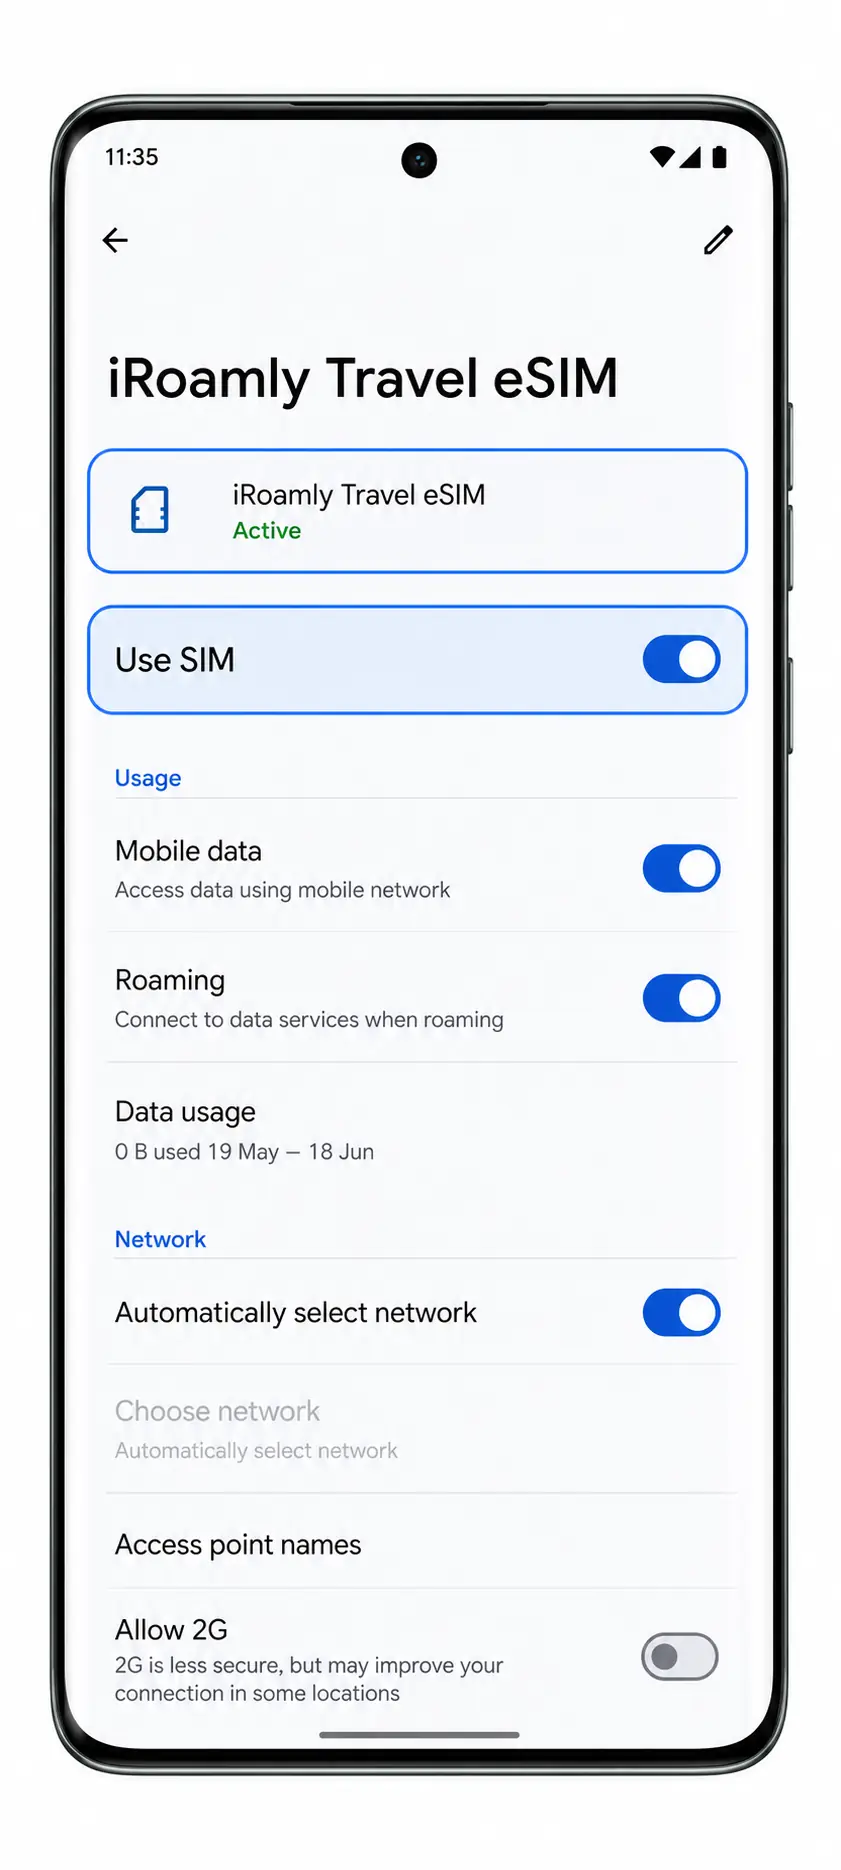
Configure eSIM for Mobile Data
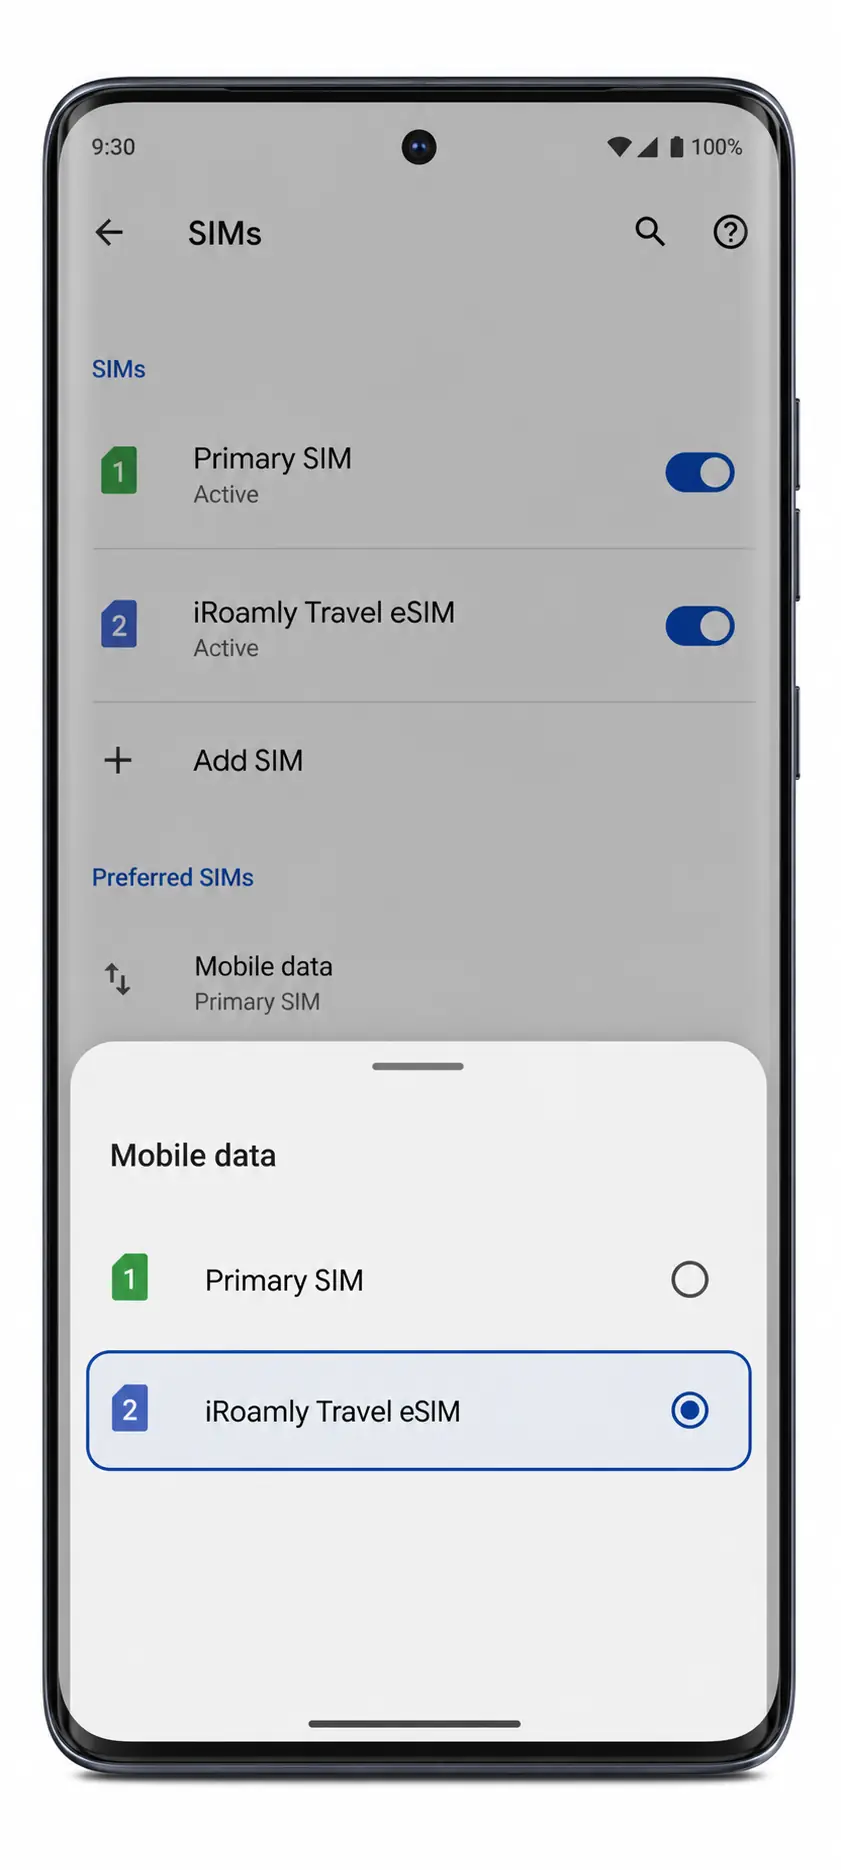
In Settings > Network & internet > SIMs, open the iRoamly eSIM profile and turn on Mobile data. If your primary SIM is still installed, choose iRoamly as the mobile data SIM when Android asks.
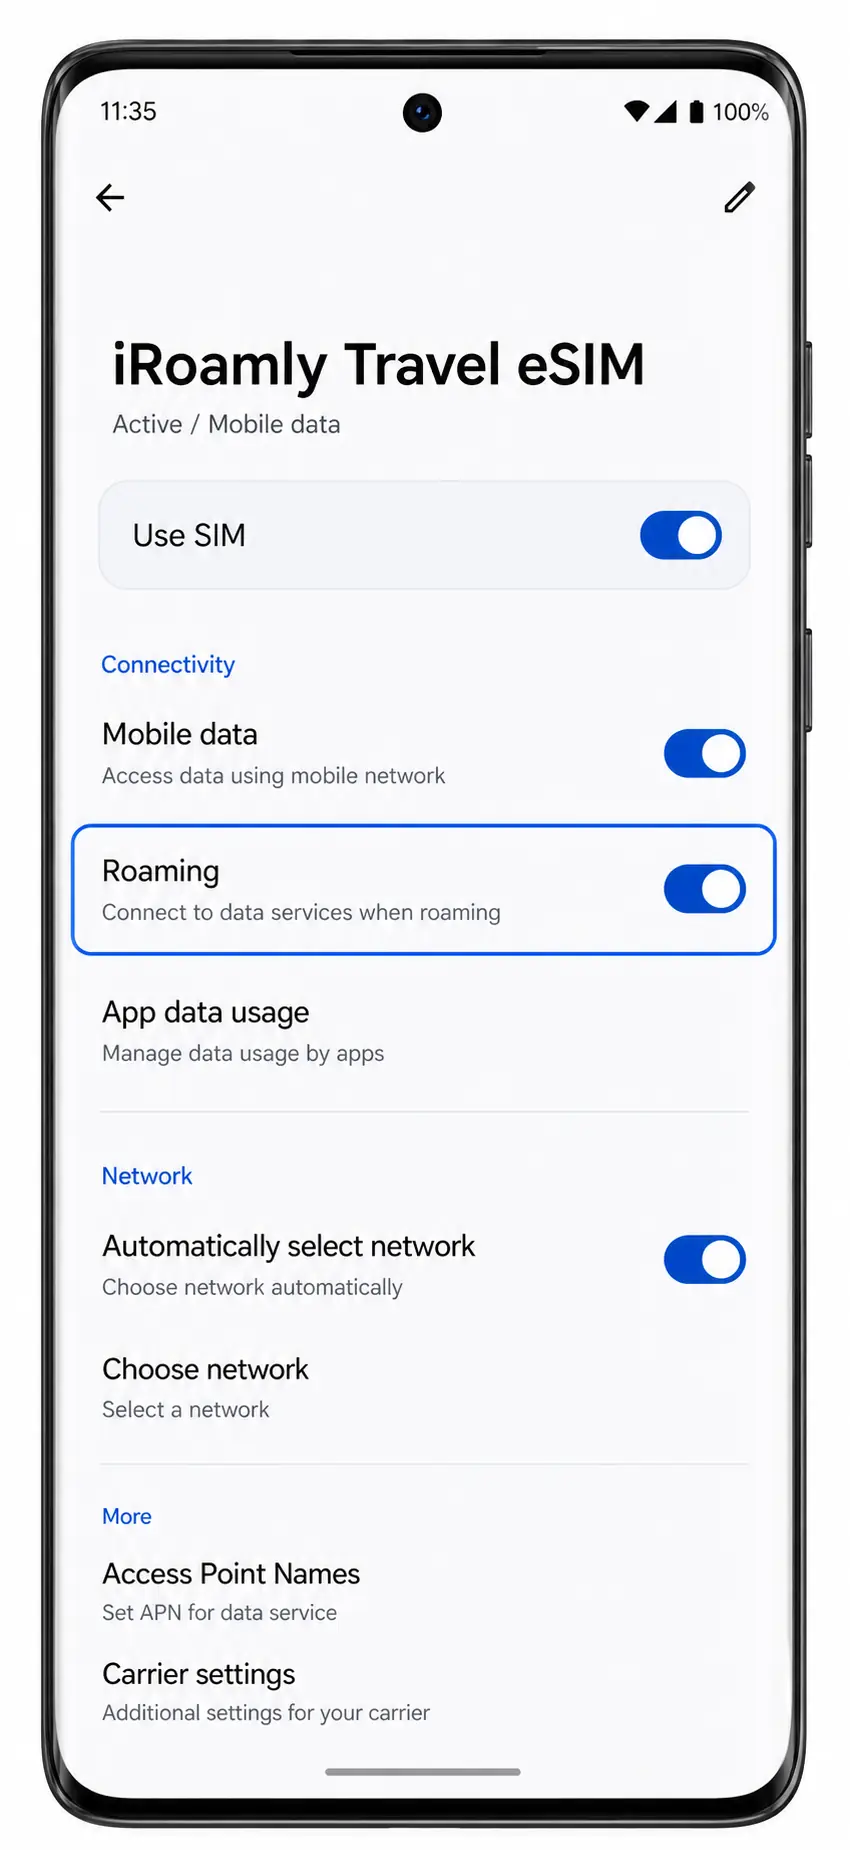
Turn on Roaming for the iRoamly eSIM if your destination plan requires it. Keep data switching off or set your preferred data SIM carefully if you want to avoid accidental use of your primary SIM abroad.
Troubleshooting
If Add SIM or Set up an eSIM is missing, confirm that your Motorola Edge 60 regional model supports eSIM and that your carrier firmware has not disabled it.
If the QR code will not scan, increase screen brightness on the device showing the QR code, clean the camera lens, and keep the QR code inside the scanner frame.
If the QR code says it has already been used, do not delete the eSIM. Contact iRoamly support because many QR codes can be installed only once.
If manual entry fails, check every character in the SM-DP+ Address and Activation Code. Avoid adding extra spaces.
If the eSIM downloads but does not connect, restart the phone, return to Settings > Network & internet > SIMs, confirm the iRoamly line is on, and turn on roaming if the plan requires it.
If mobile data still does not work after arrival, confirm the destination is covered by your iRoamly plan and that the iRoamly eSIM is selected for mobile data.
More Motorola eSIM Setup Guides
Setting up another Motorola phone? These eSIM activation guides may help.
Conclusion
After completing the installation, there's usually very little left to do other than using your travel plan when you reach your destination. Keeping your eSIM profile installed and your preferred data settings configured can help ensure a smoother experience whenever you switch to your travel connection.
Because every travel plan has different coverage areas and activation conditions, reviewing your plan details before departure is always worthwhile. Knowing what to expect can help you avoid confusion and stay connected with greater confidence.