
The Motorola Razr 40 supports eSIM on compatible regional variants, making it a practical travel phone when you want mobile data without swapping a physical SIM.
This guide assumes an unlocked Motorola Razr 40 running Motorola's Android 13 or Android 14 interface, where the relevant path is usually Settings > Network & internet > SIMs.
An iRoamly travel eSIM can be installed before a trip so the profile is ready when you arrive.
You will need a stable internet connection during installation, and you should check your plan details because iRoamly eSIM validity starts from activation; for many travel eSIMs, activation may happen when the eSIM is installed or first connects to a supported destination network, depending on the plan.
This guide covers both setup methods: scanning the iRoamly QR code and entering the manual activation details. The manual route is useful if you are reading the QR code on the same phone, if the camera cannot scan the code, or if your iRoamly account/email provides an activation string instead of a printable QR code.

Travel with Mobile Data from iRoamly
iRoamly is a travel eSIM service that lets compatible phones use mobile data through digital plans instead of a removable travel SIM.
Available options may include local destination plans as well as regional or global plans, and the data amount, validity period, and supported services can differ by destination.Once installed, the travel line can help keep maps, messaging, translations, and booking apps connected during a trip.
On an eSIM-capable Motorola Razr 40, iRoamly can be installed as a separate profile and selected for mobile data when needed. The guide below keeps the phone-specific QR-code and manual setup steps together so you can add the eSIM correctly.
Before You Set Up Your iRoamly eSIM
Confirm your Motorola Razr 40 is unlocked and that your regional model supports eSIM. Some carrier or market variants may limit eSIM features.
Connect the phone to stable Wi-Fi before starting. The eSIM profile must download from the internet.
Keep your iRoamly QR code, SM-DP+ address, activation code, or full activation string ready.
Install the iRoamly eSIM 1-2 days before travel when your plan allows it, but check the plan activation rule first.
If Japan is your destination, preparing the travel eSIM in advance can reduce setup after arrival. The same pre-departure approach works for France when France is the trip destination.
Do not delete the iRoamly eSIM after installation unless iRoamly support tells you to. Many eSIMs cannot be reinstalled after removal.
iRoamly plans may be data-only. Voice calls and SMS vary by plan, so check the specific plan details before relying on them.
Menu names can vary slightly by Android version, region, or carrier firmware. On some Motorola builds, Add SIM may appear as Add eSIM.
Method 1: Install eSIM by Scanning a QR Code
Open the app drawer or home screen, then tap Settings.
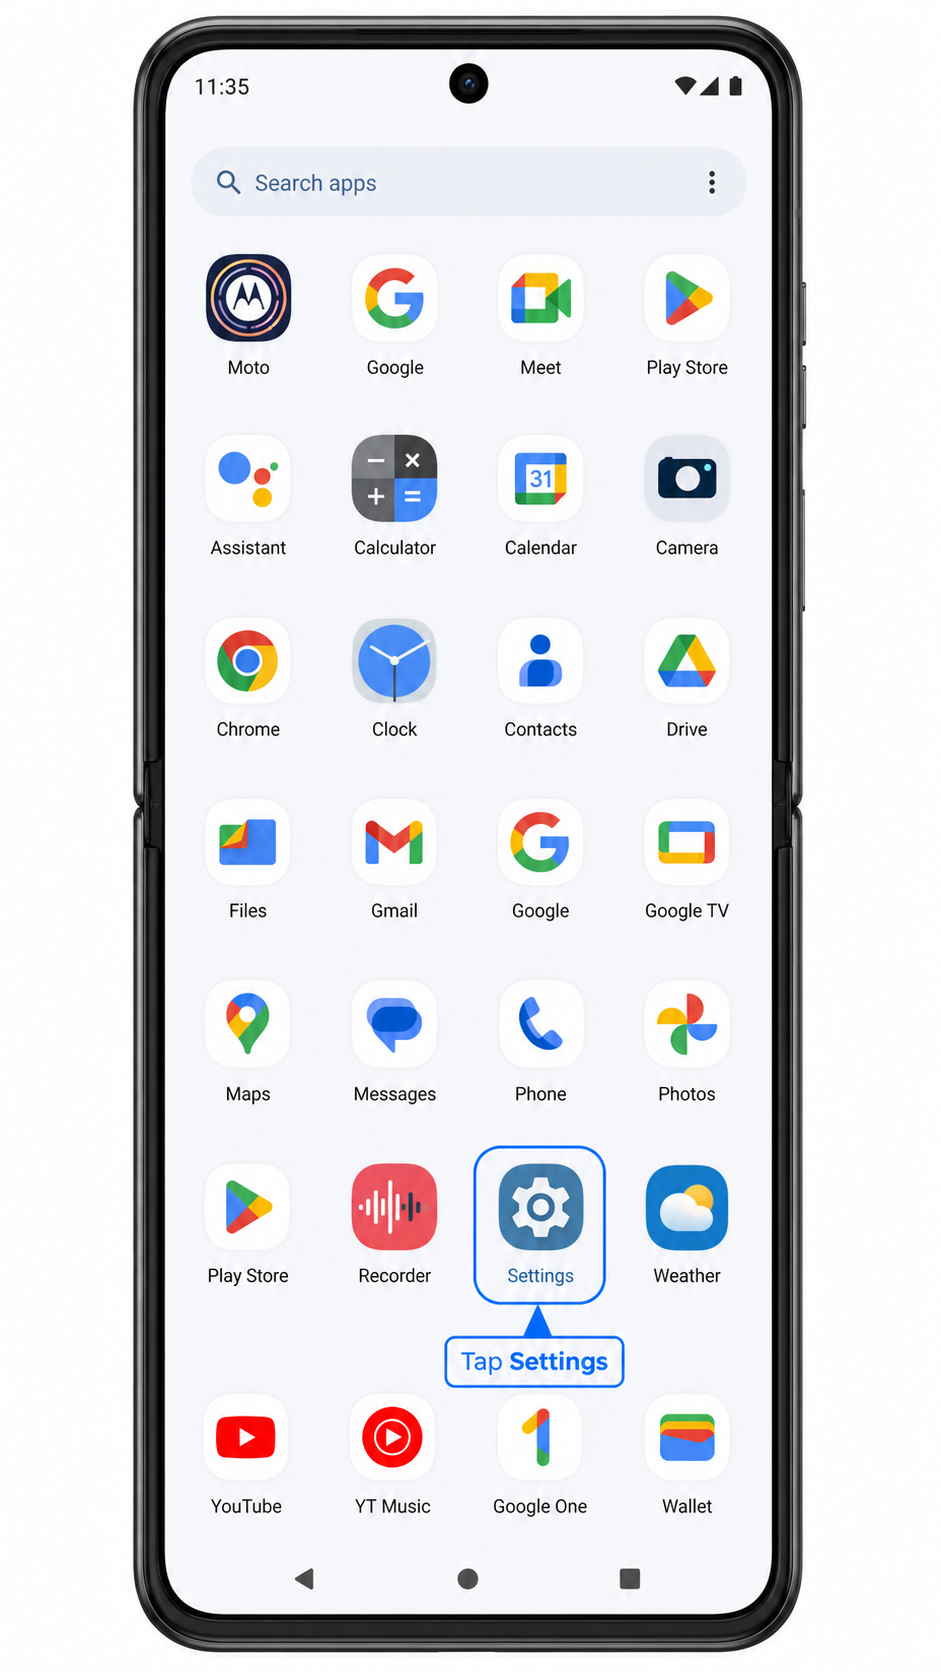
In Settings, tap Network & internet.
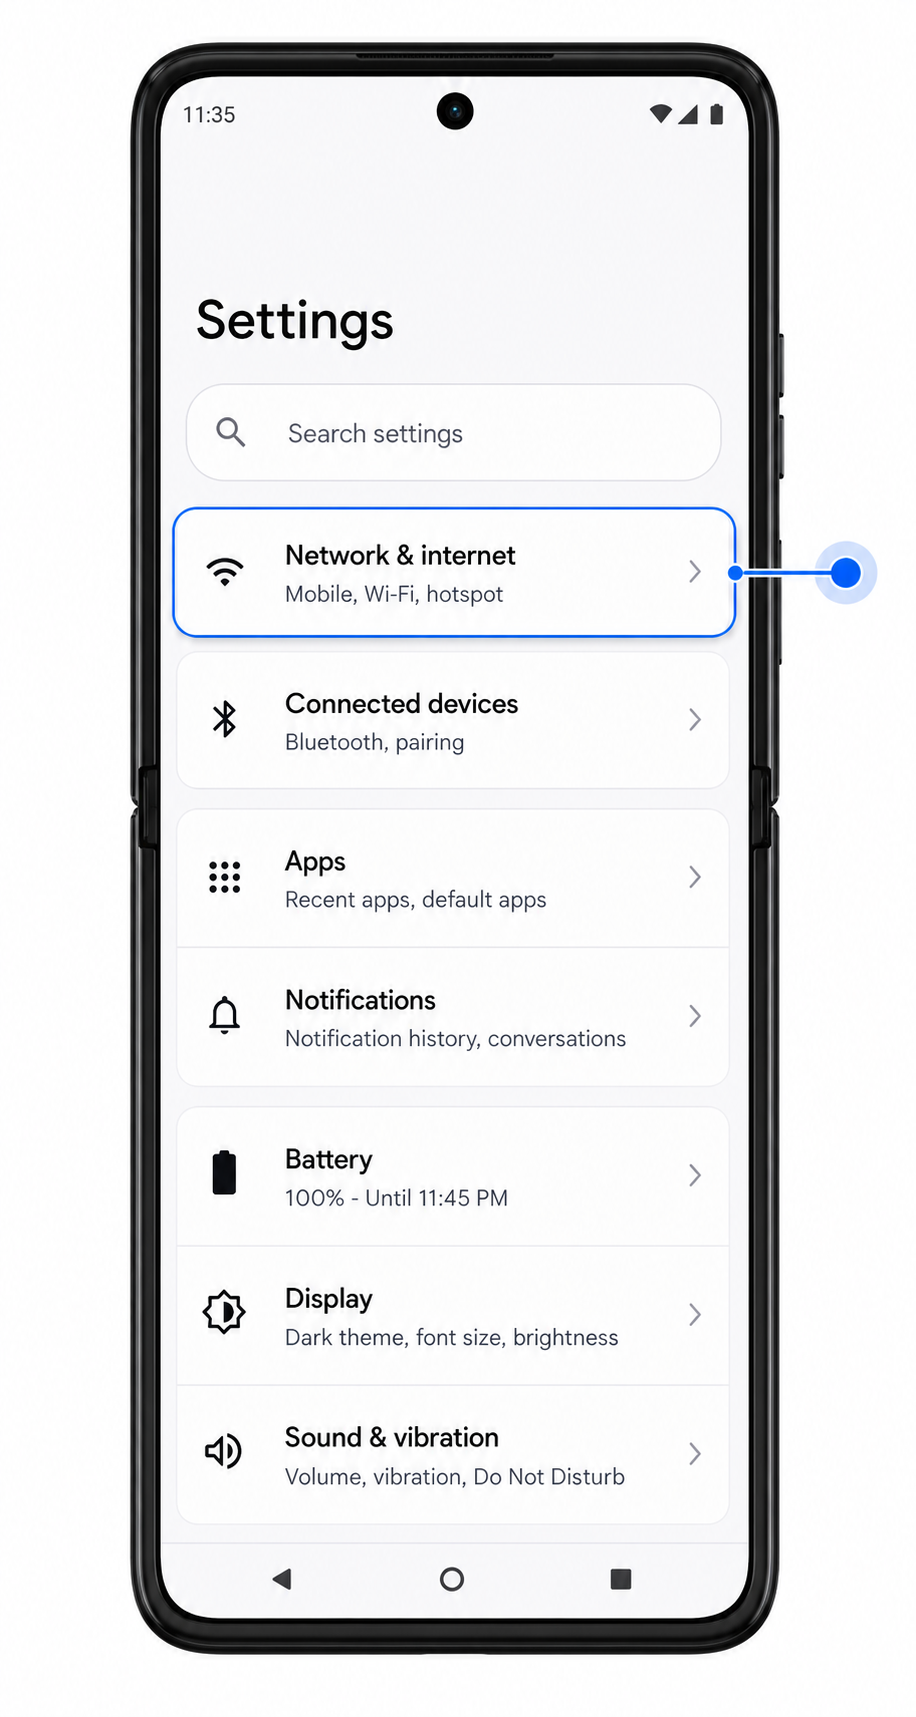
On the Network & internet page, tap SIMs.
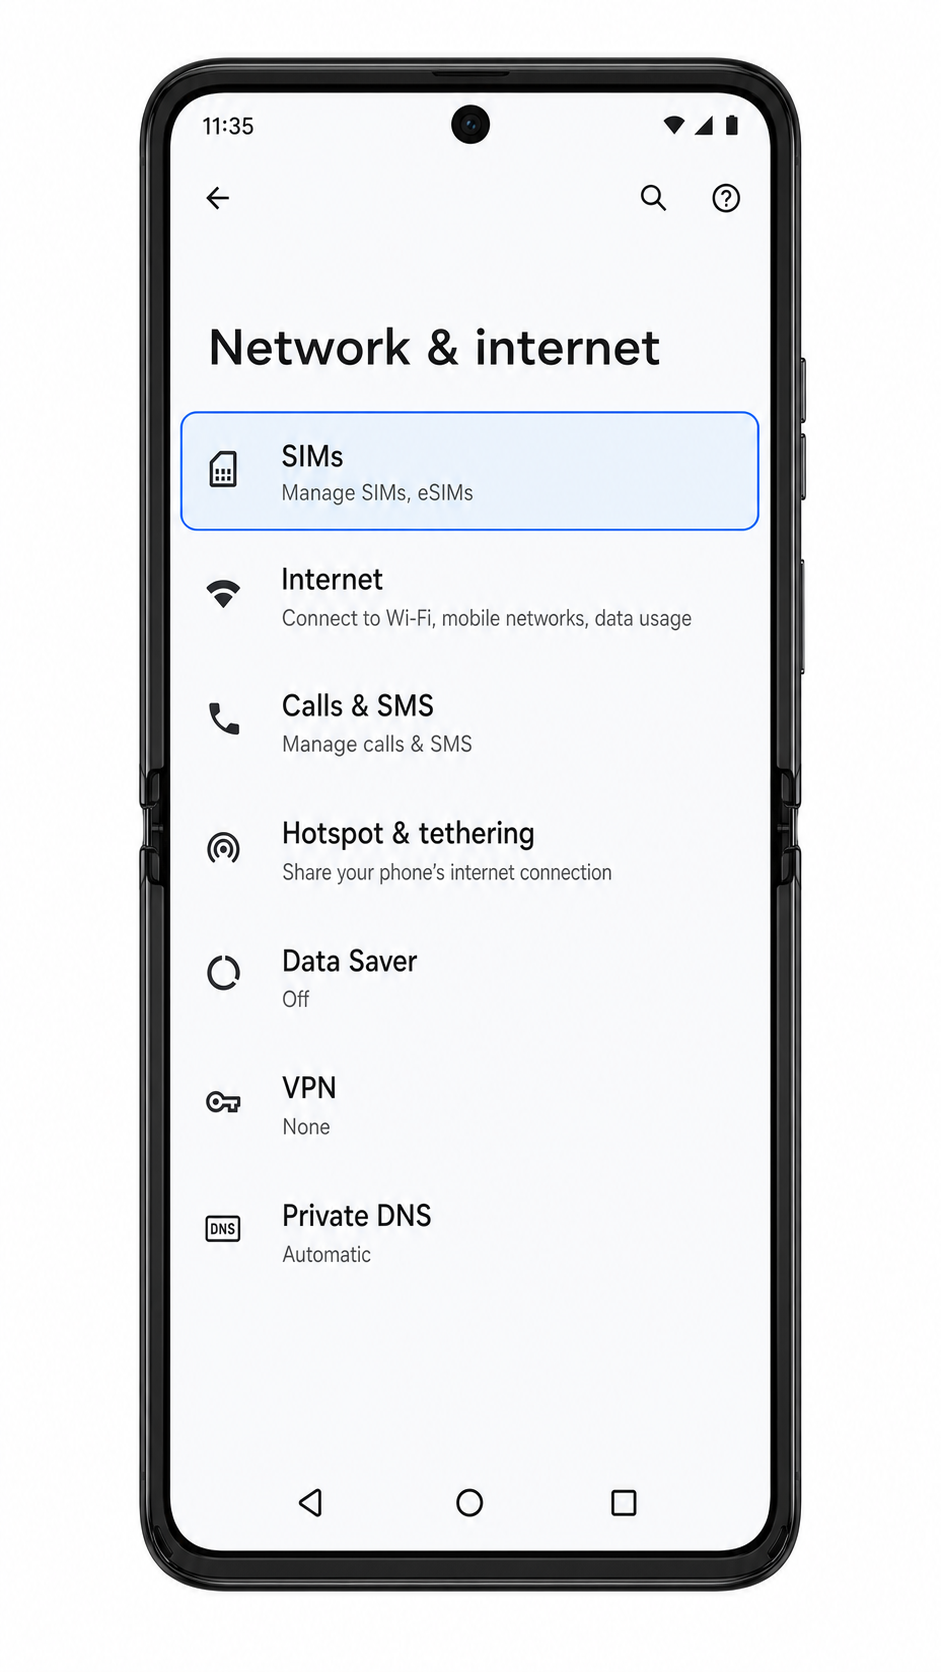
On the SIMs page, tap Add SIM or Add eSIM.
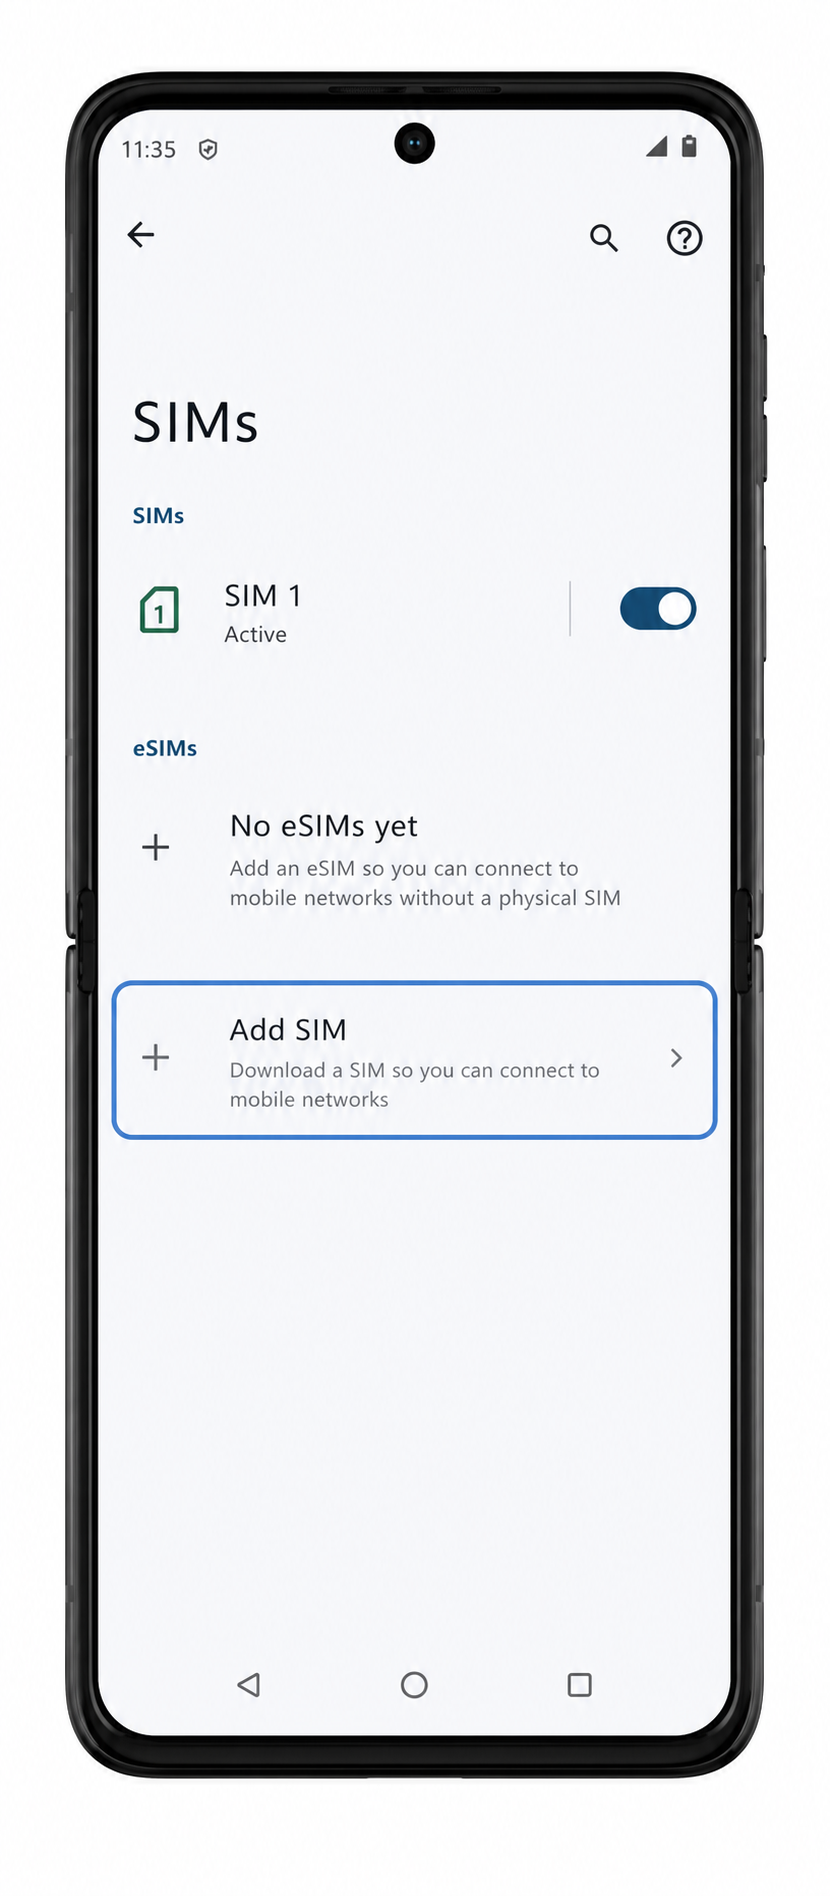
Choose the option to download or add an eSIM, then scan the iRoamly QR code with the camera scanner. Keep the QR code flat and fully inside the scan frame.
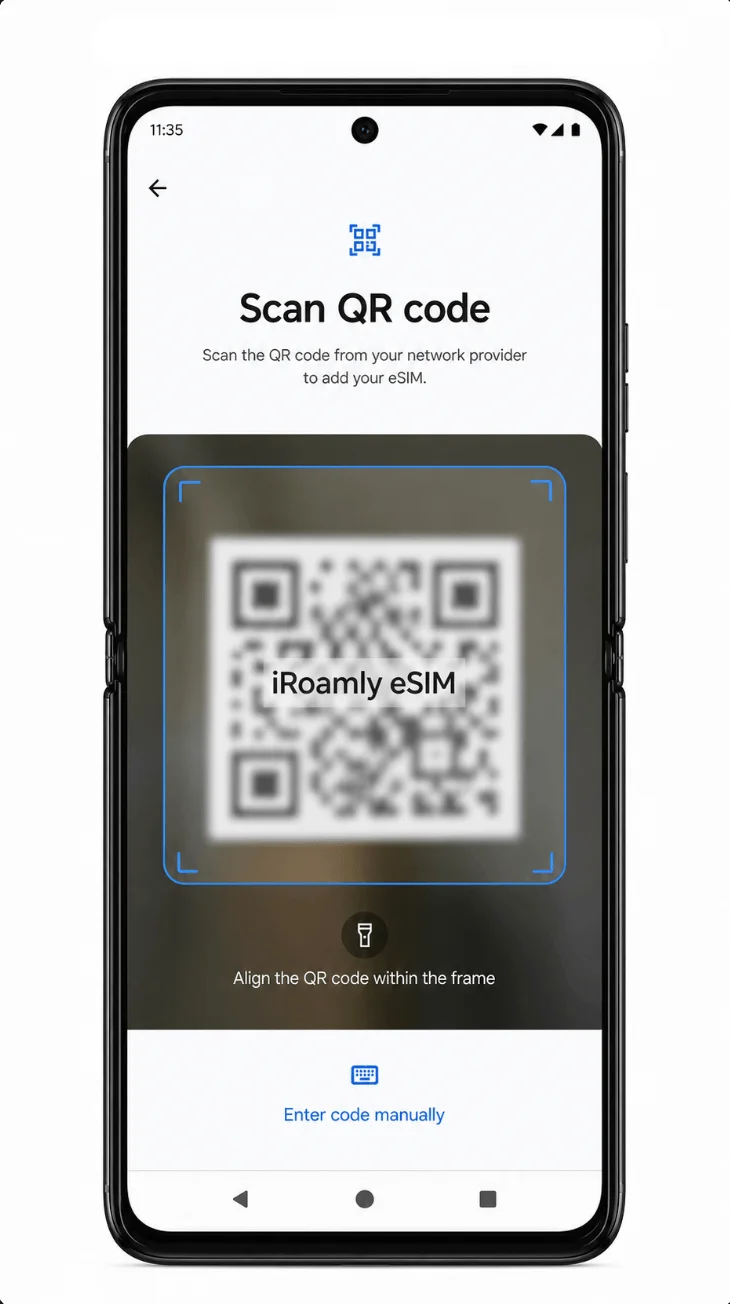
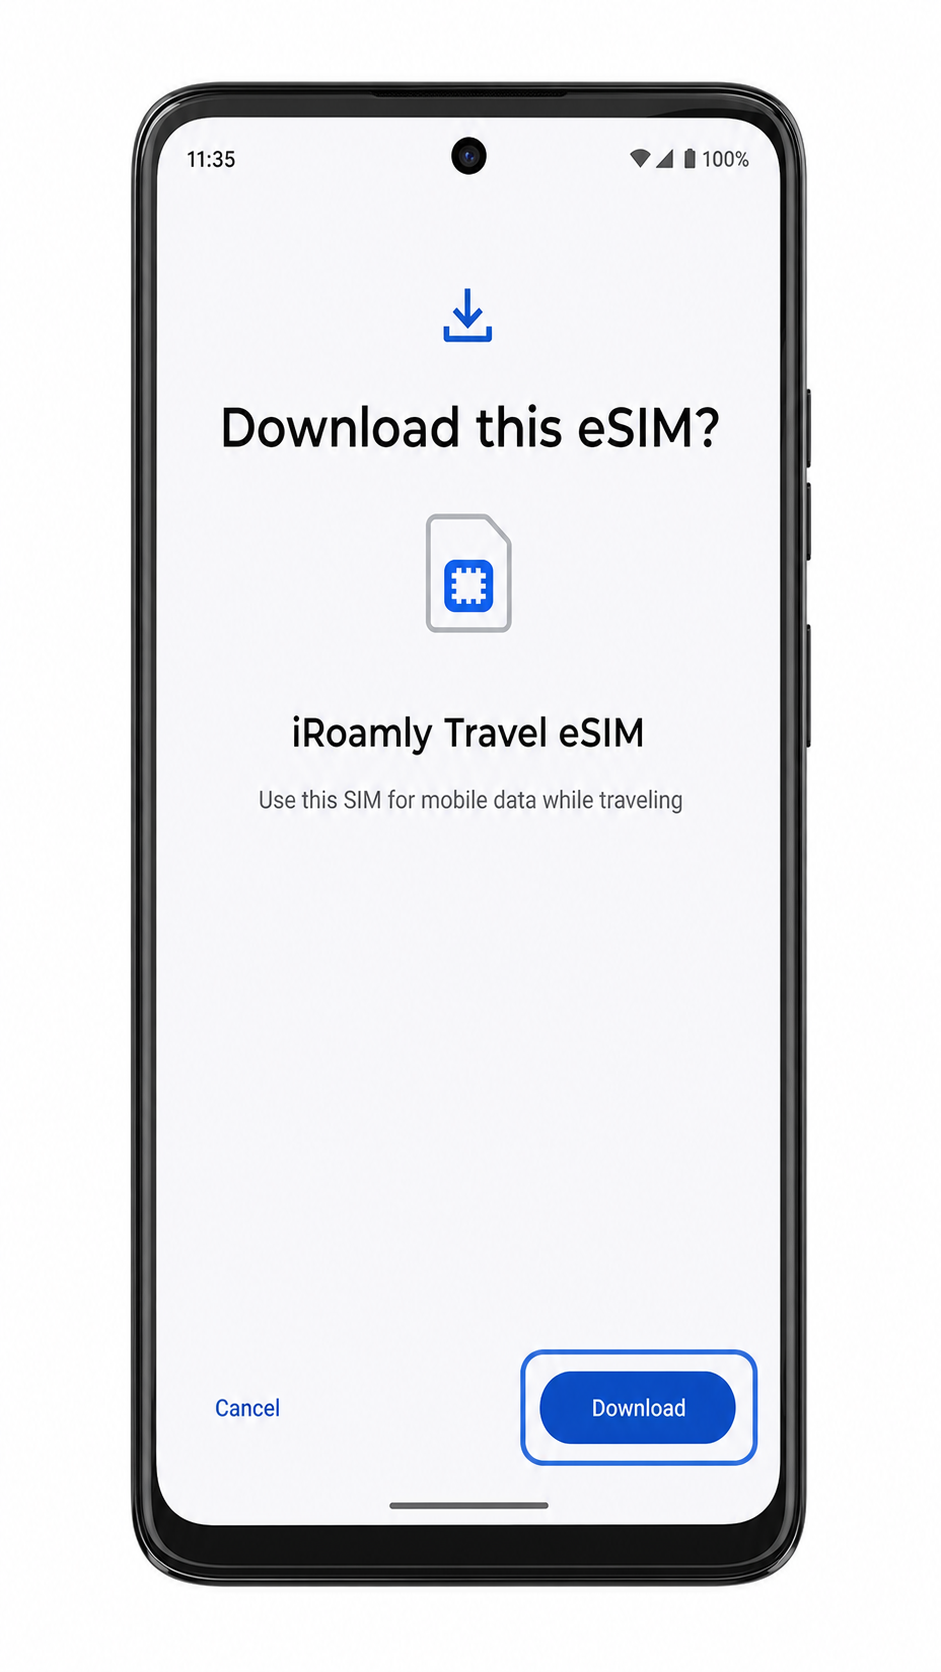
When the phone shows the iRoamly eSIM download confirmation, tap Download and wait until the profile finishes installing.
Method 2: Install eSIM Manually
Open the app drawer or home screen, then tap Settings.
In Settings, tap Network & internet.
On the Network & internet page, tap SIMs.
On the SIMs page, tap Add SIM or Add eSIM.
On the QR code scanner page, tap Enter code manually or the equivalent manual-entry link.
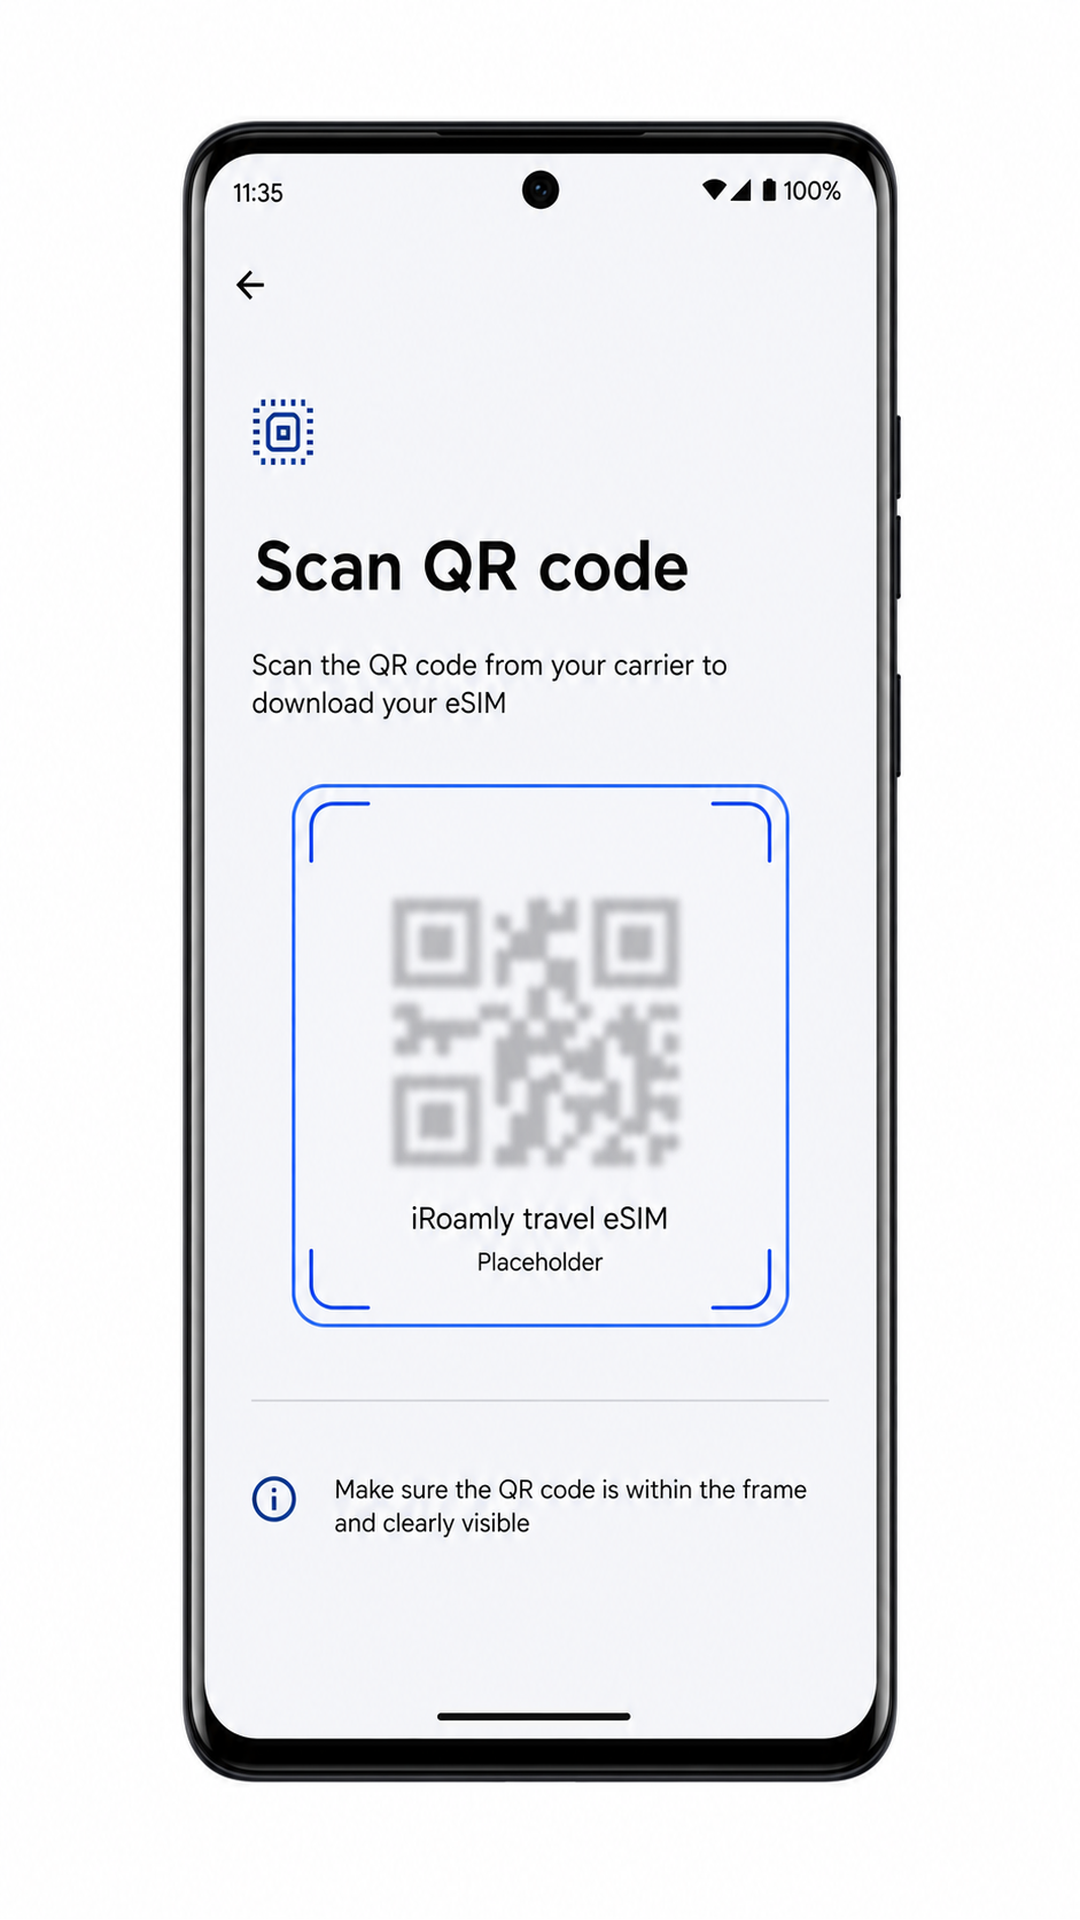
Enter the iRoamly manual details exactly as provided. If the phone asks for one activation string, paste the full LPA:1$... code. If your software separates the fields, enter the SM-DP+ Address, Activation Code, and optional Confirmation Code, then tap Next.
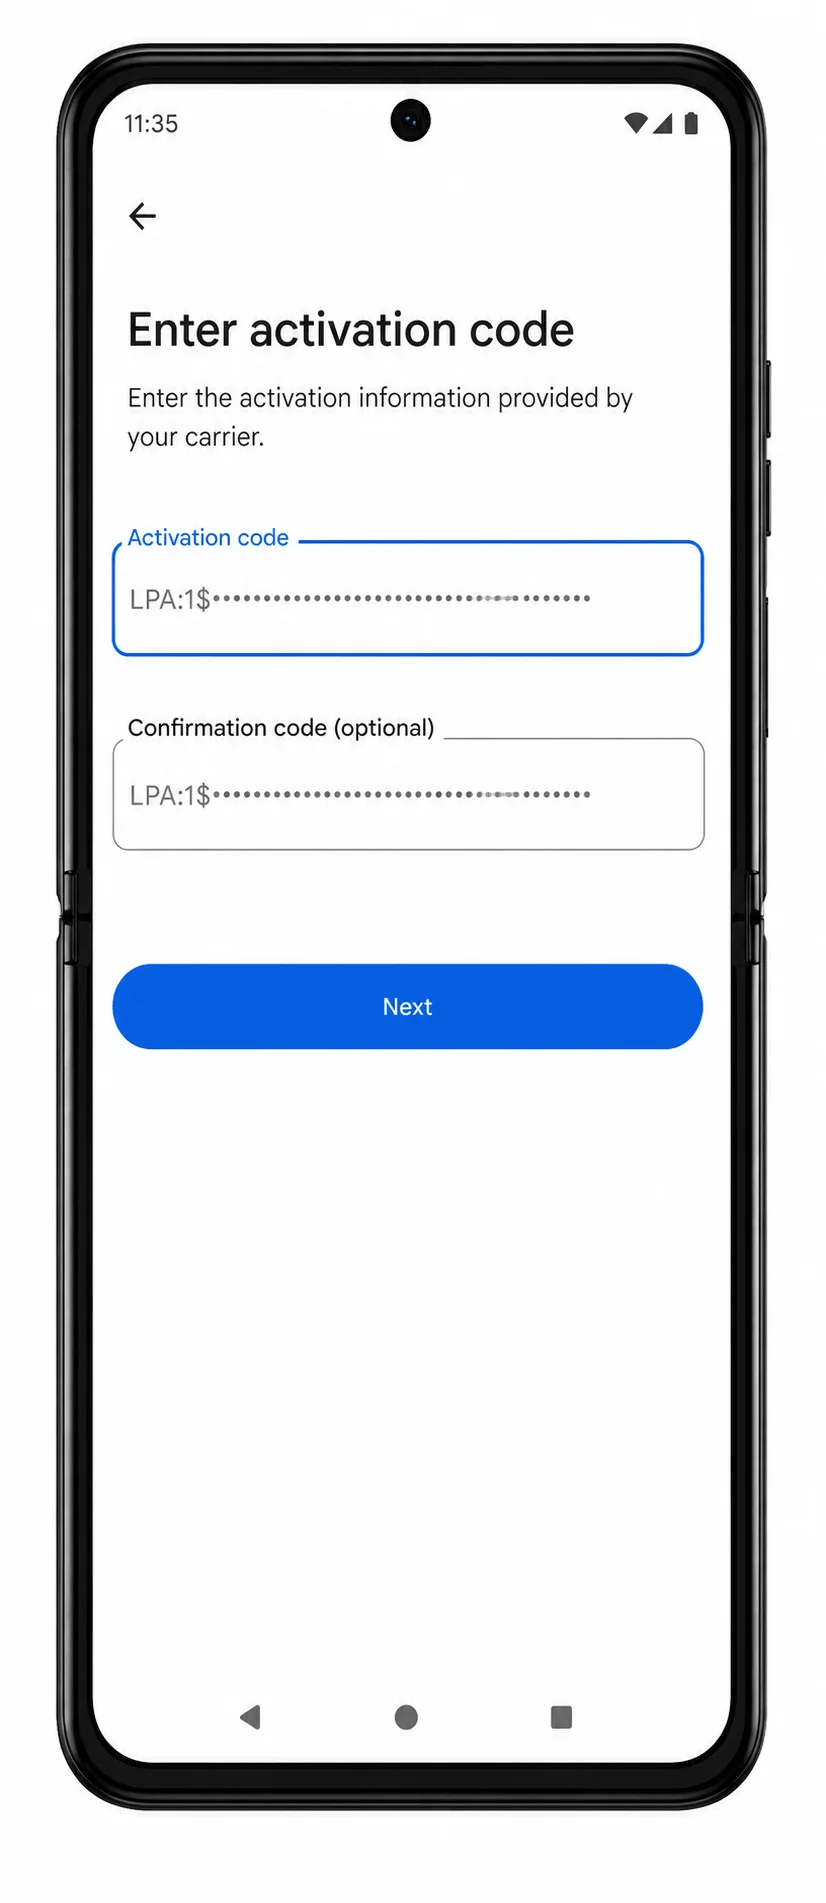
When the phone shows the iRoamly eSIM download confirmation, tap Download and wait for installation to finish.
How to Confirm Your iRoamly eSIM Is Installed
Go to Settings > Network & internet > SIMs, then look for iRoamly eSIM or the travel eSIM label in the eSIM list.
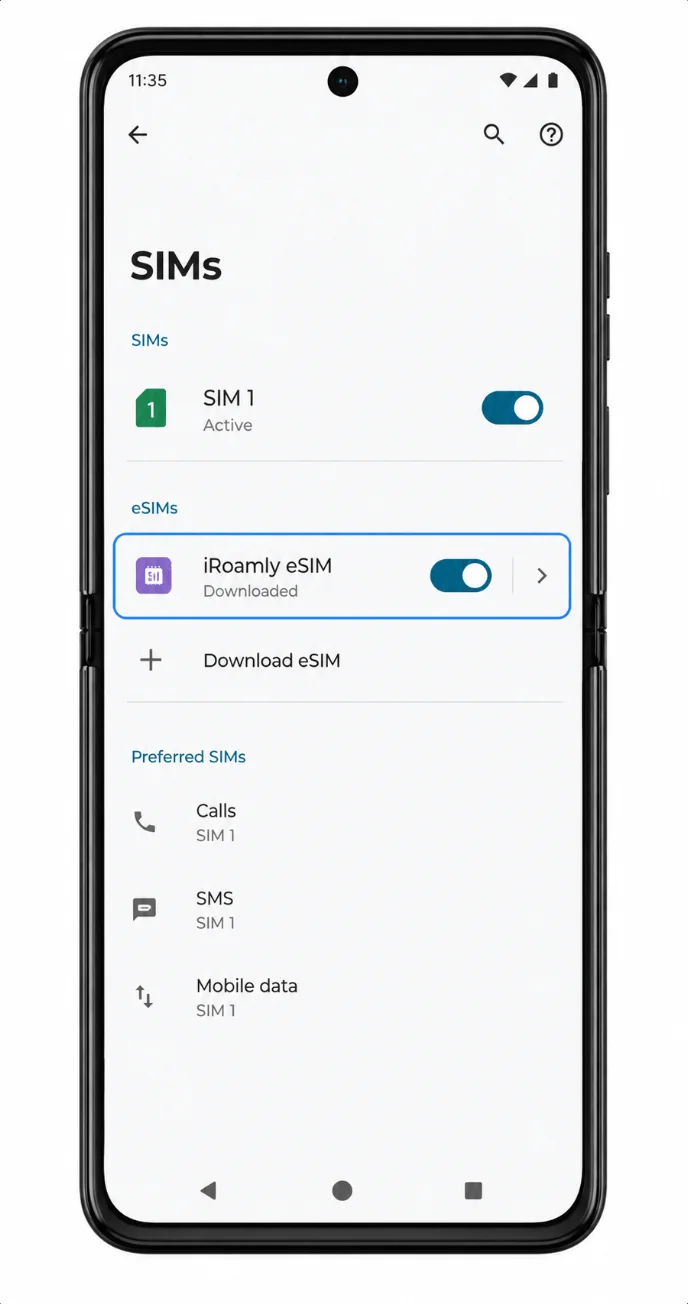
Tap the iRoamly eSIM row and check that the line can be turned on. If your travel plan is already active in the destination, the phone may also show signal bars or a data indicator after the network connects.
Configure eSIM for Mobile Data
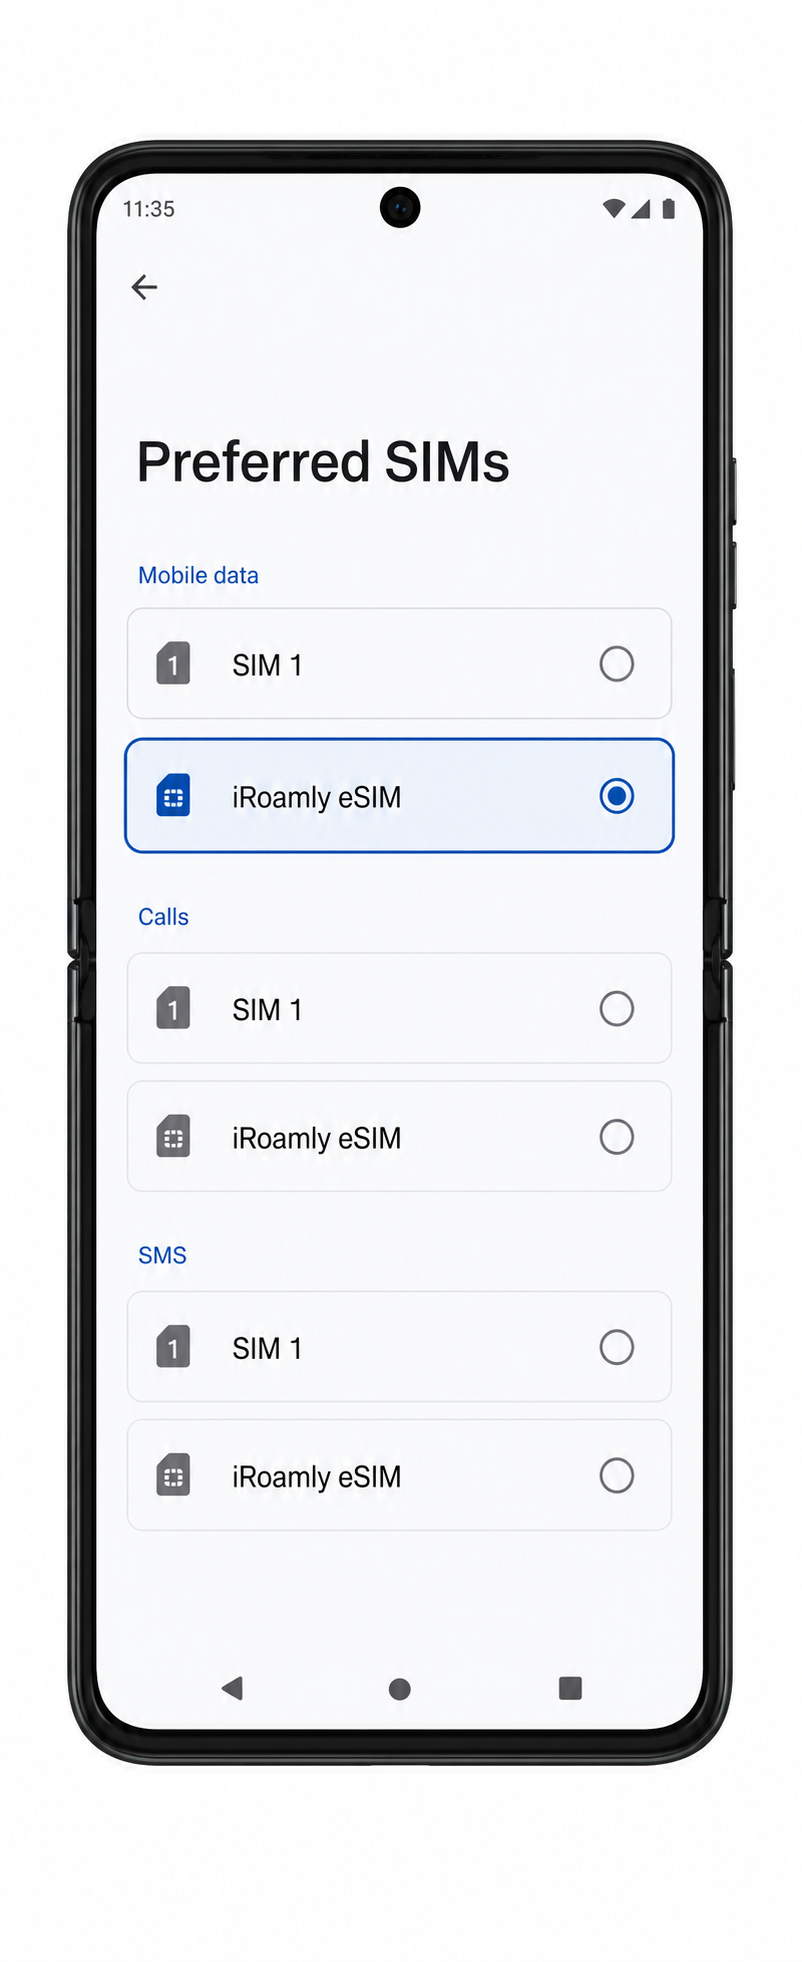
Open Settings > Network & internet > SIMs, then choose Mobile data or Preferred SIMs and select iRoamly eSIM for mobile data.
Open the iRoamly eSIM detail page and turn on Use SIM if it is off.
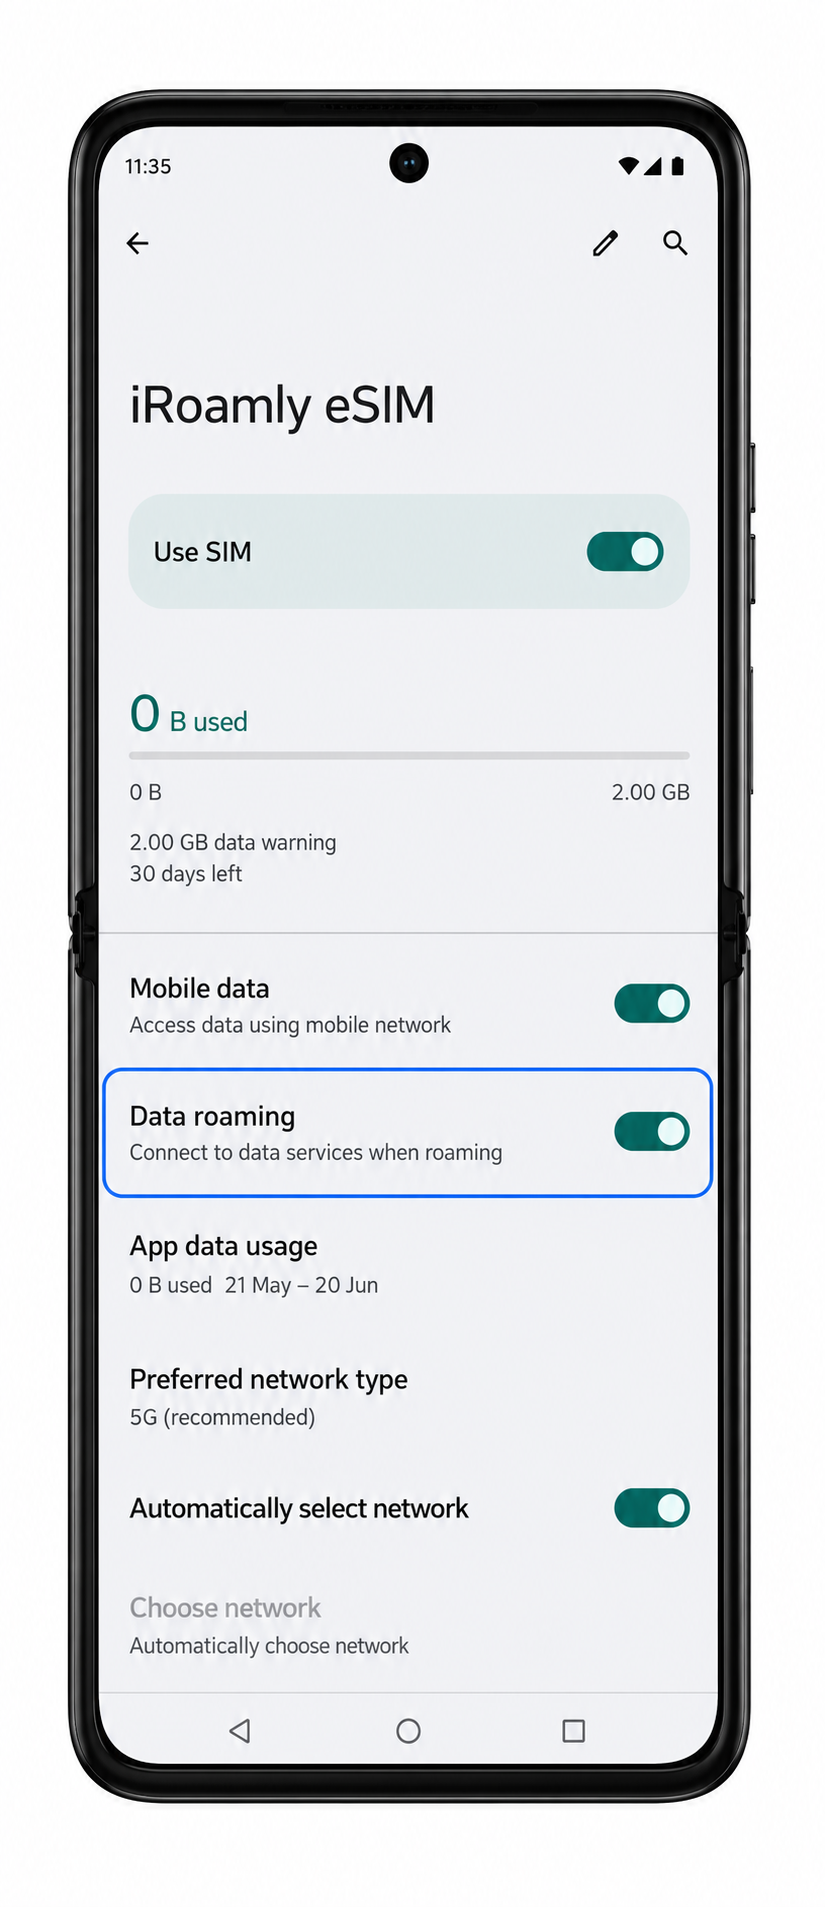
Turn on Data roaming for the iRoamly eSIM when your iRoamly plan or destination instructions require roaming.
Turn off automatic mobile data switching if your Motorola software offers that option and you want to avoid unexpected use of your primary SIM.
Troubleshooting
Add SIM or Add eSIM is missing: confirm the Motorola Razr 40 variant supports eSIM, update Android, restart the phone, and check whether your carrier firmware disables eSIM.
QR code will not scan: increase screen brightness on the device showing the QR code, clean the camera lens, avoid glare, or use the manual-entry method.
QR code says it was already used: do not delete the eSIM and try again repeatedly. Contact iRoamly support because many eSIM QR codes are single-use.
Manual activation fails: check every character in the SM-DP+ address or activation string. Do not add spaces before or after the code.
eSIM does not appear after download: restart the Razr 40, then return to Settings > Network & internet > SIMs.
No mobile data after installation: select iRoamly eSIM for mobile data, turn on Use SIM, enable Data roaming if required, and confirm you are in a supported destination.
Activation stays pending: keep Wi-Fi connected, wait a few minutes, and avoid deleting the eSIM. Some plans complete activation only after connecting to a supported network.
Calls or SMS do not work: check the plan details. Many travel eSIMs are data-only, and voice/SMS are available only on plans that explicitly include them.
More Motorola Razr eSIM Setup Guides
Setting up another Motorola Razr phone? These eSIM activation guides may help.
Conclusion
With the installation complete, your Motorola Razr 40 is prepared to use iRoamly travel data as soon as your plan activates and a supported network is available. Setting everything up before departure helps reduce last-minute configuration and gives you a more seamless start to your trip.
For the best experience, keep the eSIM profile on your device, verify your mobile data preferences, and save your activation information until your travels are finished. These simple precautions can help you get connected more quickly and minimize common connectivity issues abroad.