
Motorola Razr+ (2025) supports eSIM on compatible regional and carrier variants, making it a practical travel phone when you want mobile data without swapping a physical SIM.
This guide assumes the phone is running Android 15 with Motorola Hello UX, where the eSIM controls follow the Android path through Network & internet and SIMs.
An iRoamly travel eSIM can be installed before a trip, then turned on for mobile data when you arrive. The easiest method is scanning the QR code from your iRoamly order, but manual entry is useful if the QR code is on the same phone, the camera cannot scan it, or you received separate activation details.
The steps below cover both setup methods, confirmation after installation, mobile data settings, and common problems. Menu names can vary slightly by software version, region, or carrier firmware, so check that your Razr+ (2025) shows an Add eSIM option before you travel.

Get Your Razr+ Ready for Travel with iRoamly
iRoamly is a travel eSIM service that provides mobile data plans for destinations abroad. Travelers can choose from available destination, regional, or global plans, with data amounts, validity periods, plan types, and features varying by destination.
After the eSIM is installed on a compatible phone, that travel data line can support maps, messaging, booking apps, translation tools, and travel updates.
On a compatible Motorola Razr+ (2025), iRoamly can be installed as a digital travel profile and selected for mobile data when needed. The instructions below keep the QR-code and manual-entry setup methods together so you can add the eSIM and confirm the phone is ready for travel data.
Before You Set Up Your iRoamly eSIM
Connect the Motorola Razr+ (2025) to stable Wi-Fi before starting.
Confirm the phone is unlocked and that your specific regional model supports eSIM.
Keep your iRoamly QR code ready on another screen or printed page.
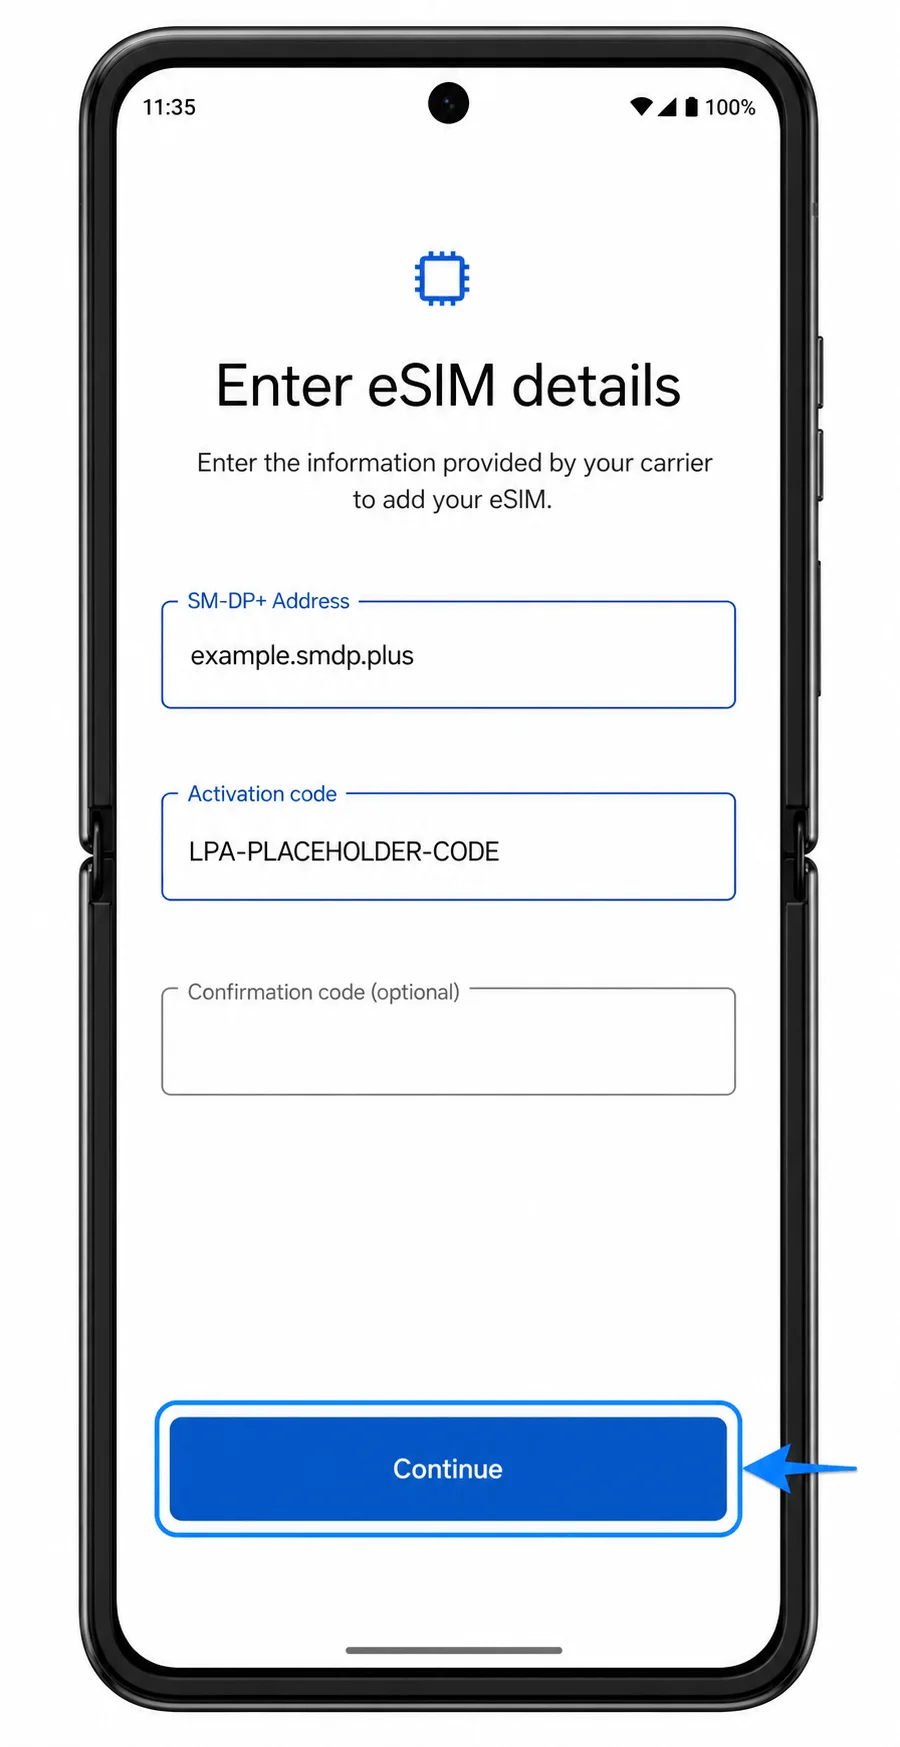
For manual setup, keep the SM-DP+ Address, Activation Code, and any optional confirmation code from your iRoamly order details.
Install the eSIM 1-2 days before travel when possible, but check your plan first. iRoamly validity starts from activation, and some plans begin counting once the eSIM connects to a supported destination network.
Heading to the United States or France? Preparing the destination eSIM before departure can reduce the setup left for your first connection abroad.
Do not delete the eSIM after it is installed unless iRoamly support tells you to. Many eSIMs cannot be reinstalled after removal.
iRoamly plans may be data-only. Voice calls and SMS vary by plan, so check the plan details before relying on them.
Method 1: Install eSIM by Scanning a QR Code
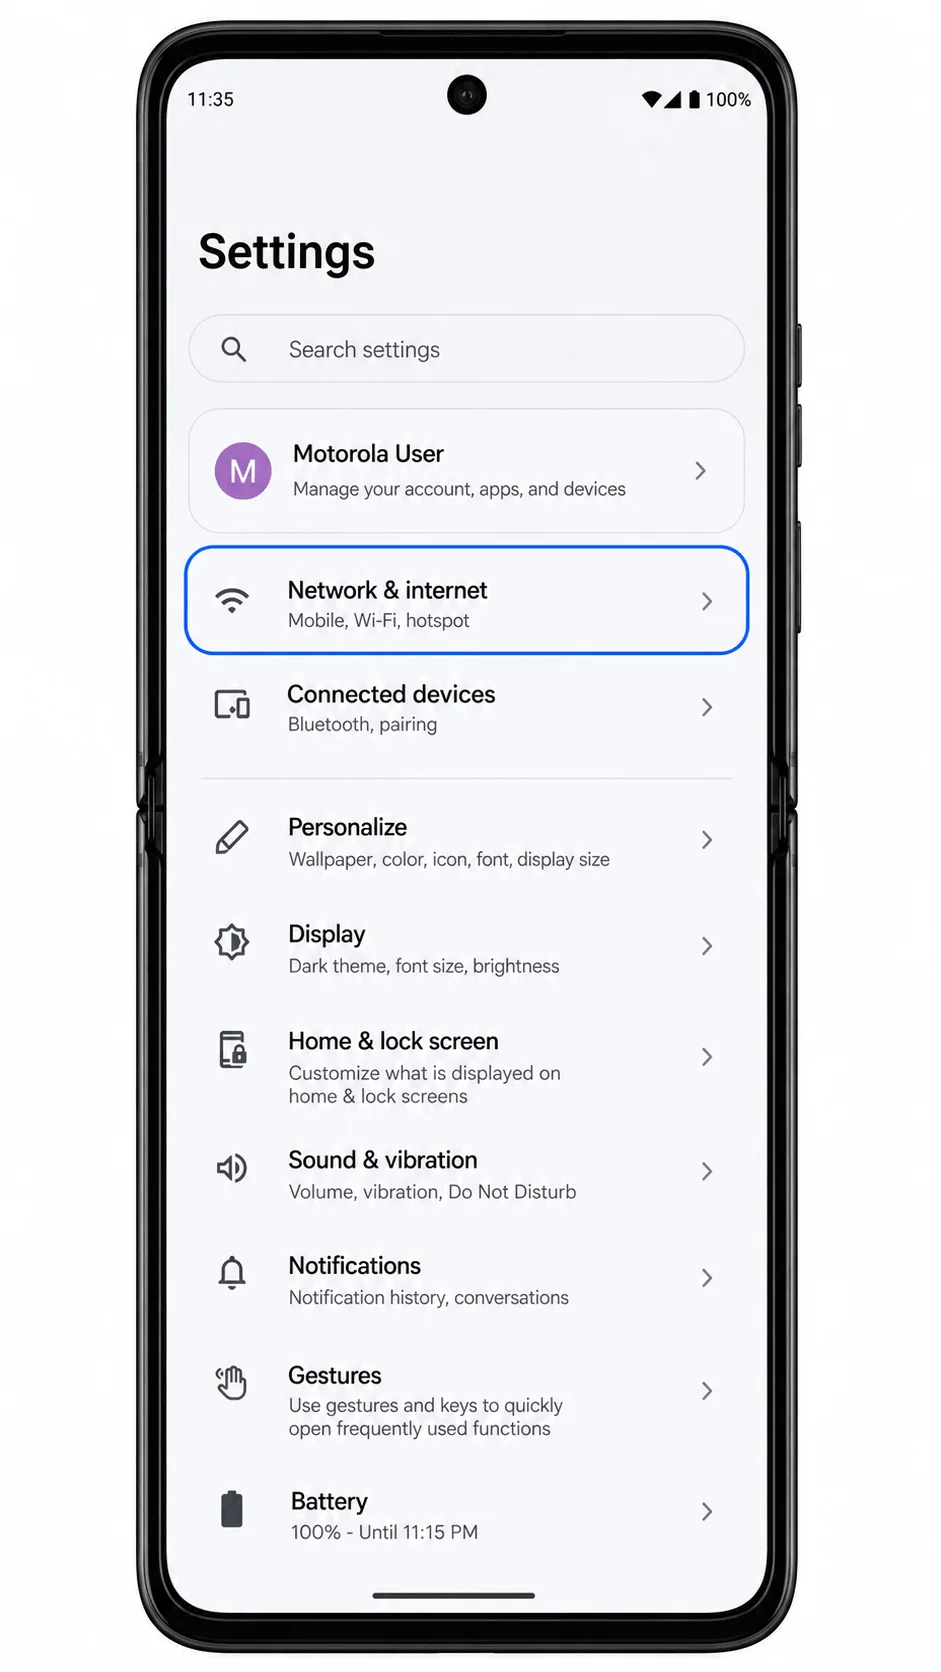
Open Settings on the Motorola Razr+ (2025), then tap Network & internet.
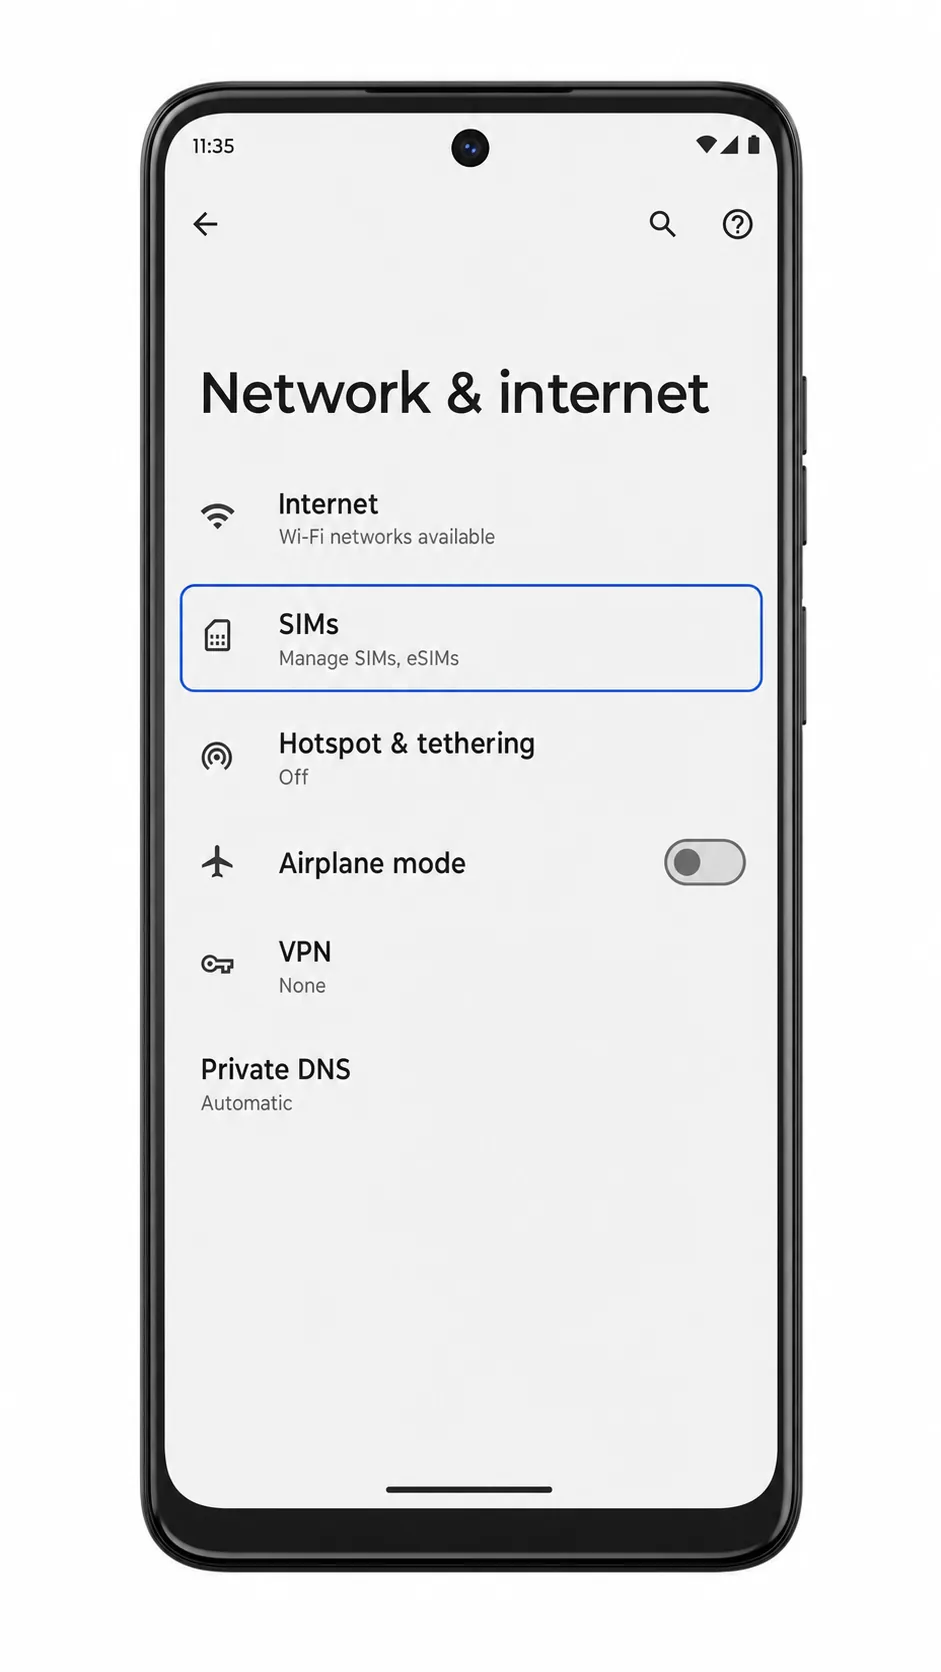
Tap SIMs to open the SIM and eSIM management page.
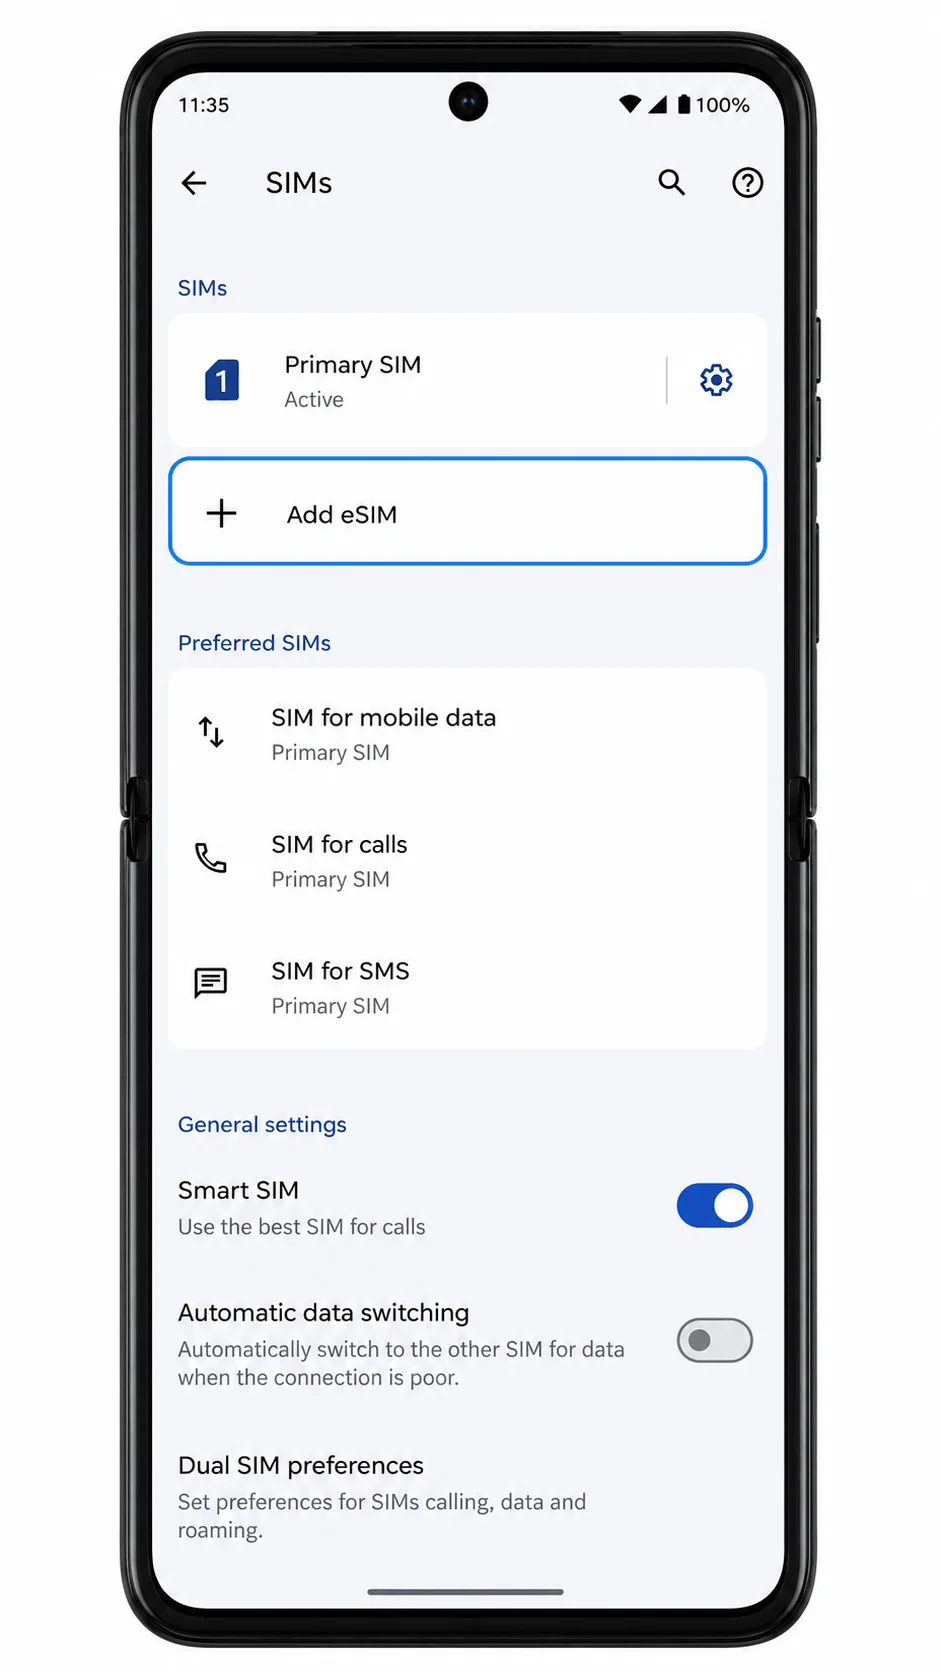
Tap Add eSIM. If the phone asks whether to use a physical SIM instead, choose the eSIM download option.
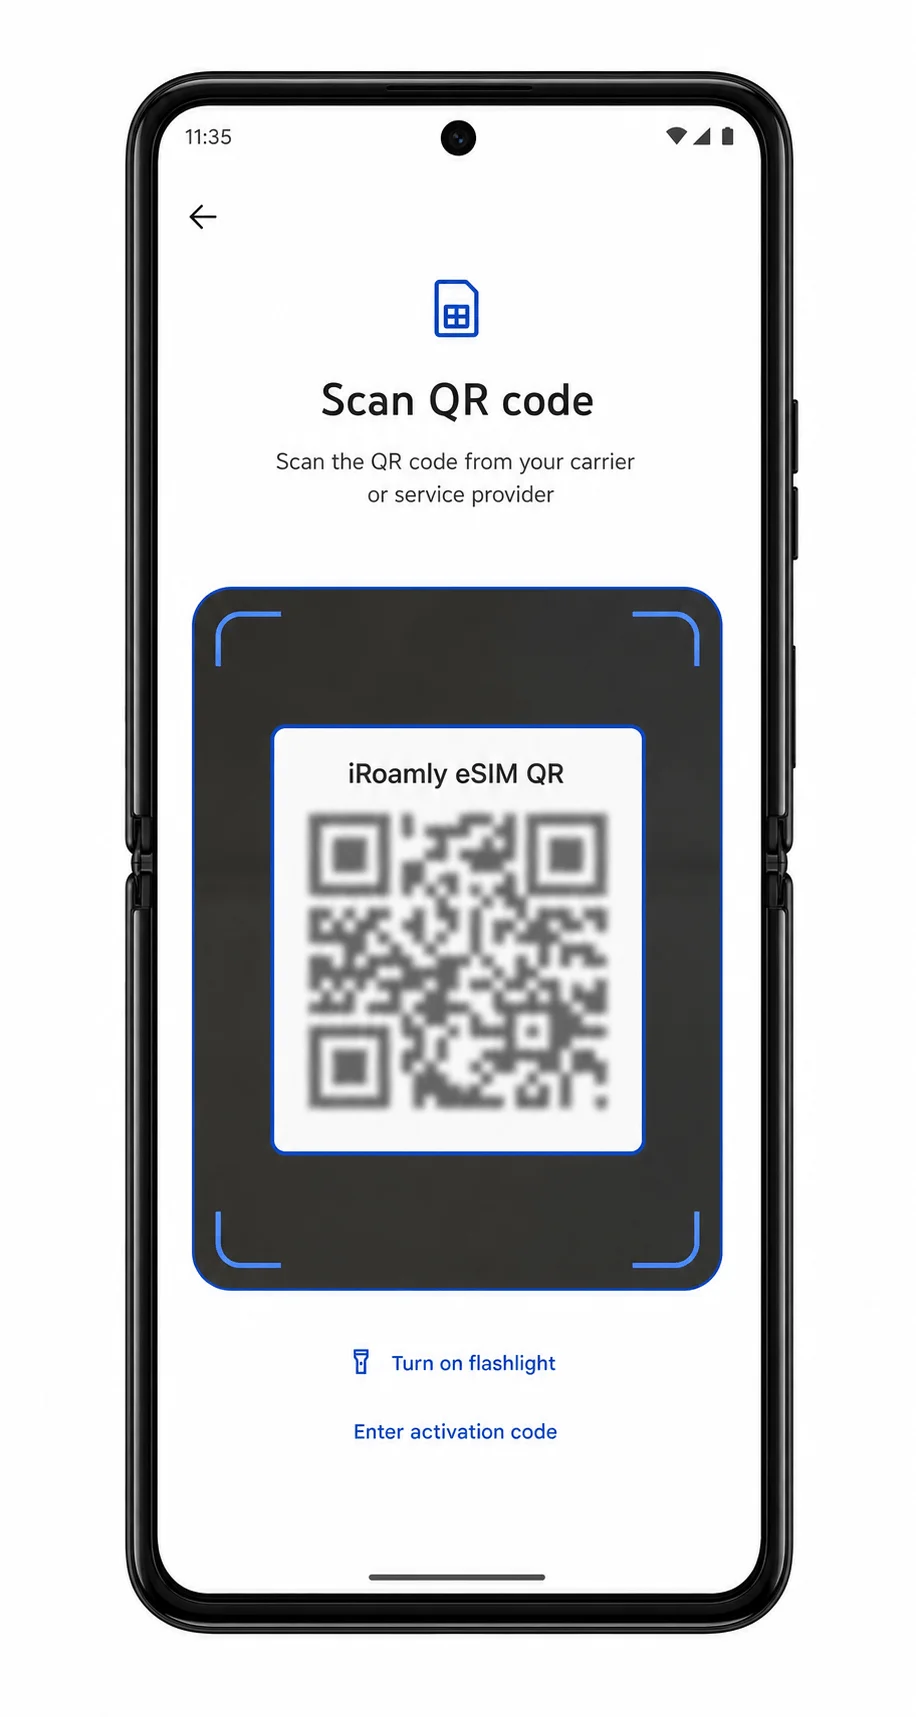
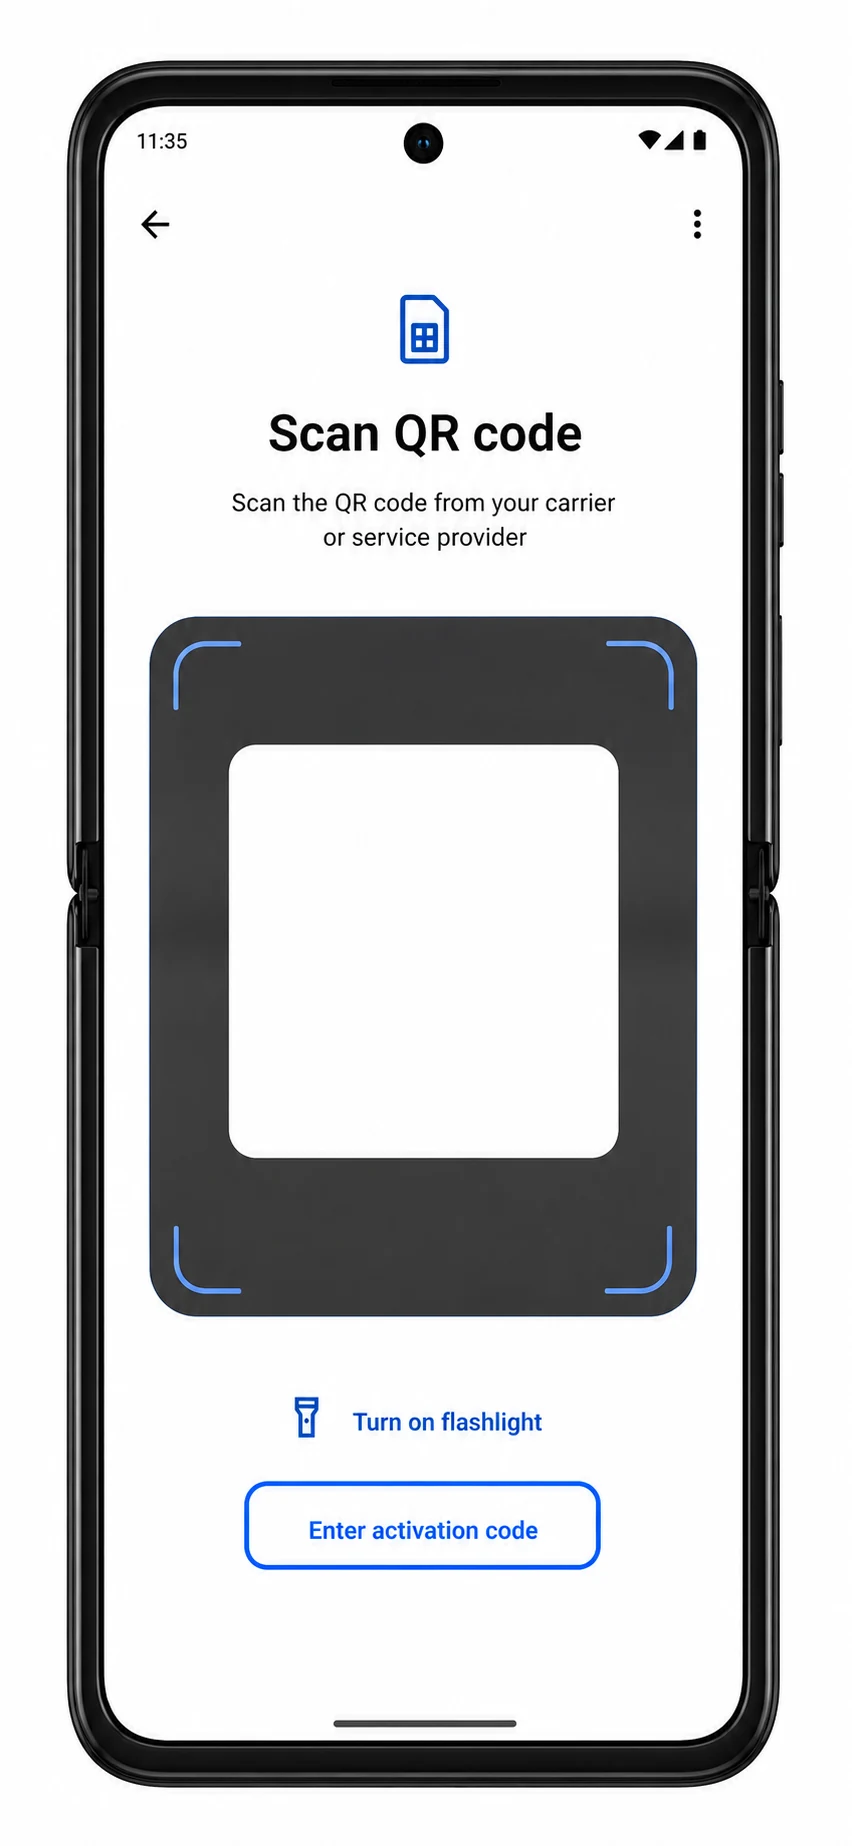
Choose the QR code option, then point the Razr+ camera at the iRoamly QR code from your order page or email.
Review the detected iRoamly eSIM profile, then tap Download to add it to the phone.
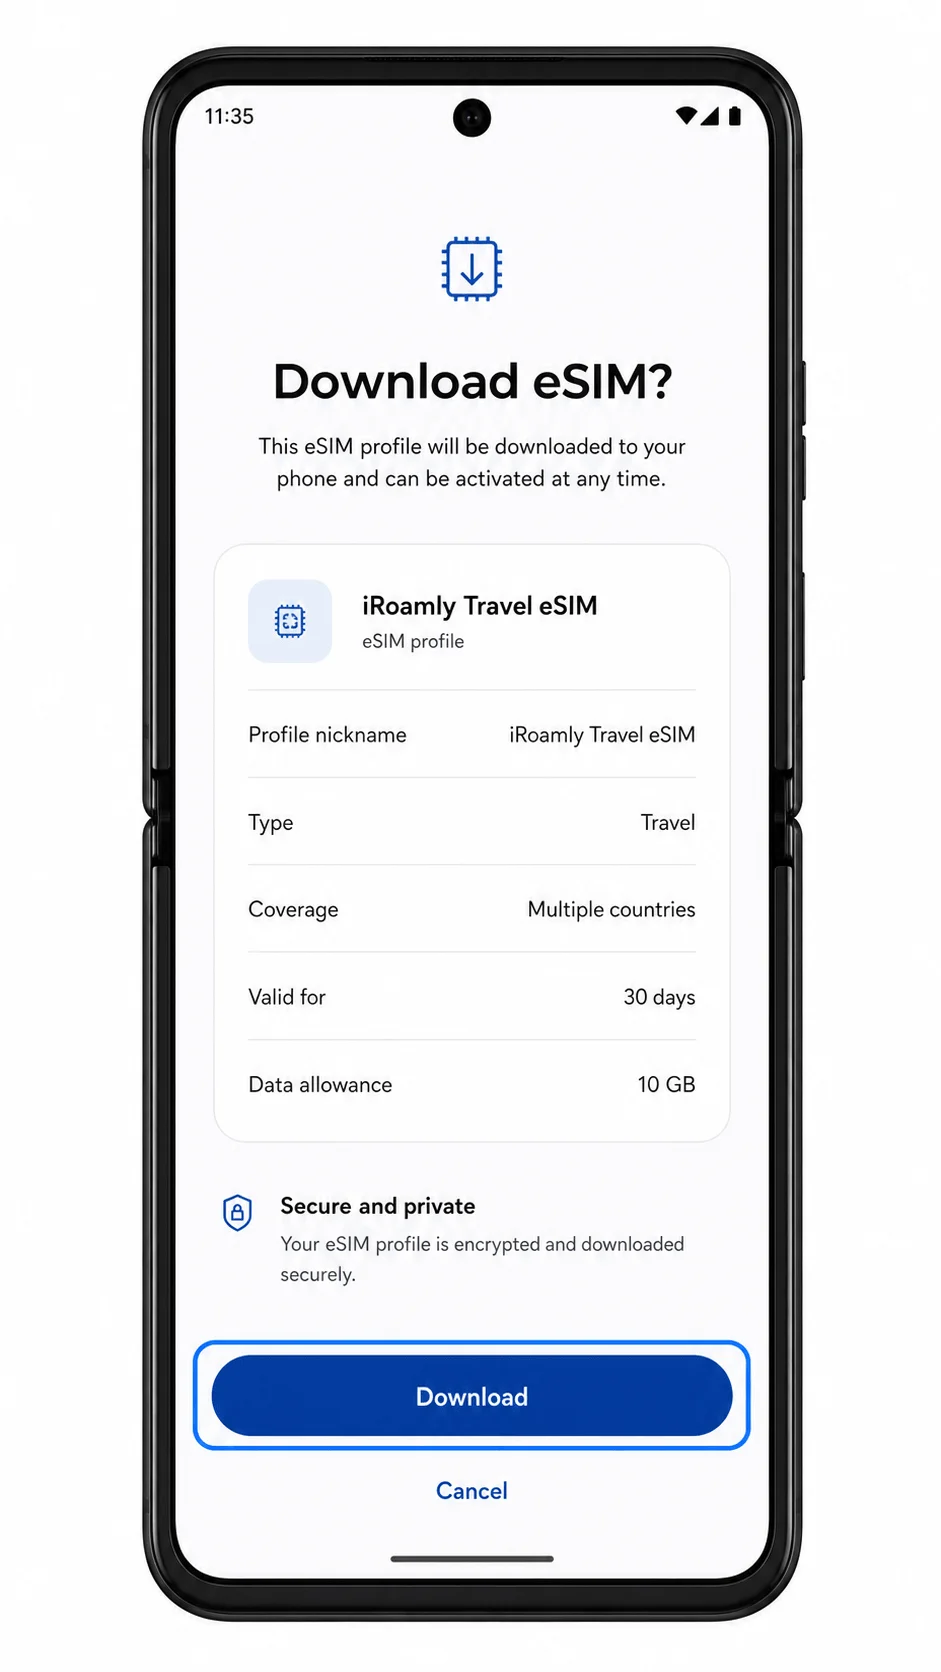
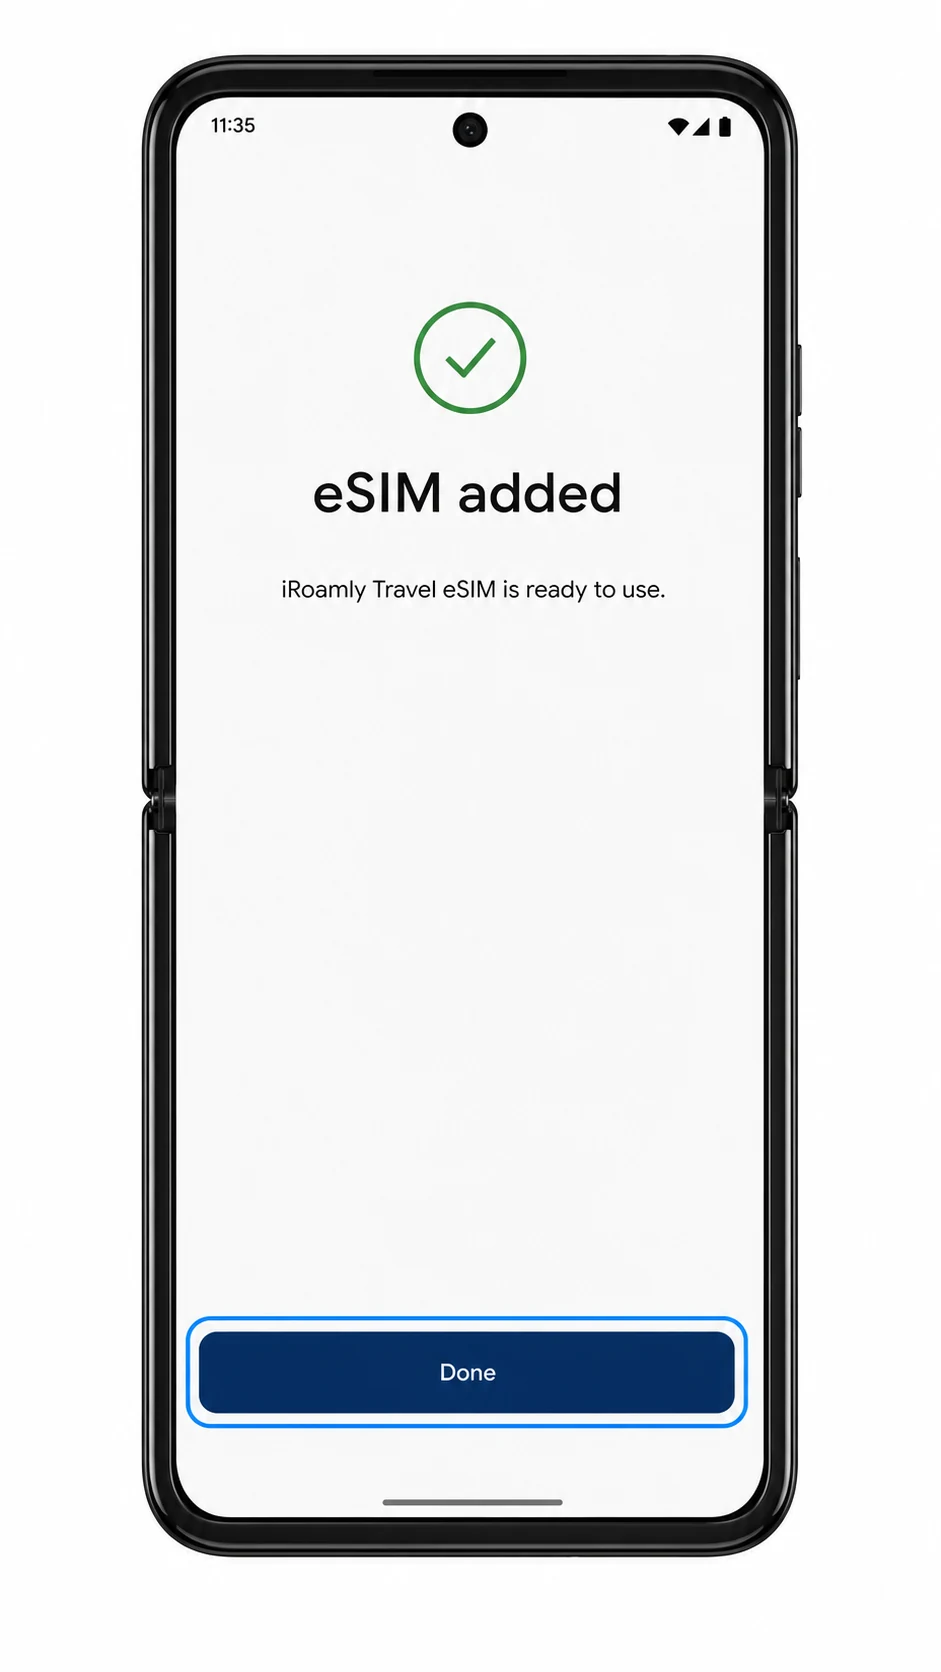
When the download finishes, tap Done or follow the on-screen prompt to return to the SIM settings page.
Method 2: Install eSIM Manually
Open Settings, then tap Network & internet.
Tap SIMs to manage physical SIM and eSIM profiles.
Tap Add eSIM to start adding a new mobile plan.
On the QR scanning screen, tap Enter activation code.
Enter the SM-DP+ Address and Activation Code exactly as shown in your iRoamly order details. If a Confirmation Code field appears, leave it blank unless iRoamly provided one, then tap Continue.
Review the iRoamly eSIM profile, then tap Download to install it.
When the phone says the eSIM has been added, tap Done.
How to Confirm Your iRoamly eSIM Is Installed
Go to Settings > Network & internet > SIMs, then look for the newly added iRoamly eSIM or travel eSIM profile in the SIM list.
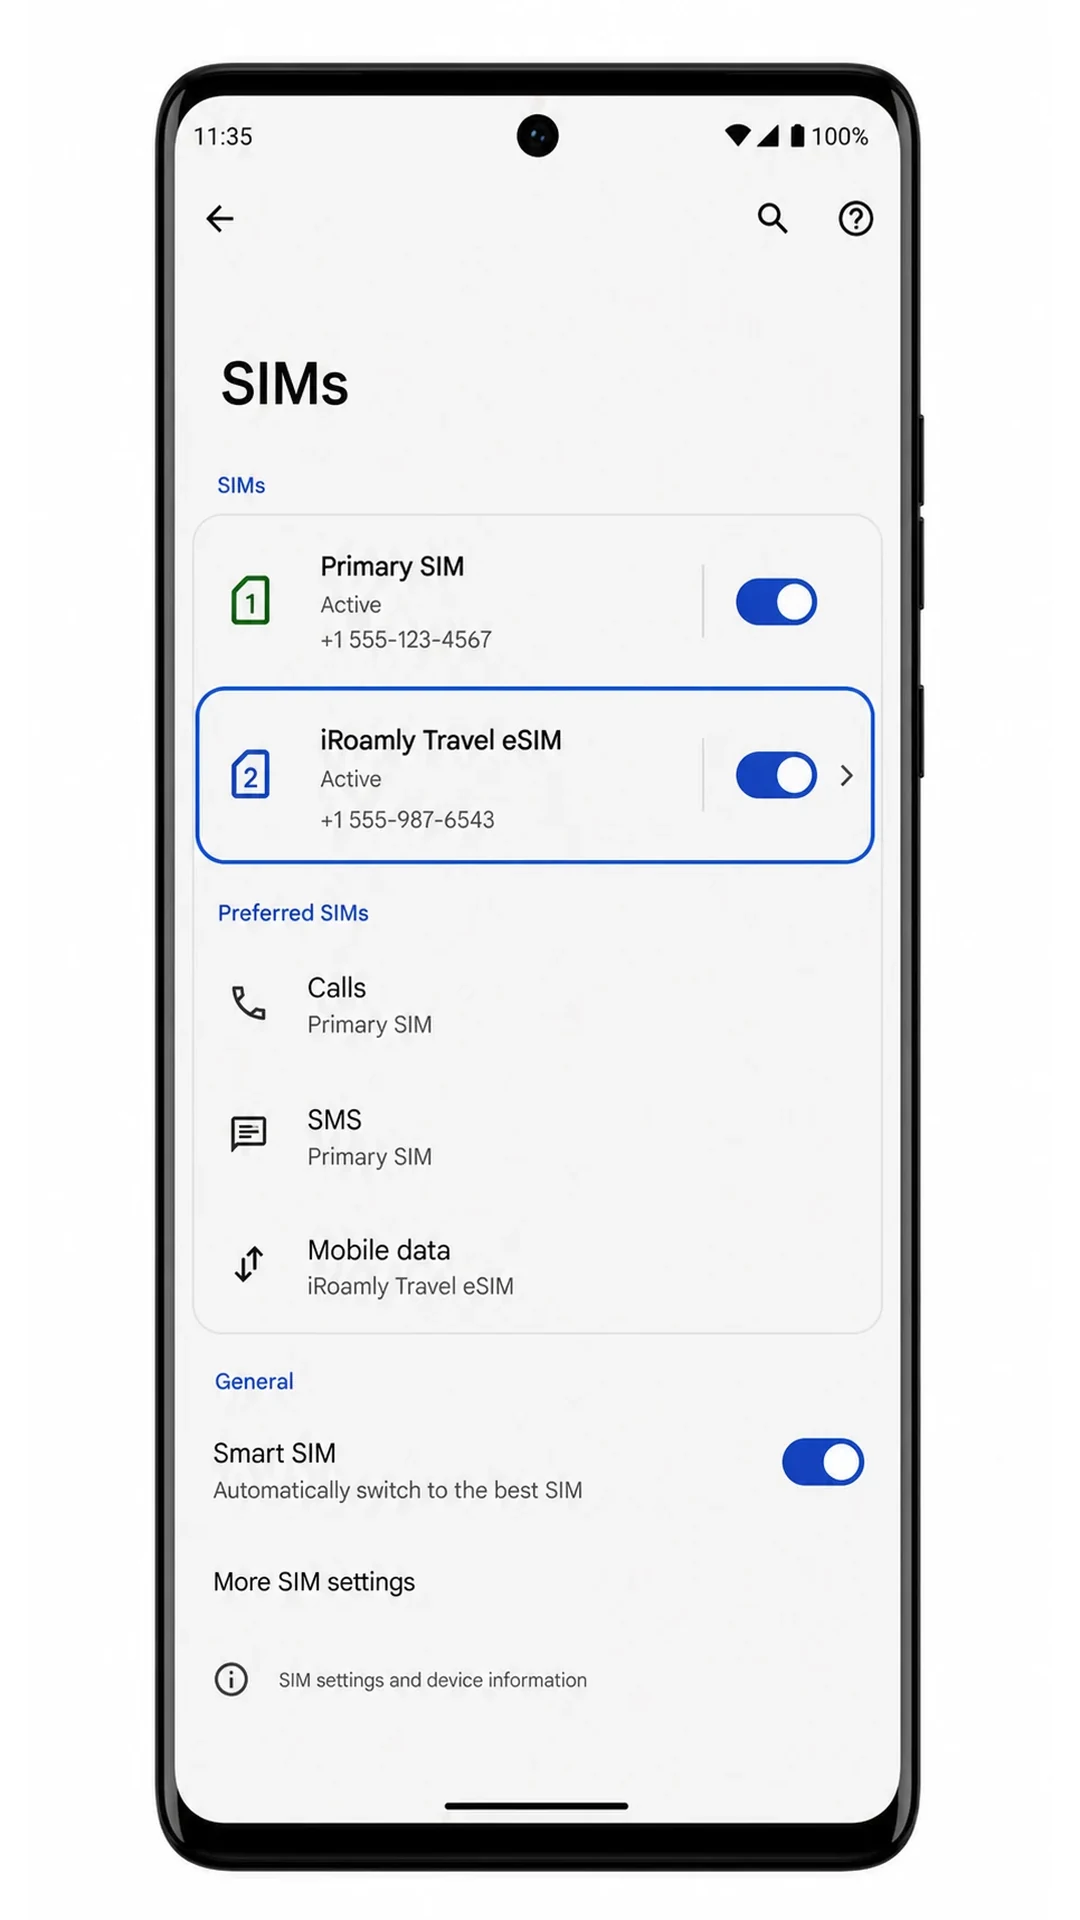
Tap the iRoamly eSIM profile and confirm the Use SIM switch is available. If you are still at home, it may show no signal until you reach the destination network.
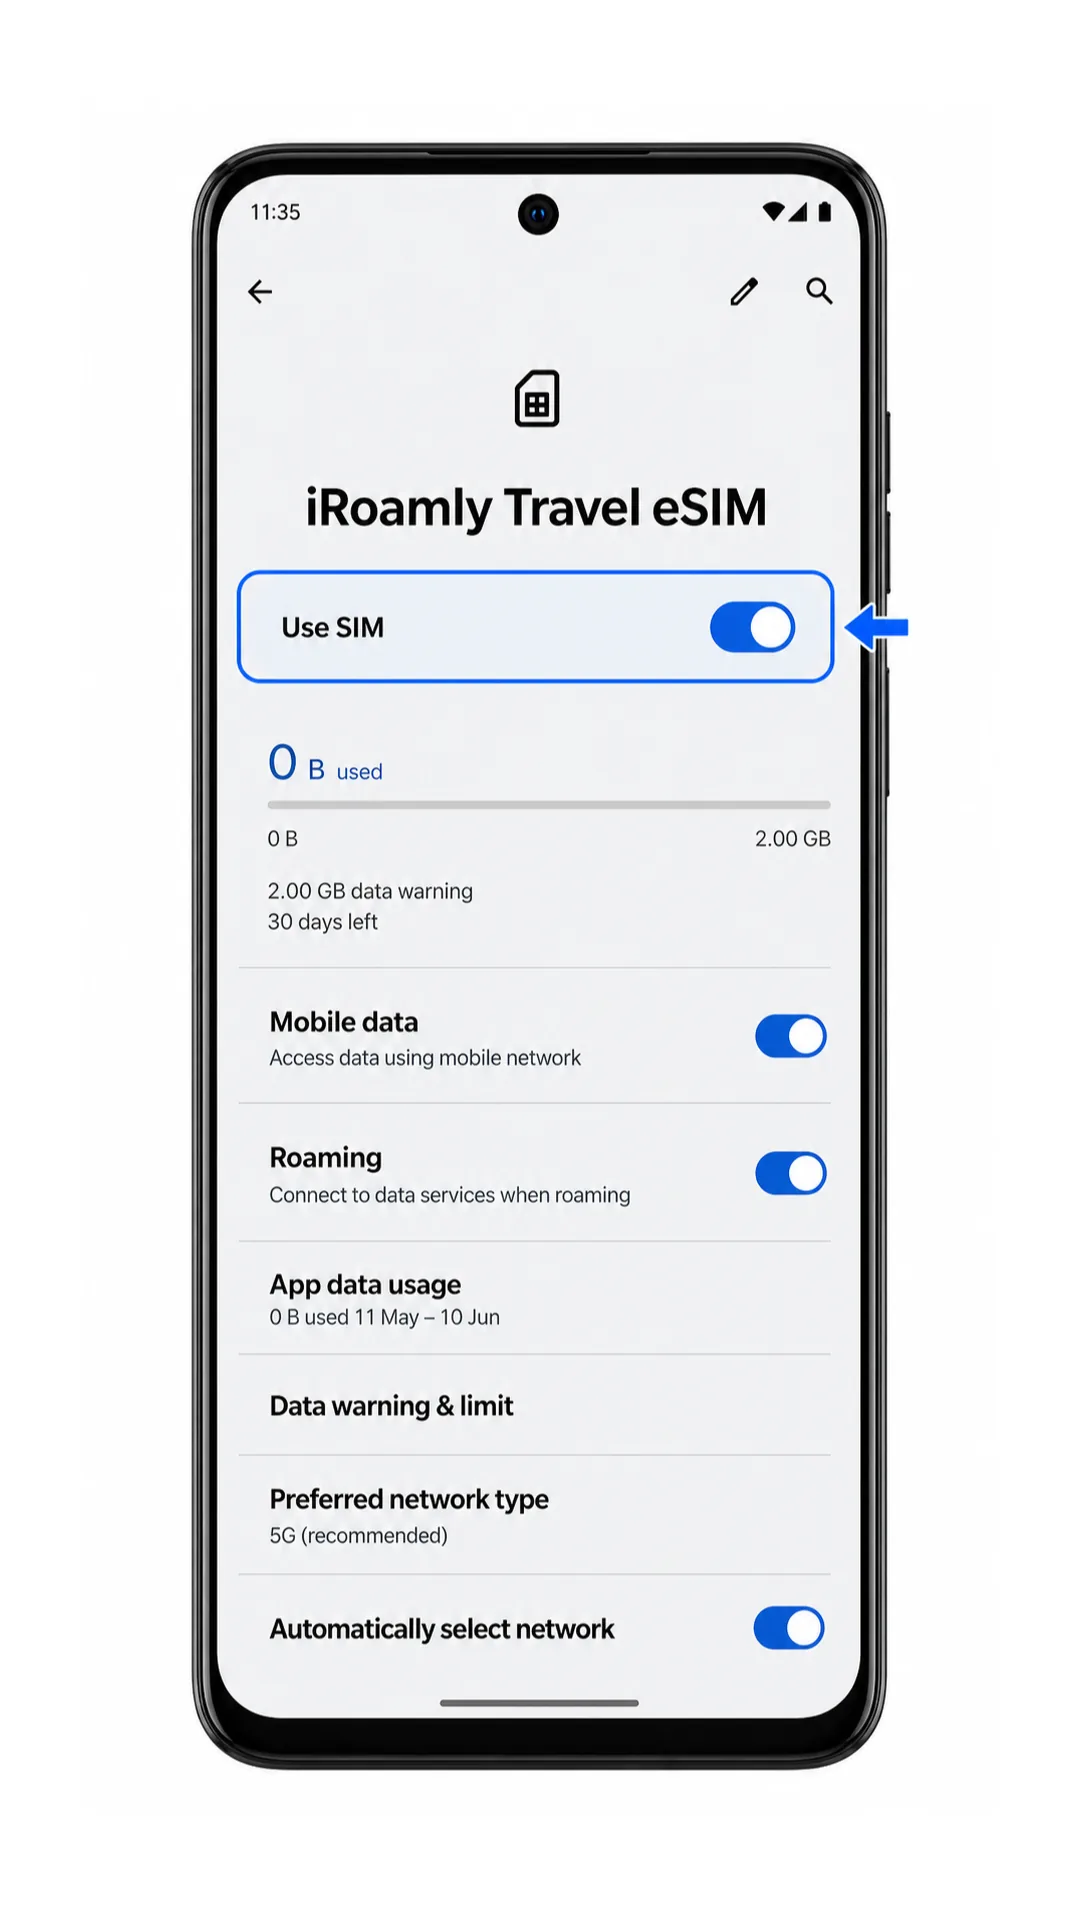
If your plan supports SMS or calls, test those services only after checking the plan details. For data-only plans, confirm installation by checking that the profile appears and mobile data settings can select it.
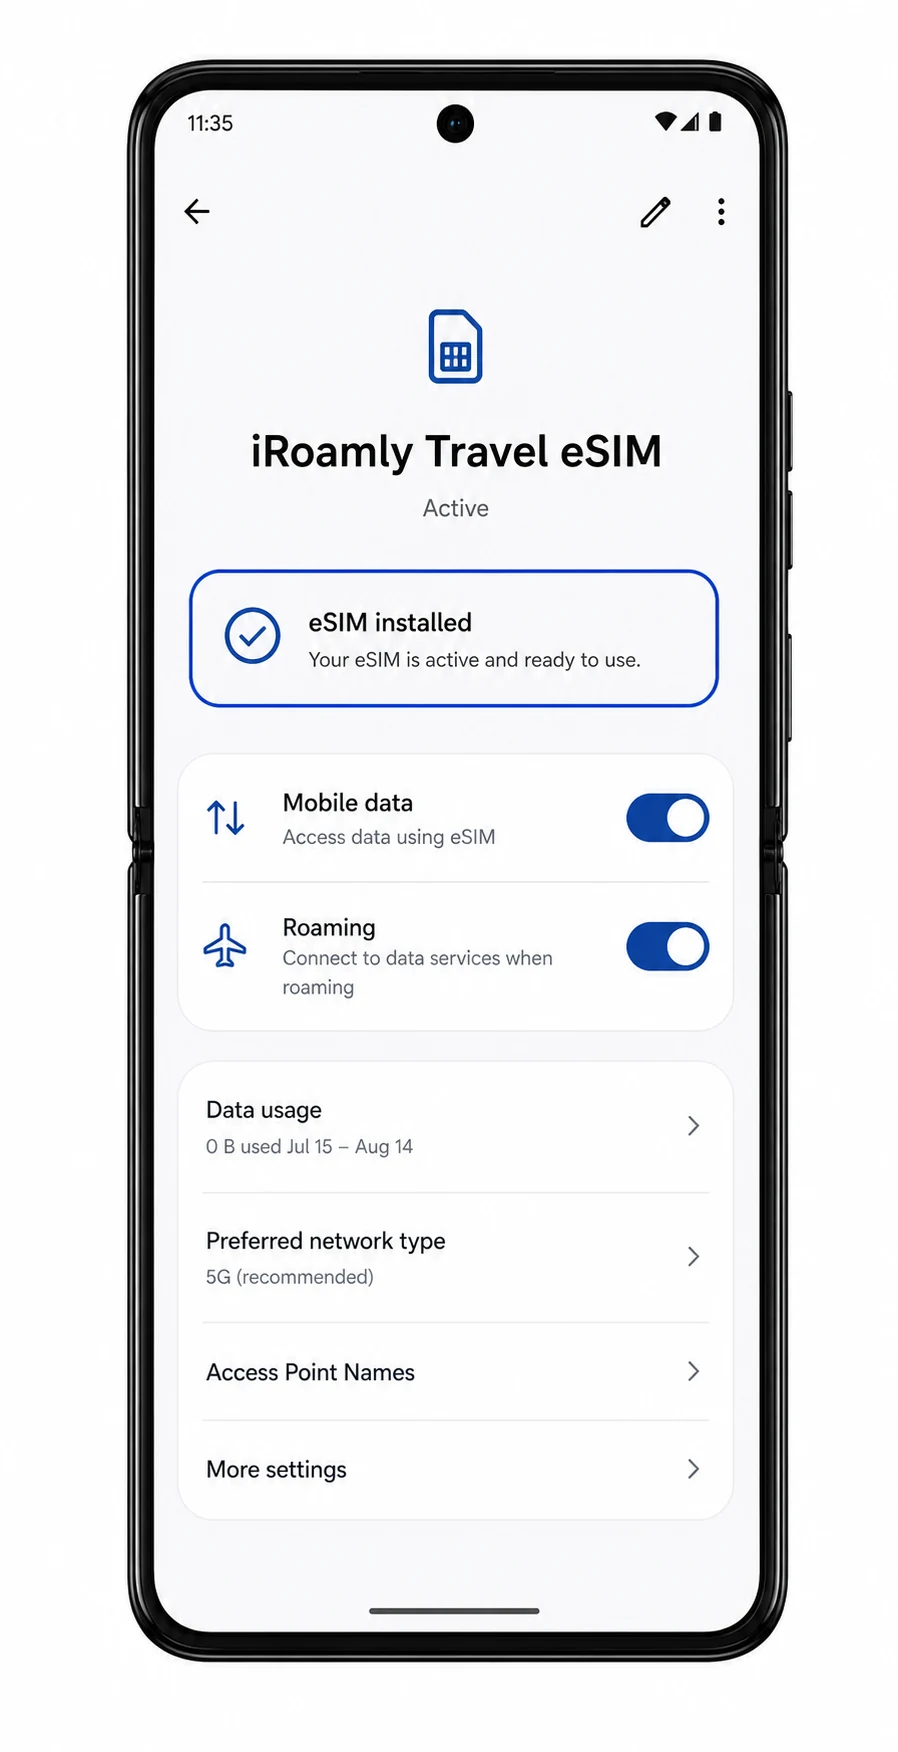
Configure eSIM for Mobile Data
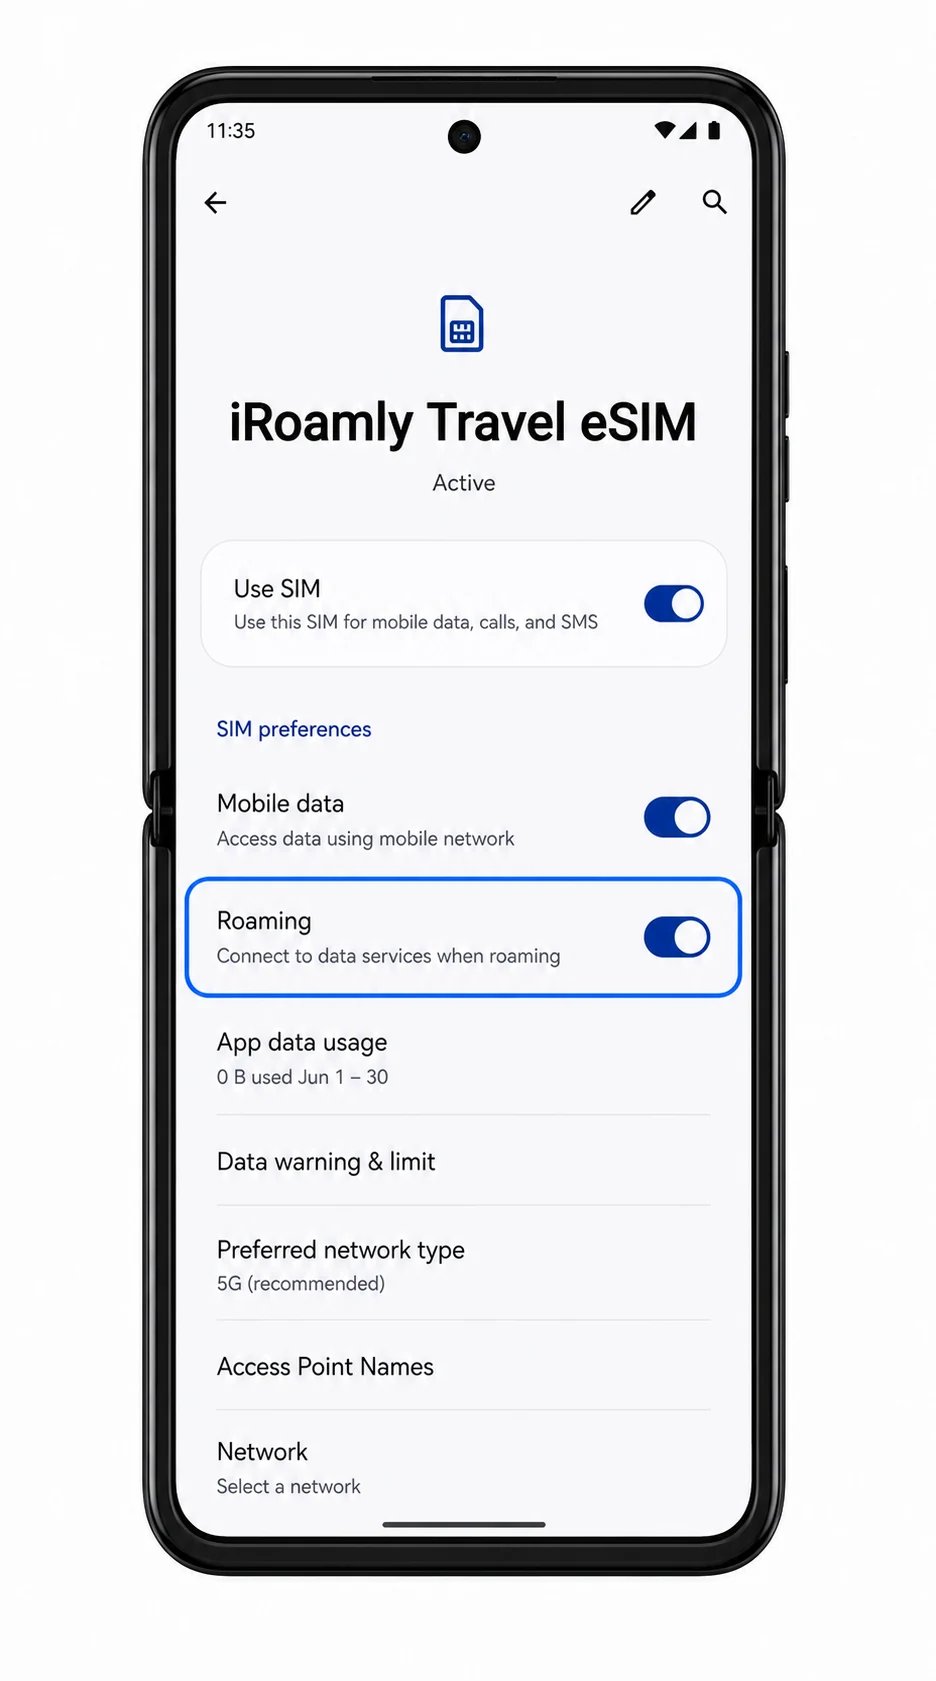
Open Settings > Network & internet > SIMs, then tap the iRoamly eSIM profile.
Turn on Use SIM for the iRoamly eSIM when you are ready to use it.
Tap Mobile data or the data preference option, then choose the iRoamly eSIM for mobile data.
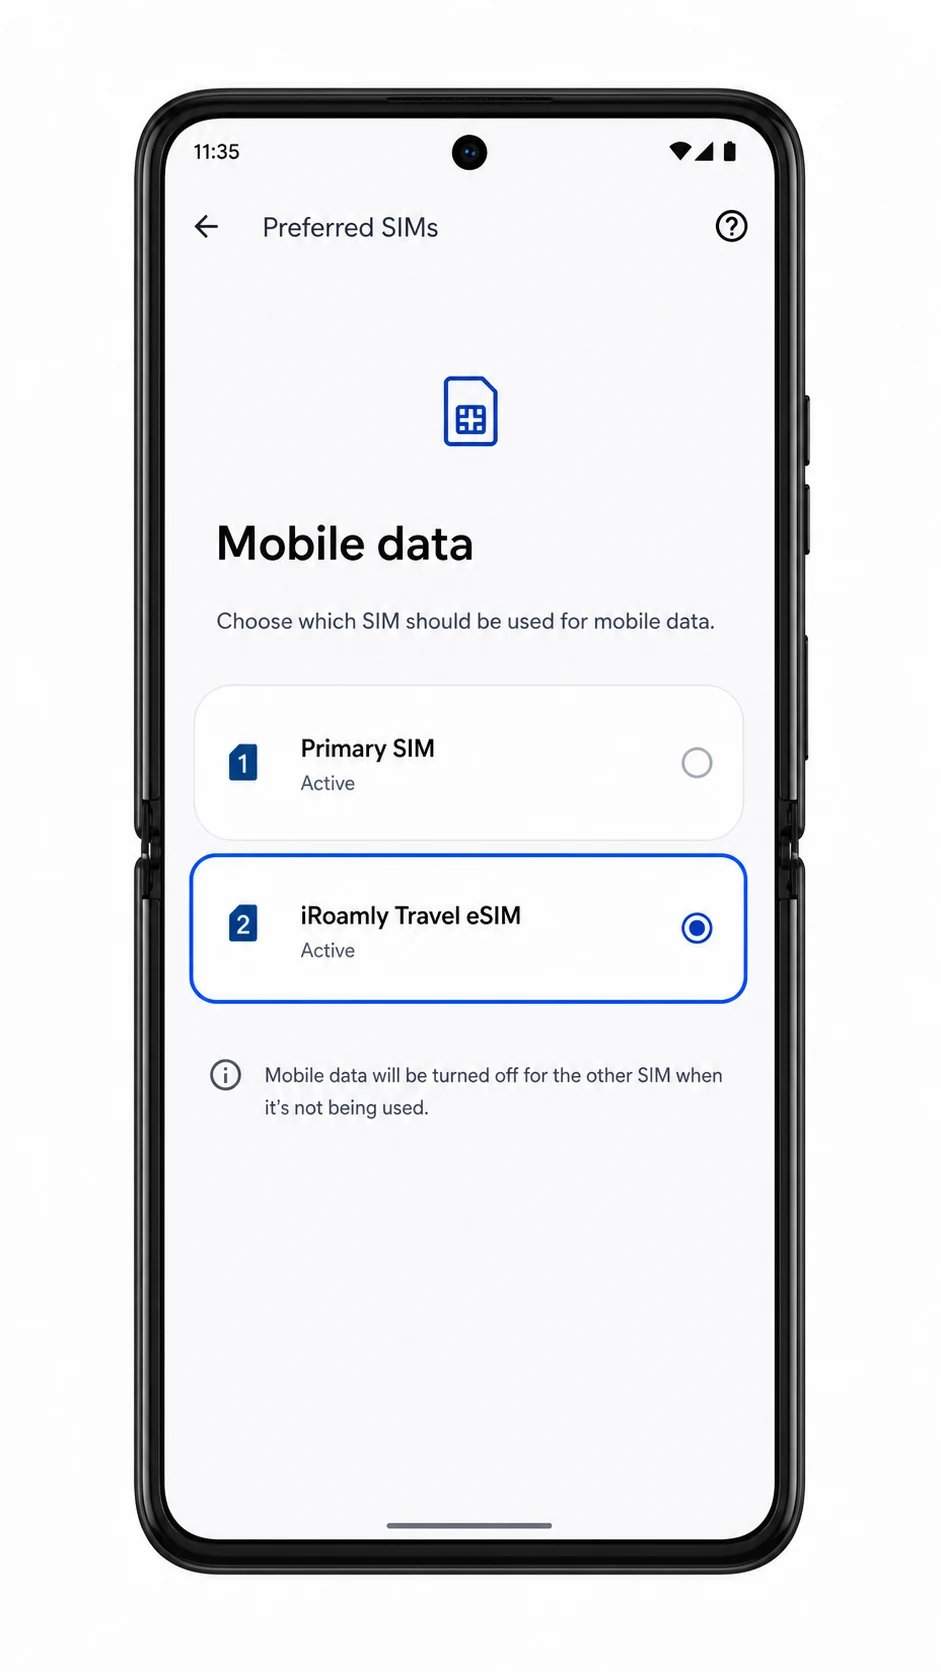
Turn on Roaming for the iRoamly eSIM if your destination plan requires roaming to connect to partner networks.
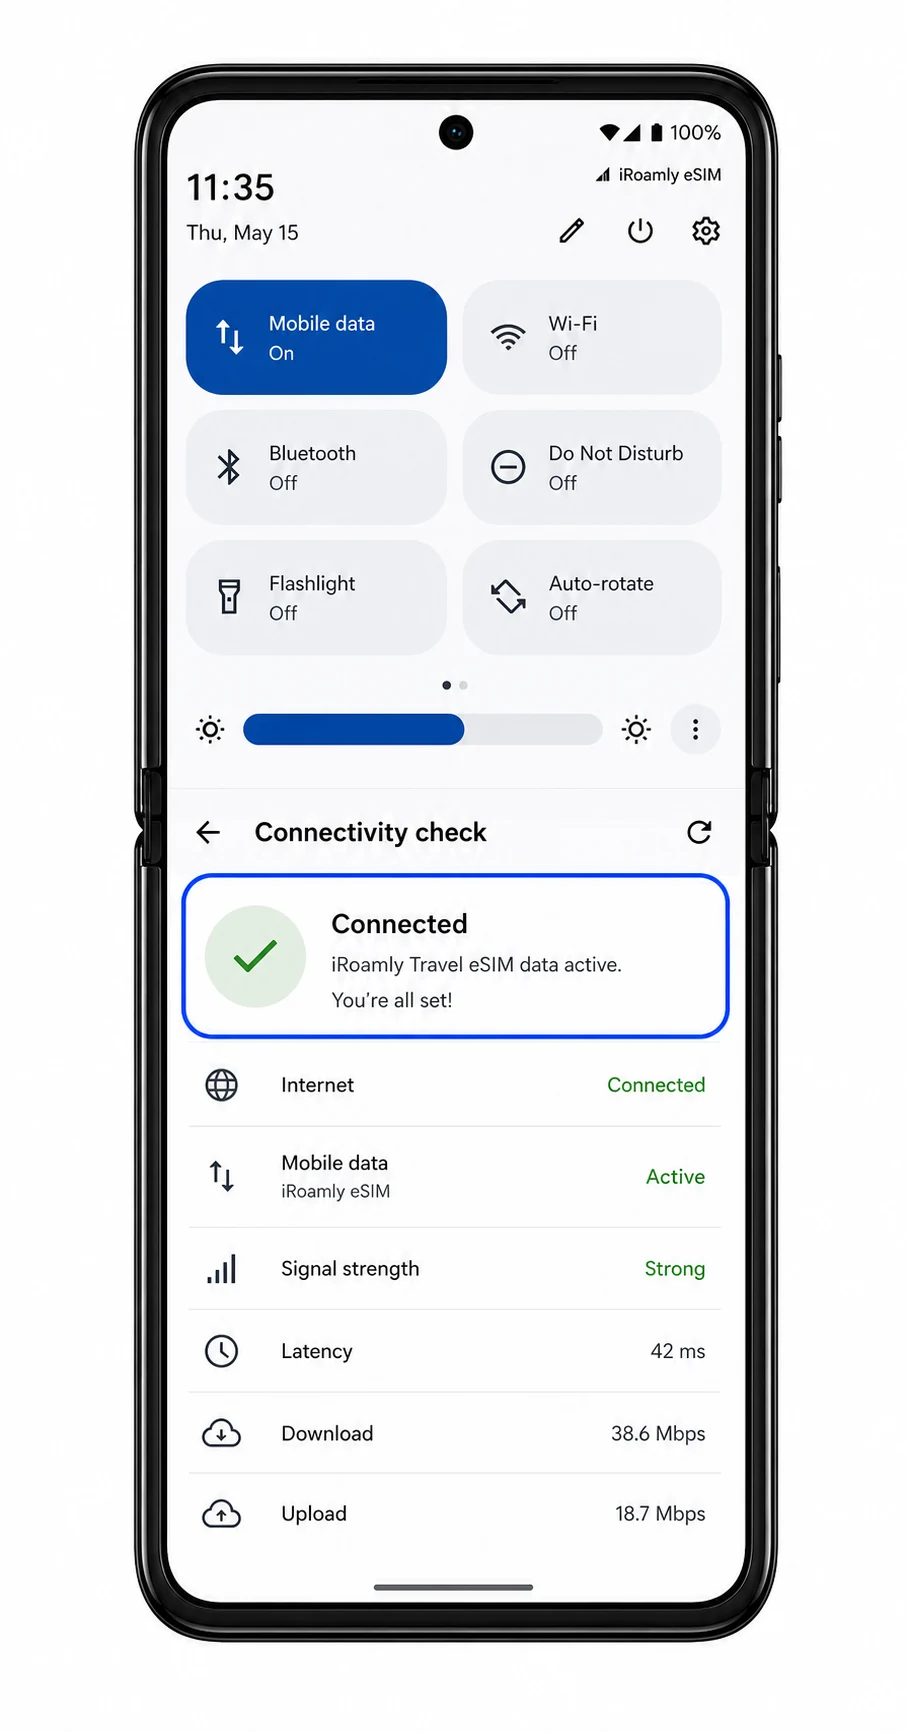
Open a browser or maps app with Wi-Fi off to confirm mobile data works. If your primary SIM is still installed, keep calls and SMS on the primary line unless your iRoamly plan includes those services.
Troubleshooting
If Add eSIM is missing, confirm your Motorola Razr+ (2025) variant supports eSIM, update Android/Hello UX, restart the phone, and check whether your carrier firmware disables eSIM.
If the QR code will not scan, increase screen brightness on the device showing the code, clean the camera lens, or use manual entry with the SM-DP+ Address and Activation Code.
If the QR code says it has already been used, do not delete the installed profile. Contact iRoamly support because many eSIM QR codes are single-use.
If installation is stuck on activation pending, keep the phone on Wi-Fi, wait a few minutes, restart the Razr+ if prompted, and check again under Settings > Network & internet > SIMs.
If the iRoamly eSIM is installed but has no data, turn on Use SIM, select it for Mobile data, enable Roaming if required, and test again after arriving in the covered destination.
If calls or SMS do not work, check the iRoamly plan details. Many travel eSIM plans are intended for mobile data only.
If manual entry fails, check for extra spaces, line breaks, or missing characters in the SM-DP+ Address and Activation Code.
More Motorola Razr eSIM Setup Guides
Using another Motorola Razr phone? These eSIM activation guides may help.
Conclusion
Your iRoamly eSIM is now ready to support your travel with convenient mobile data in supported destinations. By preparing your connection before you leave, you can get online more quickly after arrival and continue using the apps and services you rely on every day.
Whether you're navigating a new city, sharing your travel experiences, or staying productive on the move, a travel eSIM offers a simple and flexible way to stay connected without replacing your physical SIM card. Safe travels and enjoy your journey!