
Motorola Razr 5G supports a nano-SIM plus eSIM configuration, so travelers can keep their usual SIM available while adding an iRoamly travel eSIM for mobile data abroad.
This guide assumes the Motorola Razr 5G is unfolded and running Motorola's Android 10/Android 11-style Settings. On some carrier firmware, Add carrier, Download a SIM instead, or Add eSIM may use slightly different wording, but the setup still starts from Settings and Network & internet.
You will find two complete setup methods below: scanning the iRoamly QR code and entering the SM-DP+ address plus activation code manually. Manual entry is useful if the QR code will not scan, if you are viewing the QR code on the Razr itself, or if your email only shows text activation details.
Meet iRoamly for Easier Travel Connectivity
iRoamly is a travel eSIM service that provides mobile data for international trips through digital plans. Depending on the destination, available options may include local, regional, or global plans, with plan length, data amount, and included features varying by location.
After installation on a compatible phone, the travel data can help keep maps, messaging, reservations, and travel updates available while you are abroad.
For a Motorola Razr 5G that supports eSIM, an iRoamly profile can work as a separate travel data line alongside the phone's nano-SIM. The instructions below show the supported QR-code and manual-entry methods without changing the phone-specific checks you need before setup.
Because this Razr model is a foldable phone, keep it open during setup so the QR scanner and confirmation screens are easier to use.
Before You Set Up Your iRoamly eSIM
Connect the Motorola Razr 5G to stable Wi-Fi before starting. The eSIM profile must download from the internet.
Confirm the phone is unlocked and supports eSIM in your region and carrier variant. Some carrier-sold or region-specific devices may restrict eSIM use.
Keep your iRoamly QR code open on another screen or printed. For manual setup, keep the SM-DP+ Address, Activation Code, and any optional confirmation code ready.
Install the iRoamly eSIM 1 to 2 days before travel when possible, but check your exact plan details before activating. iRoamly plan validity starts from activation, and the activation trigger can vary by plan.
The same Razr 5G setup process applies across different destinations, whether you choose a plan for France, Spain, or somewhere else.
Do not delete the iRoamly eSIM after installation unless iRoamly support tells you to. Many eSIM profiles cannot be reinstalled after removal.
iRoamly travel eSIM plans may be data-only. The availability of voice calls and SMS varies by plan, so check the specific plan details before relying on calls or texts.
Method 1: Install eSIM by Scanning a QR Code
Open Settings on the Motorola Razr 5G, then tap Network & internet.
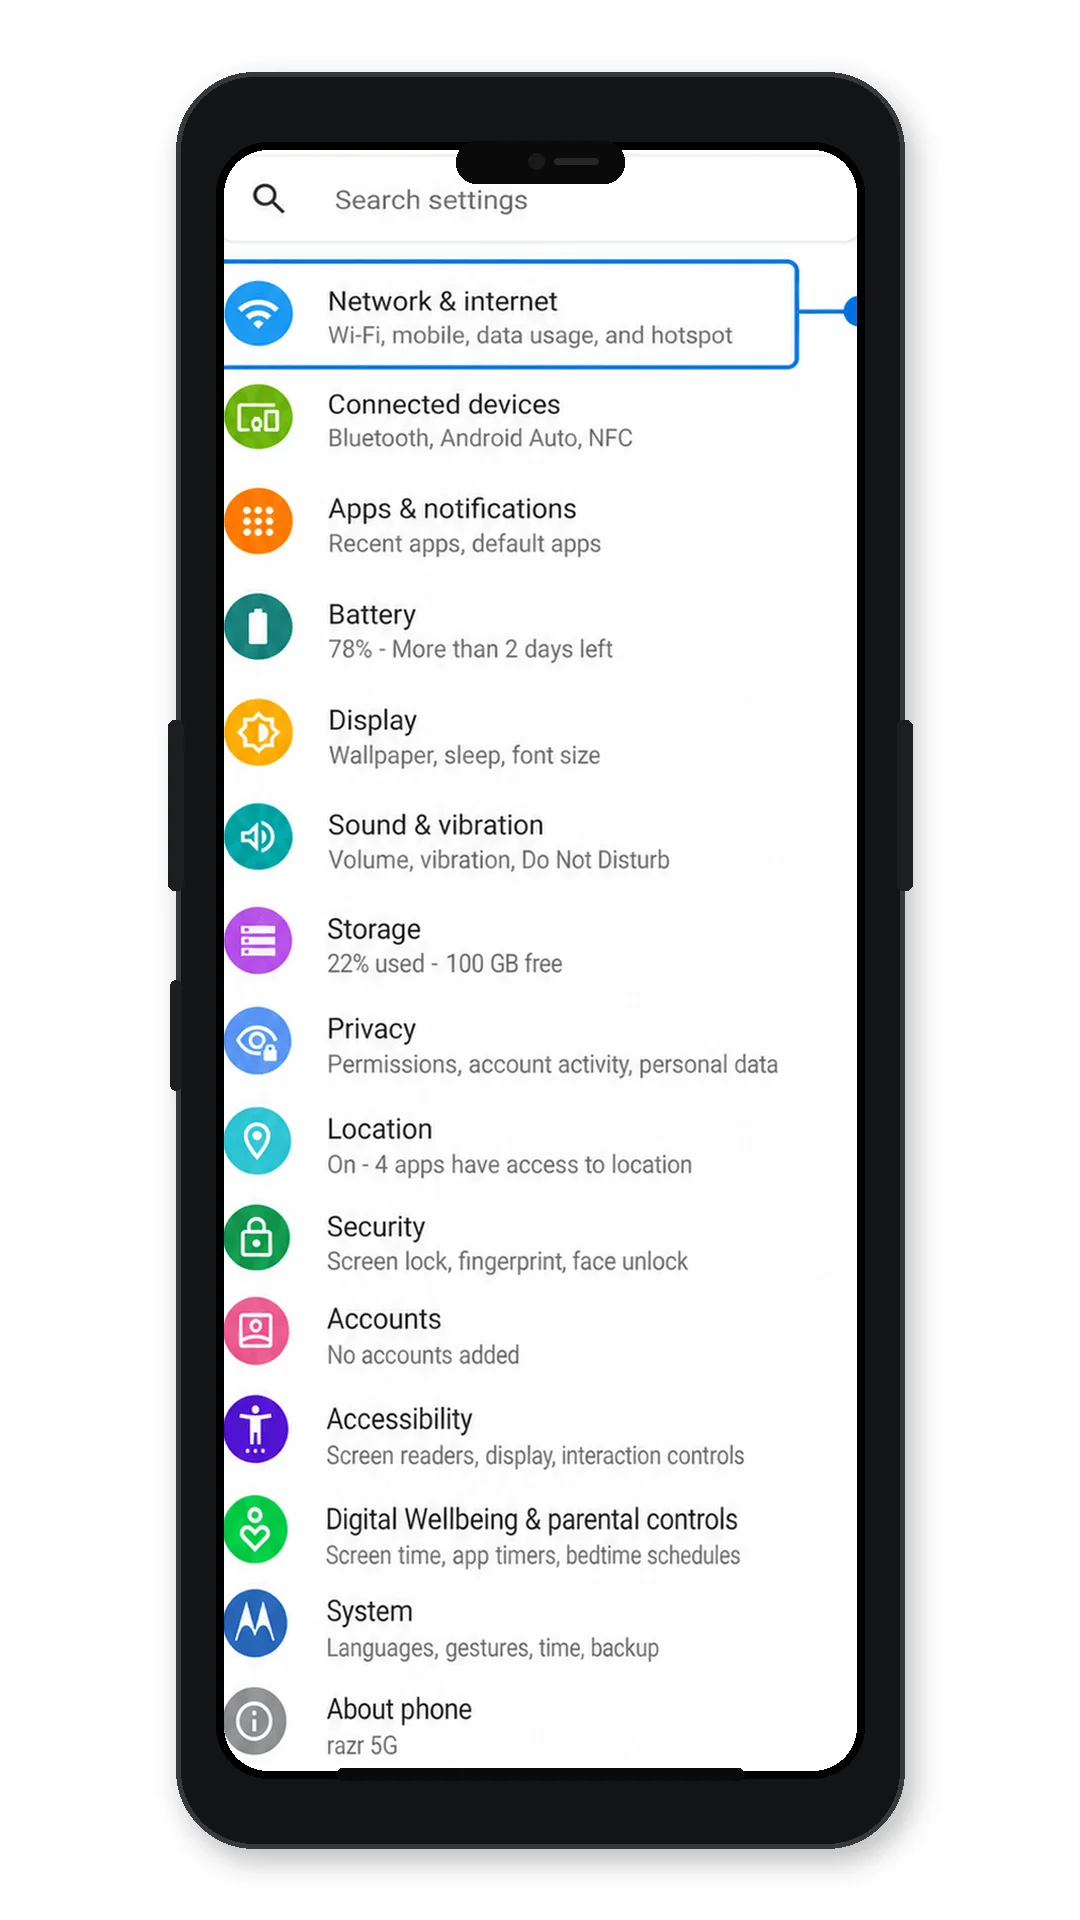
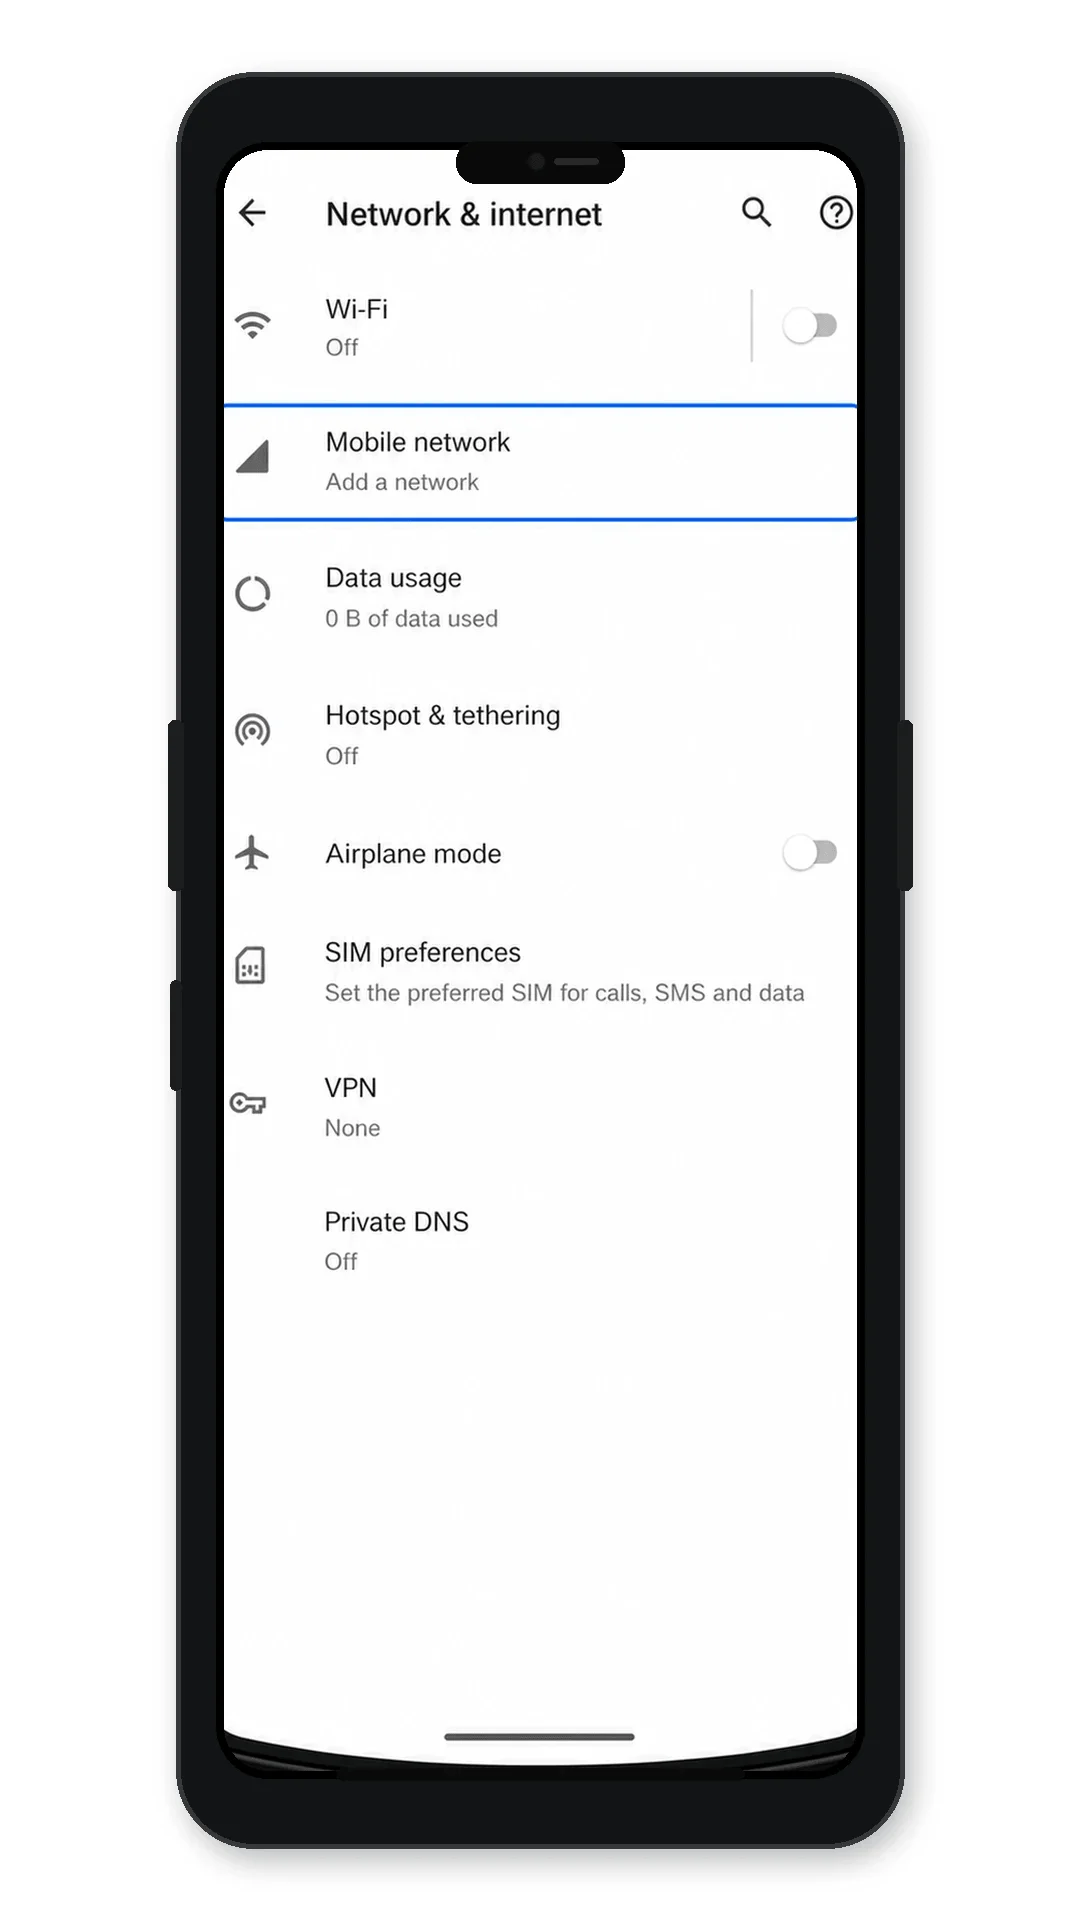
Tap Mobile network. If your software shows SIMs instead, tap SIMs.
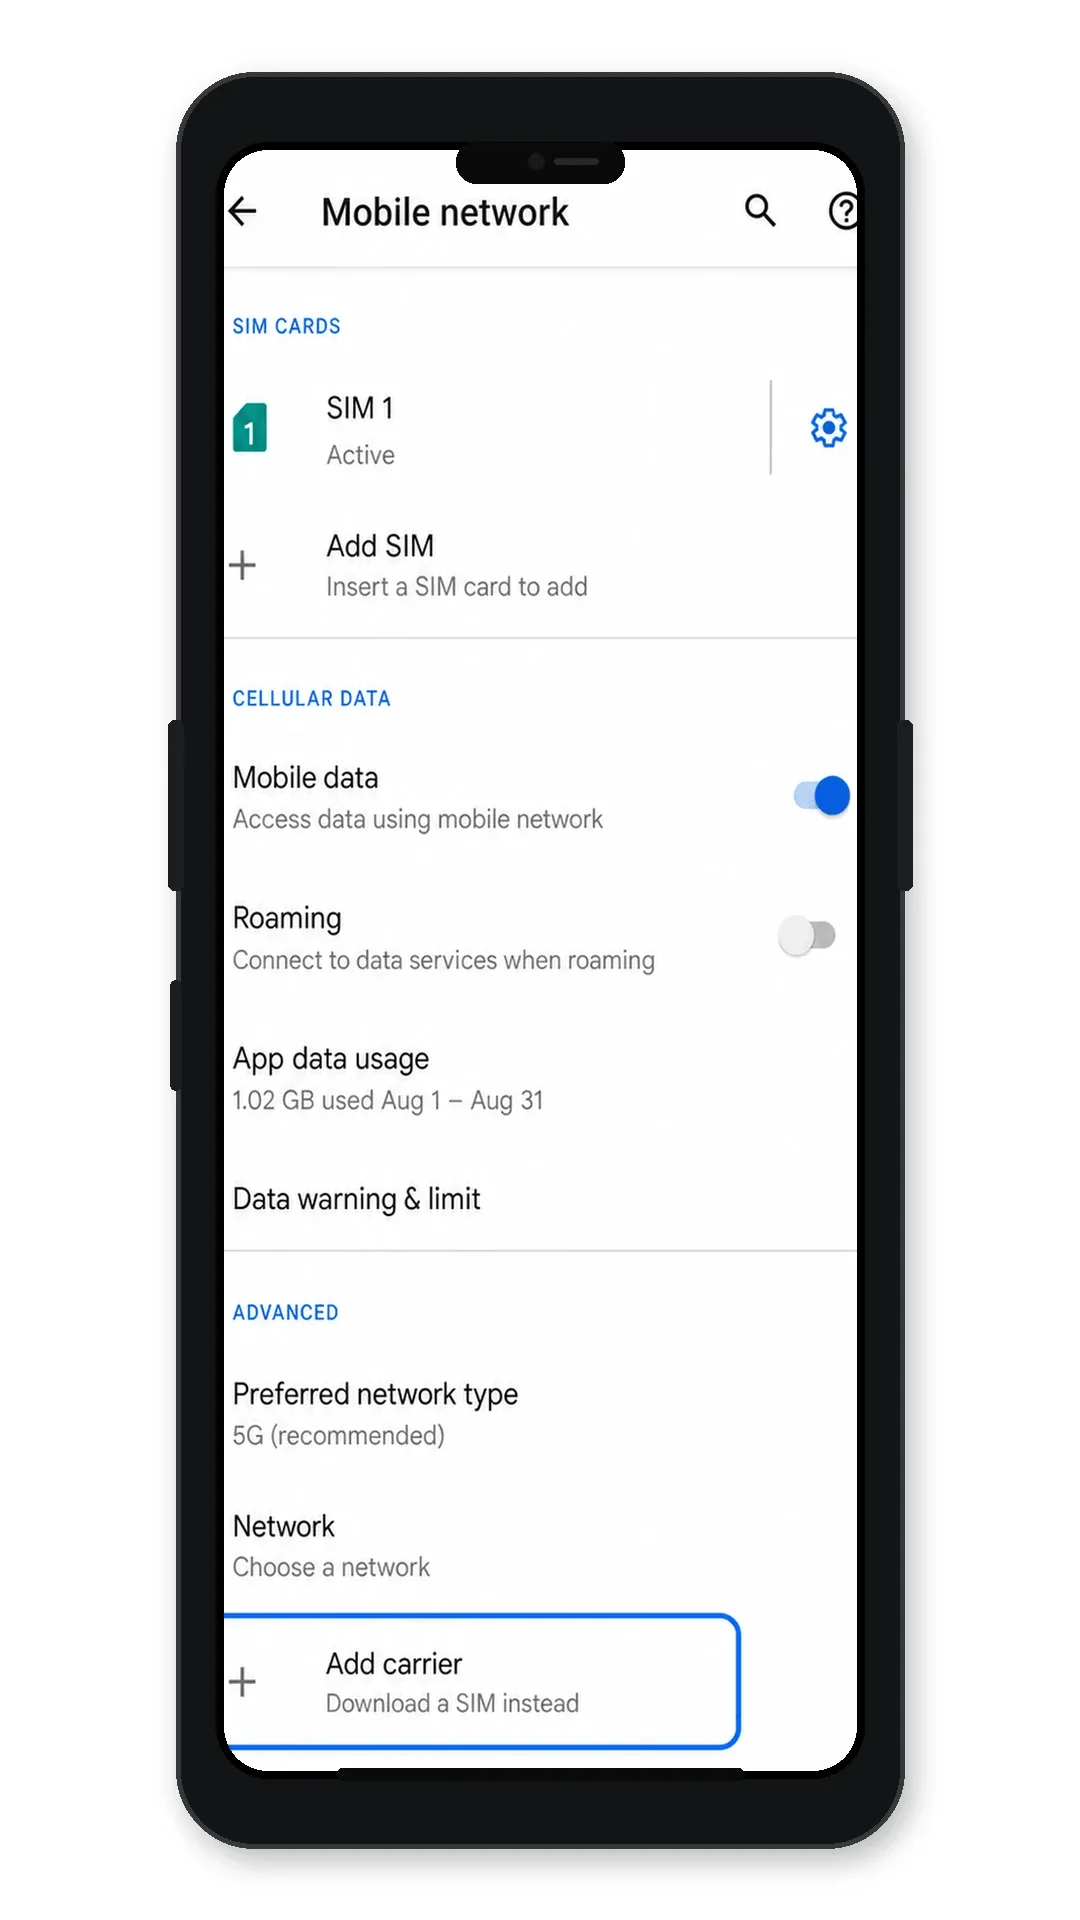
Tap Add carrier, Download a SIM instead, or Add eSIM, depending on the wording shown on your Razr 5G.
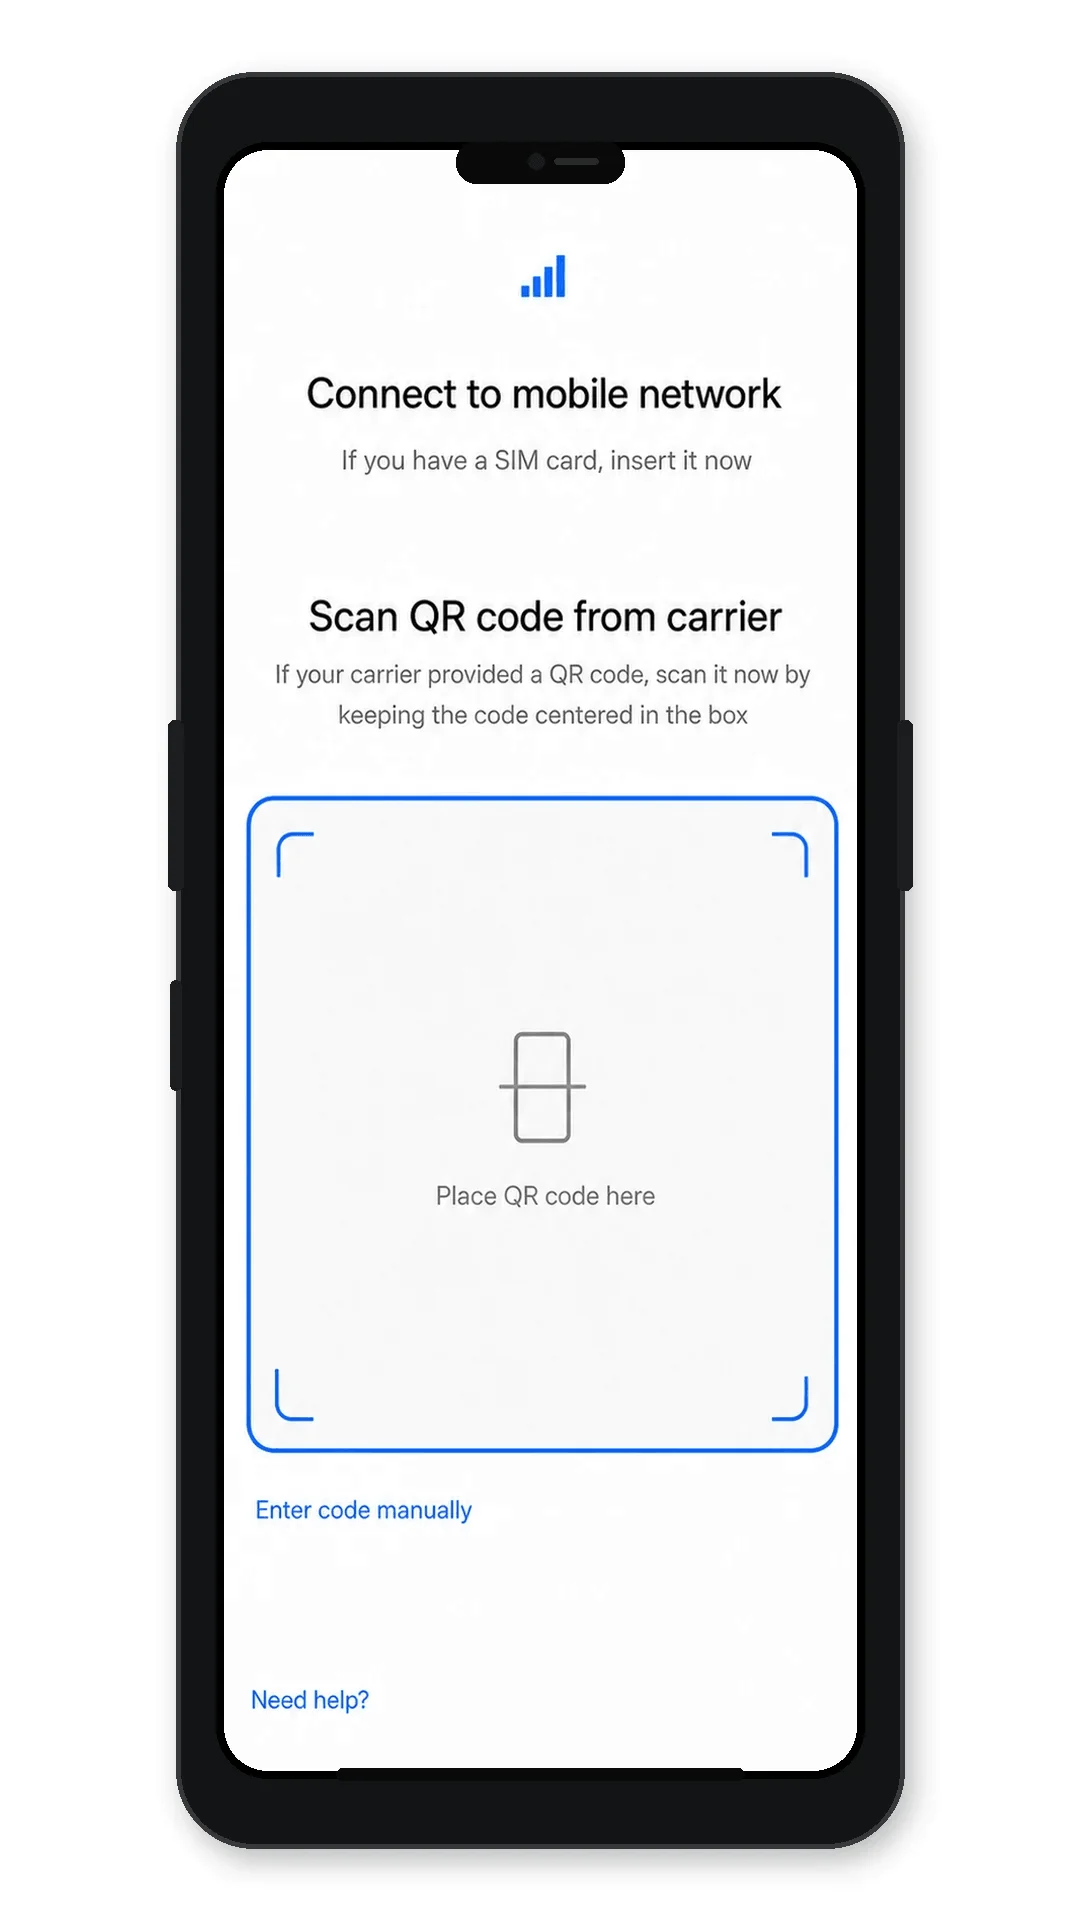
When the QR scanner opens, point the camera at the iRoamly QR code from your purchase email or iRoamly account page.
Review the downloaded eSIM information, then tap Download or Add to save the iRoamly eSIM profile to the phone.
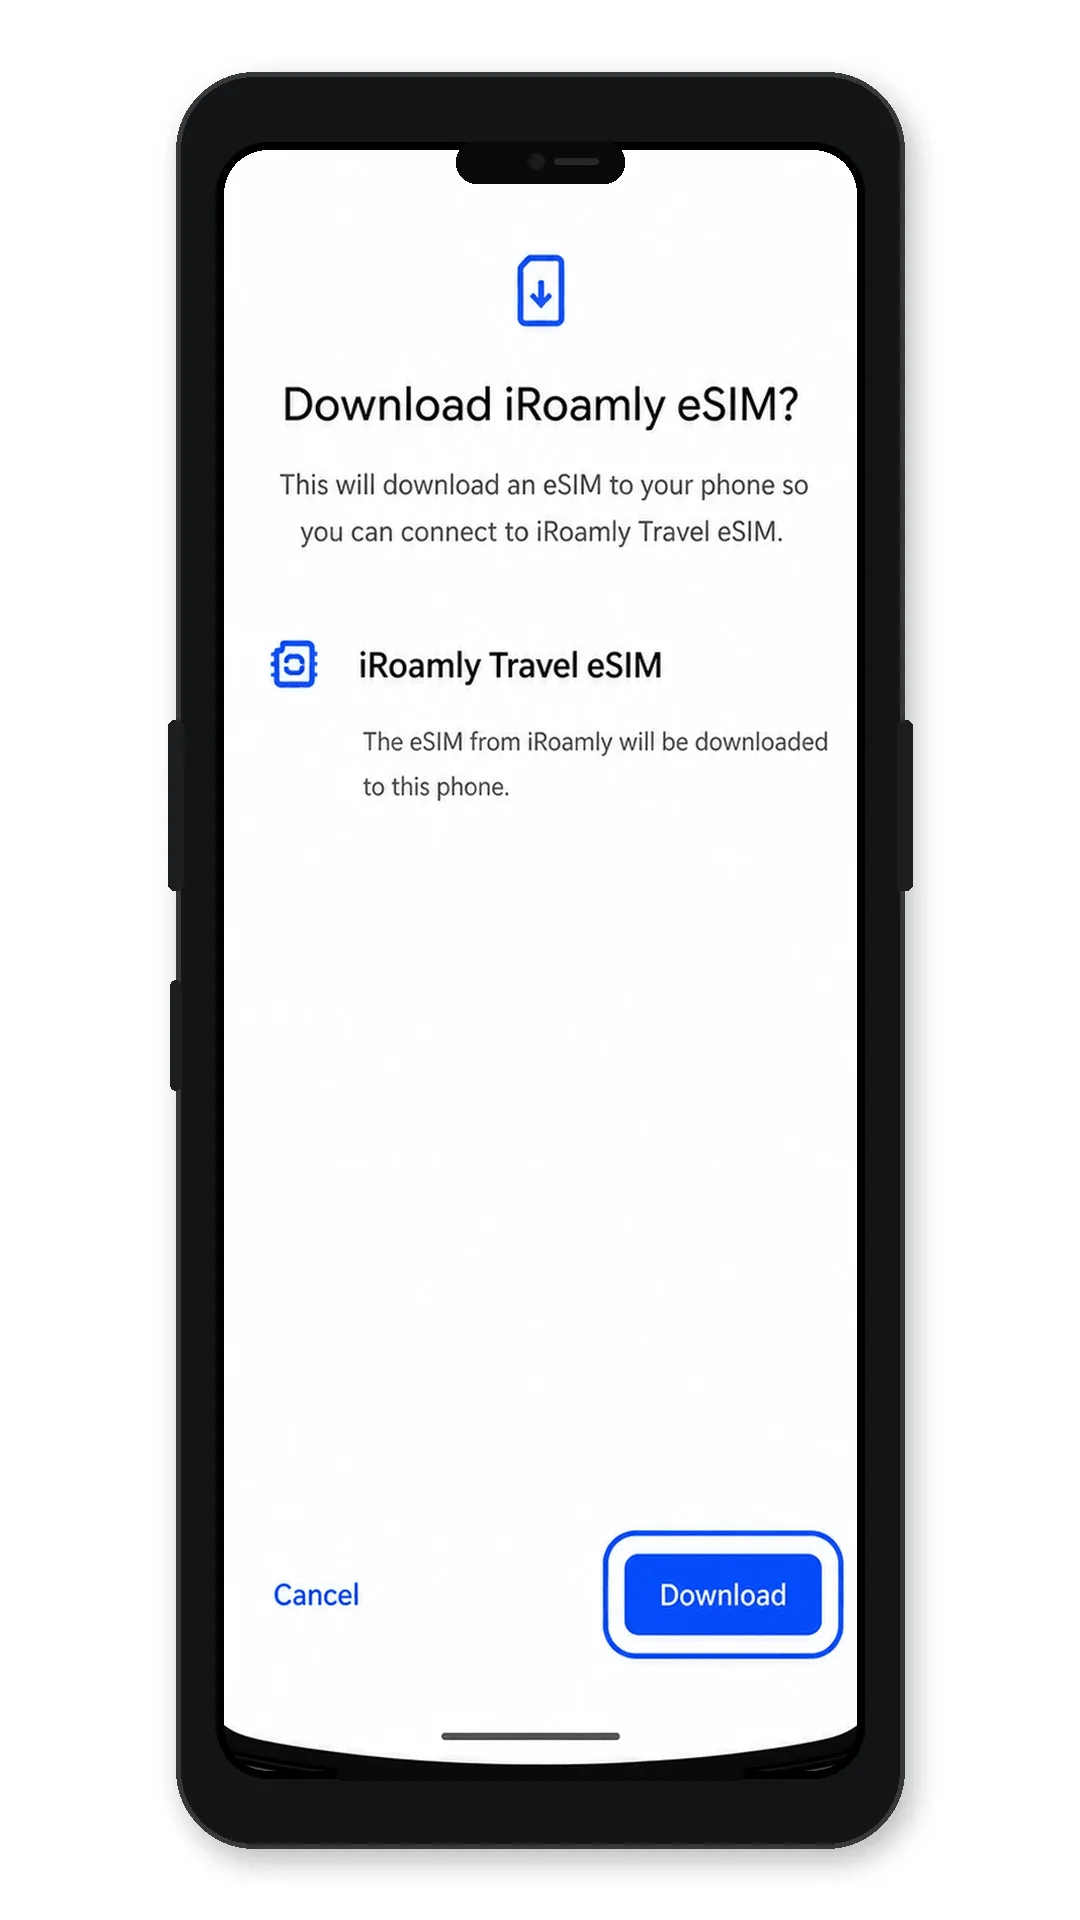
Wait until Android finishes downloading the eSIM. If the phone asks whether to use the new SIM now, choose the option that keeps your primary SIM available and finish setup.
Method 2: Install eSIM Manually
Open Settings on the Motorola Razr 5G, then tap Network & internet.
Tap Mobile network. If your phone uses the newer label, tap SIMs.
Tap Add carrier, Download a SIM instead, or Add eSIM to start adding a new eSIM profile.
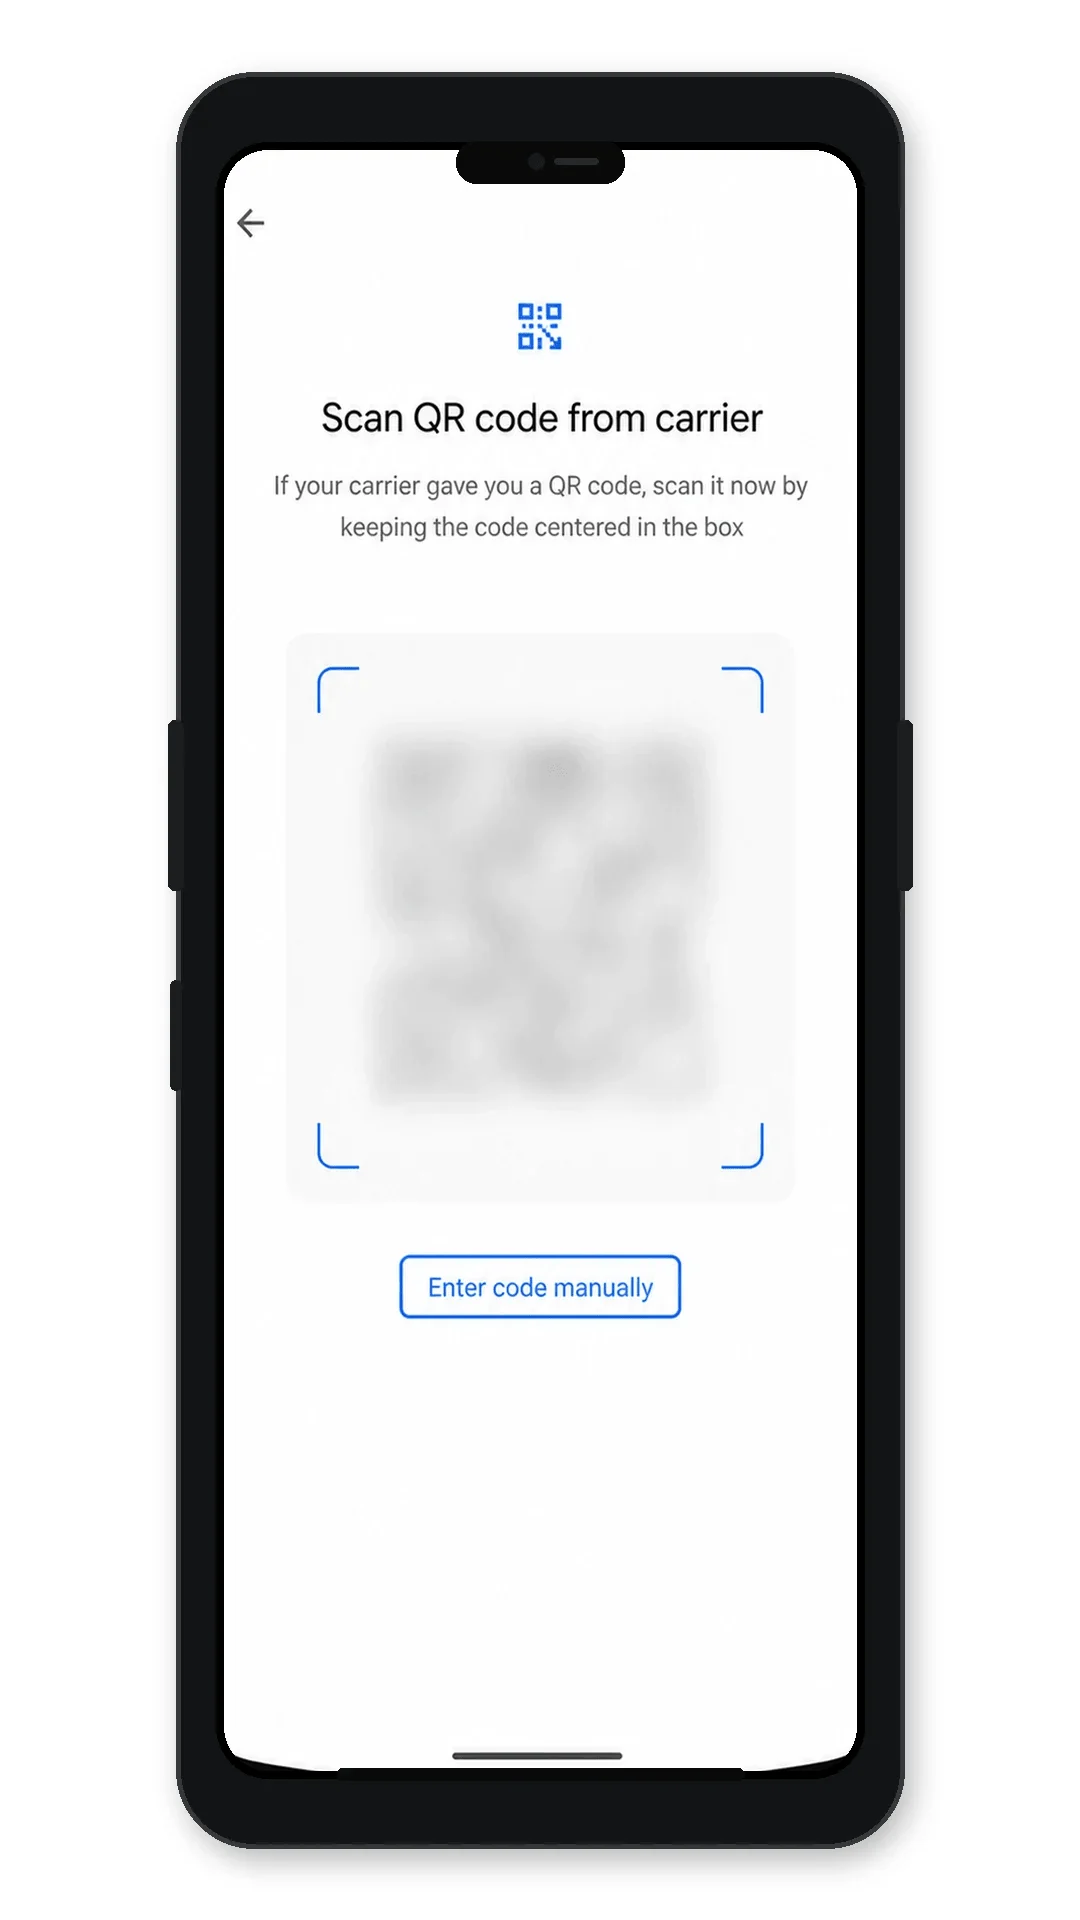
On the QR scanning screen, tap Enter code manually.
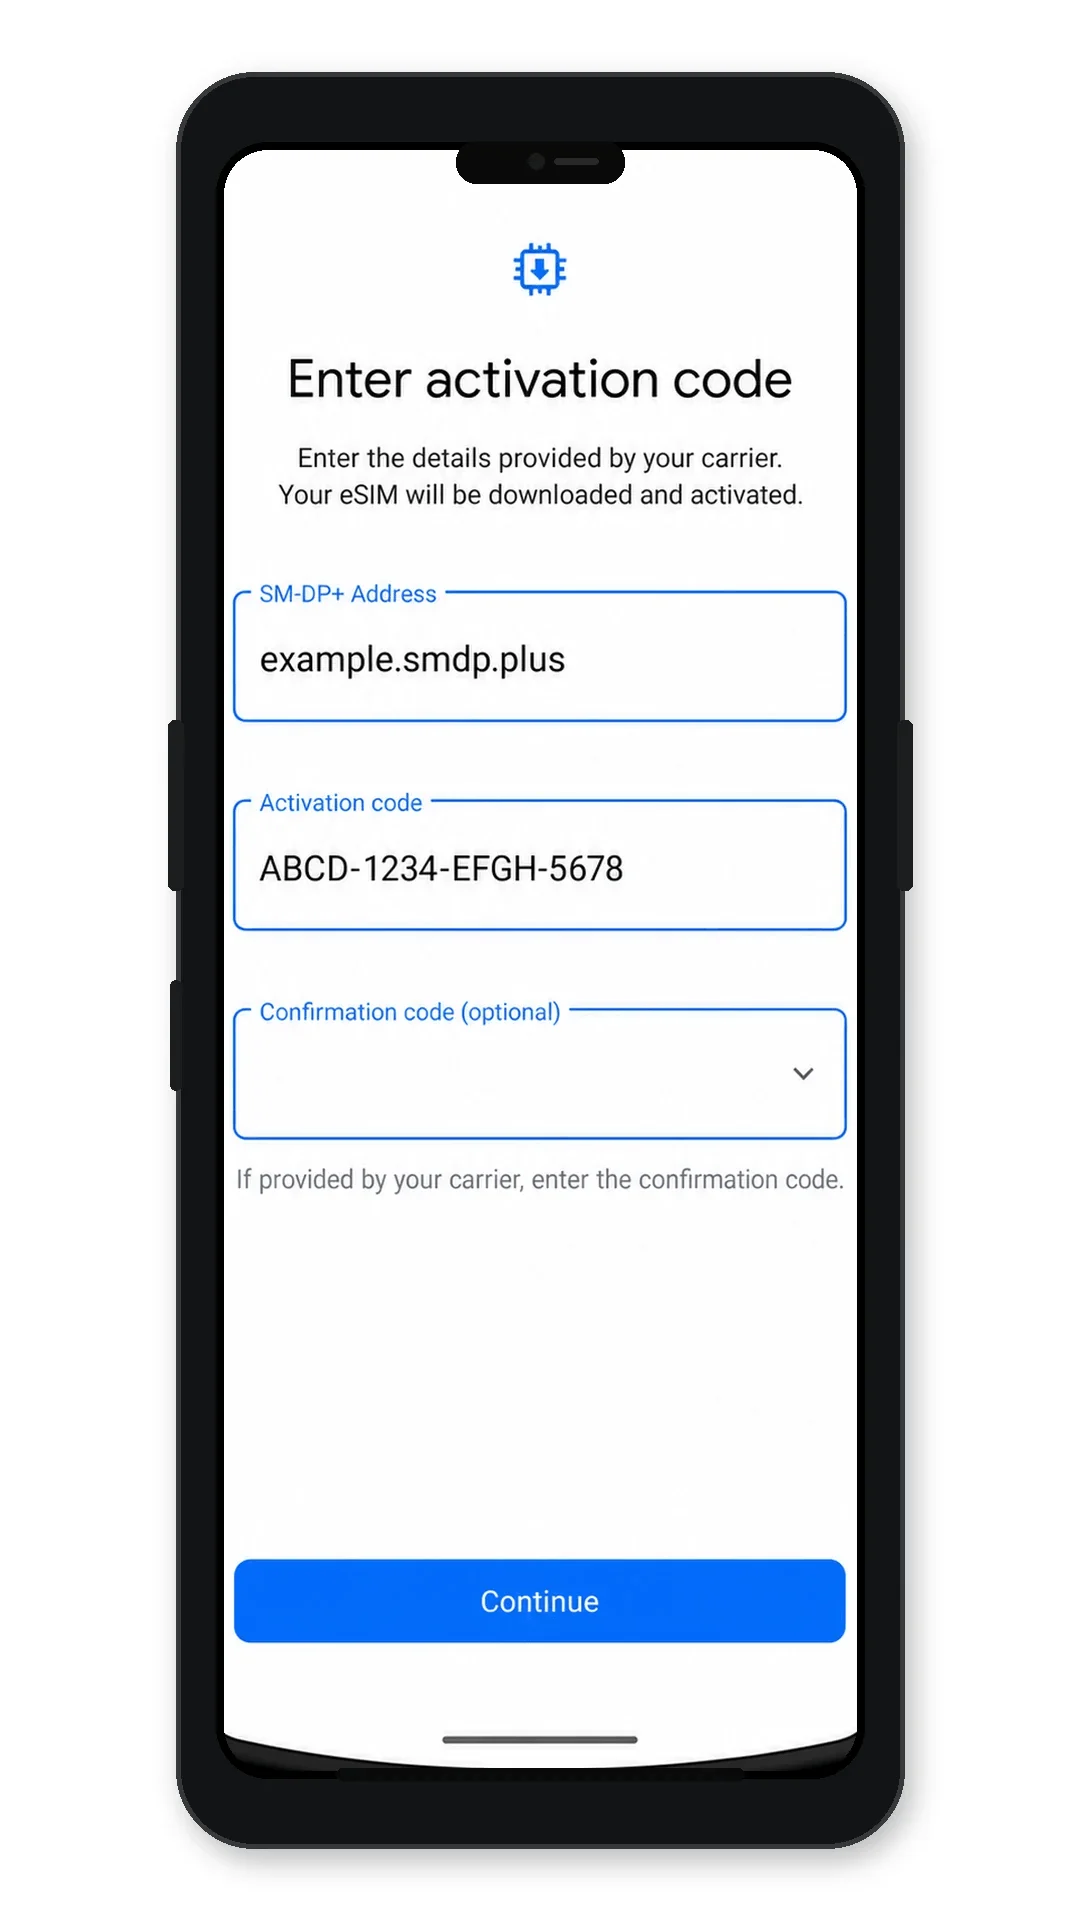
Enter the SM-DP+ Address and Activation Code exactly as shown by iRoamly. If your iRoamly instructions include a Confirmation Code, enter it only when the phone asks for it, then tap Continue.
Review the iRoamly eSIM details, then tap Download or Add to install the eSIM profile.
How to Confirm Your iRoamly eSIM Is Installed
Go to Settings > Network & internet > Mobile network or SIMs, then look for iRoamly Travel eSIM in the SIM list.
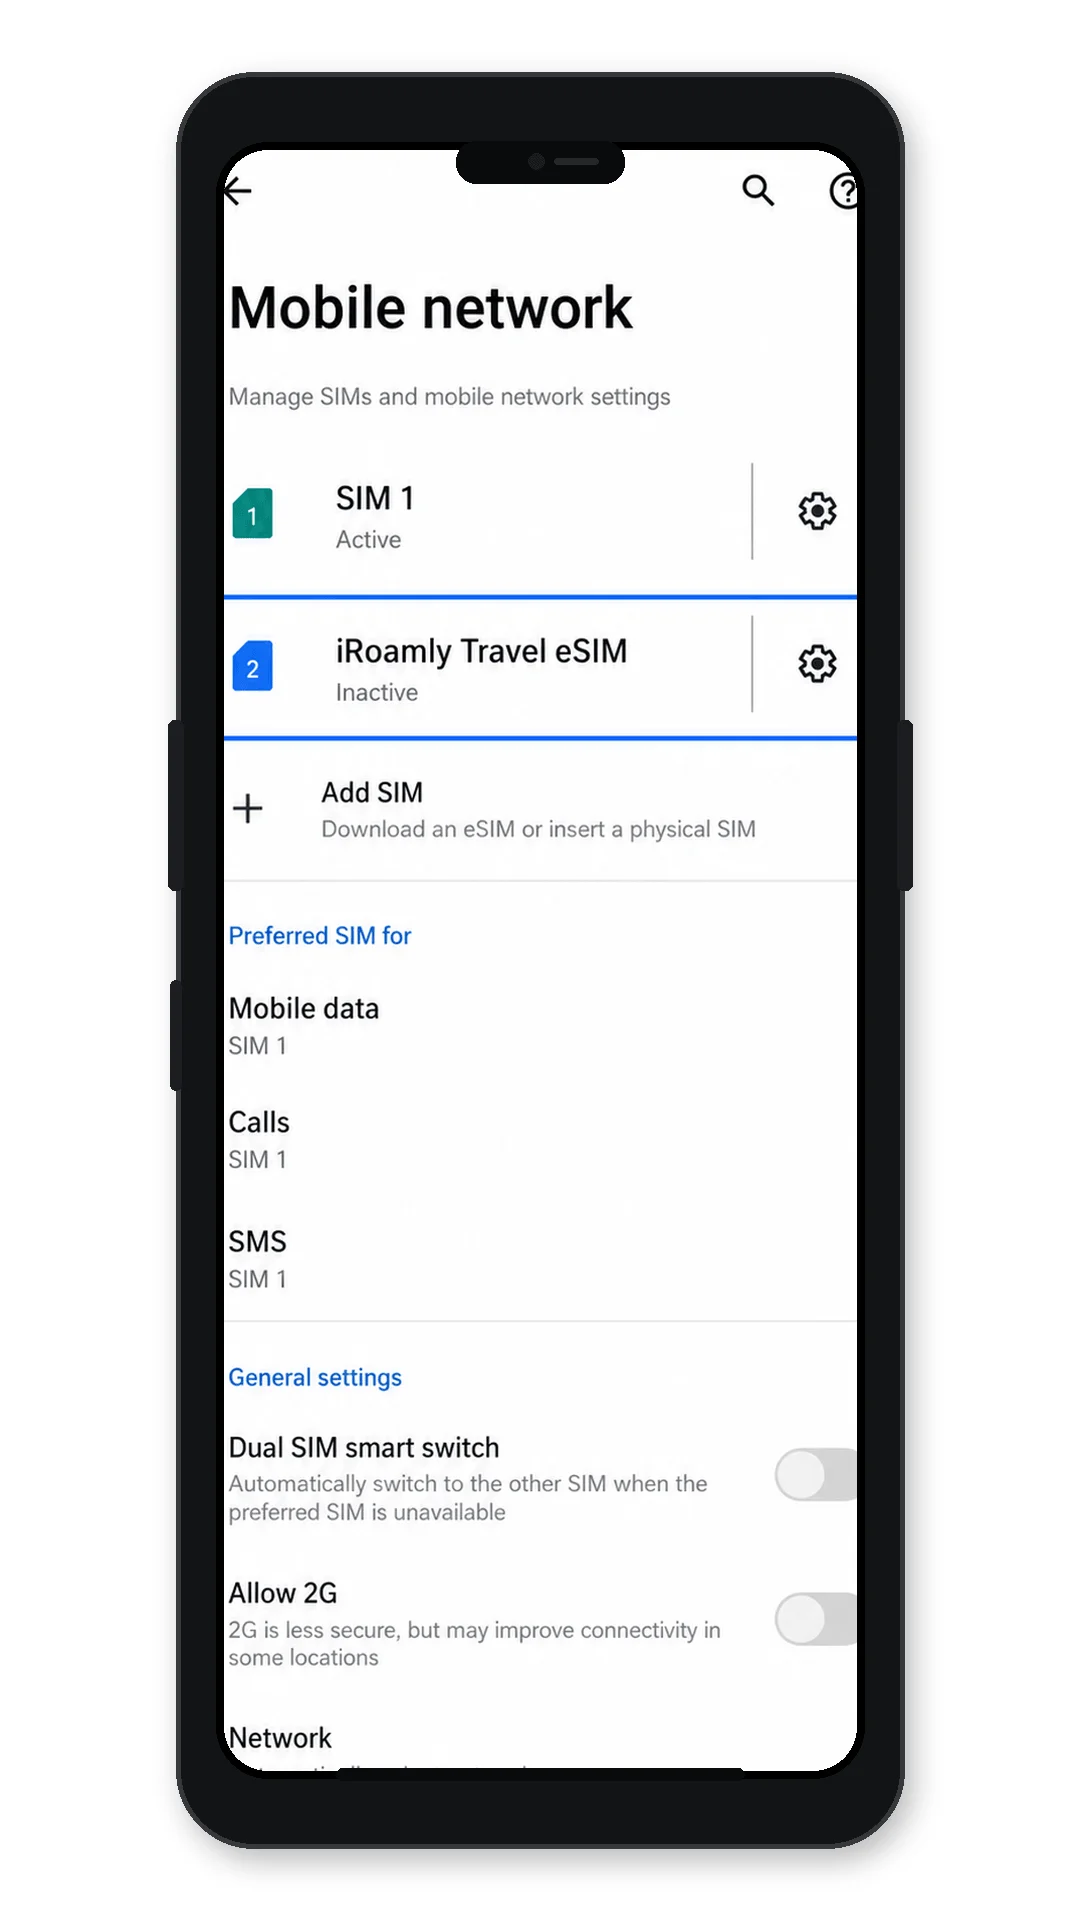
Tap the iRoamly Travel eSIM profile and check that the phone shows the eSIM as available or ready. If the profile is off, leave it off until you are ready to use the travel data plan, unless your iRoamly plan instructions say to activate immediately.
After arrival at your destination, turn on the iRoamly eSIM and test mobile data by opening a web page with Wi-Fi turned off.
Configure eSIM for Mobile Data
Open Settings > Network & internet > Mobile network or SIMs, then choose the mobile data or preferred SIM setting.
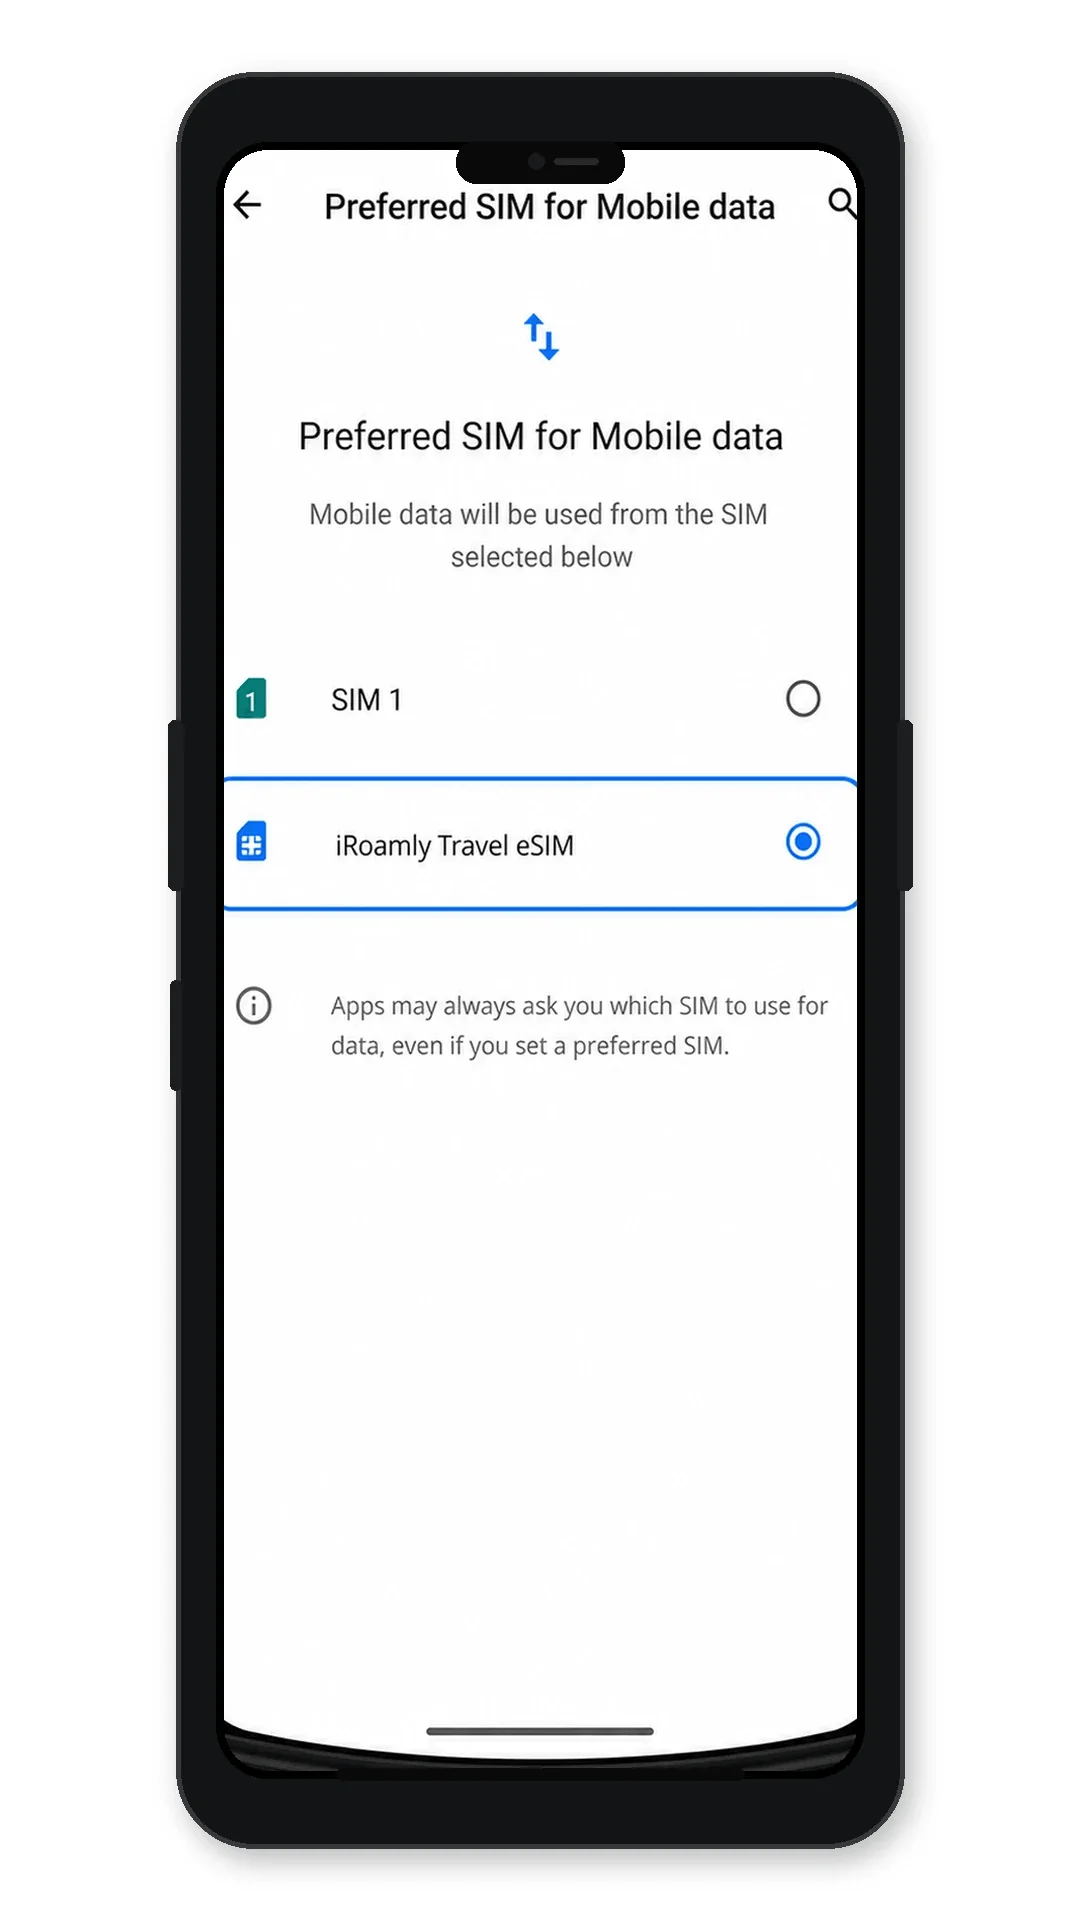
Select iRoamly Travel eSIM as the SIM for mobile data.
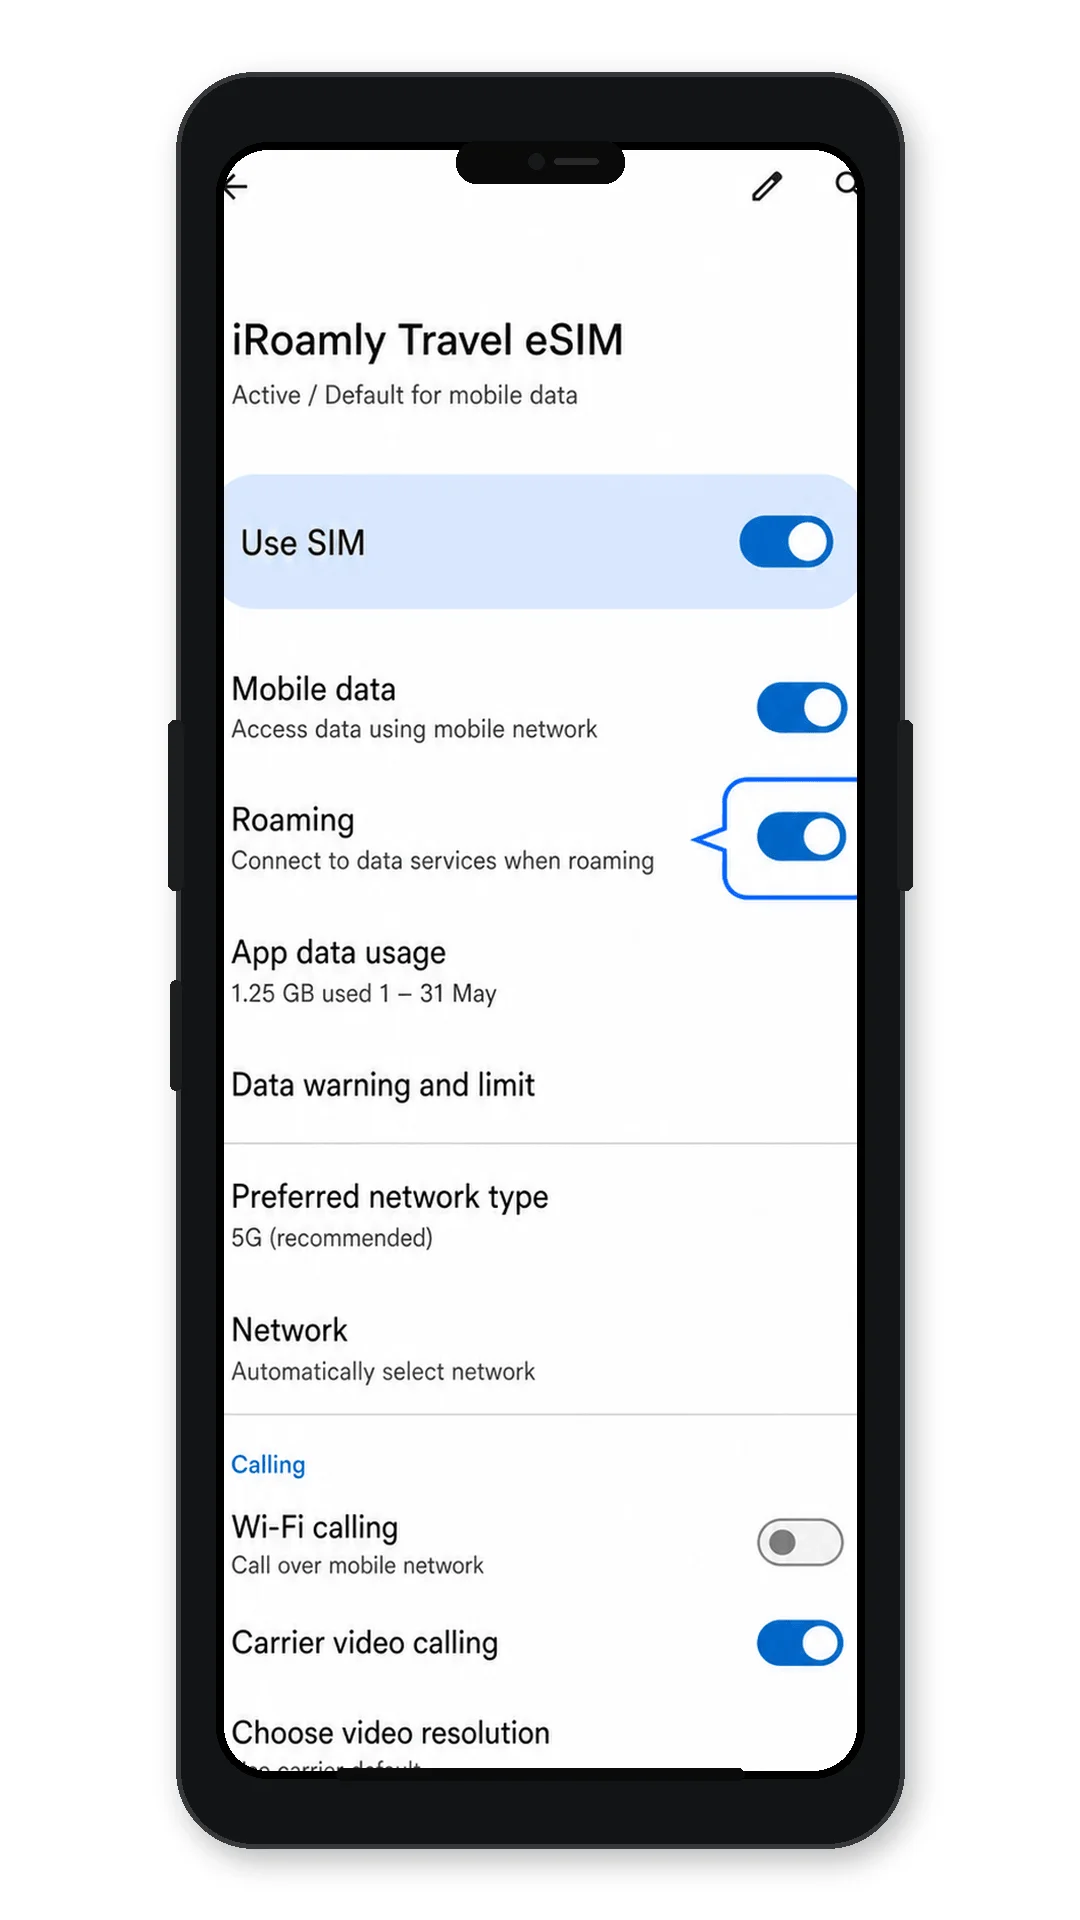
Open the iRoamly Travel eSIM profile and turn on Use SIM when you are ready to use it.
Turn on Roaming for the iRoamly eSIM if your iRoamly destination plan requires roaming. Keep data switching or automatic SIM switching off if you want to avoid the phone falling back to your primary SIM.
Turn off Wi-Fi and open a website or map app to confirm mobile data is working through the iRoamly eSIM.
Troubleshooting
Add carrier, Download a SIM instead, or Add eSIM is missing: confirm the Razr 5G is unlocked, updated, and from a region/carrier variant that allows eSIM. Restart the phone and check Settings > System > Advanced > System update.
QR code will not scan: raise screen brightness on the device displaying the QR code, clean the camera lens, avoid reflections, and try manual entry with the SM-DP+ address and activation code.
QR code says it was already used: do not delete the eSIM. Most eSIM QR codes are single-use. Contact iRoamly support with your order details.
Manual activation fails: check every character in the SM-DP+ address and activation code. Do not add spaces unless iRoamly shows them as part of the code.
eSIM is installed but no data works: select iRoamly Travel eSIM for mobile data, turn on roaming for that eSIM if required, turn Wi-Fi off for testing, and restart the phone.
Activation is pending: keep the phone connected to Wi-Fi during installation. Some plans complete activation only after the eSIM connects to a supported destination network.
Calls or SMS do not work: check the iRoamly plan details. Many travel eSIM plans are for data service, and voice/SMS support is not guaranteed.
More Motorola Razr eSIM Setup Guides
Using another Motorola Razr phone? These eSIM activation guides may help.
Conclusion
Your iRoamly eSIM is now stored on your Motorola Razr 5G and ready for use when your travel plan becomes active. Because the phone supports both a physical SIM and an eSIM, you can continue using your primary line while enjoying mobile data through your travel eSIM abroad.
Once connected, you'll have convenient internet access for the apps and services you use every day, whether that's finding directions, staying in touch with family, or managing your travel plans. Preparing your eSIM ahead of time helps make international travel simpler and more convenient.