
Compared to traditional SIM cards, eSIM offers a more modern and seamless way to activate mobile service.
There’s no need for physical handling—everything is configured directly on your phone, which improves both efficiency and ease of use. This is especially helpful for users who want a quick and hassle-free setup.
In this guide, we’ll use the iPhone 13 mini as an example to show you exactly how to install and activate your iRoamly eSIM from start to finish.
Get Your iPhone Ready for Travel with iRoamly
iRoamly eSIM is a travel eSIM service that provides mobile data plans for destinations around the world. Available choices can include destination-specific, regional, and global plans, with data allowances, validity periods, plan types, and features varying by location.
Once installed on a compatible phone, the travel data line can support maps, messaging, translations, ride-hailing, bookings, and travel updates.
On a compatible iPhone 13 mini, iRoamly can be installed as a separate travel data profile while the regular SIM remains available. The guide below shows how to add the eSIM by QR code or manual entry and confirm it is ready for mobile data.
Preparations Before Setting Up iRoamly eSIM
Before starting, ensure you have the following:
A stable internet connection (Wi-Fi or cellular)
A valid eSIM QR code or manual activation details (SM-DP+ address and activation code) provided by your carrier
Your iPhone 13 mini powered on and unlocked
The device updated to the latest iOS version (recommended for compatibility)
Heading to Spain or Italy? Installing the destination eSIM before departure can make it easier to switch the iPhone to travel data when you need it.
Method 1: Install eSIM via QR Code
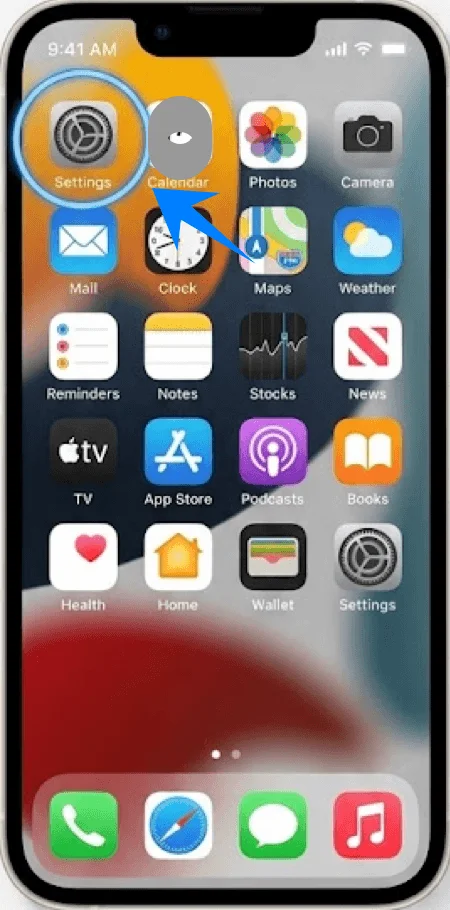
Step 1: Open Settings
Tap Settings on the Home Screen
Step 2: Enter Cellular Settings
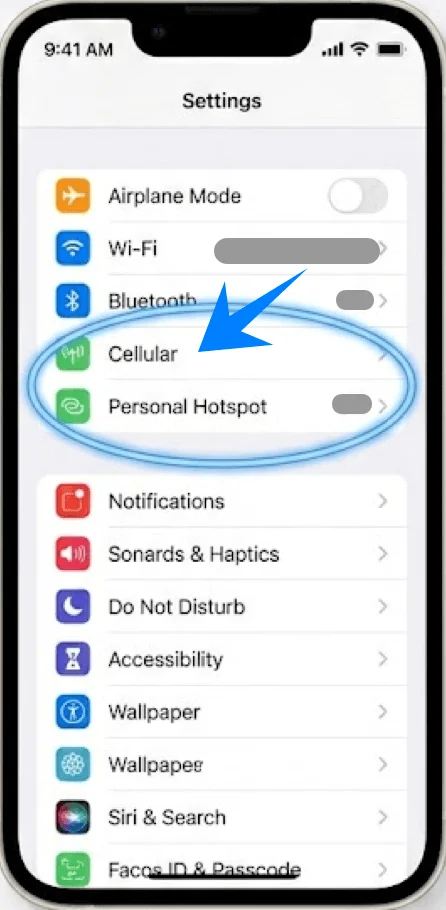
Scroll down and tap Cellular (On some devices, this may appear as “Mobile Service” or “Mobile Data”)
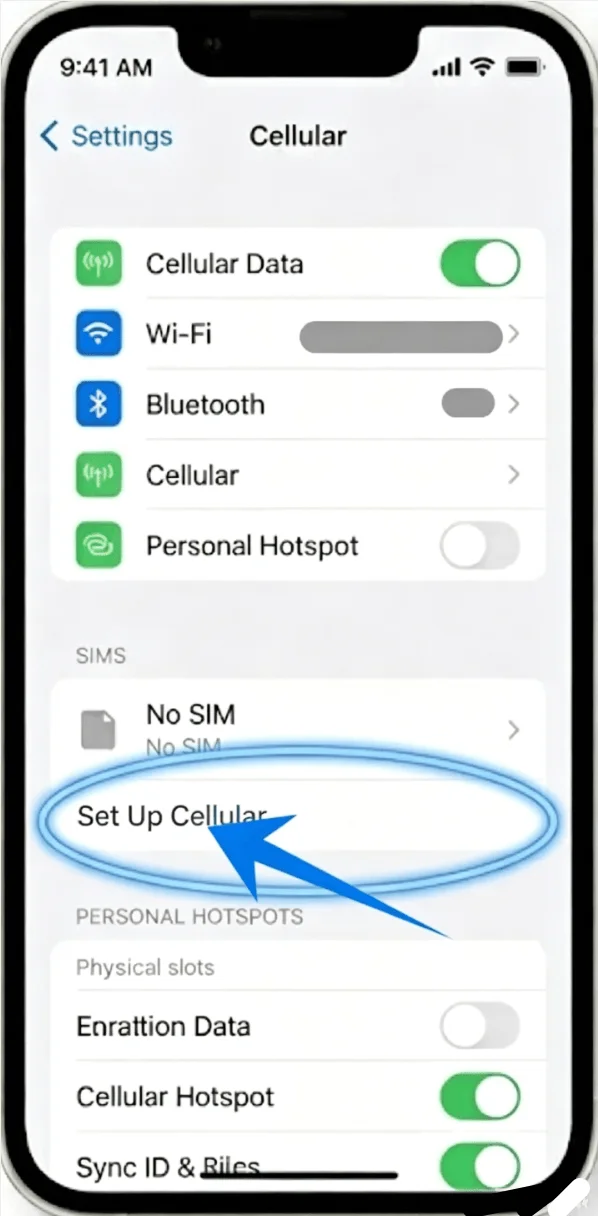
Step 3: Start eSIM Setup
Tap Set Up Cellular if no cellular plan is installed, or tap Add Cellular Plan to add a new line
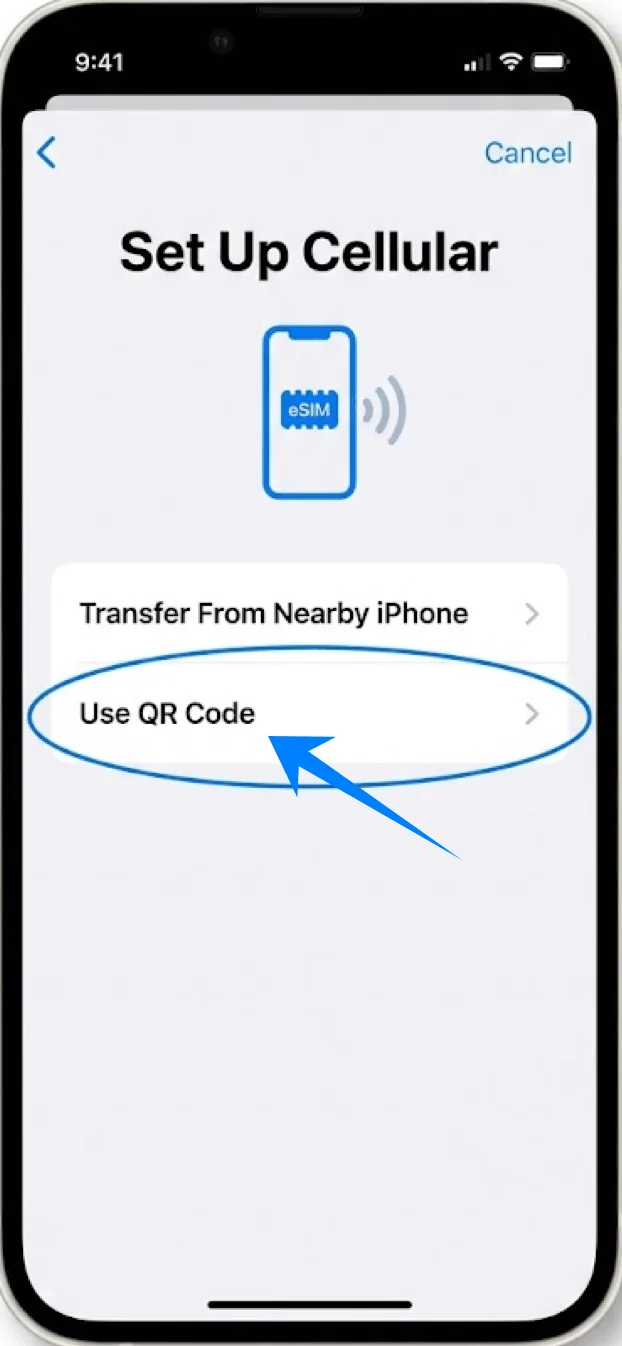
Step 4: Select QR Code Option
Tap Use QR Code
Step 5: Scan the QR Code
Hold the iPhone over the QR code
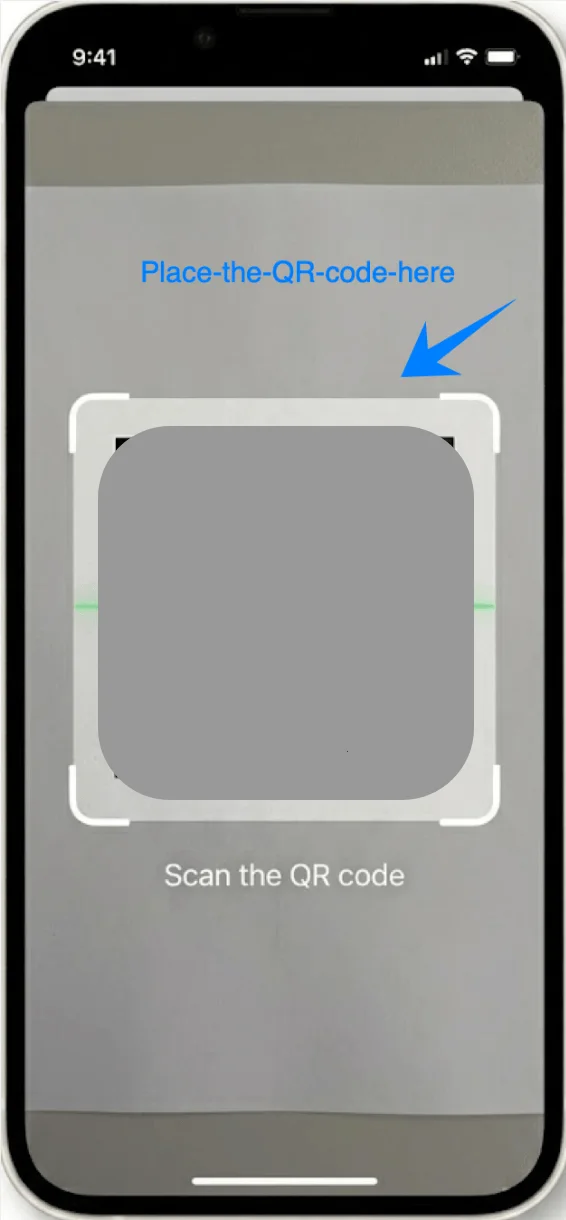
Wait until the code is recognized automatically
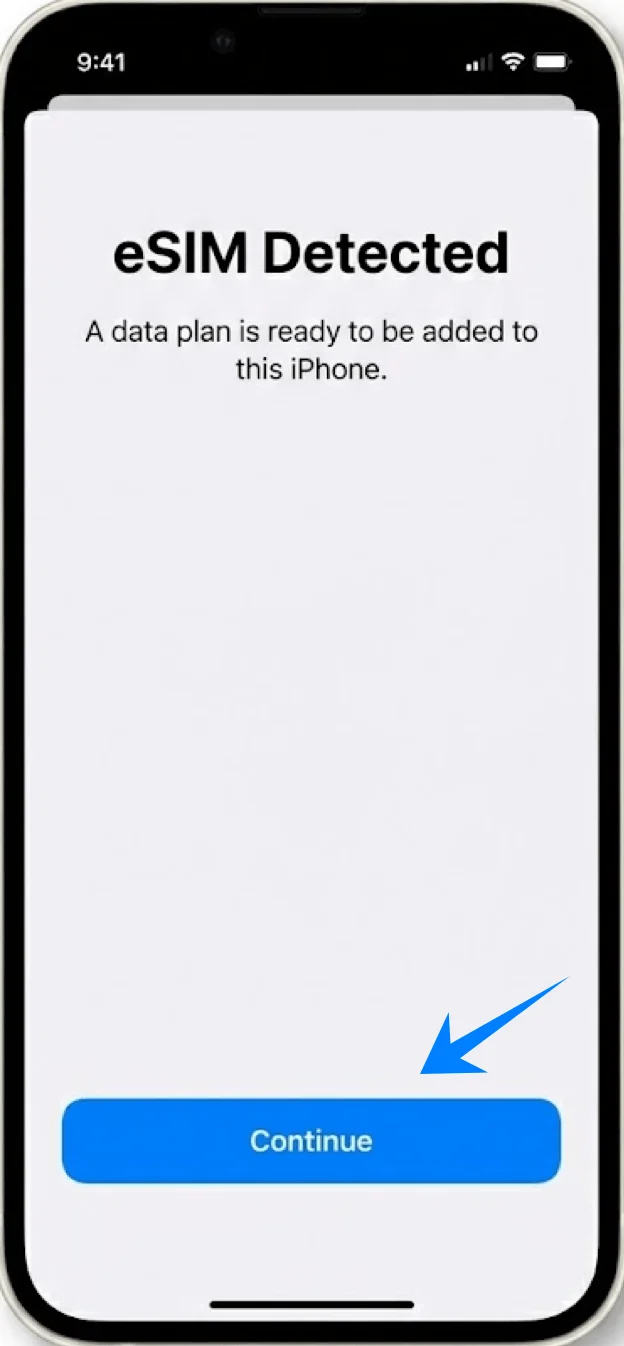
Step 6: Confirm Plan Detection
Tap Continue
Step 7: Add the eSIM
Tap Add Cellular Plan
Step 8: Assign a Label
Select a label (e.g., Primary, Secondary)
Tap Continue
Step 9: Configure Usage Settings
Choose default line for calls → tap selection → tap “Continue”
Choose default line for messages → tap selection → tap “Continue”
Choose default line for cellular data → tap selection → tap “Continue”
Method 2: Install eSIM via Manual Input
Step 1: Open Settings
Tap Settings
Step 2: Enter Cellular Menu
Scroll down and tap Cellular (On some devices, this may appear as “Mobile Service” or “Mobile Data”)
Step 3: Start eSIM Setup
Tap Set Up Cellular if no cellular plan is installed, or tap Add Cellular Plan to add a new line
Step 4: Access Manual Entry
Tap Use QR Code
Tap Enter Details Manually at the bottom of the screen
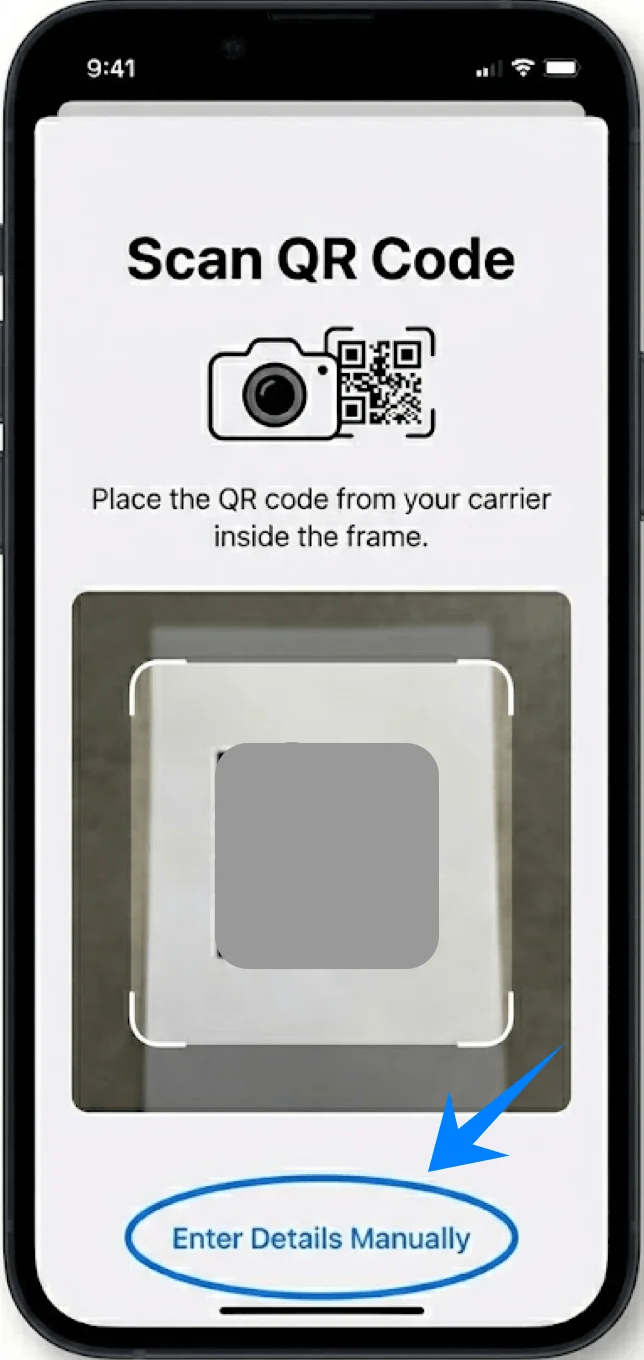
Step 5: Input Activation Information
Tap the SM-DP+ Address field and enter the provided address
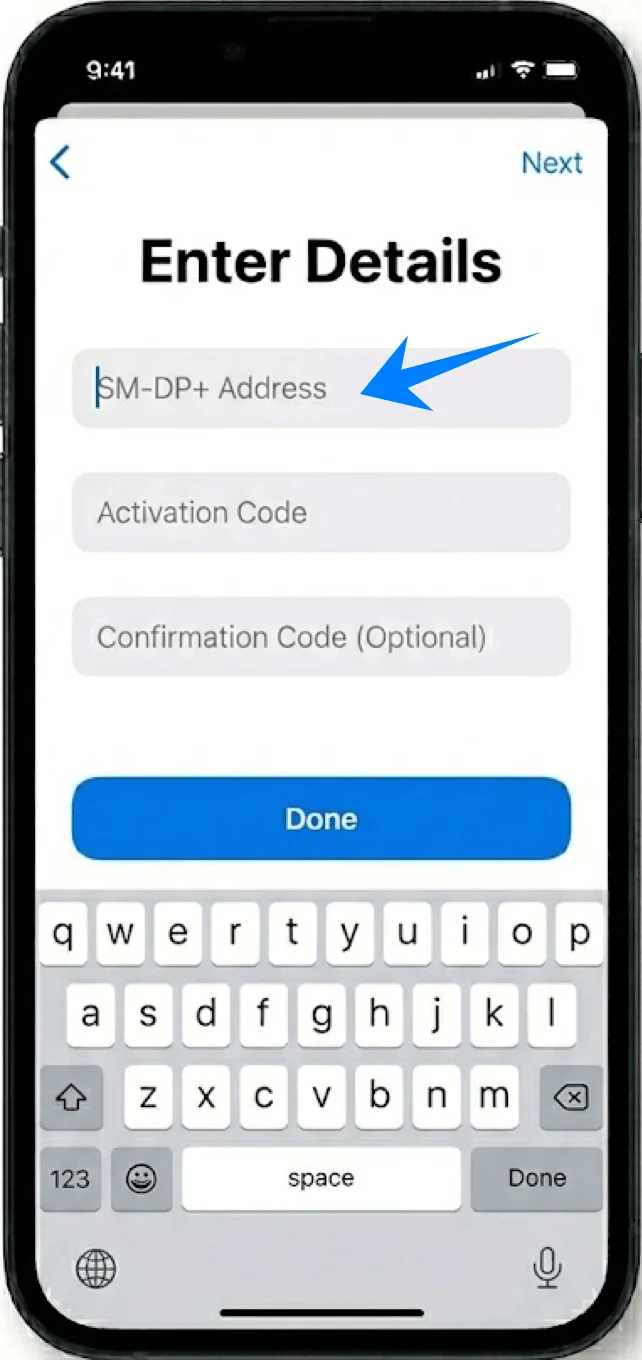
Tap the Activation Code field and enter the code
Enter Confirmation Code if provided
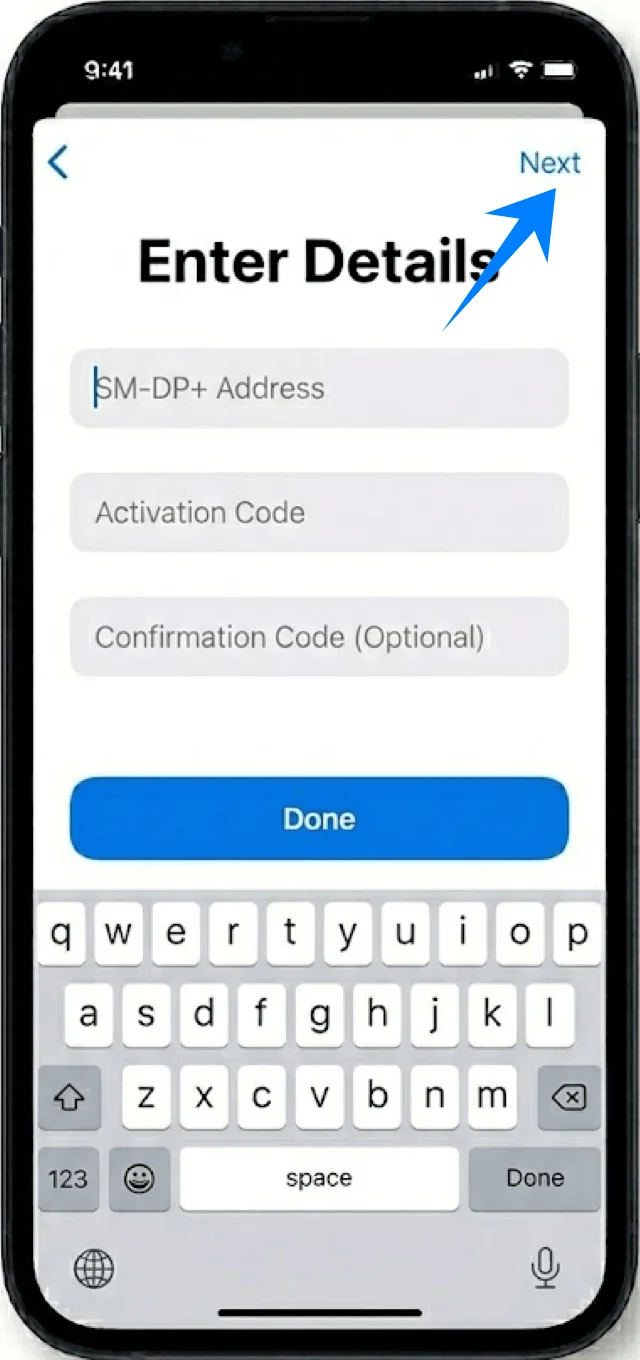
Step 6: Proceed with Activation
Tap Next
Step 7: Add the Plan
Tap Add Cellular Plan
Step 8: Assign a Label
Select a label (e.g., Primary, Secondary)
Tap Continue
Step 9: Configure Line Settings
Choose default line for calls → tap selection → tap “Continue”
Choose default line for messages → tap selection → tap “Continue”
Choose default line for cellular data → tap selection → tap “Continue”
How to Confirm Successful eSIM Installation
Step 1: Check Installed Plans
Go to Settings → Cellular (On some devices, this may appear as “Mobile Service” or “Mobile Data”)
Verify the new plan appears under Cellular Plans
Step 2: Check Line Status
Tap the new plan
Ensure Turn On This Line is enabled
Step 3: Verify Signal
Check the status bar for signal bars
Step 4: Test Connectivity
Go to Settings → Cellular (On some devices, this may appear as “Mobile Service” or “Mobile Data”) → Cellular Data
Select the new line
Test by enabling data or making a call
Note: Some eSIM plans may not include voice calling support, so this feature might not be available depending on your plan.
More Device-Specific eSIM Setup Guides
Need to activate an eSIM on another device? You may find these guides helpful.
Conclusion
Once setup is complete, your iRoamly eSIM will be ready to support your daily connectivity needs. This fully digital setup reduces the complexity of managing mobile plans and allows you to make changes directly on your device at any time.
Whether you need to switch data lines, review connection status, or update your settings, everything can be done in a few steps. The overall process is simple, repeatable, and designed to keep you connected with minimal effort.