
Still dealing with the inconvenience of physical SIM cards? From waiting in line at airports to the hassle of swapping tiny chips, staying connected can sometimes feel more complicated than it should be—especially when you’re using a new device like the iPhone 17 and expect everything to work seamlessly.
With iRoamly eSIM, you can skip all of that. There’s no physical card required—just a quick setup process directly on your iPhone 17 that gets you online in minutes.
In this guide, we’ll walk you through everything you need to know, from preparation to activation, so you can complete the setup smoothly and confidently.
Meet iRoamly for Easier Travel Connectivity
iRoamly eSIM is a travel eSIM service that provides mobile data plans through digital profiles for trips abroad. Travelers can choose destination, regional, or global options where available, with data amounts, validity periods, and plan features varying by location.
Once installed, the travel data line can support everyday needs such as maps, messaging, translations, ride-hailing, bookings, and travel updates.
On an eSIM-capable iPhone 17, iRoamly can be added directly through the iOS cellular setup flow. The guide below keeps the QR-code and manual-entry paths in order so you can install the eSIM and configure the line for mobile data when needed.
Preparations Before Setting Up iRoamly eSIM
Before starting, ensure you have the following:
A stable internet connection (Wi-Fi or cellular)
If you are preparing an iPhone 17 for a trip to Japan or the United States, installing the travel eSIM while reliable Wi-Fi is available can leave less to handle after arrival.
A valid eSIM QR code or manual activation details (SM-DP+ address and activation code) provided by your carrier
Your iPhone 17 powered on and unlocked
The device updated to the latest iOS version (recommended for compatibility)
Method 1: Install eSIM Using QR Code
Step 1: Open Cellular Settings
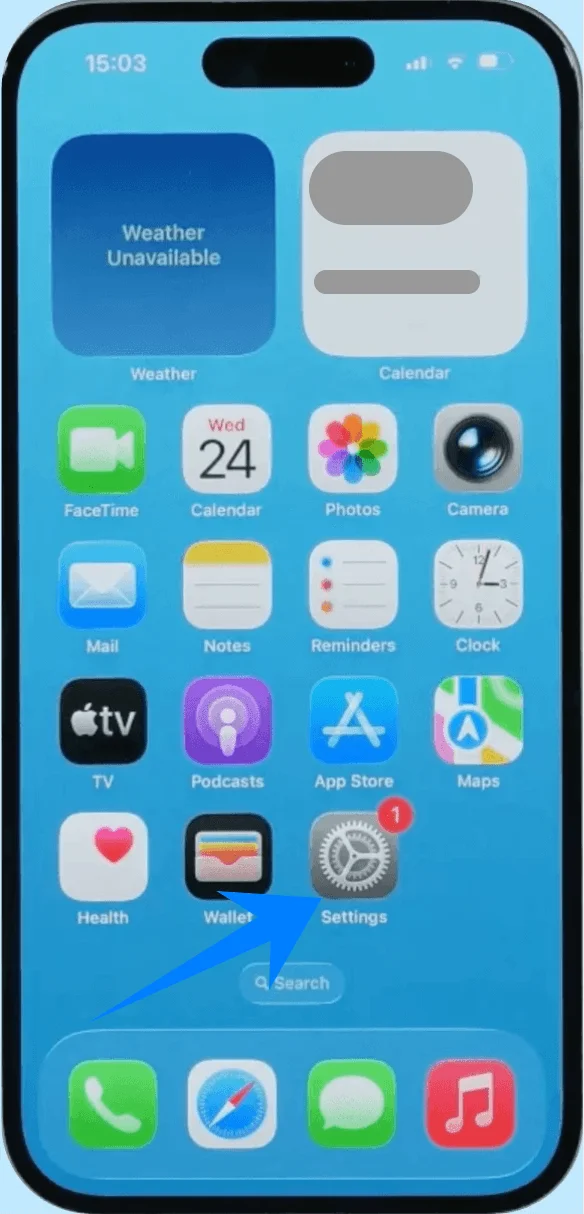
Tap Settings
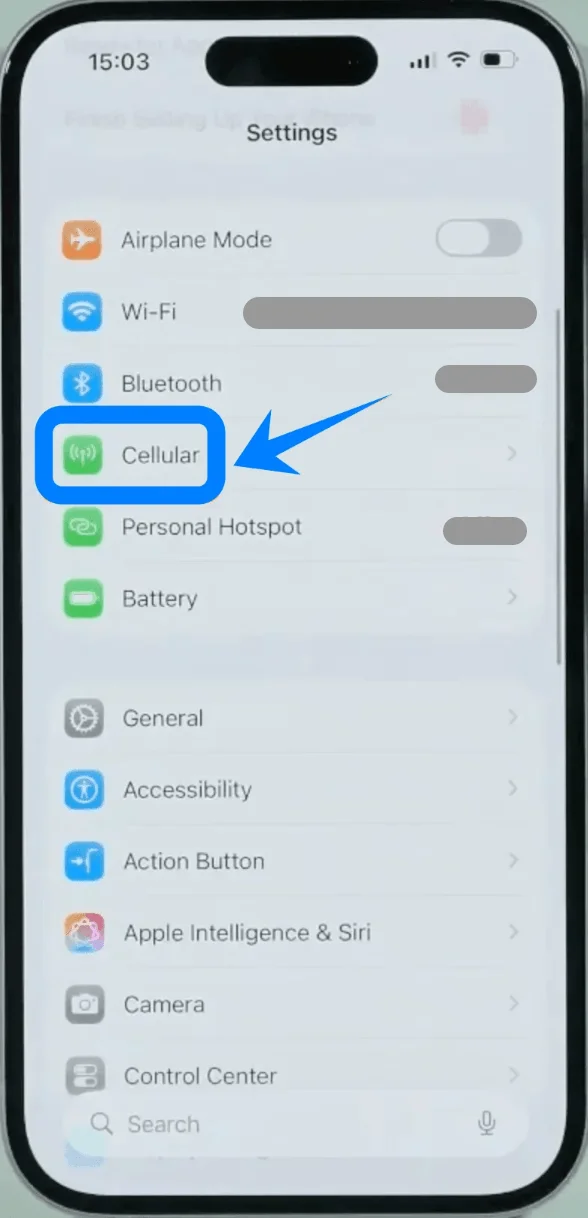
Scroll down and tap Cellular (On some devices, this may appear as “Mobile Service” or “Mobile Data”)
Step 2: Start eSIM Setup
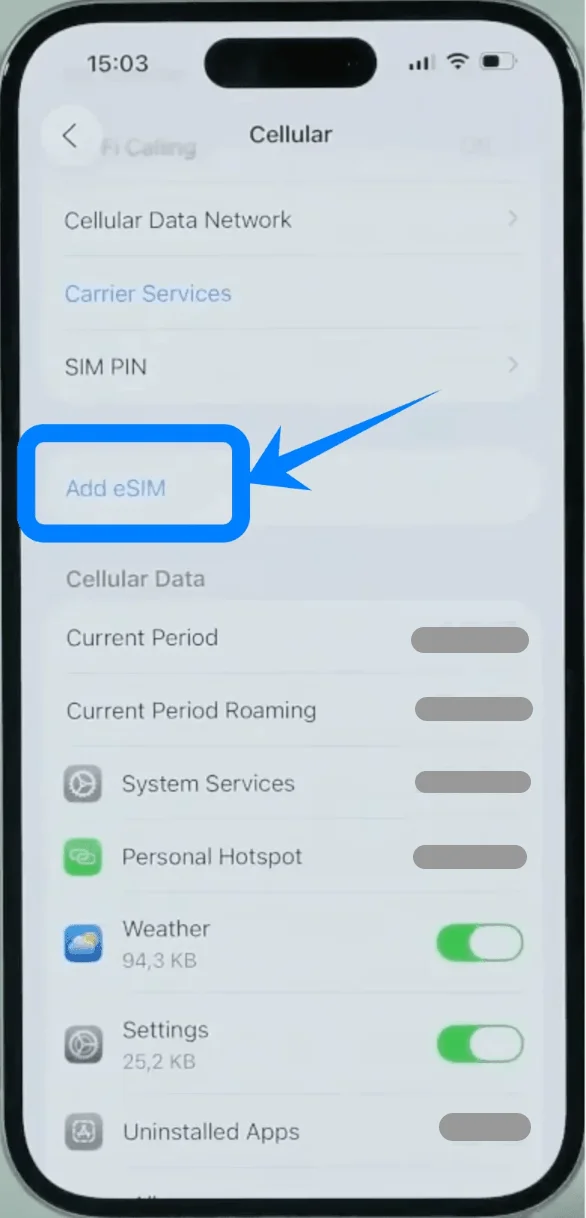
Tap Add eSIM if you already have an existing cellular plan, or tap Set Up Cellular if this is your first plan
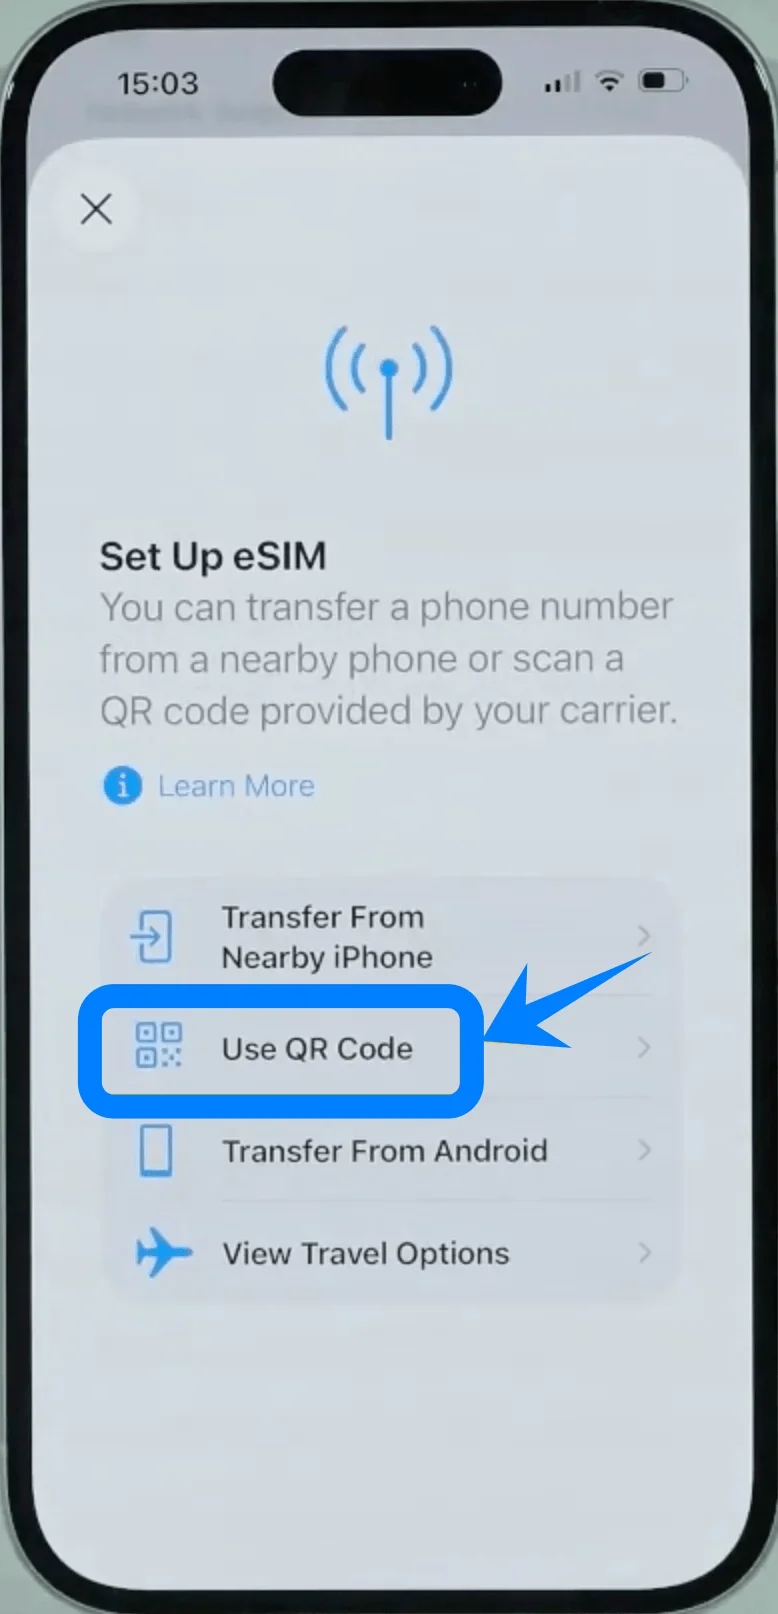
Step 3: Choose QR Code Option
Tap Use QR Code
Step 4: Scan the QR Code
Position the iPhone camera over the QR code provided by your carrier
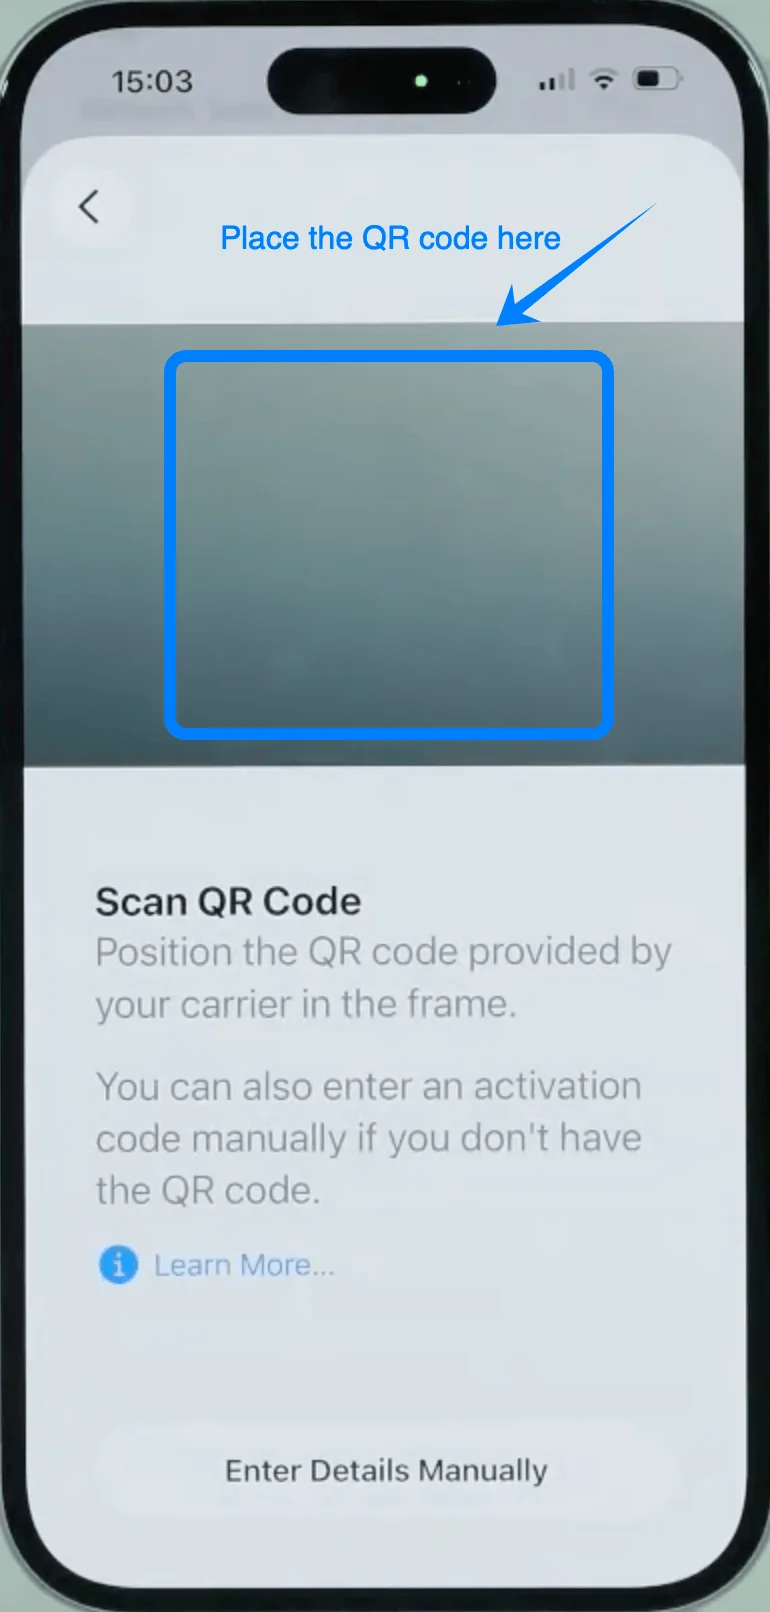
Wait until the code is recognized automatically
Step 5: Confirm eSIM Activation
When prompted, tap Continue
Then tap Add Cellular Plan
Step 6: Complete Carrier Activation
The phone will begin activating the eSIM
Wait until the process finishes (this may take a few seconds to a minute)
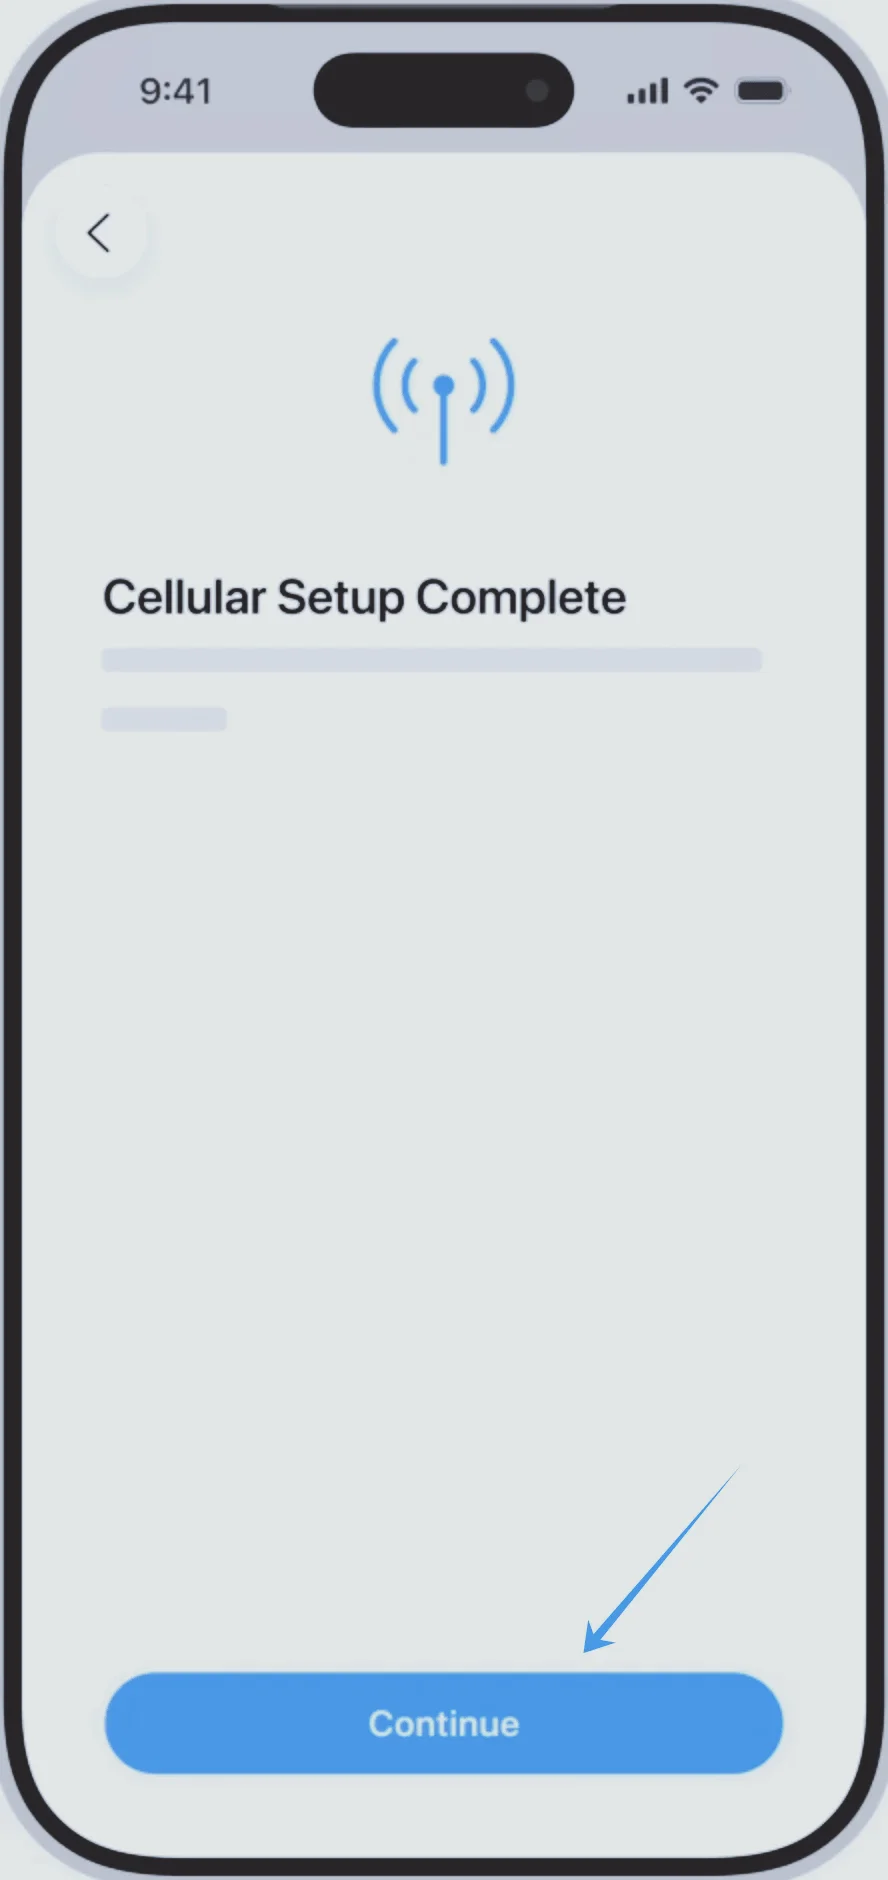
Step 7: Label the Line
Choose a label (e.g., Primary, Secondary, Business)
Tap Continue
Step 8: Set Default Line Preferences
Choose your default line for:
Calls → tap desired line → tap Continue
Messages → tap desired line → tap Continue
Cellular Data → select line → tap Continue
Method 2: Install eSIM Using Manual Input
Use this method if your carrier provides activation details, or if you prefer not to use a QR code.
Step 1: Open Cellular Settings
Tap Settings
Scroll down and tap Cellular (On some devices, this may appear as “Mobile Service” or “Mobile Data”)
Step 2: Start eSIM Setup
Tap Add eSIM if you already have an existing cellular plan, or tap Set Up Cellular if this is your first plan
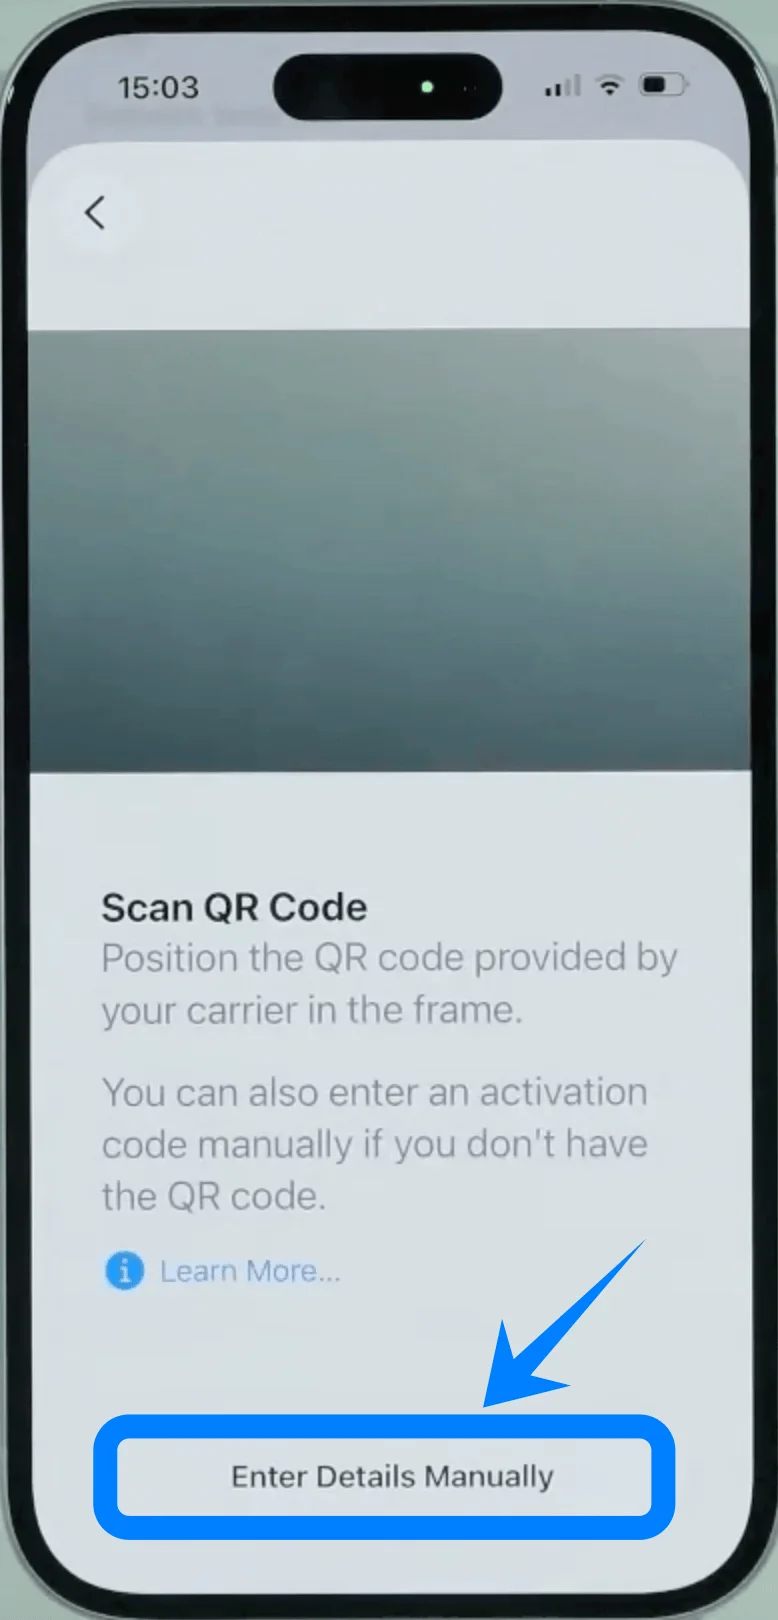
Step 3: Select Manual Entry
Tap Use QR Code
On the QR scanning screen, tap Enter Details Manually (bottom of screen)
Step 4: Enter SM-DP+ Address
In the SM-DP+ Address field, type the address exactly as provided by your carrier
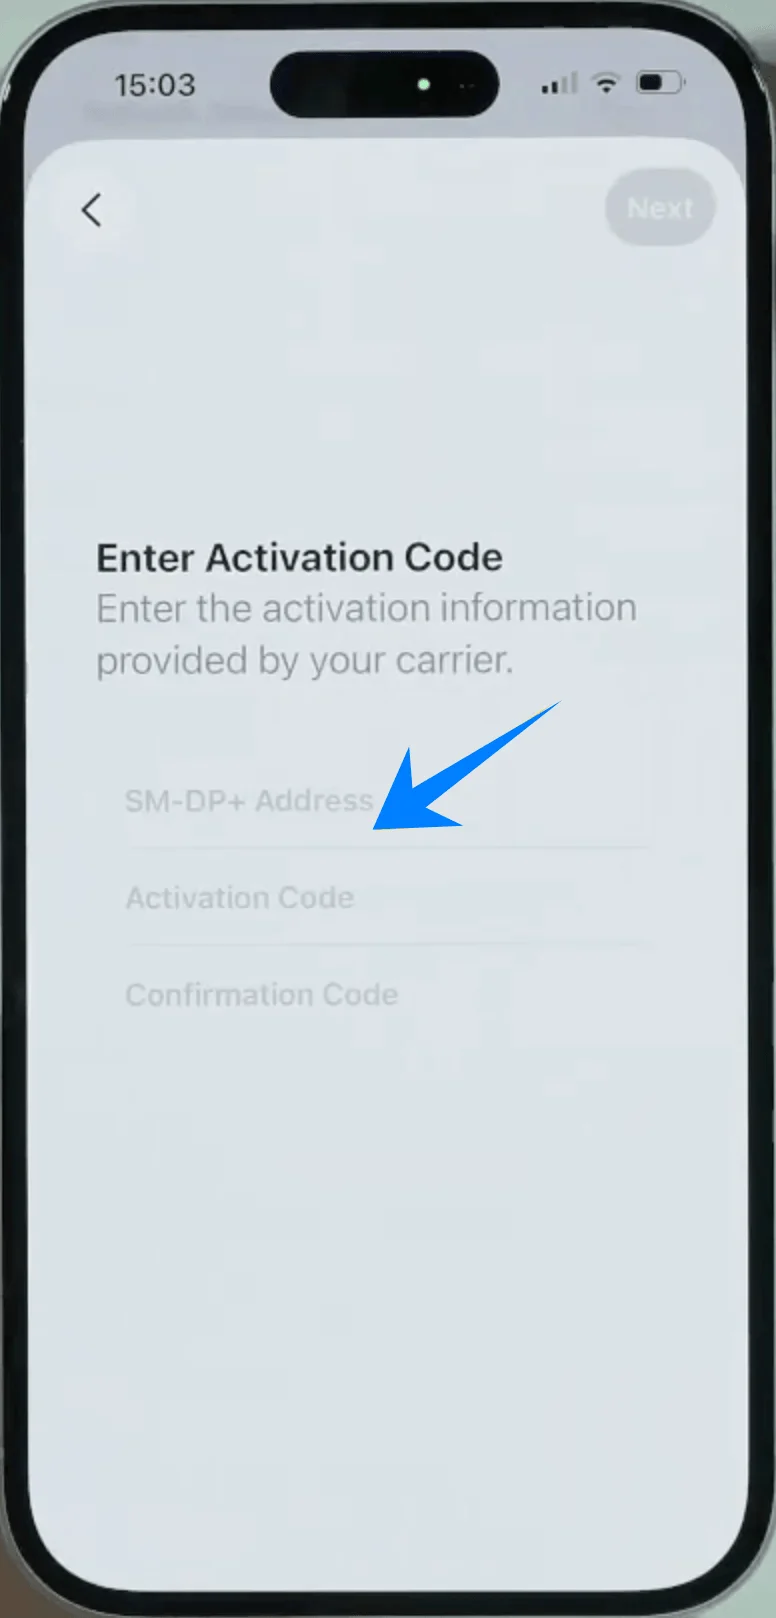
Step 5: Enter Activation Code
In the Activation Code field, input the full code provided
Step 6: Enter Confirmation Code (if required)
If your carrier provided a confirmation code: Enter it in the Confirmation Code field
If not required, leave this field blank
Step 7: Submit Activation Details
Tap Next
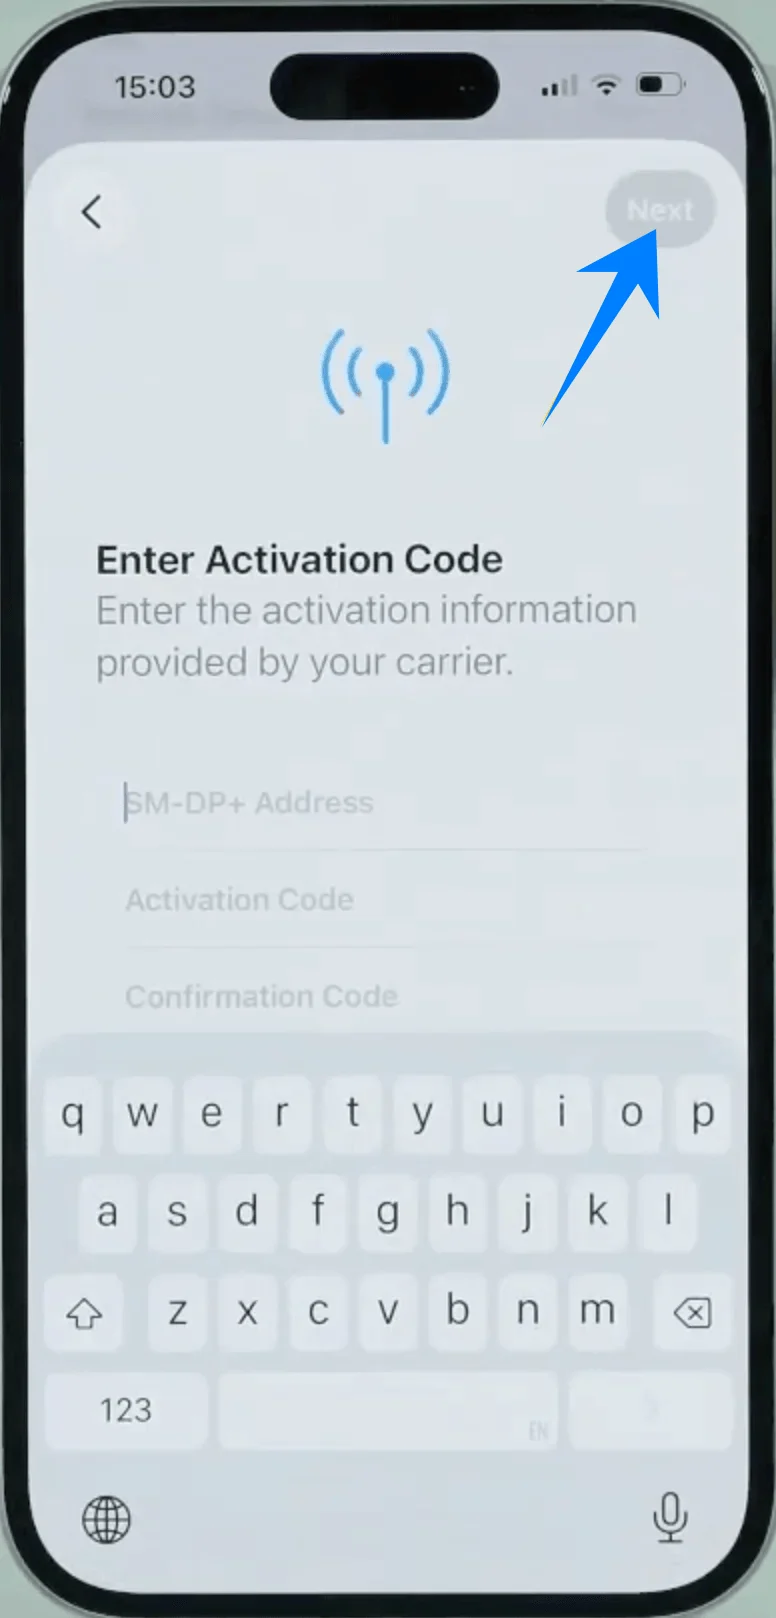
Step 8: Confirm eSIM Installation
Tap Add Cellular Plan
Step 9: Wait for Activation
The device will connect to the carrier and install the eSIM profile
Step 10: Label the Line
Choose a label (e.g., Primary, Secondary, Business)
Tap Continue
Step 11: Configure Default Usage
Select default line for:
Calls → tap selection → tap Continue
Messages → tap selection → tap Continue
Cellular Data → tap selection → tap Continue
How to Confirm Successful eSIM Installation
After completing either method, verify installation using the following checks:
Check 1: Cellular Plan Visibility
Go to Settings > Cellular (On some devices, this may appear as “Mobile Service” or “Mobile Data”)
Confirm that a new plan appears under SIMs or Cellular Plans
Check 2: Signal Indicator
Look at the top-right corner of the screen
Ensure signal bars appear for the newly added line
Check 3: Line Status
In Settings > Cellular (On some devices, this may appear as “Mobile Service” or “Mobile Data”)
Tap the newly added plan
Confirm that Turn On This Line is enabled
Check 4: Test Connectivity
Make a phone call or send a message using the new line. Alternatively, toggle:
Settings > Cellular (On some devices, this may appear as “Mobile Service” or “Mobile Data”) > Cellular Data
Switch to the new line and test internet access
Note: Some eSIM plans may not include voice calling support, so this feature might not be available depending on your plan.
More iPhone eSIM Setup Guides
Using another iPhone? These eSIM activation guides may help.
Conclusion
After completing the setup, your iPhone 17 should now be connected to the network.
To be sure everything is working, try opening a website or using an app that requires data.
Compared to traditional SIM cards, eSIM offers more flexibility—especially for travelers.
With your iPhone 17 ready to go, you can focus on your journey instead of worrying about connectivity.