
As connectivity technology continues to evolve, eSIM is becoming a more efficient and flexible way to stay online.
Instead of using a physical card, eSIM allows you to configure your network digitally, making it easier to set up and manage connections wherever you are.
For iPad 7th Generation and later models, eSIM support is already built into the system, allowing you to install and activate a plan directly from your device.
In this guide, we’ll walk you through the full process of installing an iRoamly eSIM, from preparation to activation, so you can get connected quickly and smoothly.

Meet iRoamly for Easier Travel Connectivity
iRoamly is a travel eSIM service for mobile data in many destinations worldwide. Depending on where you are traveling, available options may include local destination plans, regional plans, and broader global coverage, with allowances and validity periods varying by plan.
After installation, the data line can help with navigation, messaging, bookings, ride-hailing, and travel updates.
For iPad 7th Generation and later models with supported cellular features, an iRoamly eSIM can be added directly from iPadOS settings. Continue with the existing preparation, QR-code, and manual-input steps below to install the plan and confirm the connection.
Preparations Before Setting Up iRoamly eSIM
Before starting, ensure you have the following. Once you have chosen an eSIM for your destination, such as an eSIM for Italy, you can install it before the trip and select it for mobile data when needed.
A stable internet connection (Wi-Fi recommended)
A valid eSIM QR code or manual activation details (SM-DP+ address and activation code) provided by your carrier
Your iPad powered on and unlocked
The device updated to the latest iPadOS version (recommended for compatibility)
Demo device used in this guide: iPad (11th generation, 2025)
Method 1: Install eSIM via QR Code Scanning
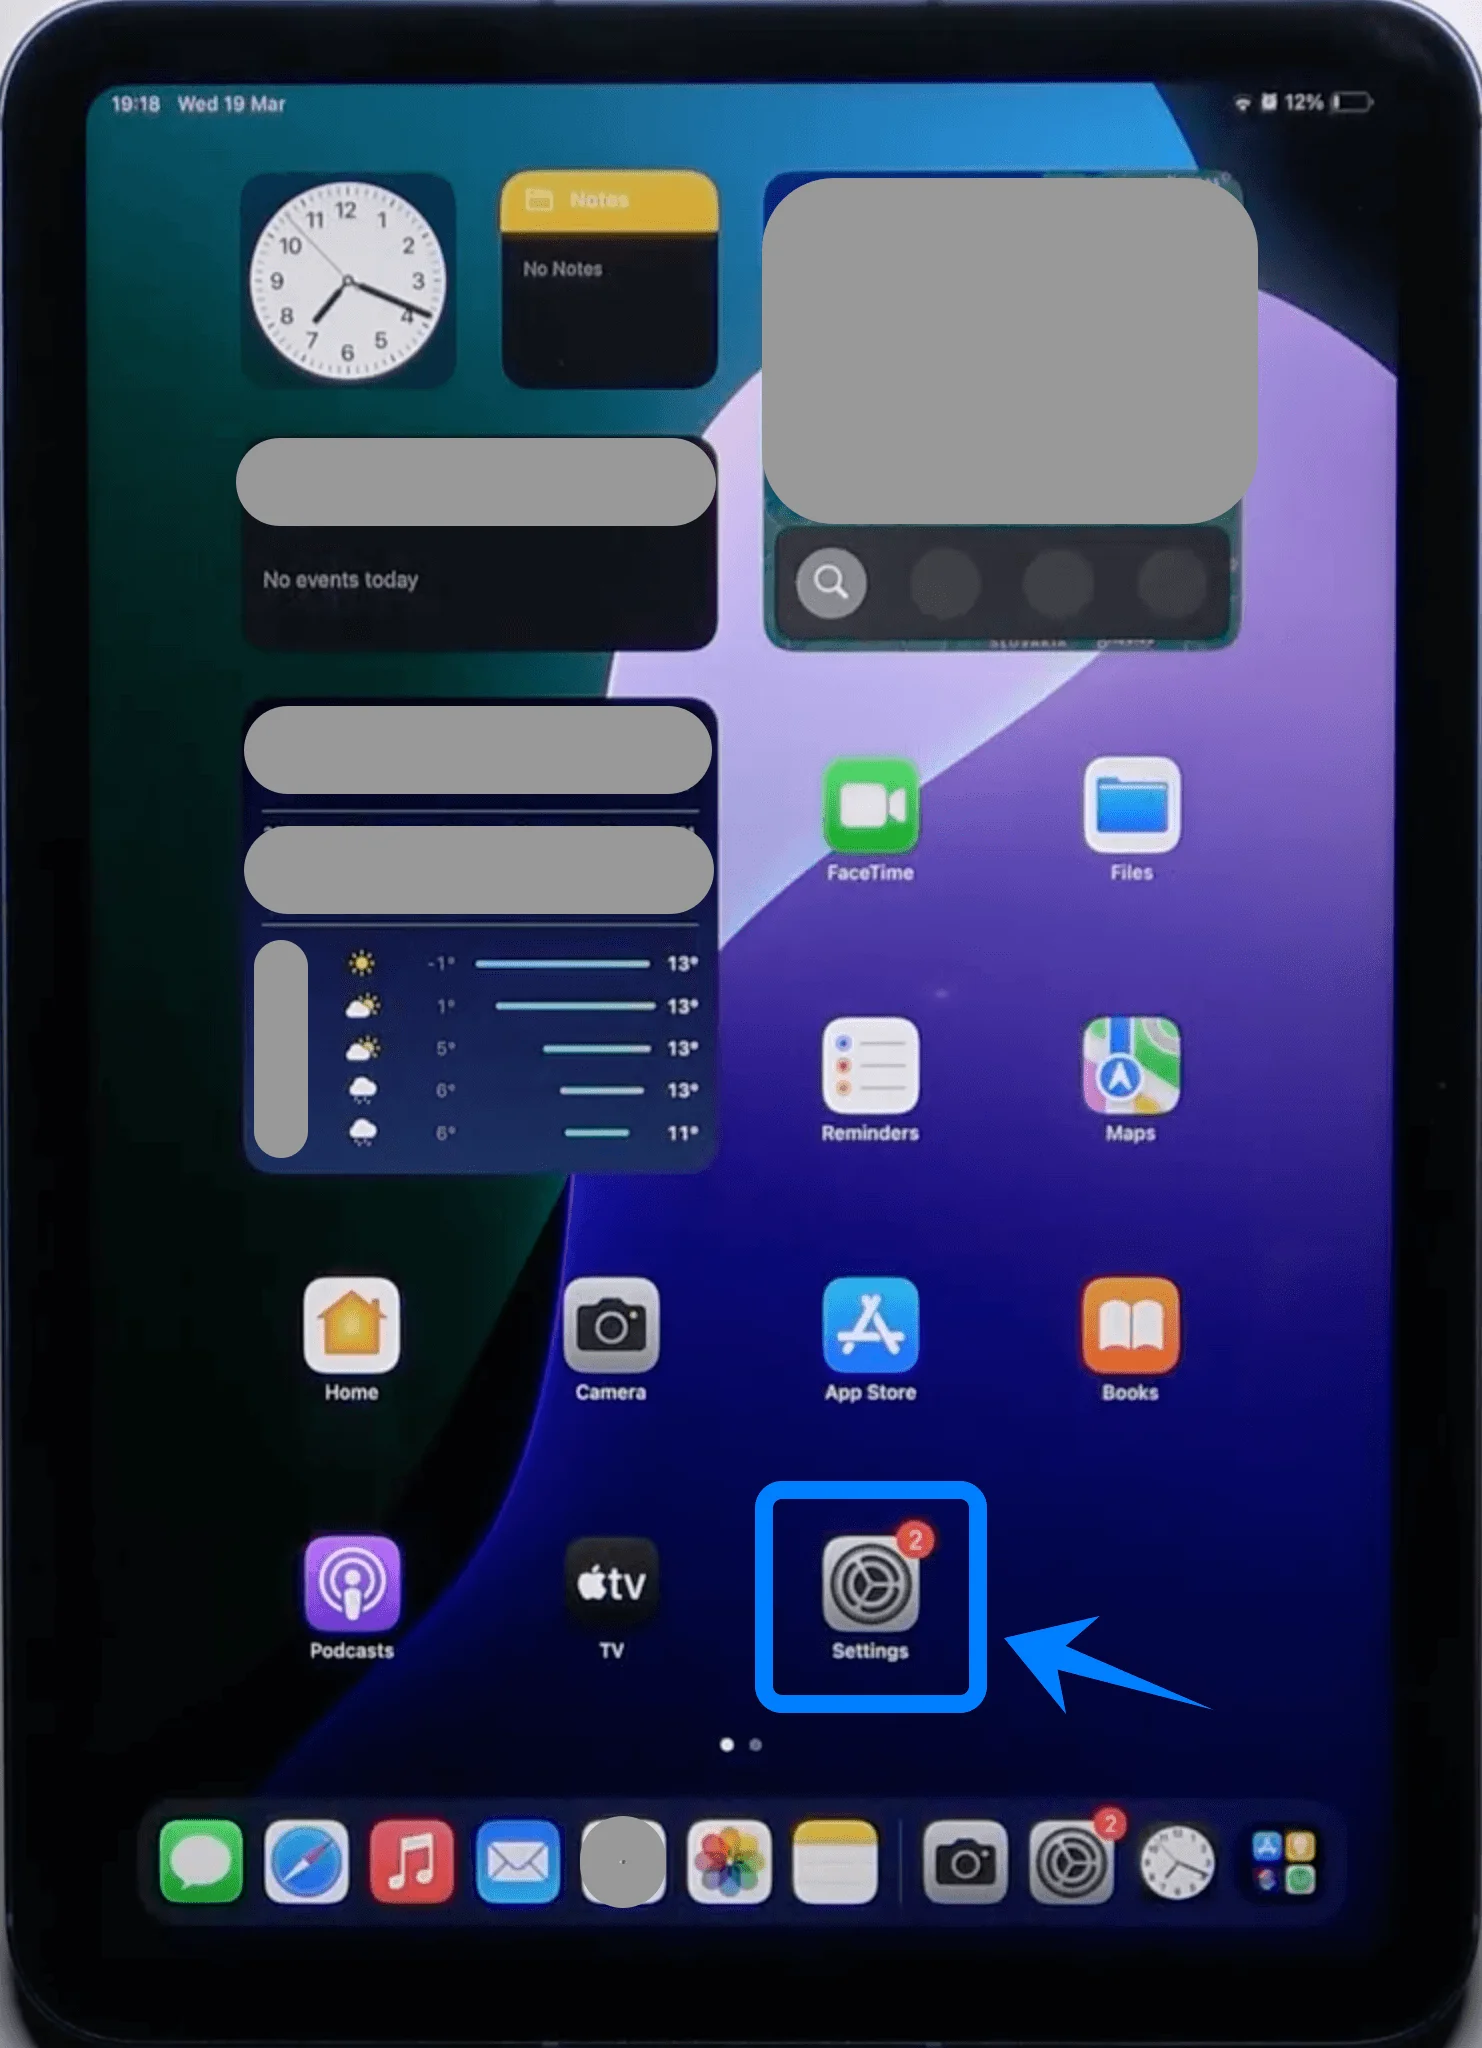
Step 1: Open Settings
Tap Settings on the iPad Home Screen
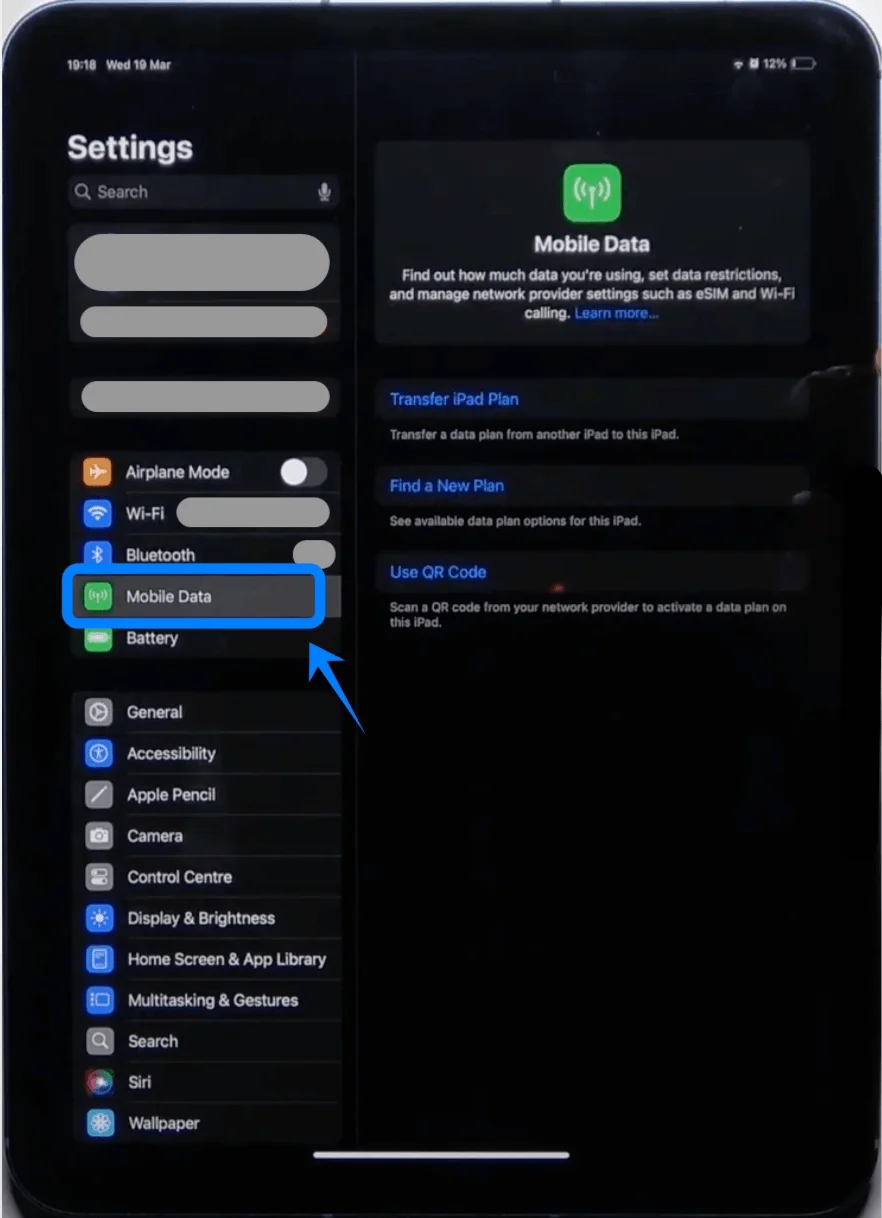
Step 2: Navigate to Cellular Settings
Tap Mobile Data (On some devices or iPadOS versions, this may appear as “Cellular Data.”)
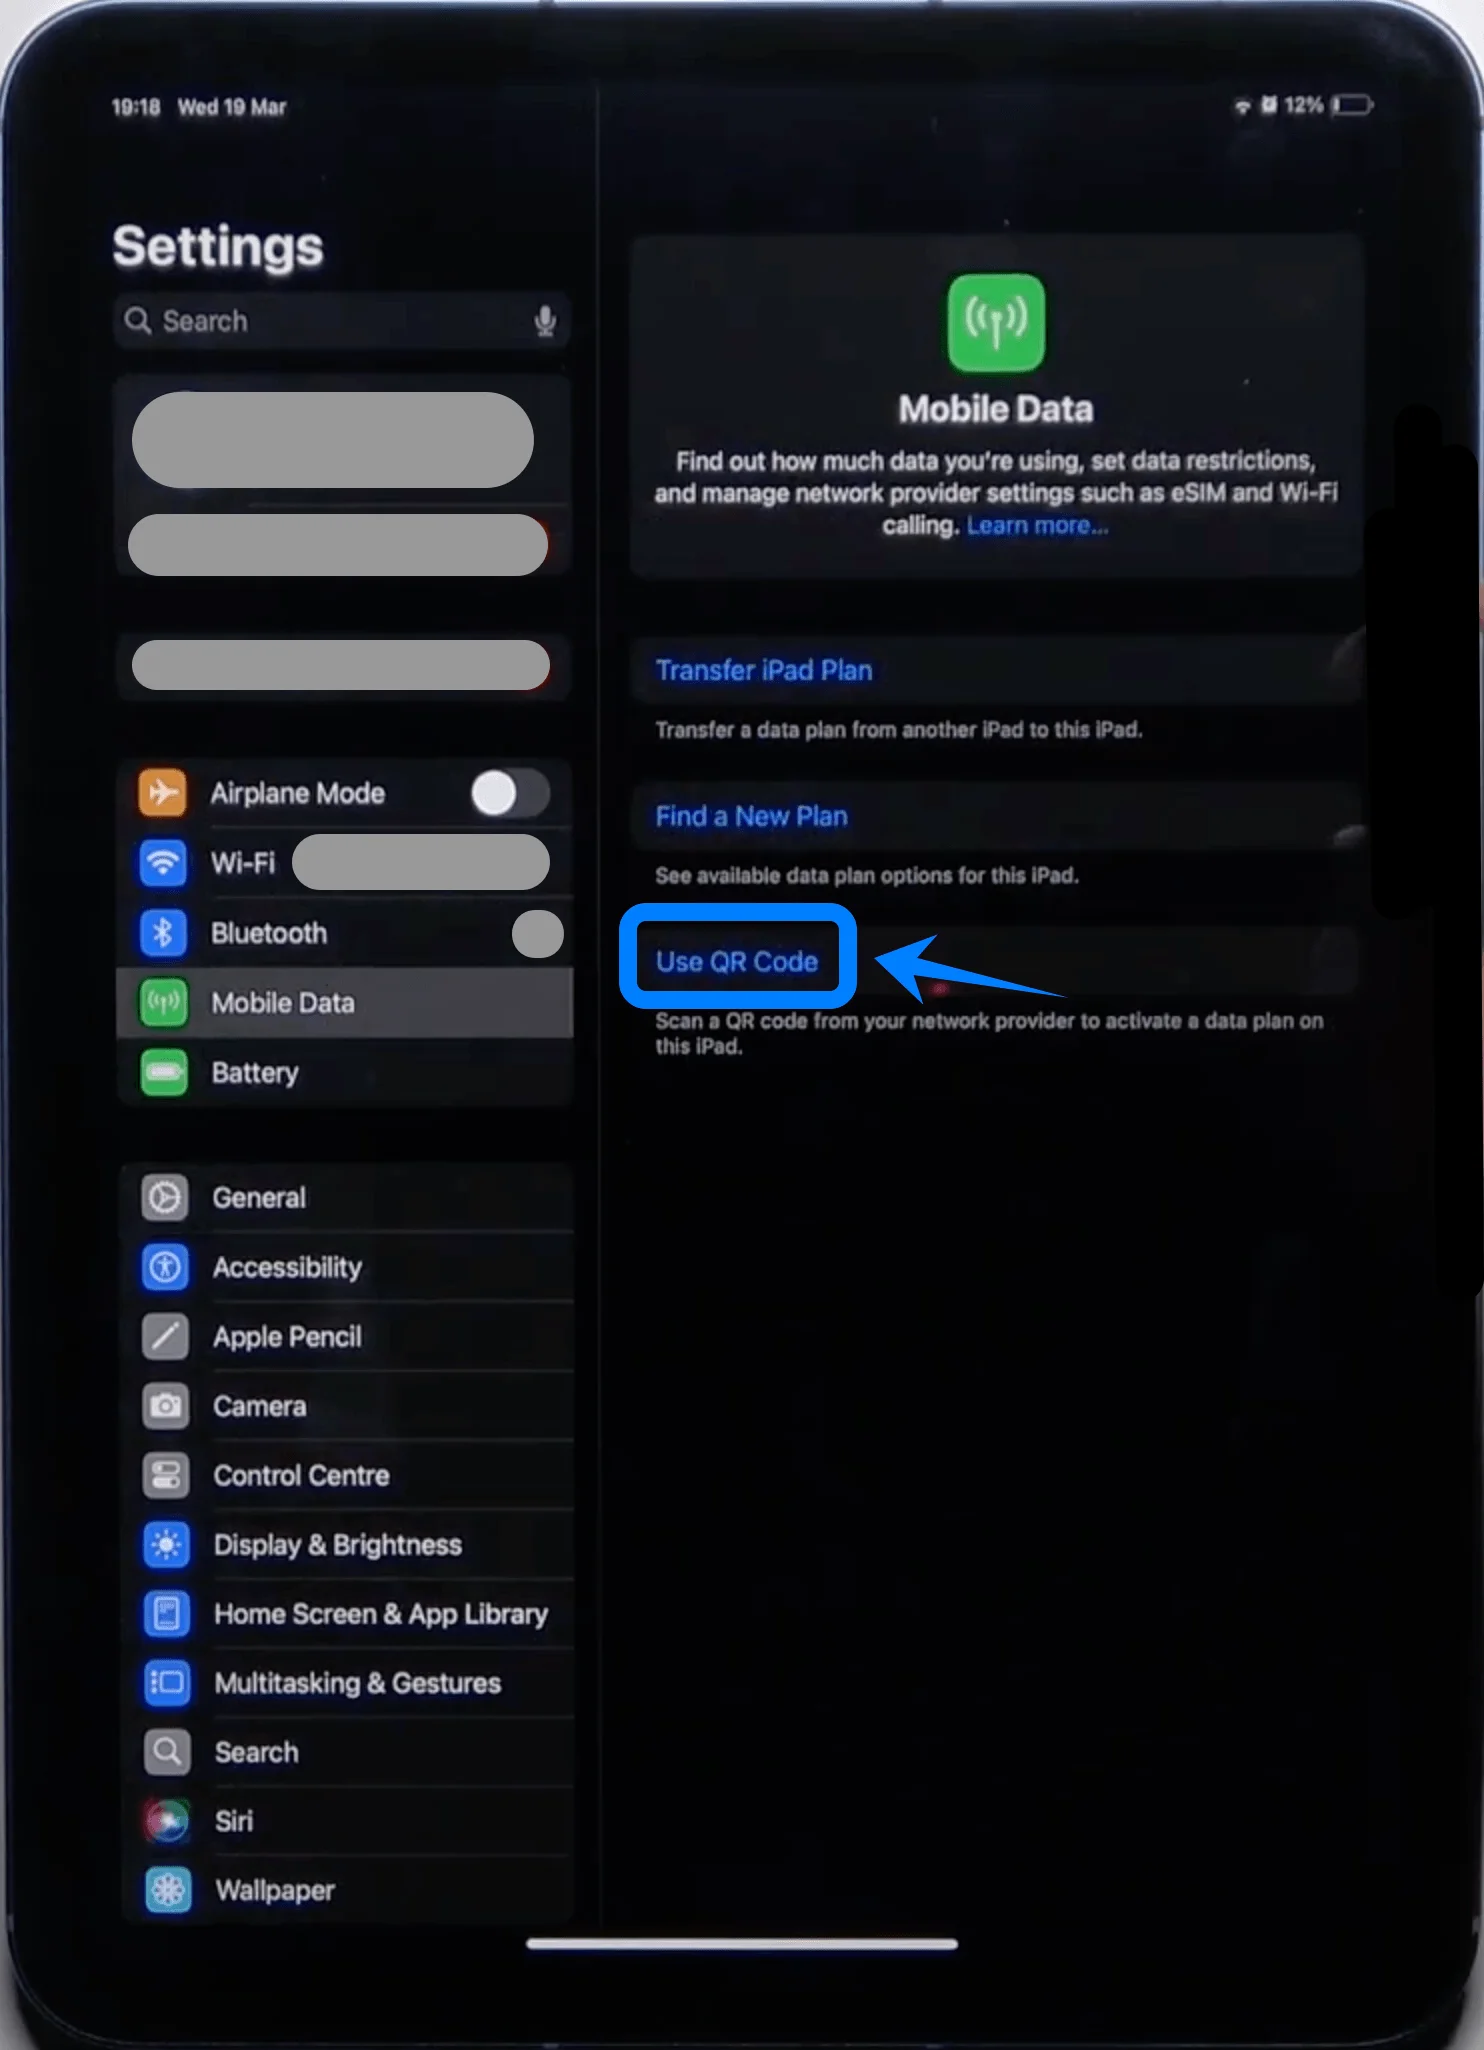
Step 3: Select QR Code Option
Tap Use QR Code
Step 4: Scan the QR Code
Position the iPad camera over the QR code provided by your carrier
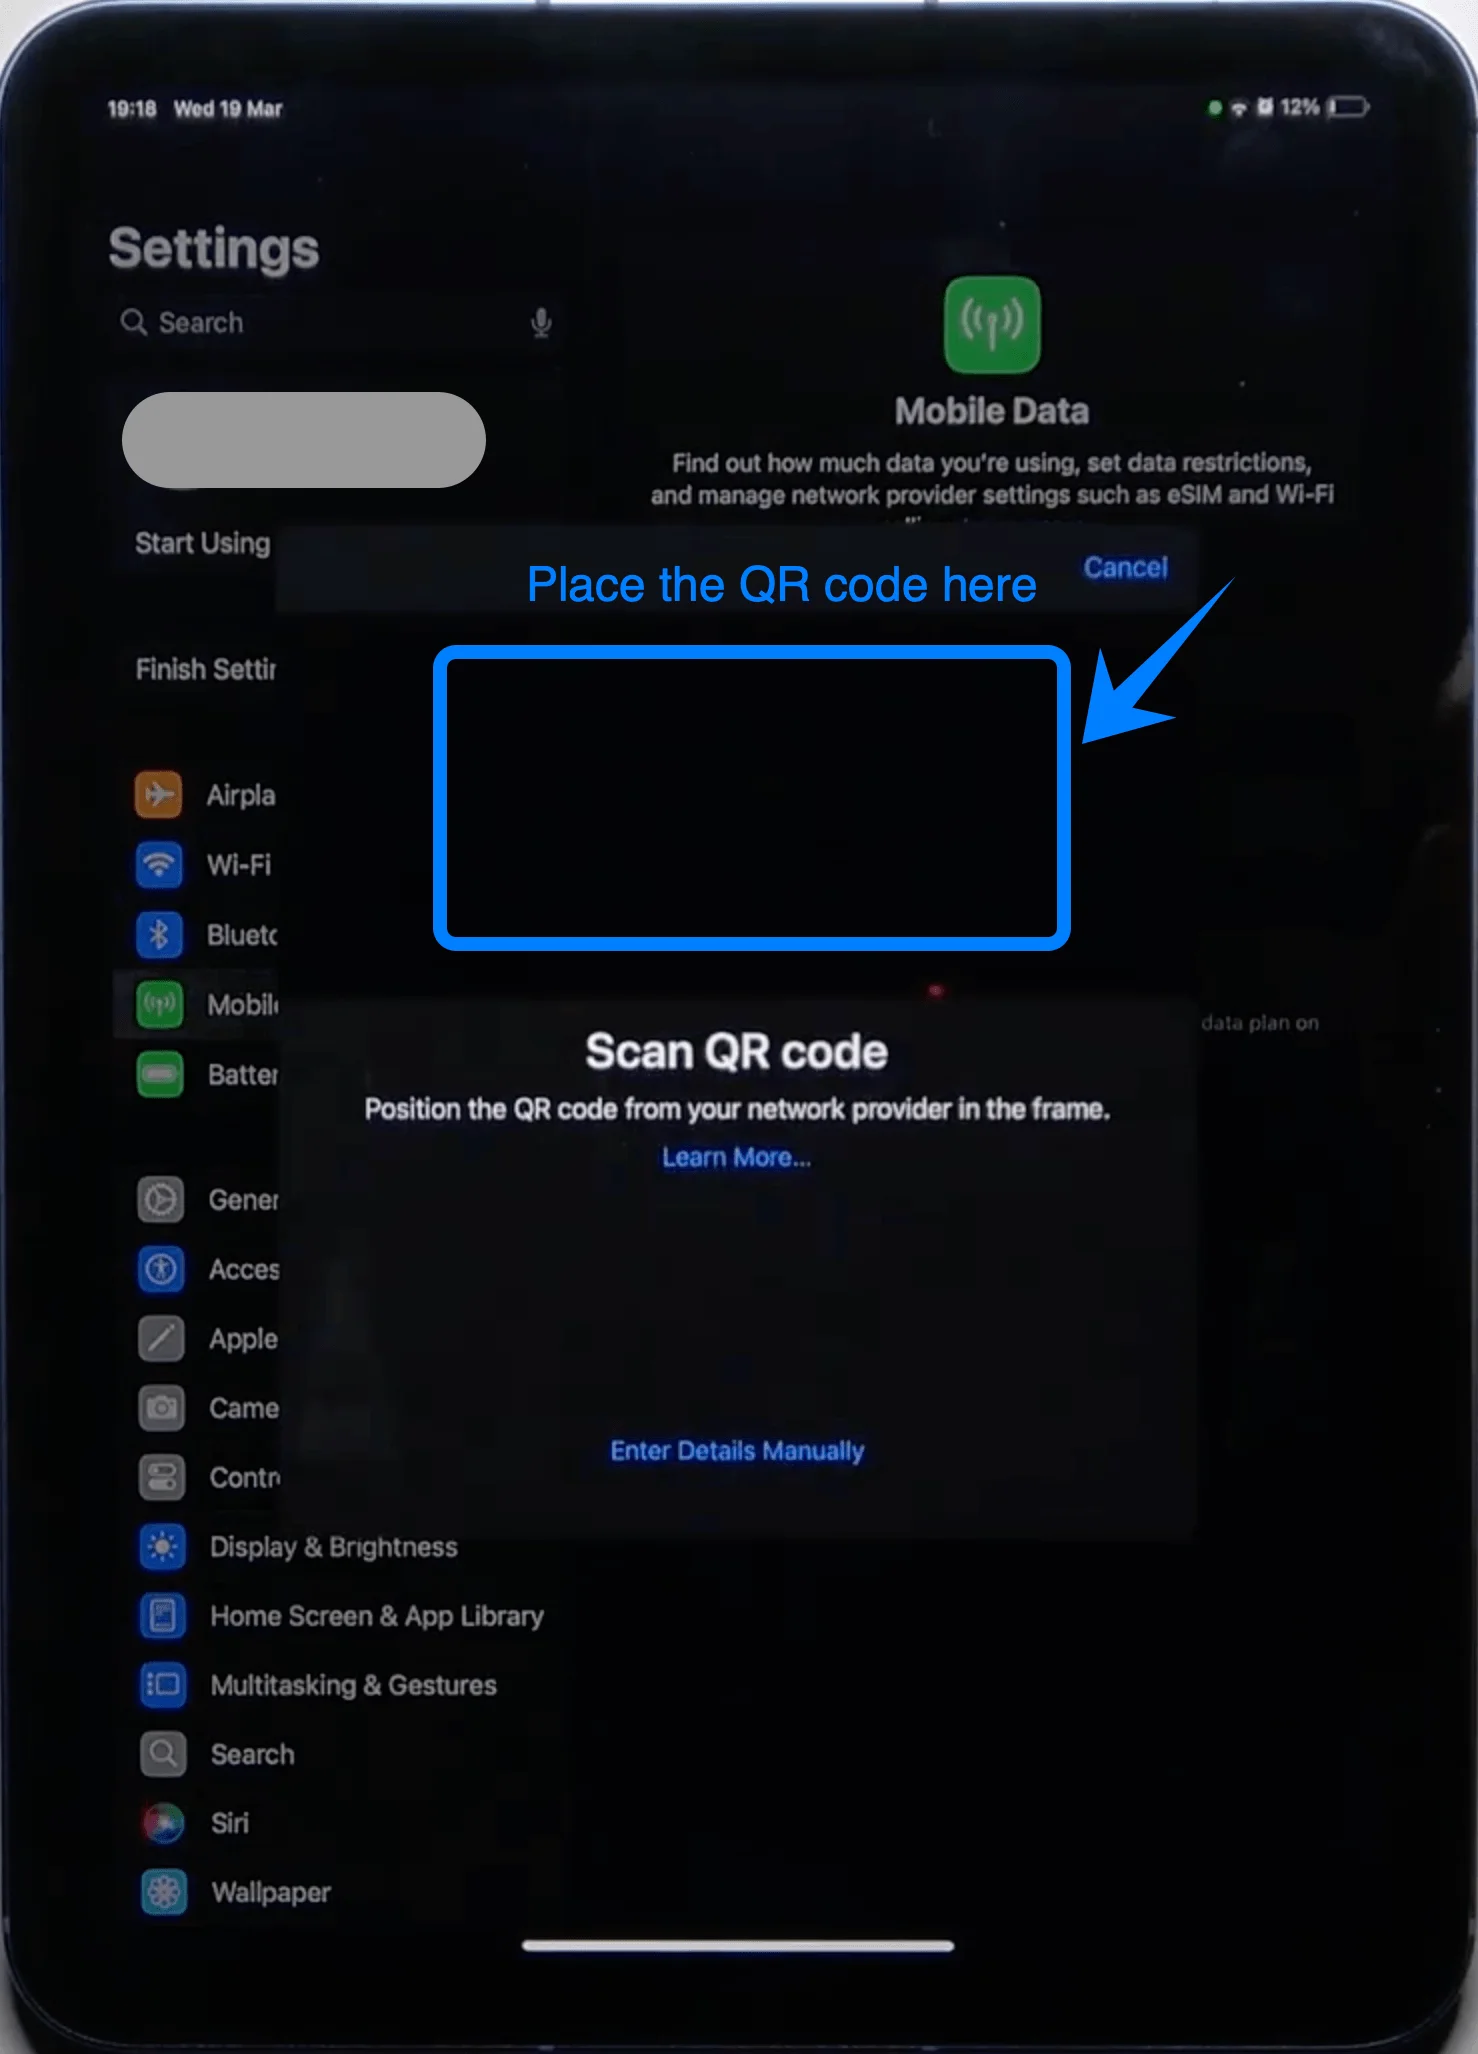
Wait for the device to recognize the code automatically
Step 5: Confirm Plan Addition
When prompted, tap Add Cellular Plan
Step 6: Label the Plan (Optional but Recommended)
Choose a label (e.g., “Primary”, “Travel”, “Work”)
Tap Continue
Step 7: Complete Activation
Wait while the iPad activates the eSIM
Once complete, tap Done
Method 2: Install eSIM via Manual Input
Step 1: Open Settings
Tap Settings
Step 2: Navigate to Cellular Settings
Mobile Data (On some devices or iPadOS versions, this may appear as “Cellular Data.”)
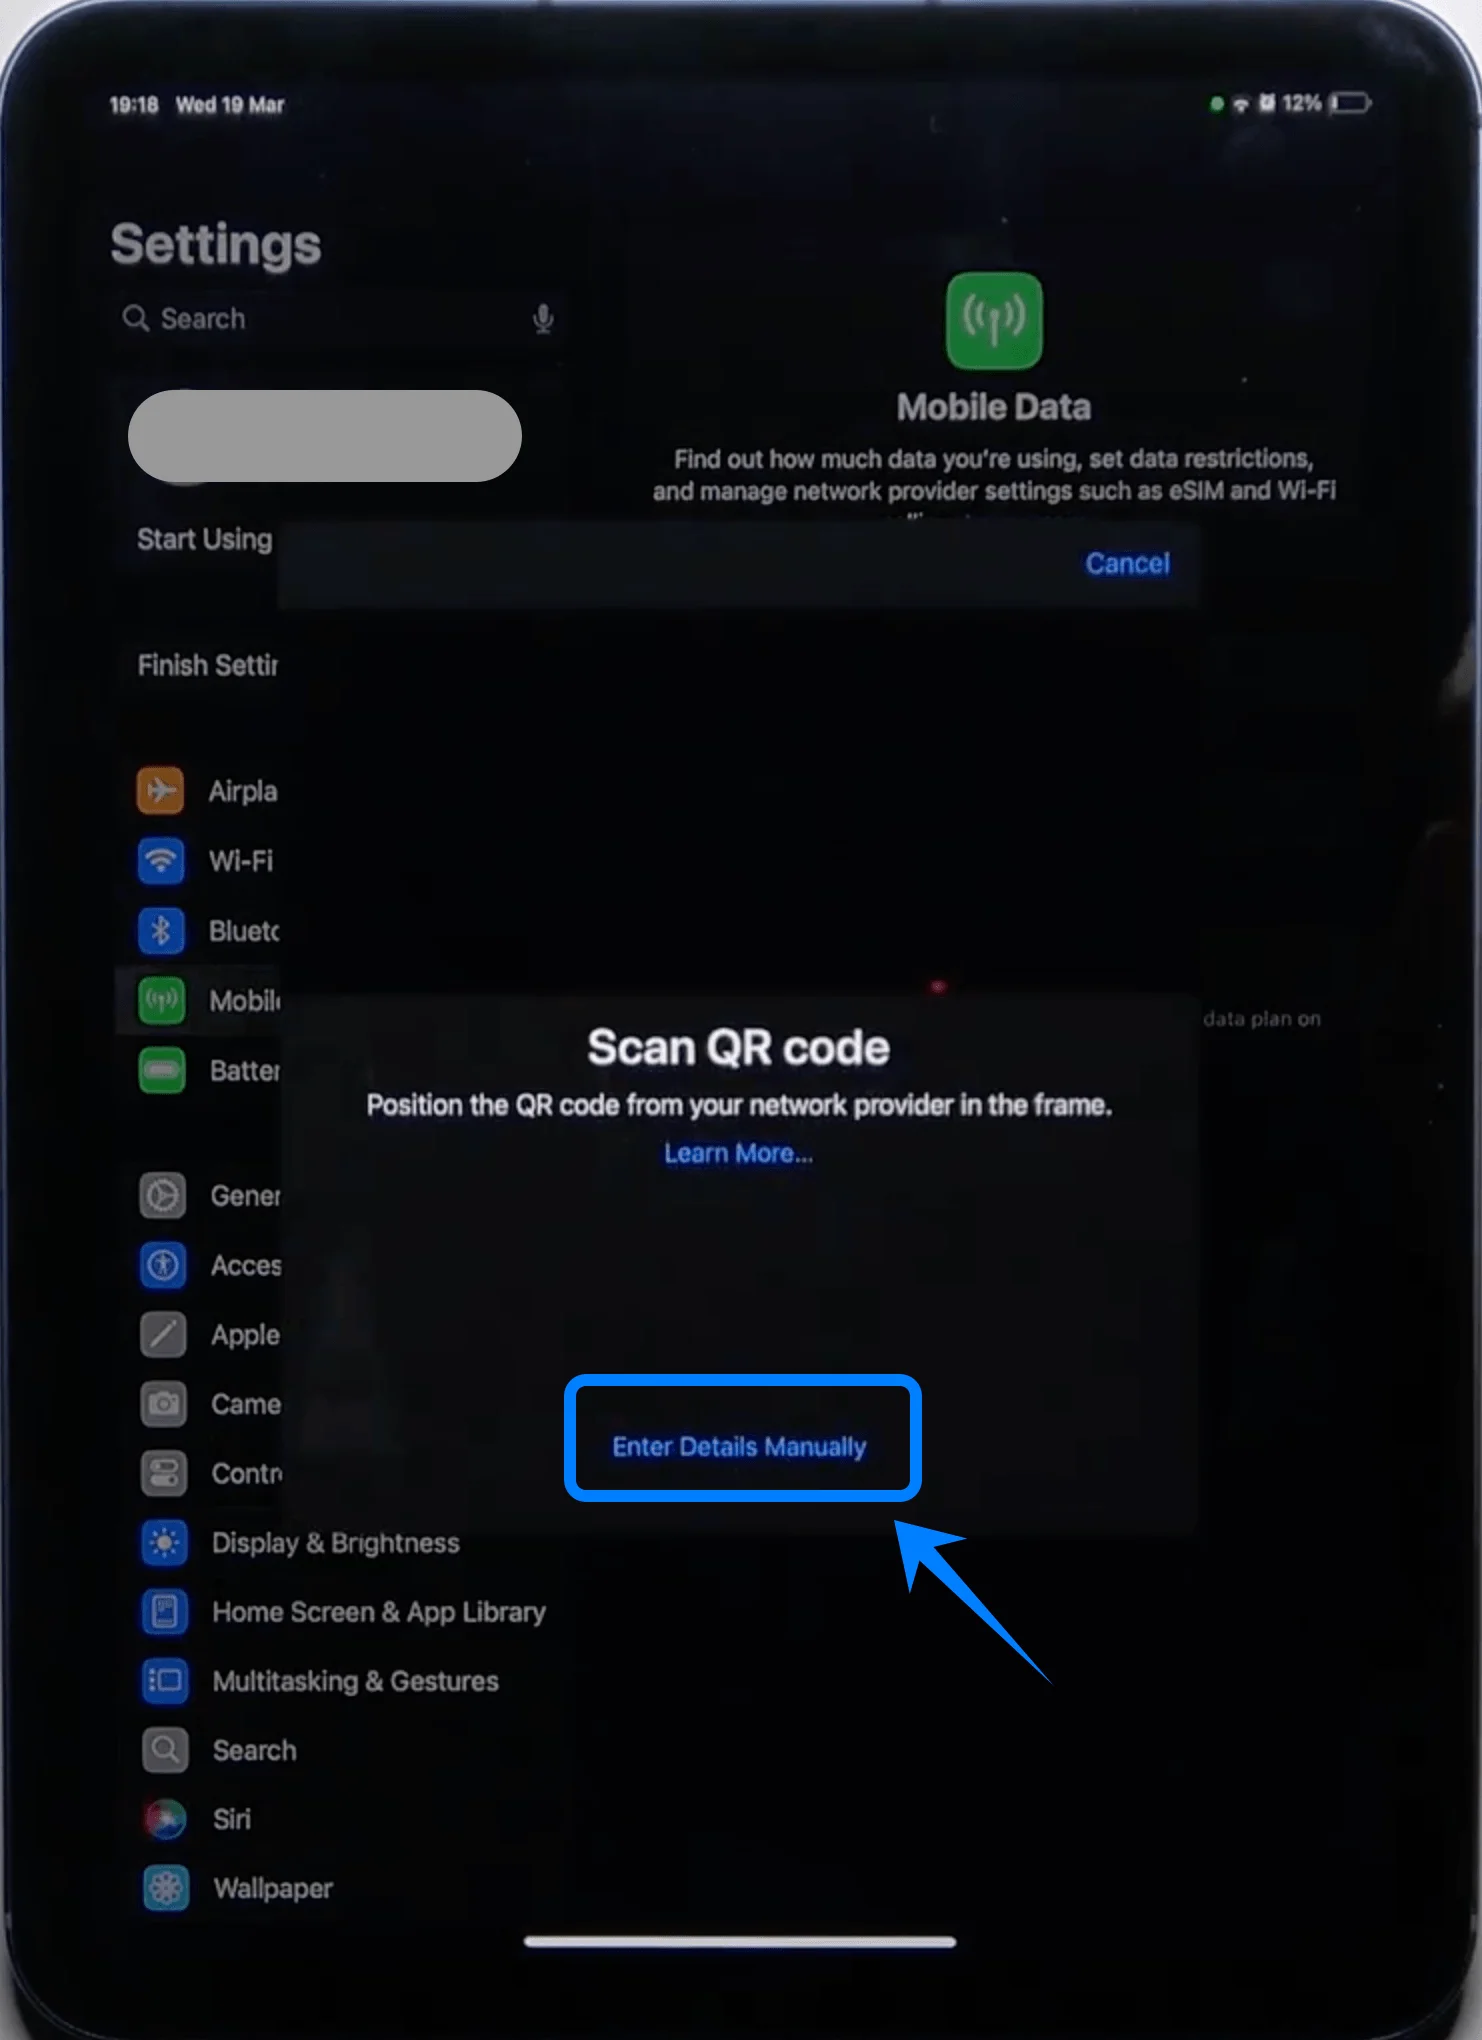
Step 3: Select Manual Entry
Tap Enter Details Manually
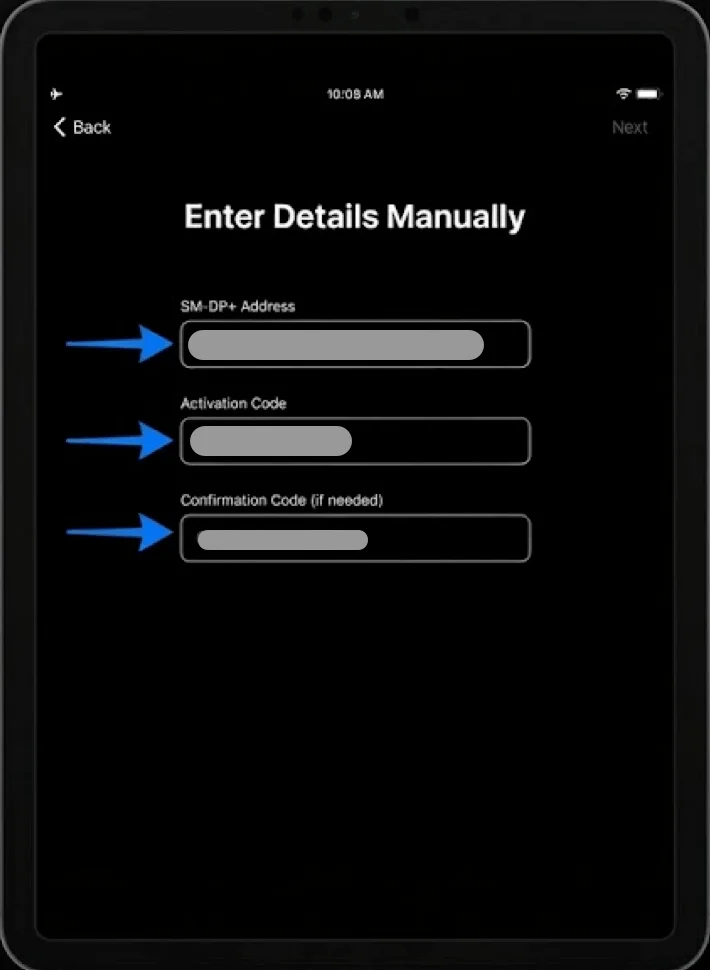
Step 4: Enter Activation Details
In the SM-DP+ Address field, type the address provided by your carrier
In the Activation Code field, enter the code exactly as provided
If prompted, enter the Confirmation Code
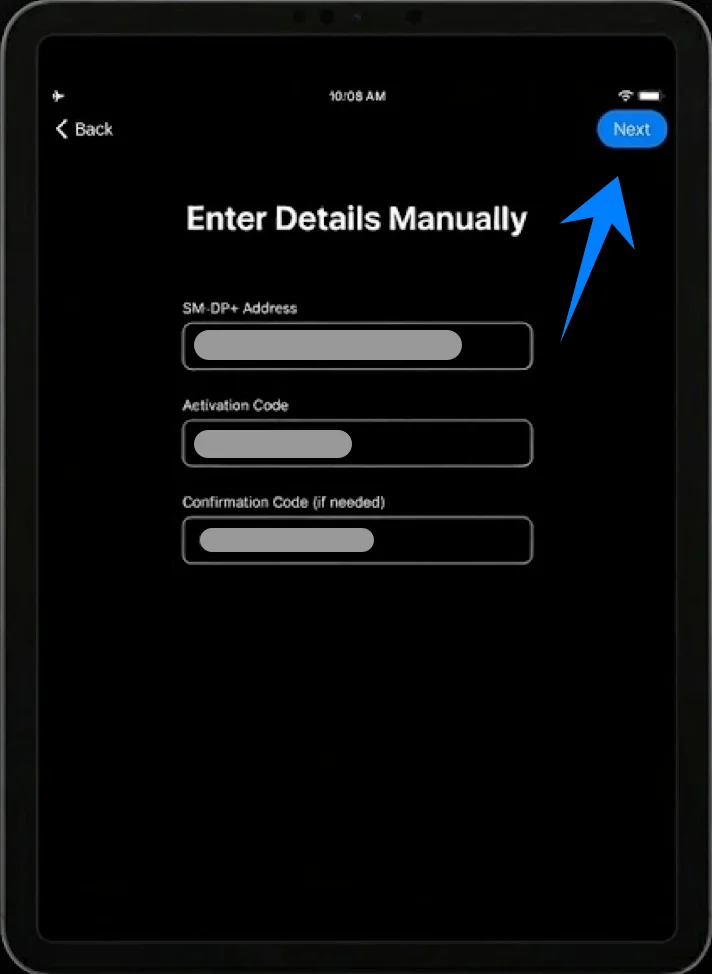
Step 5: Proceed with Installation
Tap Next
Step 6: Confirm Plan Addition
Tap Add Cellular Plan
Step 7: Label the Plan
Assign a label to the plan
Tap Continue
Step 8: Complete Activation
Wait for the iPad to finish provisioning the eSIM
Tap Done once activation completes
How to Confirm Successful eSIM Installation
Check Cellular Plan Visibility
Go to Settings → Mobile Data (On some devices or iPadOS versions, this may appear as “Cellular Data.”)
Confirm your new plan appears under Cellular Plans
Verify Signal and Connectivity
Look for signal bars in the top-right status bar
Open Safari and load a webpage to confirm data connectivity
Check Plan Status
Tap the newly added plan under Mobile Data (On some devices or iPadOS versions, this may appear as “Cellular Data.”)
Ensure the status shows Active or Connected
Optional: Set Default Data Line
In Settings → Cellular Data, tap Mobile Data (On some devices or iPadOS versions, this may appear as “Cellular Data.”)
Select the newly installed eSIM as the active data line
More iPad eSIM Setup Guides
Using another iPad? These eSIM setup and activation guides may help.
Conclusion
With the setup complete, your iPad is now ready to use eSIM for everyday connectivity. The entire process is built into the system, allowing you to manage network settings directly without relying on any physical components.
This makes it easier to stay organized and handle changes when needed. Once you’re familiar with these steps, future installations, updates, or plan switches can be completed quickly with minimal effort.