
The Samsung Galaxy A55 5G supports eSIM on compatible regional/carrier variants and uses Samsung’s One UI menu path for mobile plan setup: Settings > Connections > SIM manager > Add eSIM.
For travel, an iRoamly travel eSIM lets you prepare mobile data before departure without swapping your physical SIM.
This guide covers both ways to install it on a Galaxy A55 5G: scanning the iRoamly QR code and manually entering the activation code. The QR method is usually fastest, while manual entry is useful if you are setting up from the same phone that is displaying the QR code or if the camera cannot scan it clearly.

Stay Connected Abroad with iRoamly on Samsung Galaxy A55 5G
iRoamly is a travel eSIM service that provides mobile data for international trips through digital eSIM plans. Travelers can choose destination, regional, or global options, with data allowances, validity periods, plan types, and features varying by location and selected package.
After installation on a compatible device, that travel data can help with maps, messaging, translations, ride-hailing, bookings, and travel updates while abroad.
For Samsung Galaxy A55 5G, the iRoamly eSIM setup in this guide supports both QR-code installation and manual activation-code entry. The steps below show how to add the eSIM profile and then select it for mobile data when you are ready to use the travel plan.
If you install before departure, keep Wi-Fi available and save the QR code or manual activation details until the eSIM profile is confirmed on the device.
Preparations Before Setting Up iRoamly eSIM
Use stable Wi-Fi. Make sure your Galaxy A55 5G is unlocked and supports eSIM. Keep your iRoamly QR code or manual activation code ready. Install the eSIM 1-2 days before travel when suitable, and do not delete it unless iRoamly support tells you to.
Plan validity starts from activation, so check your specific plan's activation terms before installing. Voice/SMS support also varies by plan; many travel eSIMs are data-only.
iRoamly offers destination plans for different trips, including an eSIM for the United States and an Indonesia eSIM. Once you've chosen the plan that matches your destination, you can continue with the Galaxy A55 5G installation steps below.
Method 1: QR Code Setup
Open Settings, then tap Connections.
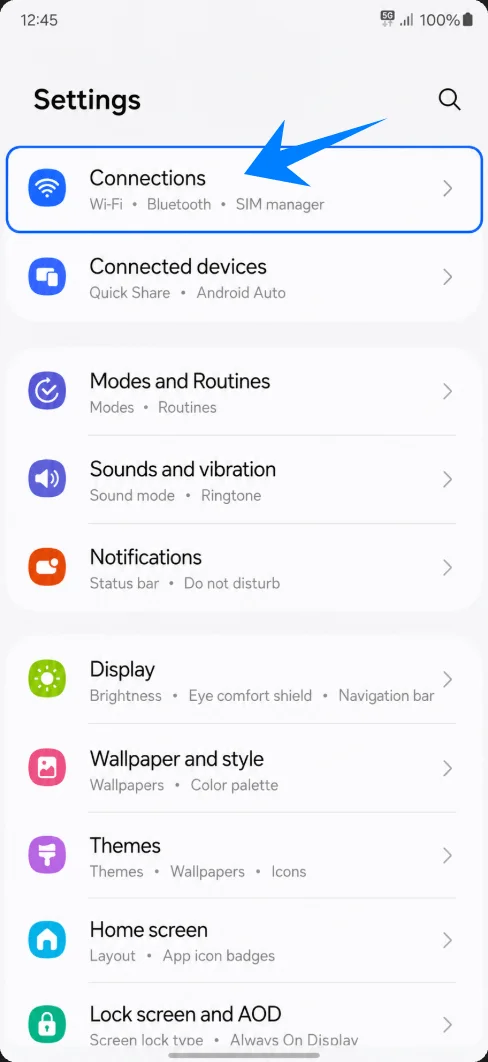
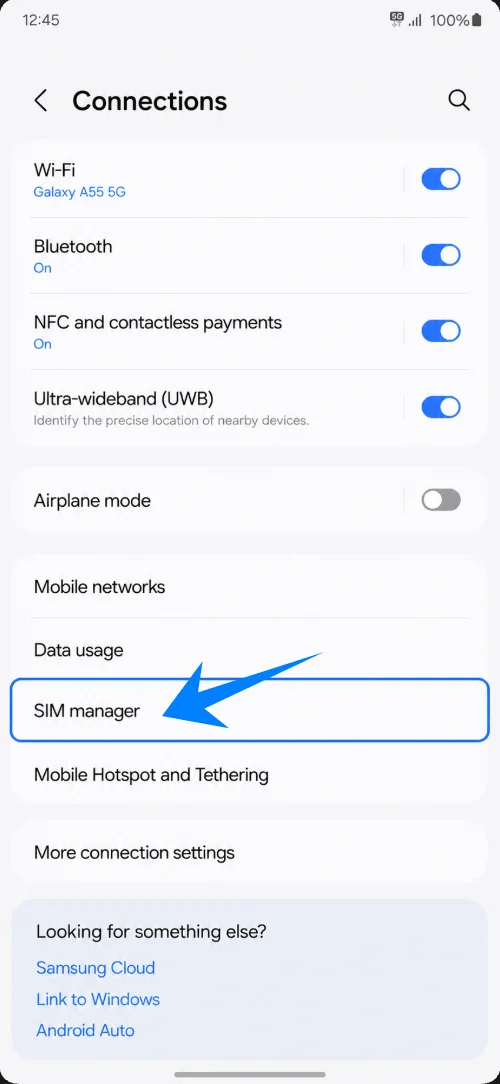
Tap SIM manager.
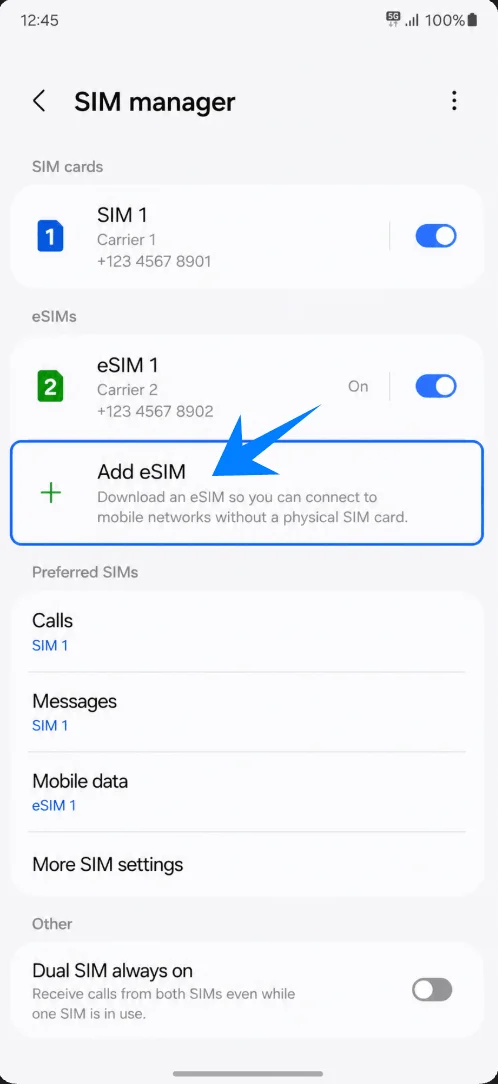
Tap Add eSIM.
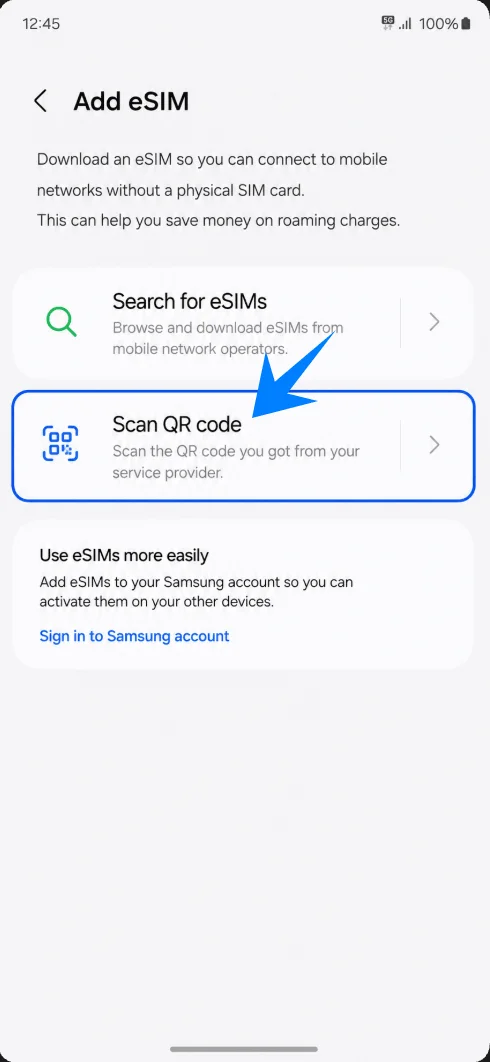
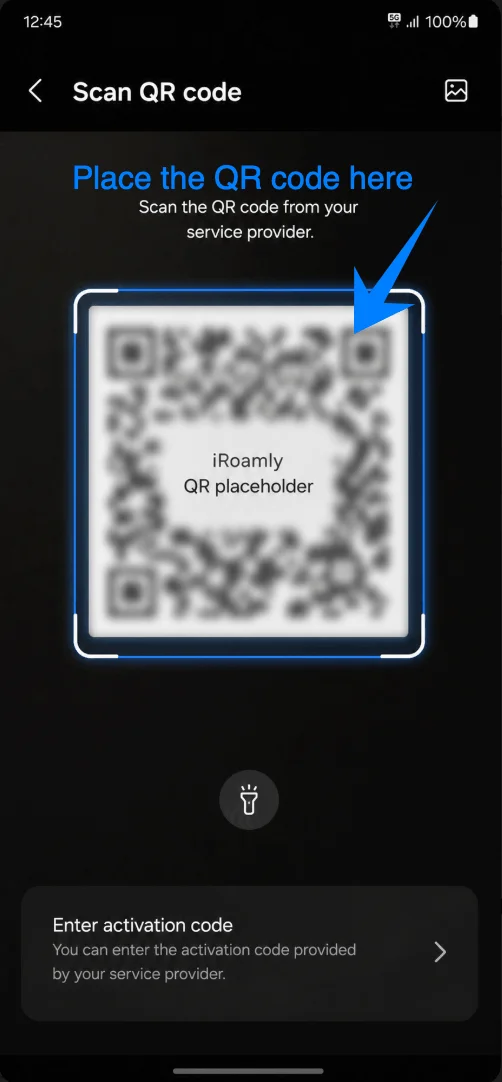
Tap Scan QR code.
Scan the iRoamly QR code.
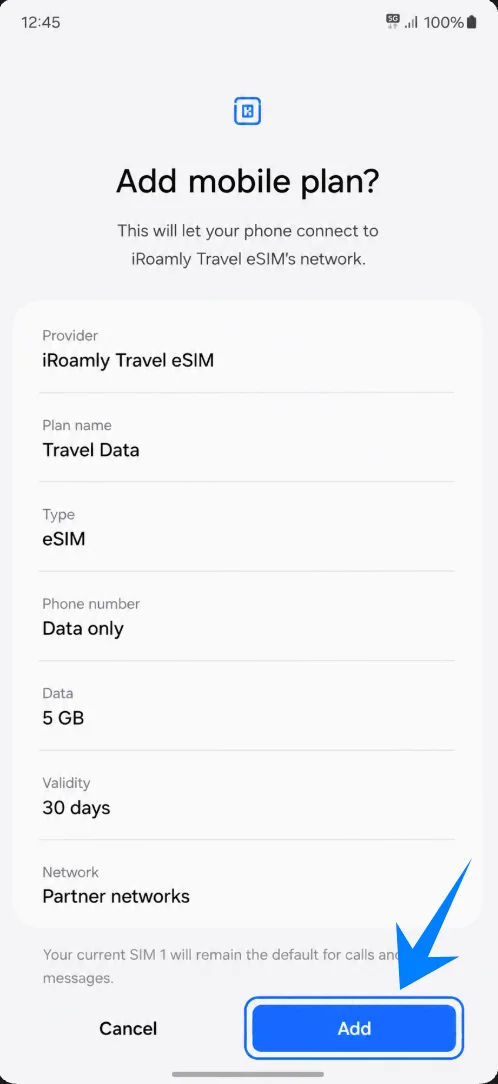
Review the detected iRoamly eSIM, then tap Add.
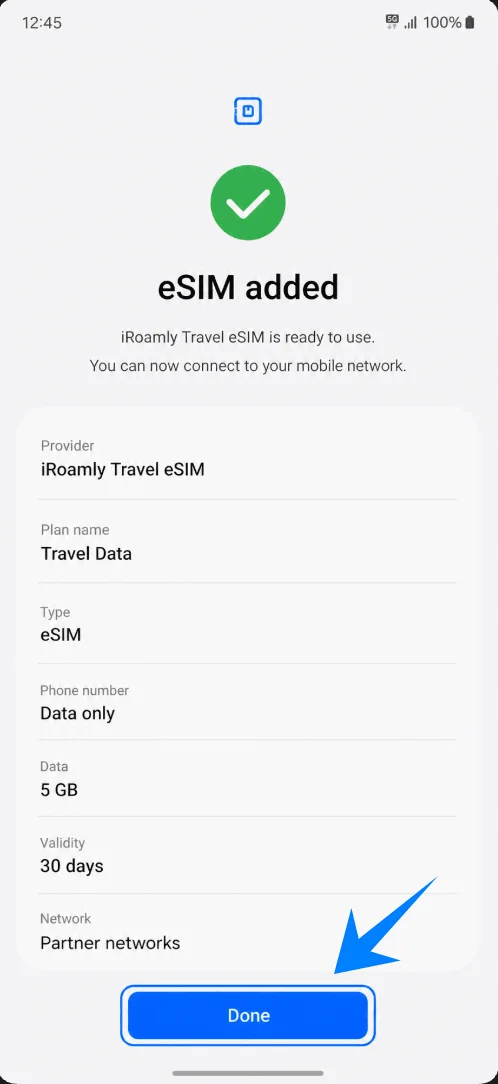
Wait for installation, then tap Done.
Method 2: Manual Setup
Open Settings, then tap Connections.
Tap SIM manager.
Tap Add eSIM.
Tap Scan QR code.
Tap Enter activation code.
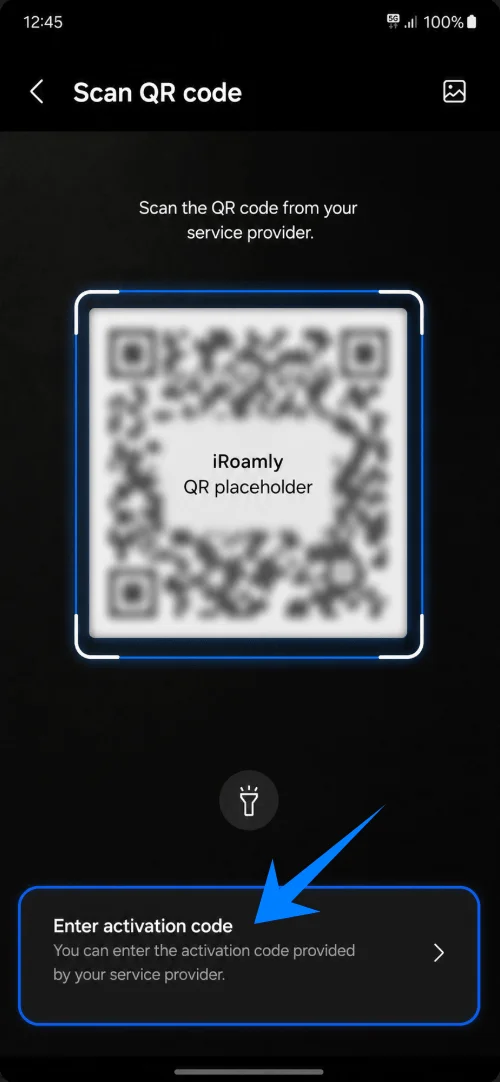
Enter the full iRoamly activation code, then tap Next.
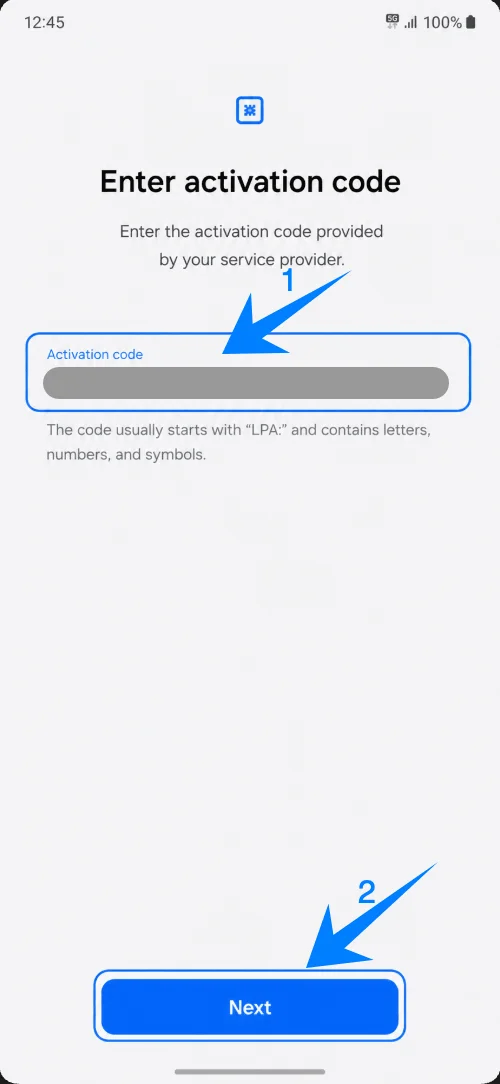
On Samsung One UI, the manual screen uses one activation-code field. If your iRoamly details are split into parts, use the full format shown in your order, usually like LPA:1$SM-DP+ Address$Activation Code.
Review the iRoamly eSIM, then tap Add.
Tap Done when installation finishes.
Confirm It Is Ready
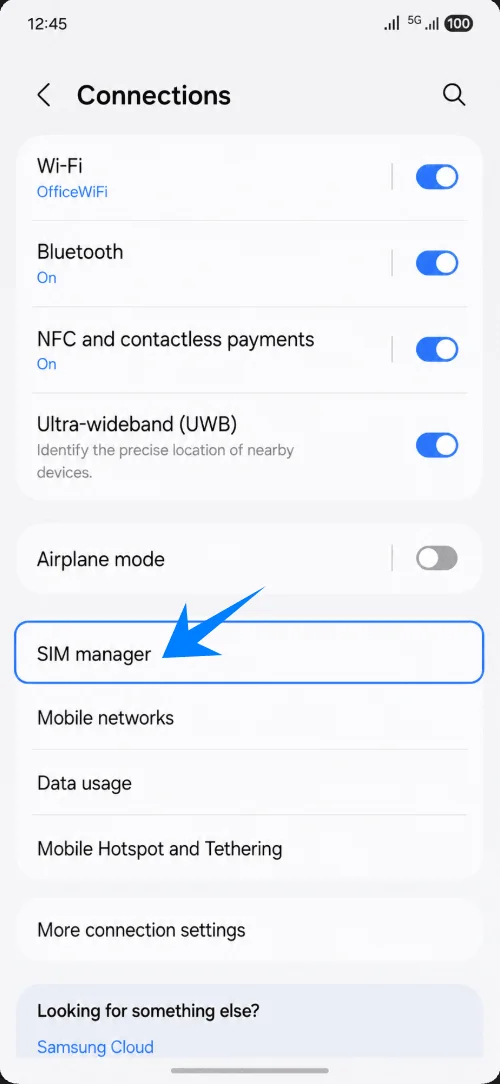
Go to Settings > Connections > SIM manager.
Check that iRoamly Travel eSIM appears and is turned on.
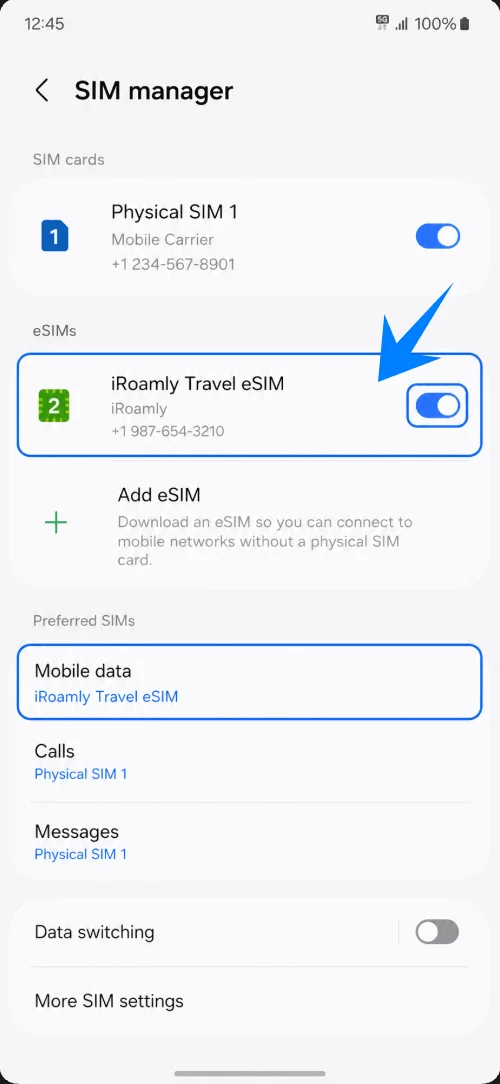
Set Mobile data to the iRoamly eSIM.
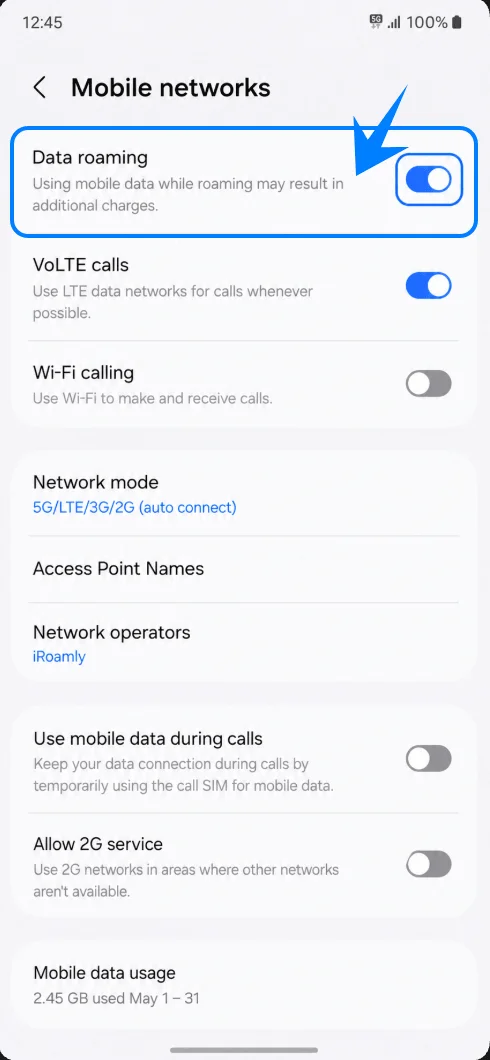
Go to Mobile networks and enable Data roaming if your plan requires it.
Troubleshooting
If Add eSIM is missing, update One UI, restart the phone, and confirm your Galaxy A55 5G variant supports eSIM.
If the QR code was already used, check whether the eSIM is already installed before deleting anything.
If mobile data does not work, select iRoamly for Mobile data, turn on Data roaming if required, and restart the phone.
If activation stays pending, keep Wi-Fi on and try again after reaching the supported destination.
More Samsung Galaxy eSIM Setup Guides
Need to activate an eSIM on another device? You may find these guides helpful.
Conclusion
For the Galaxy A55 5G, the QR code method is the simplest way to install an iRoamly travel eSIM through Samsung’s SIM manager. Manual activation is the best backup when the QR code is on the same phone or cannot be scanned.
After installation, always confirm that iRoamly Travel eSIM appears in SIM manager, select it for Mobile data, and enable Data roaming when your destination plan requires it. That final check is what turns a successful installation into a ready-to-use travel data setup.